
25+ Winter Hairstyles 2026 — Gorgeous Seasonal Looks
Winter hair has its own set of rules. Between dry indoor heating, wool hats, and static that turns every strand into a science experiment, your hair needs styles that actually survive the season — and still look gorgeous doing it.
The good news? Winter 2026 is serving some of the prettiest hairstyles we’ve seen in years. Think sleek buns that laugh at hat hair, heatless curls that love cold air, and braids that keep every strand exactly where you put it. These looks work with the season instead of fighting it.
Whether you’re heading to a holiday party or just trying to look polished on a freezing Tuesday, these 25 winter hairstyles have you covered from December through March.
1. Sleek Low Bun with Middle Part
If there’s one hairstyle that never fails in winter, it’s the sleek low bun. The middle part keeps it modern, the low placement means it survives under beanies and hoods, and the whole thing takes about three minutes once you’ve practiced it twice.
Start with a smoothing serum on damp hair — winter frizz is real — then blow-dry with a paddle brush for that glassy finish. Part down the middle, gather at the nape, twist, and pin. The secret to making it look expensive rather than severe is pulling out two face-framing pieces before you secure the bun. A light mist of flexible hairspray keeps flyaways down without that crunchy helmet feeling. This is my go-to for everything from work meetings to weddings.
For extra polish, wrap a small section of hair from the ponytail around the bun’s base to hide the elastic — ten seconds, far more refined. If layers won’t stay tucked, long French pins (wavy side down) hold better than bobby pins. This bun transitions beautifully from day to night: swap your earrings, add a bold lip, done.

2. Voluminous Blowout with Curtain Bangs
Big, bouncy hair is winter’s best accessory — it frames your face beautifully against chunky scarves and high collars. The 2026 version pairs that volume with curtain bangs that part softly in the middle and blend into long layers.
- Prep: volumizing mousse at the roots on damp hair; it’s the difference between volume that lasts and volume that dies by noon.
- Technique: blow-dry with a large round brush, over-directing sections upward for maximum lift at the crown.
- Curtain bangs: dry them forward first, then split — this trains them to fall into that perfect face-framing curve.
- Finish: a cool shot from the dryer locks the shape; velcro rollers on the crown while you do makeup add extra staying power.
To extend your blowout, sleep on a silk pillowcase and refresh roots with dry shampoo on day two — volume comes right back with a quick upside-down blast from the dryer. Avoid heavy oils near the roots; they collapse volume fast. A pea-sized amount of smoothing cream on just the ends keeps them polished without weighing anything down.

3. Heatless Overnight Curls
Here’s the thing about winter: cold air actually helps heatless curls set better and last longer. Your hair holds shape beautifully in dry winter air, which makes overnight curl methods — foam rollers, satin rods, or the viral sock-curl trick — more effective now than any other season.
My favorite method is the satin heatless curl rod: wrap slightly damp hair around it before bed, sleep on a silk pillowcase, and wake up to soft, bouncy curls with zero heat damage. A pea-sized amount of curl cream before wrapping gives definition without crunch. In the morning, shake the curls out with your fingers — never a brush — and finish with a flexible-hold spray. You’ll get that effortless, just-left-the-salon wave pattern that looks incredible under a wool coat.

4. Classic Fishtail Braid
Is there anything more winter-romantic than a fishtail braid draped over one shoulder of a chunky knit? The intricate woven pattern looks complicated but only uses two sections — it’s genuinely easier than a French braid once you get the rhythm.
Divide your hair into two equal sections, then take a thin piece from the outside of the left section and cross it over to the right, and repeat on the other side. Keep your tension even and your pieces small for that detailed, herringbone look. Here’s the styling secret: once it’s secured, gently pancake the braid by tugging the edges outward — this transforms it from tight and schoolgirlish to soft and editorial. A few pulled-out face-framing strands and a velvet ribbon tied at the end make it holiday-party ready.

5. Half-Up Claw Clip Twist
The claw clip refuses to retire, and honestly, we’re glad. The half-up twist is the easiest polished style in existence: gather the top half of your hair, twist it once, and clamp it. Done in literally ten seconds, and it looks intentional every single time.
For winter, this style is genius because it keeps hair off your face (no more strands sticking to lip gloss in the wind) while leaving the length down to show off. Choose a medium claw clip in tortoiseshell or matte black — the 2026 aesthetic is understated, not Y2K plastic. Tease the crown lightly before twisting for a little lift, and let the bottom half fall in natural waves. It works on second-day hair beautifully, which makes it the ultimate lazy-day hero.

6. Textured Ponytail with Wrapped Base
A ponytail with a visible elastic is fine for the gym. A ponytail with the base wrapped in your own hair? That’s a look. Wrapping hides the elastic and instantly elevates the whole style from casual to considered — and it takes about thirty extra seconds.
After securing your pony, take a half-inch section from underneath, wrap it around the base, and pin it discreetly underneath with a bobby pin. For winter texture, tease the ponytail itself lightly and mist with texturizing spray before wrapping — the slightly undone finish feels modern and lived-in. Position it at the crown for a lifted, energetic feel, or at the nape for quiet elegance. Either way, the wrapped base is the detail that makes people ask where you got your hair done.
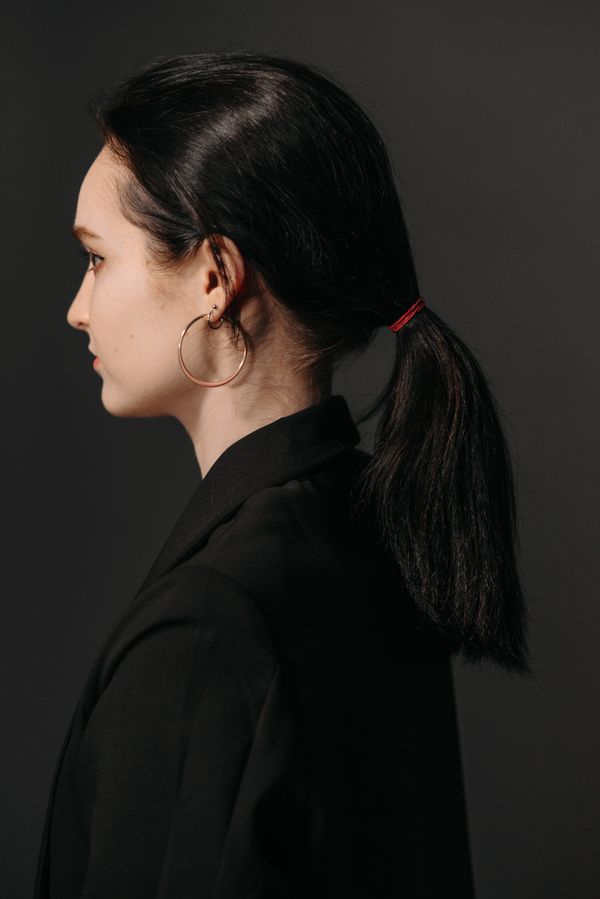
7. Glass Hair — Ultra Sleek and Straight
What makes hair look like glass? Reflective shine, zero frizz, and ends so precise they could cut paper. Glass hair is the ultimate power move for winter — it looks incredible against dark coats and photographs like a dream in holiday lighting.
- The foundation: a smoothing blowout is non-negotiable; flat-ironing over air-dried hair won’t give you that mirror finish.
- Product cocktail: heat protectant, then a pea of shine serum on the mid-lengths and ends only — roots get greasy fast.
- Iron technique: small sections, one slow pass each, following the iron with a fine-tooth comb for maximum smoothness.
- Winter armor: an anti-humidity finishing spray (yes, even in winter) seals the cuticle against indoor heating frizz.
The real secret to glass hair is the cut — blunt, even ends reflect light uniformly, while wispy layers break up the reflection. Even a micro-trim transforms straggly ends. And commit to the middle part: glass hair with a side part just doesn’t hit the same. High-maintenance day to day, but for events, nothing photographs better.
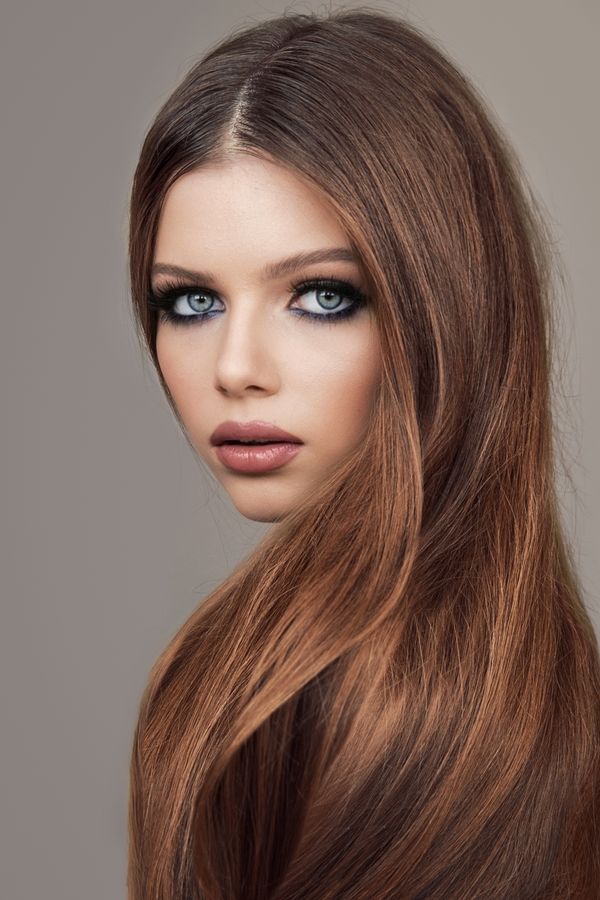
8. Romantic Loose Waves
Some hairstyles are trends; loose waves are a lifestyle. There’s a reason this look never leaves the red carpet — soft, flowing waves flatter every face shape, suit every occasion, and look just as good on day three as day one.
The 2026 approach is all about imperfection: wrap random sections around a 1.25-inch curling iron, alternating directions, and leave the last inch of each section uncurled for that modern, undone finish. Let everything cool completely before touching it — this is the step everyone skips and the reason curls fall flat. Then rake through with your fingers and a drop of shine oil. The result is touchable, romantic hair that moves beautifully in winter wind instead of fighting it. For extra longevity, pin the front sections back for the first hour while the curls cool and set — you’ll get more bounce that lasts well into the evening.
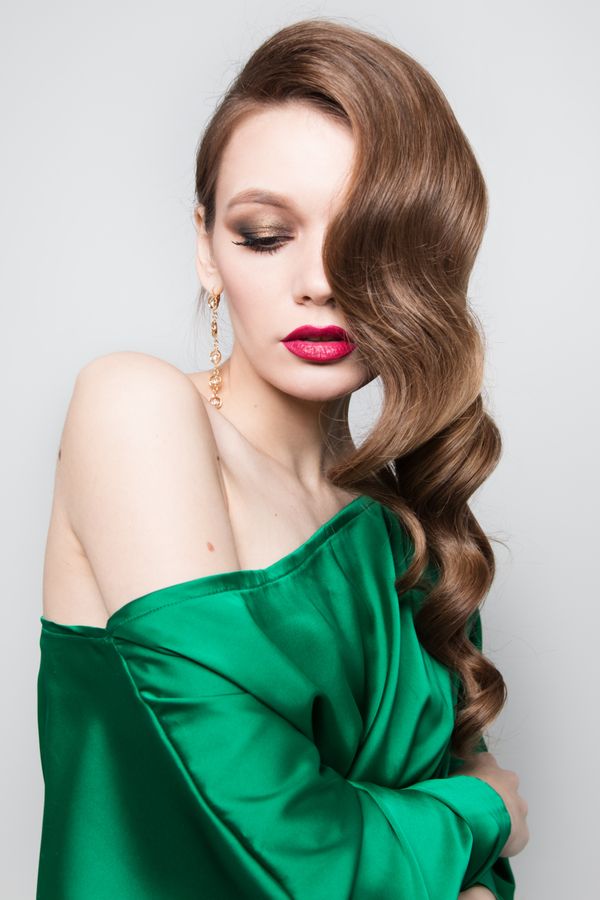
9. Modern French Twist
The French twist is having a renaissance, but forget the stiff prom version. Today’s twist is softer, slightly undone, with texture at the crown and a few face-framing pieces left out. It’s old-money elegance without the fussiness.
Gather your hair low as if for a ponytail, twist upward, and tuck the ends into the pocket the twist creates — secure with long French pins rather than bobby pins for a cleaner hold. The modern update: don’t smooth everything perfectly. Let the crown have some height, let a few pieces escape naturally, and skip the super-shiny finish in favor of a soft, touchable texture. It takes practice, but once it clicks, you have a five-minute updo that works for every formal winter event on your calendar.
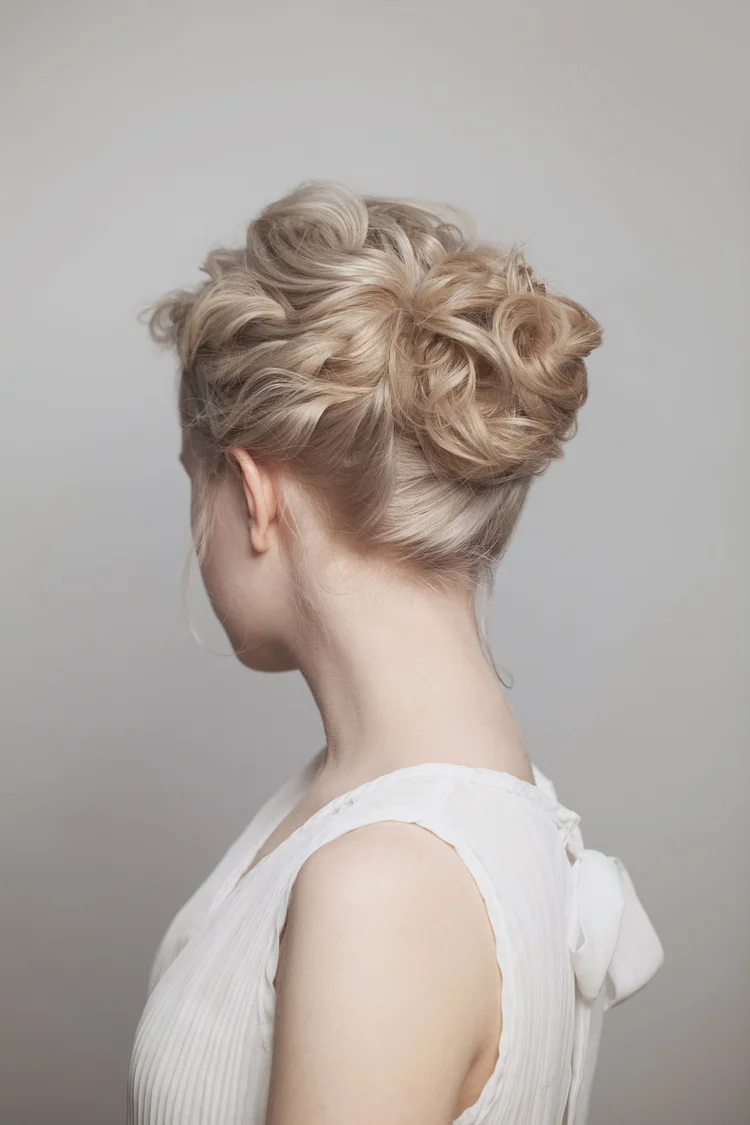
10. Playful Bubble Braid
Can a hairstyle be both playful and polished? The bubble braid says yes. Sections of ponytail puffed out between elastics create that gorgeous bubble effect — it’s fun, it’s different, and it holds up incredibly well in winter weather since every section is secured.
Secure a high or low ponytail, then add elastics every two inches down the length, gently pulling each section outward to create the bubbles. Clear mini elastics disappear into the hair for the cleanest look. For extra winter charm, weave a thin velvet ribbon through the bubbles or tie a bow at the base. This style is a lifesaver on windy days — unlike loose curls, it won’t turn into a tangled mess the moment you step outside. For a softer look, pull a few face-framing pieces out before you start and leave the bubbles slightly uneven; perfect symmetry isn’t the goal here, playful texture is.

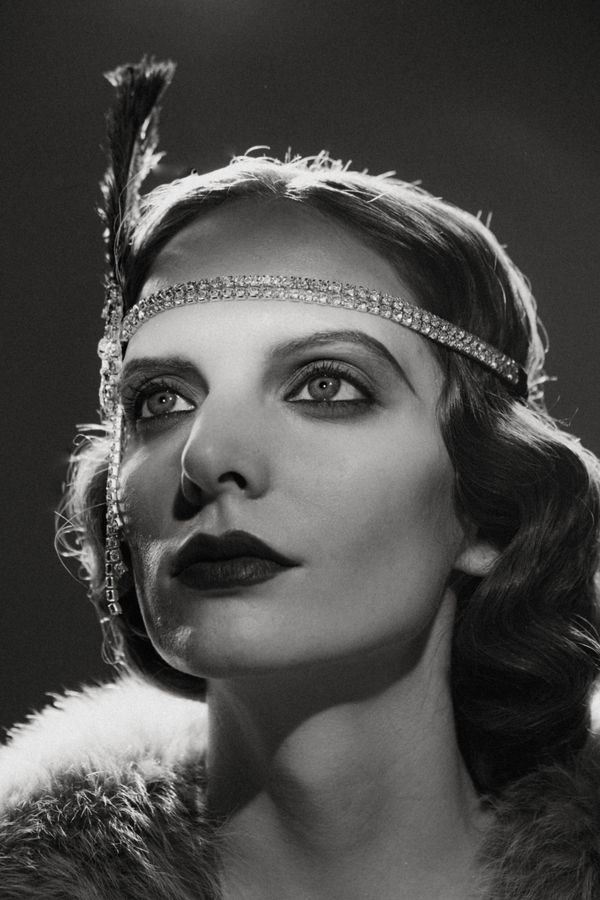
11. Old Hollywood Waves
For the nights when you want maximum glamour — New Year’s Eve, holiday galas, that fancy dinner — nothing beats Old Hollywood waves. Deep side part, sculpted S-waves, glossy finish: it’s pure vintage seduction and it never fails to turn heads.
The technique differs from regular waves: curl all sections in the same direction with a 1-inch iron, pin each curl to cool, then brush through with a boar-bristle brush to meld them into continuous waves. Set the part deep on one side and use strong-hold spray — this style needs structure to keep those sculpted waves intact. Tuck one side behind the ear and add a statement earring; the asymmetry is what makes it look expensive rather than costume-y. This style demands commitment — it takes 20-30 minutes — but the payoff is unmatched. You’ll feel like you stepped out of a different era, in the best possible way.
12. High Sleek Ponytail
The high sleek pony is confidence in hairstyle form. Snatched, glossy, and powerful — it lifts your whole face and looks incredible with winter’s structured silhouettes like turtlenecks and blazers.
- Position: the sweet spot is at the crown where a line from your cheekbones would meet — too high looks cheerleader, too low loses the lift.
- Smoothness: brush hair up with a boar-bristle brush, then tame flyaways with a toothbrush sprayed with hairspray (a classic stylist trick).
- The tail: flat-iron it straight for sleekness, or add loose curls for a glam pony — both work, just commit to one.
- Staying power: two elastics stacked give a stronger anchor than one, and they won’t stretch out by evening.
For extra length and fullness, clip a single weft extension around the ponytail base before smoothing — it blends seamlessly and gives that dramatic swish. And if your hair is fine, tease the crown before gathering; the added height makes the pony look thicker and more intentional.

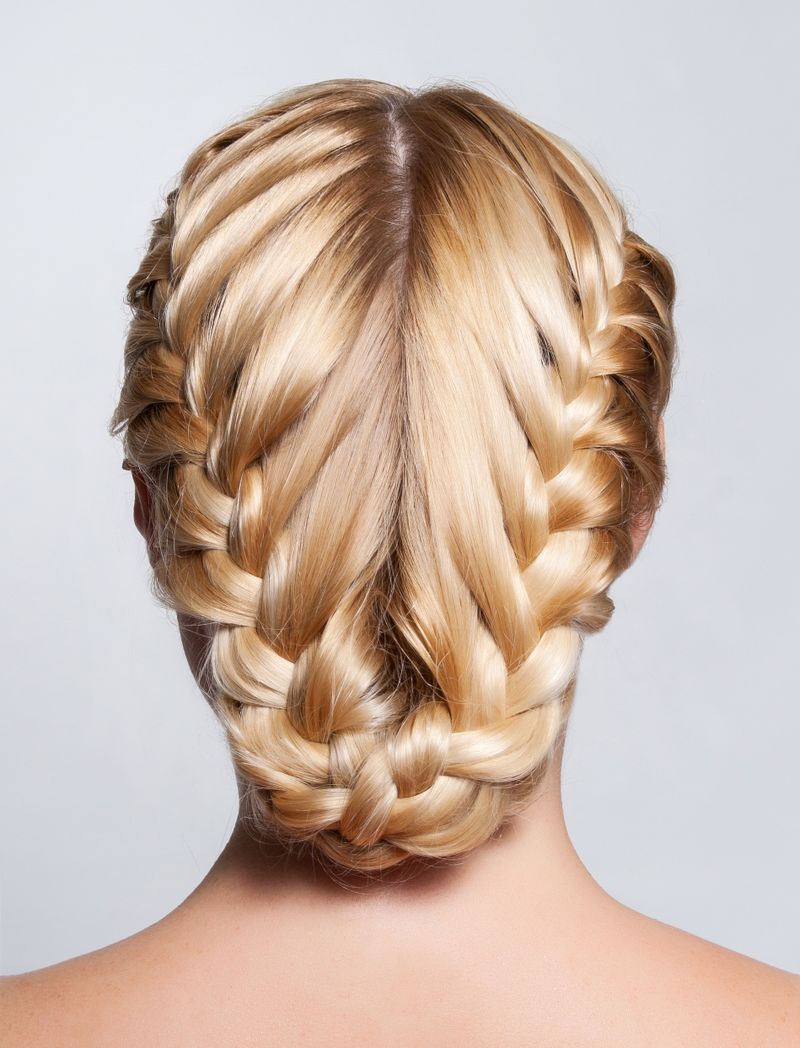
13. Crown Milkmaid Braids
Milkmaid braids wrapped around your head like a crown are peak winter romance — they look like something from a snow-covered fairytale, and they’re incredibly practical. Every strand is pinned up and protected from wind, hats, and static.
Create two Dutch braids (or regular three-strand braids if Dutch feels tricky), one on each side, then cross them over the top of your head and pin securely underneath. Pancake the braids first for a fuller, softer crown — skinny braids can look a bit severe. This style genuinely lasts all day and even looks better slightly loosened by evening. It’s my top pick for outdoor winter events where you need hair that won’t budge.
If your hair isn’t long enough for the braids to meet on top, pin them lower near the ears — the crown effect still reads beautifully. Weave in small flowers or pearl pins for a wedding-ready finish. And don’t aim for perfection: slightly loose, romantic braids look better than tight, severe ones.
14. Beanie-Friendly Low Side Braid
Let’s talk about the real winter struggle: hat hair. The solution isn’t fighting it — it’s styling for it. A loose low side braid sits perfectly under a beanie, comes out looking intentionally tousled, and takes about two minutes.
Sweep all your hair over one shoulder and braid loosely, securing with a fabric-covered elastic to avoid dents. The key word is loose — a tight braid under a hat creates weird kinks, but a relaxed one just looks effortlessly wavy when the beanie comes off. Pull a few pieces out around your face before putting the hat on; they’ll frame your face prettily instead of getting flattened. This is the ultimate low-effort winter commute style.

15. Face-Framing Blowout Layers
You know that expensive-looking hair that seems to curve perfectly around the face? That’s the face-framing blowout, and it’s all about the cut working with the styling. Long layers that start at the chin, blow-dried to flip softly inward, create that coveted swoop.
Ask your stylist for face-framing layers — not bangs, layers — starting around chin length and blending into the rest. To style, blow-dry those front pieces with a medium round brush, rolling them under and toward your face. The 2026 twist is pairing them with curtain bangs for a full frame effect. This cut grows out beautifully too, which means fewer salon visits in the cold months when you’d rather stay home.
Maintenance is refreshingly simple: the front layers need a trim every 8-10 weeks to keep their shape, but the rest can go longer. If layers fall flat, a quick blast with the round brush revives them in under two minutes. This cut pairs beautifully with every style on this list — the rare cut that improves everything you do with it.

16. Low Chignon with Soft Tendrils
The chignon is the French twist’s softer, more romantic sister. Sitting low at the nape with loose, face-framing tendrils, it’s the hairstyle equivalent of candlelight — warm, flattering, and quietly glamorous.
- Build: gather hair into a low loose ponytail, twist it into a bun, and pin — don’t overthink the shape.
- Tendrils: pull out two front sections and curl them loosely away from the face for that soft frame.
- Texture: tease the crown before gathering; a little height keeps it from looking flat and severe.
- Occasion: this is the ultimate winter wedding guest hair — elegant but never uptight.
The beauty of the chignon is its forgiveness — unlike a sleek bun, it looks better slightly imperfect. If pieces fall out during the evening, let them; the soft, lived-in version is the goal. Keep a few extra pins in your clutch, and check the back with your phone camera — that’s the view everyone else sees.

17. Ribbon-Tied Braid
Sometimes the smallest detail makes the biggest difference. Weaving a ribbon through a simple braid — or just tying a bow at the end — transforms basic into beautiful. Velvet ribbon in winter jewel tones (burgundy, forest, navy) is especially gorgeous against the season’s cozy textures.
For a woven look, tie the ribbon to your elastic at the start and treat it as a third strand as you braid. For the simpler version, just tie a bow around the base of a finished braid. The ribbon also cleverly hides elastics and any frizz at the tie point. This is such an easy way to make a school-run braid feel intentional — and it takes literally thirty seconds.
For the woven version, cut ribbon about twice your braid’s length — you’ll need extra for tying off. Satin weaves smoothly, velvet looks more wintry, grosgrain is easiest since it doesn’t slip. Coordinate with your outfit for a styled-with-intent look, or go classic black velvet — it matches everything.

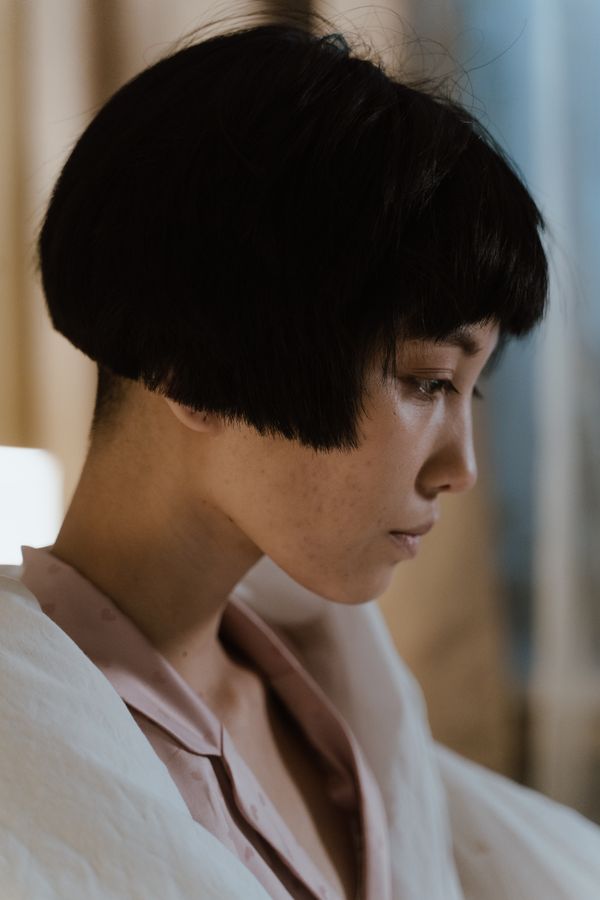
18. Tousled Textured Bob
Short hair in winter is underrated — no tangles in scarves, no static ends whipping around, and a textured bob looks effortlessly cool with every winter outfit. The 2026 bob is lived-in: choppy ends, piece-y texture, and movement rather than a severe blunt cut.
Styling is refreshingly simple: work a dime-sized amount of texturizing paste through dry hair, focusing on the ends, and twist random pieces in different directions. The goal is “I woke up like this” not “I spent an hour.” A bob with some texture also grows out gracefully, buying you extra weeks between trims. If you’re bob-curious, winter is honestly the best time to commit — you’ll appreciate the low maintenance immediately.
The grow-out is the best part: as a textured bob grows, it becomes a textured lob — two haircuts for the price of one. Ask for invisible layers rather than blunt weight lines; they create movement without sacrificing shape. And invest in a good texturizing spray — on a bob, it’s the difference between flat and fabulous.
19. Elegant Top Knot
The top knot gets a bad rap as lazy-girl hair, but done right, it’s pure elegance. A smooth, high bun with a clean finish looks sculptural and striking — especially paired with statement earrings and a bold lip for winter evenings.
The difference between messy and elegant is all in the prep: smooth hair back with a brush and a touch of gel, secure a high ponytail firmly, then twist and wrap neatly, tucking ends under. A donut form underneath gives perfect roundness if your hair is fine. Keep the hairline immaculate — that’s what separates red-carpet from rushed-morning. This style also shows off turtlenecks and high necklines beautifully since there’s nothing competing at the neck.

20. Double Dutch Braids
Sporty, youthful, and practically indestructible — double Dutch braids are the answer when you need hair that stays put through wind, workouts, and long winter days. The inverted braiding technique makes them pop off the head for extra dimension.
Part down the middle (a zigzag part adds a fun 2026 twist), then Dutch braid each side by crossing sections under rather than over. Keep the braids tight at the scalp for longevity, then pancake them once finished for that full, chunky look. These last beautifully for two days — sleep in a silk bonnet and day two looks even better with that perfectly undone texture. They’re also ideal under helmets and hoods since everything lies flat.
For a softer take, pull out face-framing pieces before braiding and curl them lightly away from your face at the end. You can also merge both braids into a low bun at the nape for an elegant evening variation. Bonus: these braids keep every strand off your neck during workouts — no more hair sticking to skin.

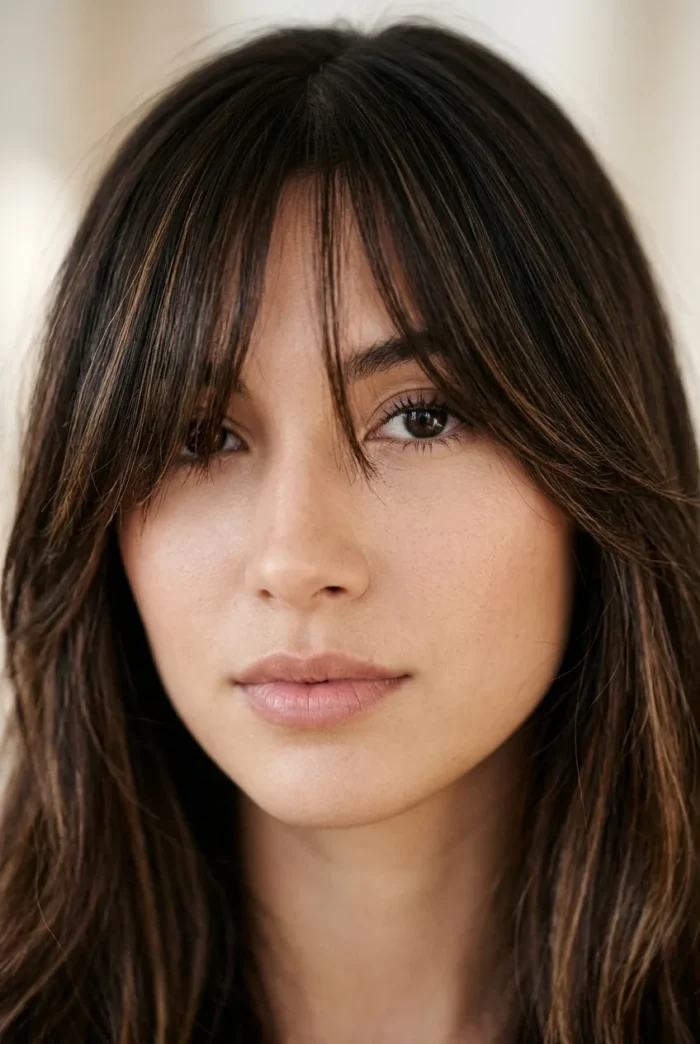
21. Curtain Bangs with Long Layers
Curtain bangs remain the most requested fringe for a reason: they suit virtually everyone. Parted in the middle and sweeping outward, they soften the forehead and blend seamlessly into long layers — no awkward grow-out phase, no commitment anxiety.
- Who they suit: honestly, everyone — they can be cut to flatter round, oval, square, and heart face shapes.
- Styling: a round brush and 60 seconds is all they need; they air-dry surprisingly well too.
- Grow-out: the best part — they just become face-framing layers, so there’s no painful in-between stage.
- Winter bonus: they look adorable peeking out from under beanies and headbands.
The awkward grow-out phase that plagues blunt bangs doesn’t exist here — curtain bangs gradually become face-framing layers, which you’d want anyway. Nervous about committing? Ask your stylist to start longer; you can always take more off. Most people wonder why they didn’t do it sooner.
22. Satin-Scarf Wrapped Ponytail
Here’s a two-in-one: a silk or satin scarf tied around your ponytail base looks incredibly chic and protects your hair from winter friction at the same time. It’s the rare style that’s both fashionable and functional.
Secure your ponytail first, then fold a square scarf into a band and wrap it around the base, tying in a bow or knot. Let the ends hang down alongside the ponytail for a pretty, flowing effect. Beyond the looks, the satin reduces breakage where the elastic grips — a real concern in dry winter air when hair is more fragile. Choose prints that complement your coat: a classic silk print against a camel coat is timeless.
Beyond the ponytail, the same scarf trick works on buns, braids, and as a headband — one accessory, endless styles. Look for vintage silk scarves at thrift stores; they’re affordable, unique, and often better quality than new ones. In a pinch, the scarf hides everything: greasy roots, grown-out color, yesterday’s style — all under chic silk.

23. Vintage-Inspired Pin Curls
Want waves with serious vintage soul? Pin curls — the technique our grandmothers used — create those soft, sculpted vintage waves that no curling iron quite replicates. And they’re completely heatless, which your winter-stressed hair will appreciate.
On damp hair, take one-inch sections, wrap each around your finger into a flat curl against the scalp, and pin. Sleep in them (a silk scarf over the top keeps everything in place) and release in the morning for bouncy, defined vintage waves. Brush through gently for softer 1940s waves or leave more defined for a 1920s feel. It takes practice to get the rolling motion down, but the results are so worth it — these waves have a spring and longevity that heat styling can’t match.
The learning curve is real — your first attempt might look more mad scientist than vintage vixen. Stick with it; by the third try the rolling motion clicks. Start with larger sections for looser waves while learning, then go smaller for definition. Use proper setting lotion rather than just water — it gives curls memory and dramatically improves how long they last.
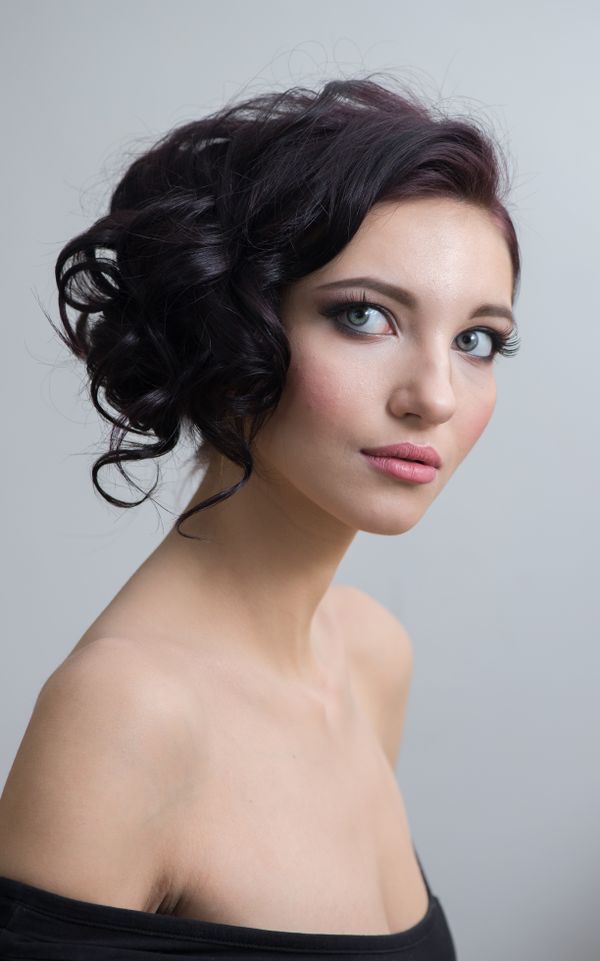
24. Braided Headband
Why buy a headband when you can braid one from your own hair? The braided headband sweeps hair back from your face in the prettiest way — part practical, part bohemian, entirely lovely.
Take a section from behind one ear, braid it across your hairline to the other side, and pin behind the opposite ear, tucking the end underneath. Dutch-braid it for more dimension, or keep it a simple three-strand for softness. It keeps hair off your face without a single accessory, which makes it perfect for windy days and workouts. For extra staying power, braid on slightly textured day-old hair and mist the finished braid with light hairspray.
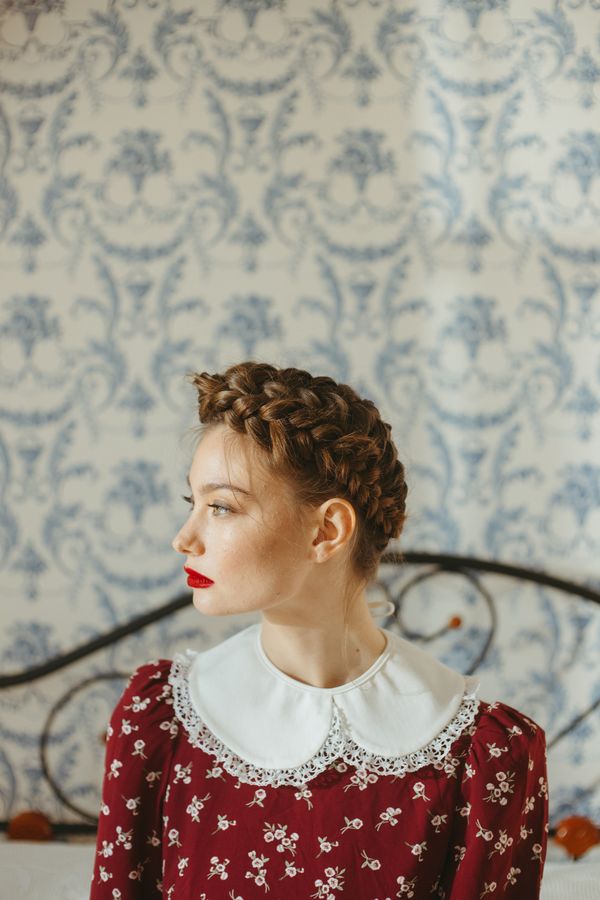
25. Sleek Side-Part Bob
We’ll close with the chicest short style of the season: the sleek side-part bob. Deep side part, glassy smooth finish, ends tucked just under — it’s giving fashion editor, it’s giving confidence, it’s giving main character.
The cut is key: a bob that hits right at the jawline with a deep side part, kept razor-sharp with trims every six weeks. Style with a flat iron and shine serum for that liquid-smooth finish, tucking one side behind the ear to show off an earring. This style is beautifully low-maintenance day to day — a quick brush and you’re out the door — but it always looks deliberate and polished. In a sea of long winter hair, a sharp bob stands out.

CONCLUSION
From heatless curls to sculpted updos, winter 2026 is full of hairstyles that are as practical as they are pretty. Try one new style a week and find your cold-weather signature.
📌 Save this post to your hairstyles board on Pinterest so you have winter hair inspiration ready!