
20+ Easy Winter Hairstyles — Quick Tutorials 2026
Let’s be real: nobody has 45 minutes for hair on a freezing winter morning. Between the snooze button and actually getting out the door, your hairstyle needs to be fast, easy, and tough enough to survive the commute.
That’s exactly what this list is. Every style here takes 10 minutes or less — most take under five — and each one comes with a quick tutorial so you can actually do it, not just admire it. No complicated techniques, no 20-step processes.
These are the easy winter hairstyles you’ll actually wear on repeat: quick updos, simple braids, and clever tricks that look like you tried way harder than you did.
1. The 5-Minute Messy Bun
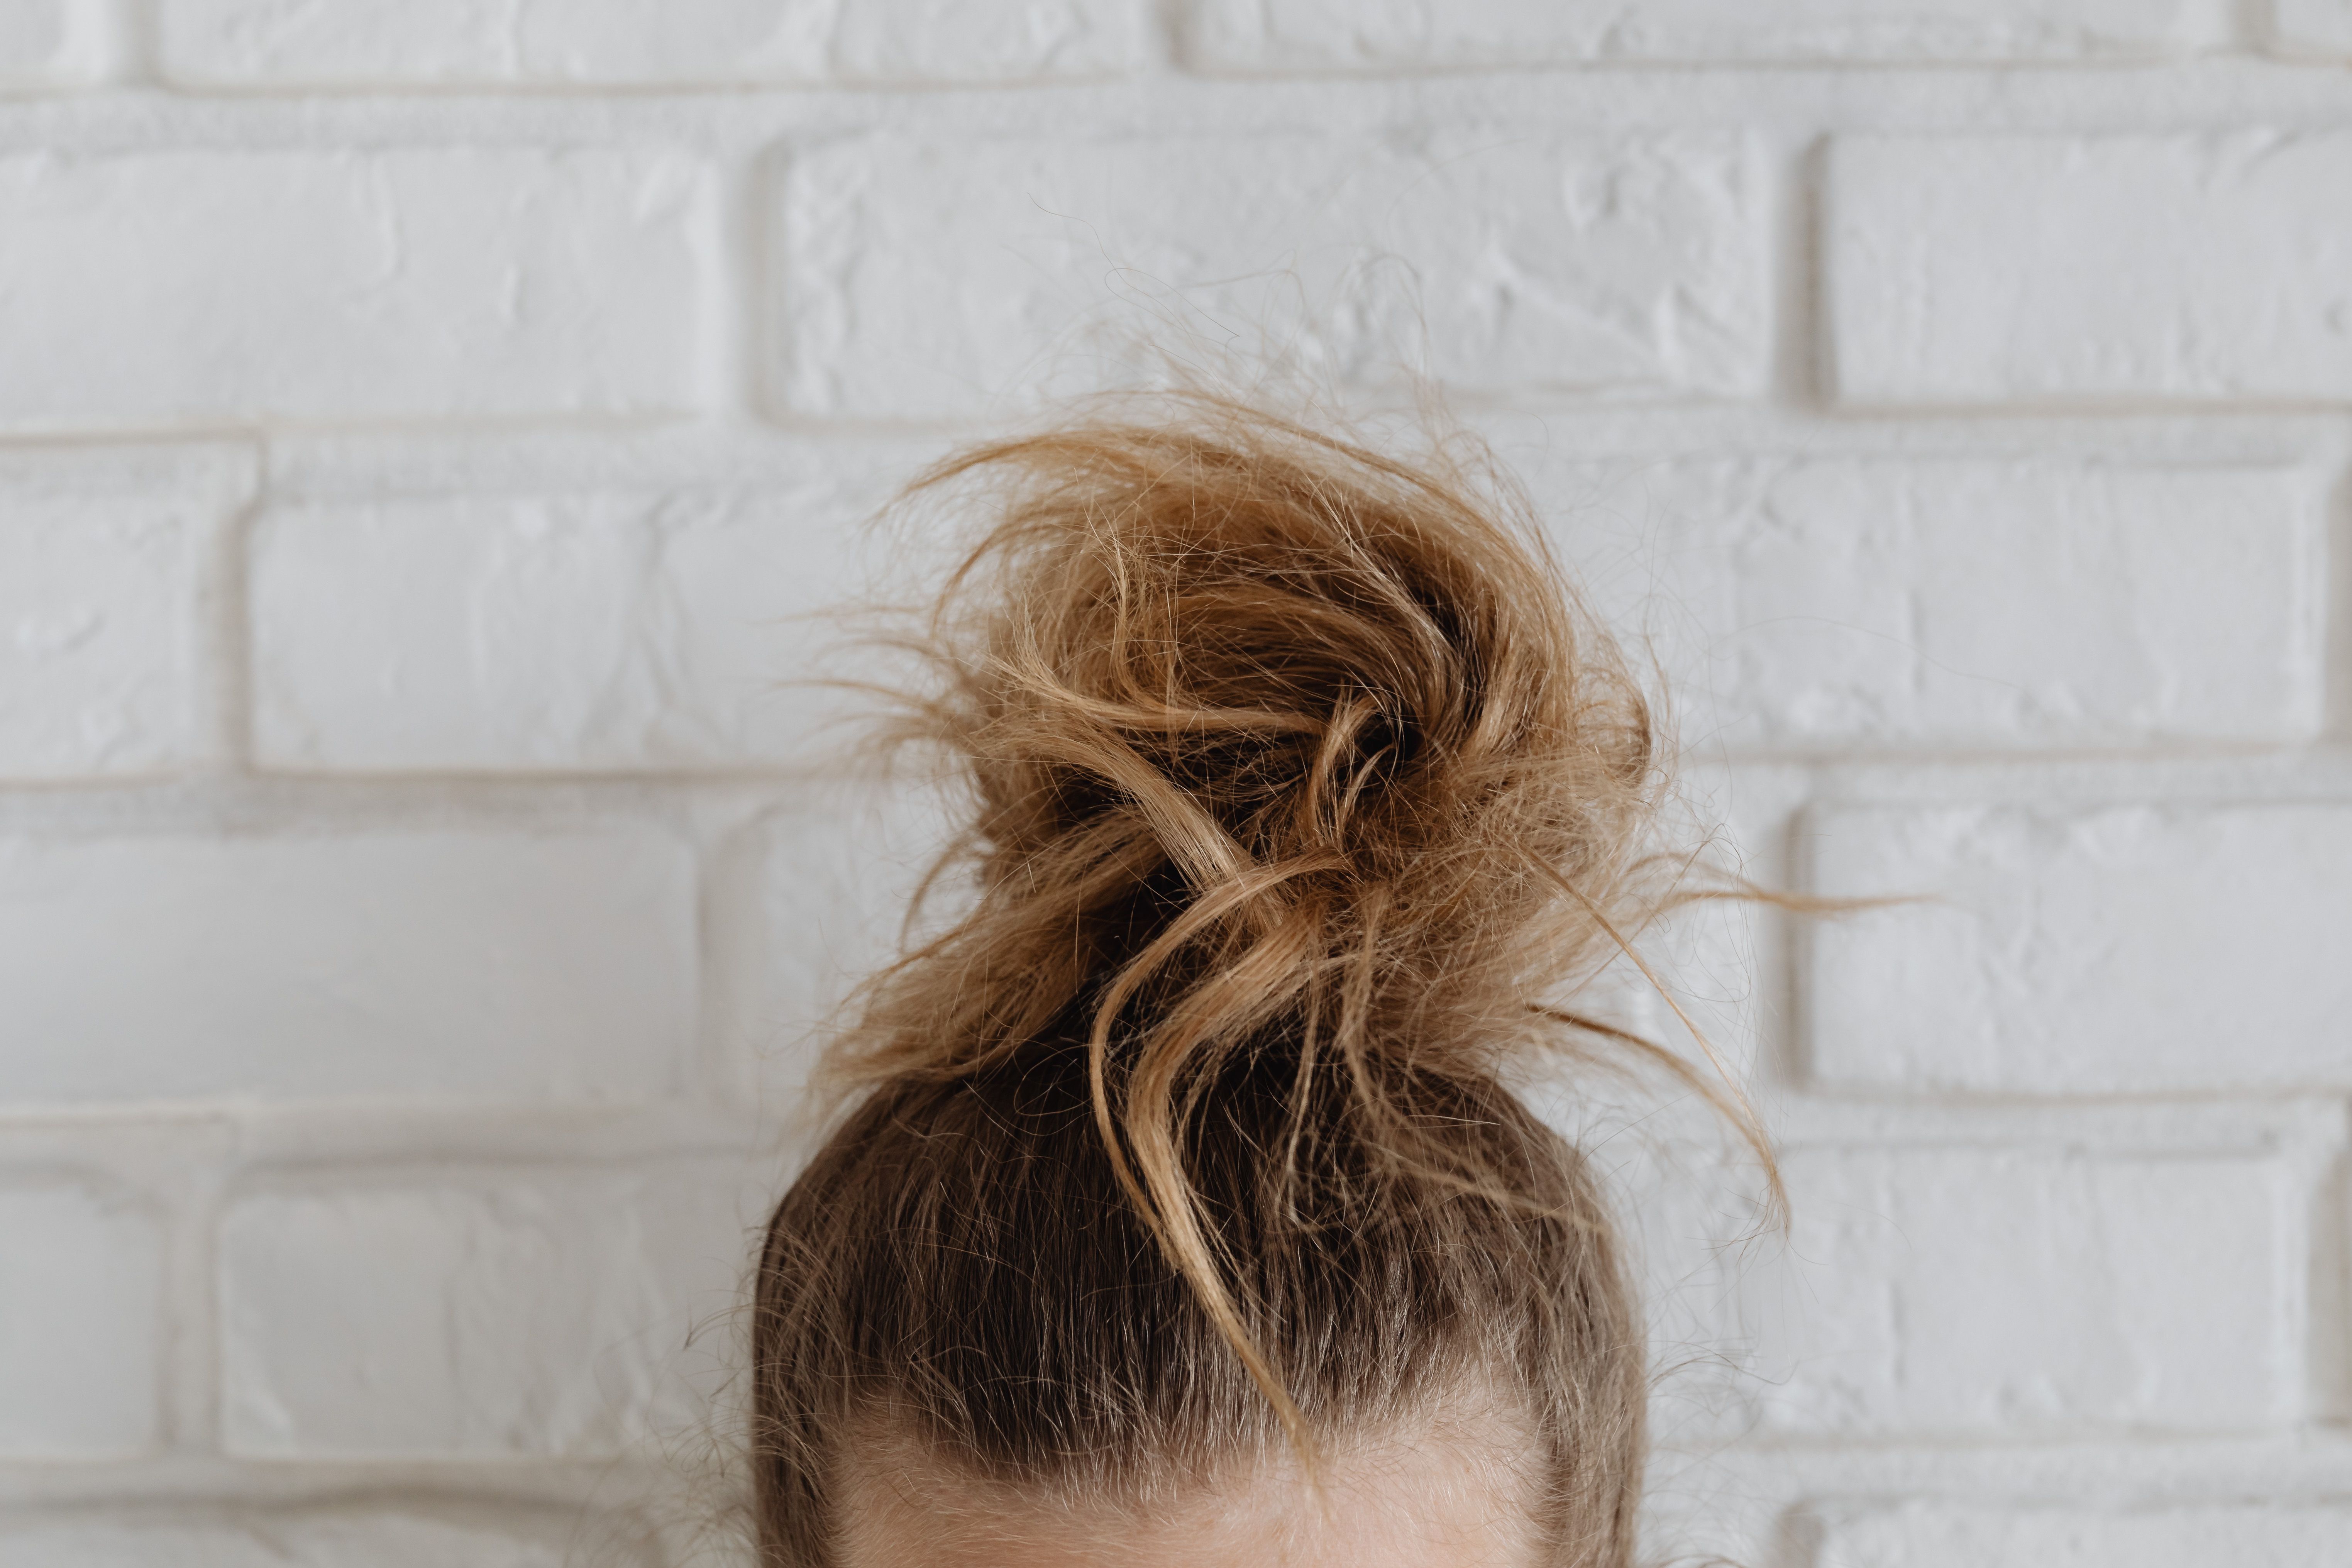
The messy bun is the undisputed queen of easy hairstyles, and winter is her season. Piled high, it keeps hair off your neck and out of your scarf; worn low, it slides right under a beanie. Either way, it takes five minutes flat.
Flip your head upside down, gather hair into a high ponytail, and twist the tail loosely around the base, pinning as you go — the messier, the better. Pull out a few pieces around your face and gently tug at the crown for volume. Here’s what makes it work: don’t aim for perfect. The whole charm is the undone texture, so embrace the flyaways and call it intentional. A spritz of texturizing spray before you start gives fine hair the grip it needs to hold all day.
2. Quick Claw Clip Updo
If you own a claw clip, you own a two-minute updo. Twist, clip, done — it’s genuinely that simple, and the result looks polished enough for the office.
- Step 1: Gather all your hair as if making a low ponytail.
- Step 2: Twist the length upward against the back of your head.
- Step 3: Fold the twist in half and clamp the claw clip over it vertically.
- Step 4: Let the ends fan out over the top of the clip and pull out two face-framing pieces. Done.
The trick is using a clip sized for your hair — too small and it’ll pop open by lunch. For thick hair, look for large 4-inch+ clips; fine hair does best with medium ones. Matte finishes look more modern than shiny plastic in 2026.

3. Simple Three-Strand Braid
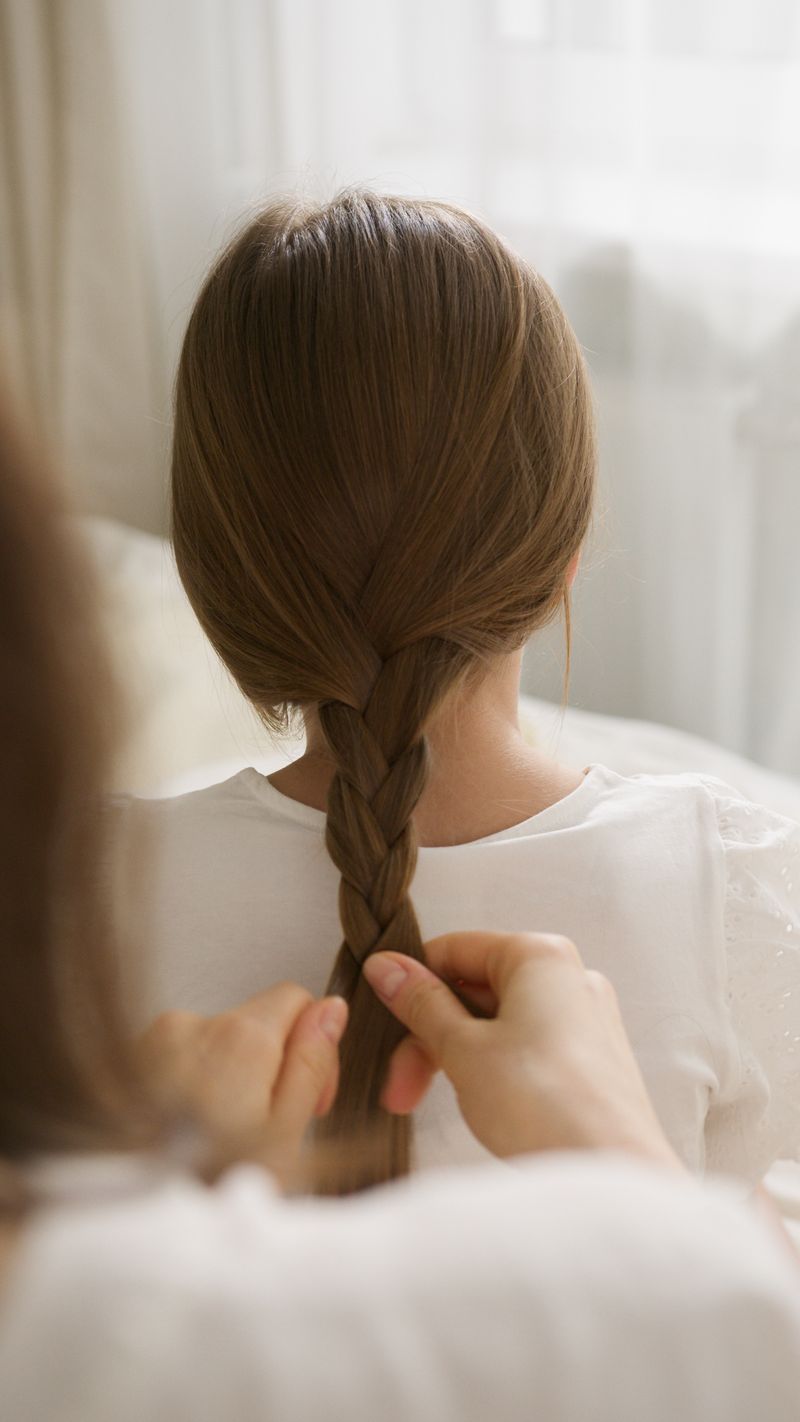
Can we appreciate the humble three-strand braid for a moment? It’s the first braid anyone learns, it takes three minutes, and it keeps every strand contained on the windiest winter day. Sometimes the basics are the basics for a reason.
Gather hair to one side or down the back, divide into three equal sections, and cross the outer sections over the middle one, alternating sides. Keep your hands close to the braid as you work downward for even tension. Secure with a small elastic — clear ones disappear, fabric ones are gentler. For a softer look, gently pull the braid edges outward (pancaking) once it’s secured. This is the perfect base skill too: master this and every fancier braid gets easier.
4. Low Ponytail with Hair Wrap
A low ponytail is easy; a low ponytail with the elastic hidden looks expensive. The hair-wrap trick takes thirty seconds and it’s the single fastest way to upgrade a basic pony.
Secure your low ponytail, then take a half-inch section of hair from underneath the tail. Wrap it around the base, covering the elastic completely, and pin the end underneath with a bobby pin pushed upward into the ponytail base. Smooth the tail with a brush and add a drop of serum for polish. For winter, wear it slightly to one side over a turtleneck — it keeps hair from tangling in your collar and looks effortlessly chic.
To give the ponytail more presence, tease the crown lightly before gathering — the added height transforms a flat pony into something with real shape. For fine hair, volumizing powder at the roots adds grip and fullness. Position the pony slightly off-center for a modern, asymmetric feel that looks great in photos.
5. Half-Up Top Knot
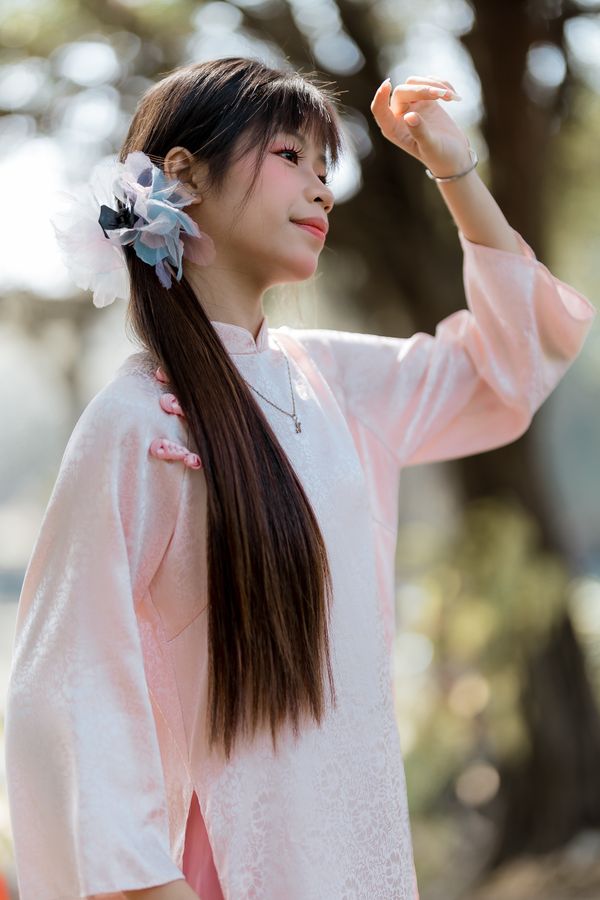
Half-up, half-down is the best of both worlds — hair off your face, length still showing — and the top knot version adds a fun, youthful twist. It works on basically every hair length from bob to waist-length.
Section off the top half of your hair (from temple to temple), gather it into a small high ponytail, then twist the tail into a mini bun and pin. The key to making it look good rather than lopsided: keep the section clean and centered, and don’t make the knot too big — it should be a cute accent, not a second head. Leave the bottom half in natural texture; a few loose waves make the whole thing look softer. This style is incredibly forgiving on second- or third-day hair.
6. Twisted Crown (Two-Strand Twists)
Can’t French braid? No problem. Two-strand twists give you a gorgeous crown effect with zero braiding skill required — if you can twist two pieces of hair around each other, you can do this.
- Step 1: Part your hair down the middle.
- Step 2: On each side, take a front section and divide into two strands.
- Step 3: Twist the strands around each other, adding hair from the hairline as you go back.
- Step 4: Pin both twists at the back of your head where they meet. Done in under five minutes.
This looks delicate and romantic but holds surprisingly well — the twists grip better than you’d expect. Add small pearl pins along the twists for a holiday-ready finish.
The twists don’t need to be perfect — slightly loose twists look softer and more romantic than tight ones. If sections slip while you work, texturizing spray on your fingertips adds grip. This style works beautifully on curly and coily hair too; natural texture makes the twists look even more intricate.

7. Heatless Sock Curls
The sock-curl method sounds ridiculous until you try it — then it becomes your whole personality. You literally wrap your hair around a sock before bed and wake up with bouncy curls. No heat, no damage, no effort while you’re awake.
Here’s the quick version: on slightly damp hair, lay a long sock (or a satin heatless curl band) across the top of your head like a headband. Wrap one-inch sections around it, working from front to back on each side, and secure the ends. Sleep on it — a silk pillowcase prevents frizz — and unwrap in the morning. Finger-comb the curls and add a light mist of hairspray. The curls are soft and natural-looking, never crunchy, and they hold beautifully in winter’s dry air.

8. Scarf-Wrapped Bun
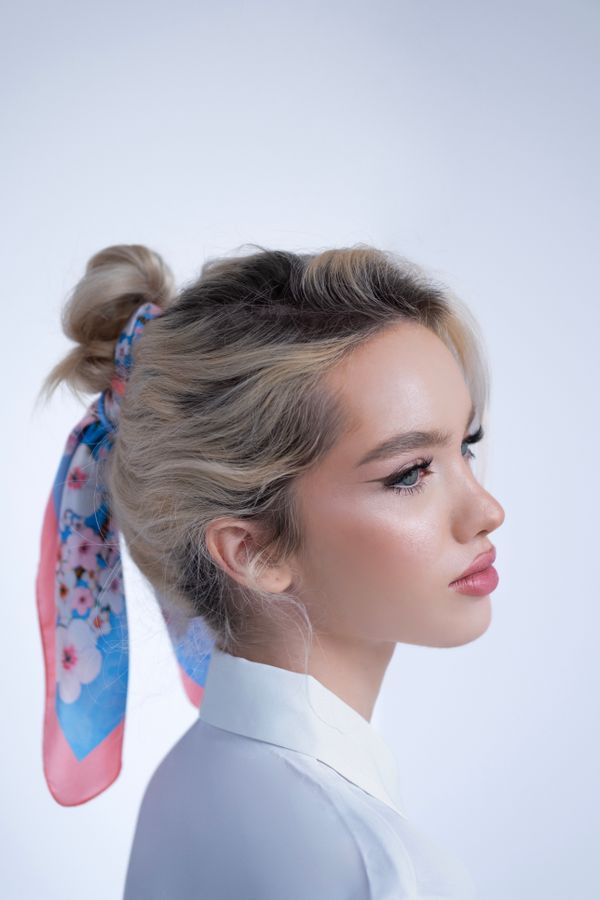
A silk scarf turns the most basic bun into a whole look — and in winter, it doubles as protection against harsh winds. This is a three-minute style with maximum impact.
Make your bun first (messy or sleek, your choice), then fold a square scarf into a long band. Wrap it around the base of the bun once or twice and tie it in a bow or knot, letting the ends drape. The scarf hides any messy pinning, adds color and pattern to neutral winter outfits, and the silk protects your hairline from friction. Pro tip: match your scarf to your coat or bag for a pulled-together look that seems way more planned than it was.
9. Bubble Ponytail in 5 Minutes
The bubble pony looks like it requires skill, but it’s literally just a ponytail with extra elastics. Five minutes, zero braiding ability needed, and it photographs incredibly well.
- Step 1: Make a sleek ponytail at your desired height.
- Step 2: Add a small elastic every 2 inches down the tail.
- Step 3: Gently pull each section outward to puff it into a bubble.
- Step 4: Mist with light hairspray. That’s the whole tutorial.
Use clear mini elastics so they disappear into the hair. For a dressier version, wrap a thin ribbon around each elastic. This style is practically windproof, making it ideal for outdoor winter days when loose styles would be a tangled disaster.
For extra volume, gently backcomb each section before puffing it out — the added fullness makes bubbles rounder and more dramatic. Alternate clear and colored elastics for a subtle pattern, or wrap each elastic with a thin strand of hair for the most polished finish. This style looks amazing in motion, so it’s perfect for days you’ll be photographed.

10. Sleek Straight Middle Part
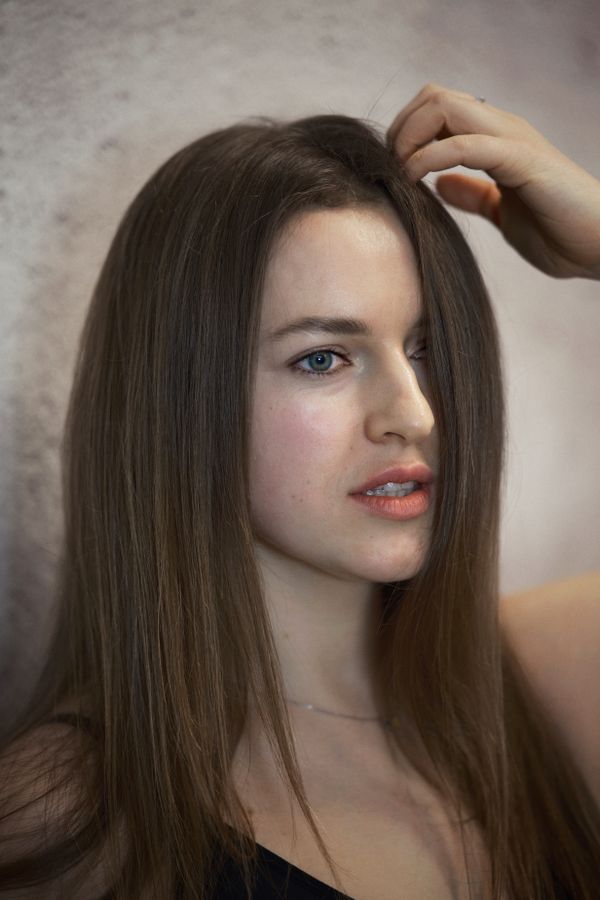
Sometimes easy means doing less, not more. Freshly straightened hair with a clean middle part is a complete look — polished, modern, and it takes whatever time your straightener takes, nothing more.
Work in small sections with your flat iron, one slow pass each, and always use heat protectant — winter hair is already dry, and unprotected heat makes it worse. The middle part is what makes it feel current; use the handle of a rattail comb for a razor-straight line. Finish with a drop of shine serum on the ends only. This is the perfect canvas style too — add a headband, clips, or a scarf later in the day to switch it up without restyling.
If your hair won’t hold straight through winter static, finish with a light pass of an ionic straightening brush after flat-ironing — it neutralizes flyaways without added heat damage. Keep travel-size anti-frizz sheets in your bag; one swipe over the surface midday restores that just-straightened smoothness in seconds.
11. Easy Rope Braid
The rope braid looks intricate but it’s just twisting — two sections twisted individually, then twisted around each other. It creates a beautiful candy-cane effect that’s perfect for the holidays and takes about four minutes.
Make a ponytail (high or low), divide it into two sections, and twist each section in the same direction — say, clockwise. Then twist the two twisted sections around each other in the opposite direction (counterclockwise) and secure the end. The opposing twists lock together so it won’t unravel. This braid looks especially striking with the two-tone effect it naturally creates, and it holds up all day without a single bobby pin.
The rope braid also makes a gorgeous accent: try a small one along your hairline as a faux headband, or two mini rope braids framing your face with the rest down. For extra security on silky hair, mist each section with texturizing spray before twisting — it gives the strands something to grip.

12. Pin-Back Front Twists
Growing out bangs? Tired of hair in your face? The pin-back twist solves both in about ninety seconds. It’s the simplest style on this list and somehow always looks intentional.
Take a one-inch section from each side of your front hairline, twist each one back away from your face, and pin them where they meet at the back or side of your head with bobby pins crossed in an X for maximum hold. That’s it. The twists add just enough detail to make it look styled, and they keep everything off your face — no more hair sticking to lip balm in the wind. Crisscross two decorative bobby pins for a little extra flair.

13. Quick Low Space Buns
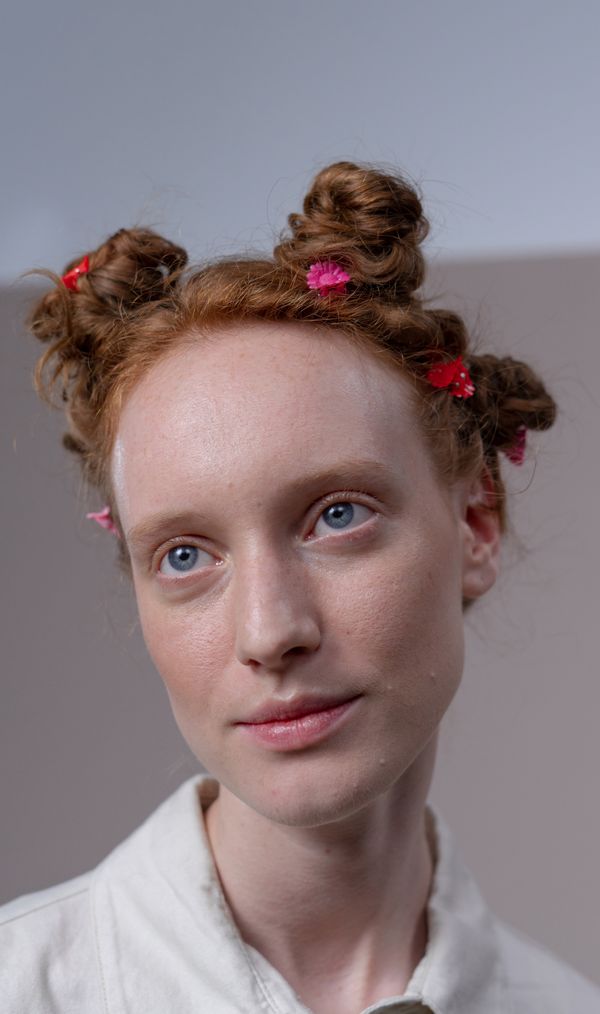
Space buns aren’t just for festivals — worn low and slightly messy, they’re an adorable everyday winter style that keeps hair completely contained. Think less rave, more cozy-cute.
Part down the middle, gather each side into a low ponytail near the nape, then twist each into a small bun and pin. Keep them loose and a little imperfect for the modern, wearable version — tight high space buns read costume, but low loose ones read effortlessly cool. Leave a few face-framing pieces out to soften the look. This style is also fantastic under hoods since everything sits flat and low.
For a half-up variation, make the space buns with just the top half of your hair and leave the rest down — playful but more wearable for everyday. Tiny braids leading into each bun add adorable detail. And don’t skip the texturizing spray beforehand; it gives fine hair the grit needed to hold the buns without a dozen pins.
14. Faux Braided Headband
All the charm of a braided headband with none of the arm-aching braiding overhead. The faux version uses a simple twist instead of a real braid, and honestly, most people can’t tell the difference.
- Step 1: Take a 2-inch section of hair from behind one ear.
- Step 2: Divide into two strands and twist them around each other (rope-twist style).
- Step 3: Drape the twist across your hairline to the opposite side.
- Step 4: Pin behind the other ear, tucking the end under your hair. Done.
It keeps hair off your face all day with zero accessories, which makes it perfect for workouts and windy commutes alike. A little pancaking of the twist makes it look fuller and more braid-like.
For curly or textured hair, this technique works even better — natural volume makes the twist look fuller and more braid-like with zero extra effort. Secure the end with two crossed bobby pins rather than one for extra hold. To make it last all day, lightly mist the finished twist with flexible-hold hairspray.

15. Overnight Braid Waves
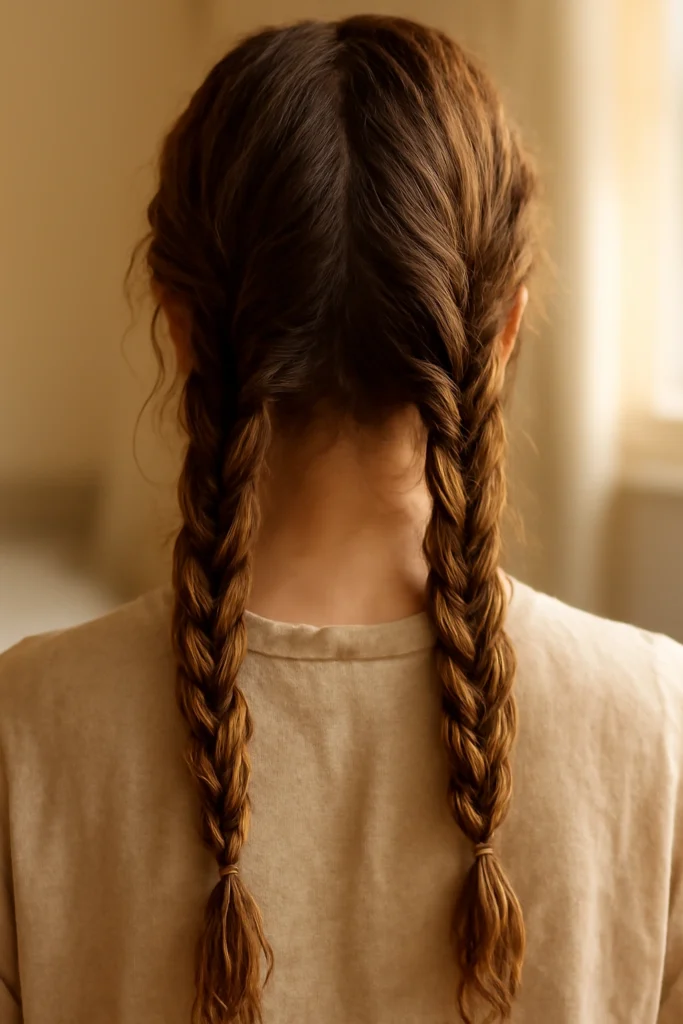
Want waves without any morning effort at all? Braid damp hair before bed, sleep on it, and wake up with perfect beachy waves. It’s the lowest-effort curl method in existence — you do the work the night before in five minutes, and the morning does the rest.
On slightly damp hair, create one loose French braid or two regular braids (two gives more volume, one gives looser waves). Secure the ends and sleep on a silk pillowcase. In the morning, undo the braids and shake out gently with your fingers — don’t brush. A touch of sea-salt spray enhances the texture. The waves last all day in winter’s dry air and look even better on day two, when they’ve relaxed into that perfect lived-in pattern.
16. Scrunchie Top Knot
The scrunchie makes everything better — comfier than an elastic, cuter than a plain tie, and it gives your top knot a soft, intentional finish. This is the elevated lazy-day bun.
Make a high ponytail, twist it into a bun, and secure with a scrunchie instead of a regular elastic. The scrunchie’s fabric adds volume around the base and looks decorative on its own — no pins needed for the casual version. Velvet scrunchies in winter tones (burgundy, forest green, chocolate) look especially rich against the season’s palette. It’s gentle on hair too, which matters when winter dryness makes breakage more likely.
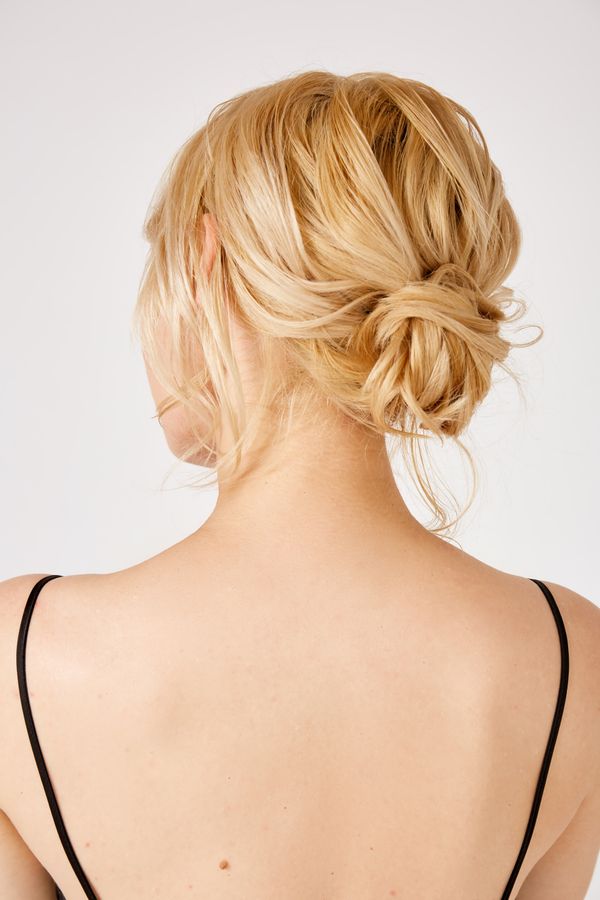
17. Loose Side Braid
There’s a reason the side braid is a forever favorite: drape a braid over one shoulder and you instantly look romantic and put-together, with about four minutes of effort. It shows off the braid’s texture in a way back braids can’t.
Sweep all your hair over one shoulder and braid loosely — regular three-strand is perfect. Secure with an elastic, then pancake generously for that full, soft look. Pull out a few wisps around your face and let them do their thing. Tie a ribbon or add a small clip at the elastic for a finishing touch. This style is particularly lovely with long layers, since the different lengths create beautiful dimension in the braid.
For maximum fullness, braid over a texturizing-spray base and pancake aggressively — don’t be shy about pulling those edges wide. A fishtail or Dutch variation adds even more visual interest if you’re feeling adventurous. Styling trick: drape the braid over the opposite shoulder from your bag strap to avoid friction and frizz.

18. Hat-Friendly Loose Pigtails
Two low, loose pigtails might sound young, but styled right they’re charming at any age — and they’re the most hat-compatible hairstyle that exists. Beanie goes on, beanie comes off, pigtails still look perfect.
Part down the middle and make two low ponytails at the nape, keeping them loose and soft rather than tight and high. A gentle wave through the lengths (or yesterday’s braid waves) keeps them from looking severe. The low placement means hats sit comfortably over them with no weird bumps. This is my favorite style for winter walks, ski trips, and any day where a hat is non-negotiable — cute, practical, and completely fuss-free.
To keep pigtails looking grown-up, keep the texture soft and the placement low — the combination reads effortless rather than juvenile. A slight wave through the lengths (yesterday’s braid waves are perfect) adds polish. Tie them with velvet ribbons or scrunchies instead of plain elastics for a finish that feels intentional and chic.

19. Twisted Half-Up Ponytail
Take the classic half-up pony and add one twist — literally. Twisting the top section before securing it adds gorgeous texture and visual interest, elevating a basic style into something that looks genuinely styled.
- Step 1: Section off the top half of your hair.
- Step 2: Divide it into two parts and twist them around each other toward the back.
- Step 3: Secure the twist with a small elastic at the back of your head.
- Step 4: Gently pancake the twist for fullness and let the rest of your hair fall naturally.
The twist catches light beautifully and adds dimension that a plain half-pony lacks. It works on straight, wavy, and curly hair alike — on curls, it’s absolutely stunning since the twist defines the texture.

20. Slicked Anti-Static Bun
Winter static is the enemy — but this style turns the solution into the look. A slicked-back bun uses gel or serum to eliminate every flyaway, giving you a polished style that’s also genuinely practical for dry winter days.
Brush all your hair straight back (no part) and smooth it with a strong-hold gel or smoothing cream, working from hairline to crown. Gather into a bun at your preferred height — low for elegance, mid for everyday — and secure firmly. The key product here is something with real hold: a clear brow-style gel on the hairline edges tames the baby hairs that static loves to lift. Finish with a shine spray for that expensive, glassy finish. On the worst static days of winter, this is the only style that truly holds up.

CONCLUSION
Quick doesn’t have to mean boring. These 20 easy winter hairstyles prove you can look polished in under ten minutes — even on the coldest, busiest mornings of the season.
📌 Save this post to your hairstyles board on Pinterest so you have winter hair inspiration ready!