
20+ Simple Christmas Nails — Easy DIY Ideas 2026
You don’t need a salon appointment to have gorgeous Christmas nails. Some of the prettiest holiday manicures are also the simplest — a couple of polishes, ten spare minutes, and a steady-ish hand. That’s genuinely it.
These 20 easy DIY Christmas nail ideas are designed for real life: minimal tools, forgiving techniques, and results that look like you tried much harder than you did. Grab your polishes and let’s make December a little more festive, one nail at a time.
1. Solid Cranberry Red Shine

Let’s start with the easiest win in the book: a perfect, glossy cranberry red. One color, two coats, top coat — done in fifteen minutes. But here’s what separates a good red manicure from a great one: nail prep. Push back cuticles, buff lightly, and use a ridge-filling base coat. The smoother the canvas, the more expensive the red looks.
Choose a blue-based red (it makes hands look brighter) in a gel-effect formula for that plush, salon shine. Short nails wear this beautifully — red is one of the few colors that looks intentional and chic at any length.
2. Nude With a Single Gold Dot

Minimalism meets mistletoe season. Paint your nails a sheer nude or your favorite “my nails but better” shade, then place one tiny gold dot — a rhinestone, a stud, or just a dot of gold polish — near the cuticle of each nail. It takes two extra minutes and looks impossibly chic.
💡 Quick Tip: A toothpick dipped in gold polish makes a perfect dot if you don’t own a dotting tool. Wipe and re-dip between nails for consistent size.
This is the design for anyone who wants a nod to the holidays without committing to full Christmas mode. It works for the office, for family dinner, for everything.
3. White Tips With Red Underscore

A tiny twist on the French manicure: classic white tips, but with a whisper-thin red line drawn right along the smile line. It reads as festive from a distance and polished up close — the best of both worlds.
- Paint white tips first and let them dry fully
- Use a liner brush or nail art pen for the red line
- Keep the red line thin; it’s an accent, not a stripe
- Sheer pink or nude base keeps it soft
No steady hand? Red nail art pens are cheap and far more forgiving than a brush.
4. Easy Polka Dot Holiday Nails

Polka dots are the gateway to nail art — if you can dot, you can do this. A deep green or red base with white dots scattered like falling snow, or white dots in a neat grid for a retro feel. Either way, it’s adorable and takes minutes.
The trick is varying your dot sizes: a few larger dots mixed with tiny ones looks organic and intentional. A bobby pin gives you two dot sizes in one tool. Finish with a glossy top coat to smooth everything into one seamless, candy-like finish.
5. Forest Green Solid With Gloss

Deep forest green is December’s best-kept secret. It’s festive without being obvious, sophisticated without being boring, and it makes gold jewelry absolutely glow. Two coats of a rich emerald or pine green, sealed with the glossiest top coat you own.
For extra depth, try a jelly-finish green — those translucent formulas look like sea glass and catch light beautifully. This is a one-polish manicure that gets more compliments than designs that took an hour. Sometimes simple really is the whole point.
💡 Quick Tip: Dark greens can stain — always use a good base coat, and don’t skip it even if you’re in a hurry.
6. Red and Gold Half-Moon Nails

The half-moon manicure is having a quiet renaissance, and Christmas is its moment. Paint nails red, then add a gold half-moon at the cuticle — like a little golden sunrise on every finger. It looks intricate but it’s genuinely easy with reinforcement stickers (yes, the office-supply kind).
Place a round sticker at the base of each nail, paint red over the whole nail, peel the sticker while the polish is still slightly tacky. The result: a perfect gold crescent. Seal with top coat and admire your handiwork.
7. Snowy White Glitter Gradient

A glitter gradient — dense sparkle at the tips fading into a nude or white base — looks like frost creeping across your nails. It’s one of the easiest “fancy” techniques because imperfection is the whole aesthetic.
- Apply your base color and let it dry
- Dab glitter polish onto a makeup sponge
- Press the sponge onto the nail tip, fading downward
- Repeat for more density, then seal with top coat
Silver or white glitter on a sheer base is the most wintery combo. No sponge? Dab the glitter straight from the brush in thin layers — it still works.
8. Simple Gold Foil on Nude

Gold foil sounds advanced, but it’s one of the most forgiving nail art materials out there — there are no wrong answers with crinkled gold. Press small pieces onto tacky nude polish, seal with top coat, and you have a manicure that looks straight out of a salon.
Tear the foil into irregular pieces rather than cutting neat shapes; organic edges look more expensive. Concentrate foil near the tips or cuticles rather than covering the whole nail — negative space is what keeps this elegant instead of chaotic.
9. Candy Stripe Accent Nail
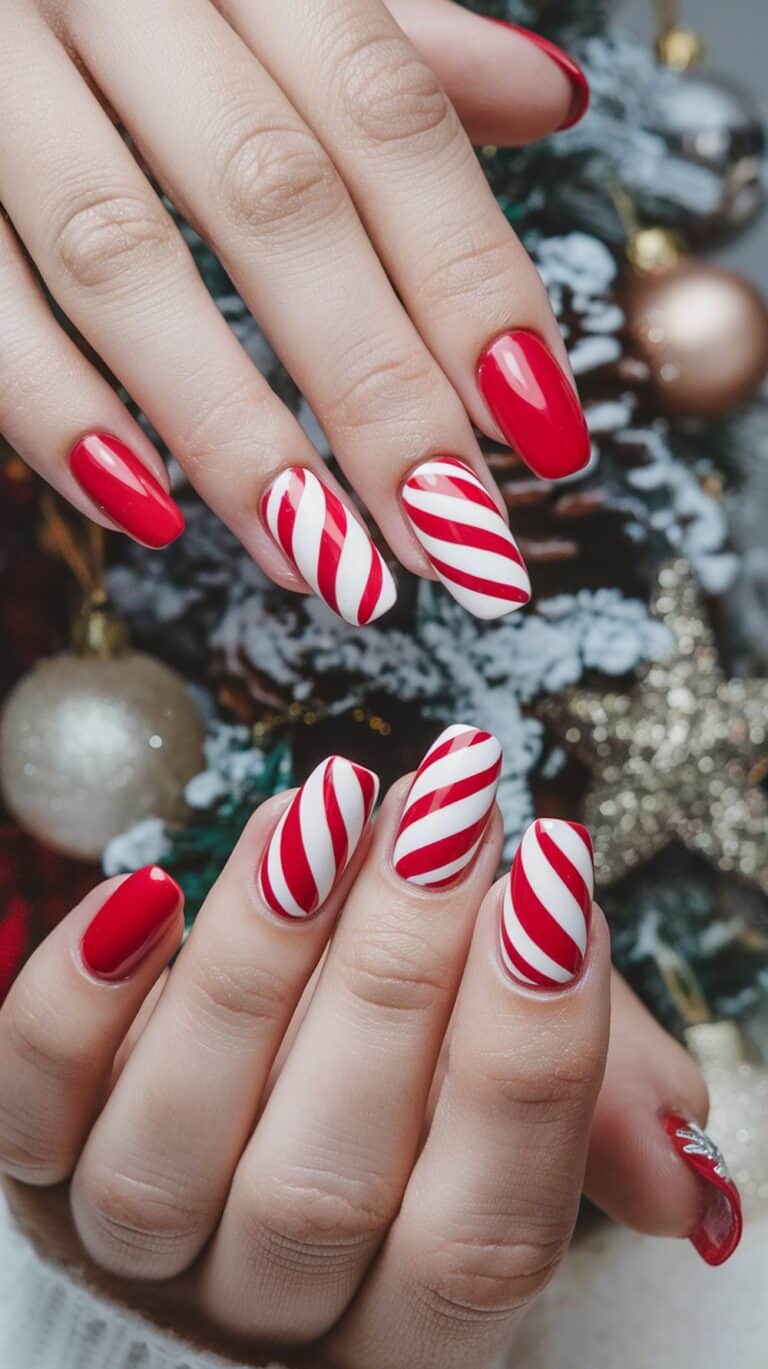
Full candy cane nails are a commitment; a single candy stripe accent nail is a delight. Paint nine nails solid red (or white), then do diagonal red-and-white stripes on just your ring fingers. All the festive charm, a fraction of the effort.
For the stripes, alternate thin lines with a striping brush over a white base. They don’t need to be perfect — slightly wobbly stripes still read as candy cane from any normal viewing distance. This is the perfect “my first nail art” project.
💡 Quick Tip: Striping tape gives razor-sharp lines if freehand stripes stress you out. Lay tape, paint, peel while wet.
10. Matte Burgundy Simplicity

Sometimes the boldest move is removing the shine. A deep burgundy or oxblood matte manicure is moody, modern, and quietly festive — like velvet in nail form. The matte finish makes the color look richer and more expensive than its glossy twin.
Matte top coat over any dark polish gives you this look instantly. Keep nails short to medium and neatly shaped — matte finishes highlight every edge, so tidy cuticles matter here. Add one glossy accent nail (same color, glossy top coat) for a subtle texture contrast that feels very 2026.
11. Tiny Tree on Ring Finger

One tiny Christmas tree, nine simple nails. Paint everything a neutral — nude, soft white, or pale gray — then draw a simple triangle tree on each ring finger with green polish and a gold dot on top. Minimal effort, maximum charm.
- Keep the tree small: it should fit comfortably on the nail
- A toothpick works for the trunk and star dot
- Add two tiny dot “ornaments” if you’re feeling fancy
- Seal carefully so the small details don’t smudge
This is proof that one well-placed detail beats ten busy nails.
12. Champagne Shimmer Wash

Not full glitter, not plain polish — a champagne shimmer wash is that in-between magic. One or two coats of a sheer, shimmery champagne polish over bare or nude nails gives a candlelit glow that flatters every skin tone.
This is the lowest-effort festive manicure that exists: no art, no precision, just beautiful shimmering color. It layers beautifully too — wear it alone for subtlety or over any nude as a topper. In December’s warm indoor lighting, your nails will look like they’re glowing from within.
13. Green French Tips
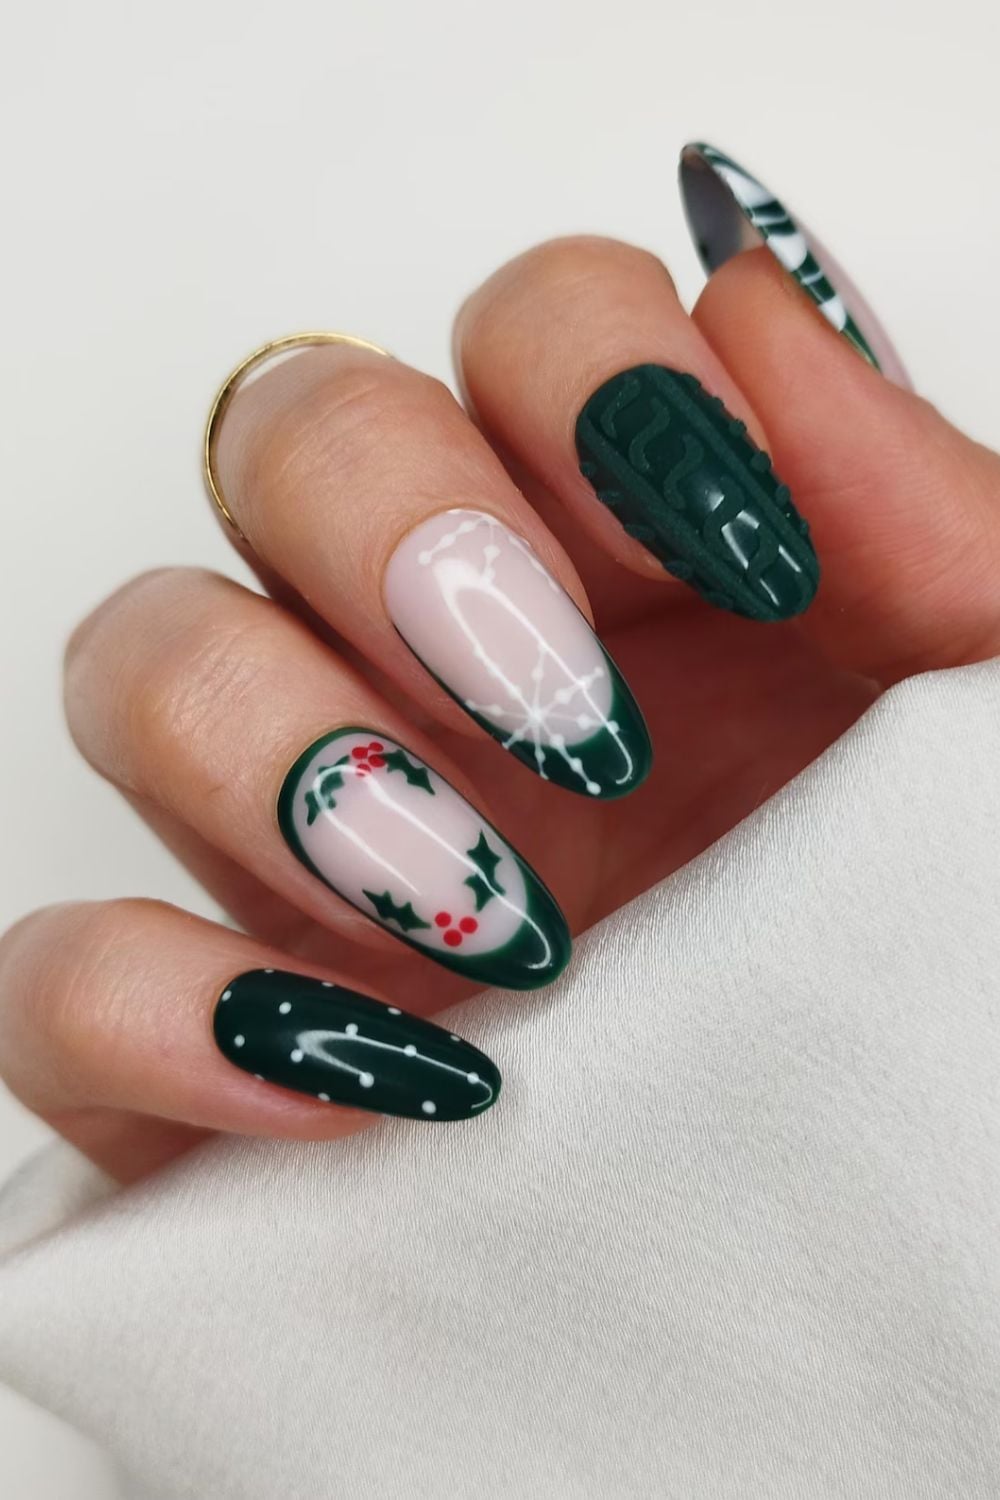
Swap the white tips of a French manicure for deep Christmas green and suddenly it’s the holidays. The technique is identical to a classic French — sheer nude base, colored tips — but the effect is completely seasonal.
Green tips on short nails look especially fresh and modern. Use a French tip guide sticker or just a steady hand; the tip line doesn’t need to be salon-perfect because the color does the talking. A thin gold line under the green tip takes it from cute to couture in thirty seconds.
💡 Quick Tip: Do your dominant hand first while your patience is fresh — it always turns out better.
14. White Snowflake Stamp Accent

Nail stamping is the DIY world’s best-kept secret: salon-level art with zero drawing skill. A snowflake stamping plate, a stamper, and white stamping polish give you perfect snowflakes in seconds. Stamp one accent nail per hand over a blue, red, or nude base.
The learning curve is about three practice stamps on paper. Press firmly, transfer quickly, and clean the plate between nails. Once you’ve got it, you’ll stamp snowflakes on everything. Fair warning: it’s addictive.
15. Red With Gold Glitter Tips

A red manicure with gold glitter tips is like the party version of a classic red — same confidence, more celebration. Paint nails red, then dab gold glitter polish just on the tips, fading it slightly downward for a gradient effect.
This works with any glitter density: a light dusting for subtlety, heavy coverage for full glam. The red base hides any glitter imperfections, making this one of the most forgiving fancy looks. It’s the manicure equivalent of adding statement earrings to a little black dress.
- Dab, don’t brush, the glitter for better coverage
- Two thin glitter layers beat one thick gloopy one
- Clean up edges with a flat brush dipped in remover
16. Cozy Sweater Knit Effect

Sweater nails — that raised cable-knit texture — look incredibly cozy and they’re easier than they appear. Paint a matte base (cream, dusty pink, or soft gray are perfect), then pipe the knit pattern with the same color polish using a thin brush or dotting tool. The 3D texture comes from layering the polish slightly thick.
Keep the pattern simple: vertical lines with small V-shapes or dots between them reads as knit instantly. Don’t overthink symmetry — real sweaters aren’t perfect either. A matte top coat over everything unifies the texture into that soft, woolly look.
17. Holly Dot Accent Nails

Three dots can be a whole design. On a nude or deep red base, cluster three tiny red dots (the berries) with two small green leaf strokes on your accent nails. That’s holly, that’s Christmas, that’s it. The rest of the nails stay beautifully simple.
This is a wonderful first attempt at freehand art because the shapes are so forgiving — dots and leaf strokes. Use the round end of a bobby pin for berries and the edge of a small brush for leaves. Cute, quick, and unmistakably festive.
💡 Quick Tip: Do the leaves first, then dot the berries on top — layering in this order looks more natural.
18. Icy Blue Solid Manicure

An icy, frosty blue — think frozen lake, not baby shower — is winter in a bottle. One color, full coverage, and suddenly your hands look like they belong in a snow globe. It’s festive without a single Christmas motif, which means zero awkwardness wearing it into January.
Look for dusty, slightly grayed blues rather than bright ones; they’re more sophisticated and more flattering. A glossy finish reads as ice, a matte finish reads as frost — both are gorgeous. This color makes silver jewelry pop like nothing else.
19. Gold Star Stickers on Nude

Nail stickers have come a long way, and gold star stickers on a nude base might be the easiest genuinely-pretty holiday manicure ever created. Paint nude, stick stars, top coat. Three steps, five minutes, endless compliments.
- Place stickers with tweezers for precision
- Press firmly, especially at the edges
- Seal with two thin top coats so edges don’t catch
- One star per nail, or a scattered constellation — both work
Mix star sizes for a more organic, less “sticker-book” look. This is also a great option for kids or anyone who wants festive nails with zero skill barrier.
20. Peppermint Red and White Dots

Red nails with white dots sound simple because they are — and that’s the charm. A glossy red base with scattered white dots in varying sizes reads as peppermint, snowfall, or holiday confetti depending on your mood. It’s playful, easy, and weirdly versatile.
Cluster dots near the cuticle for a modern look, or scatter them randomly for whimsy. A dotting tool makes this meditative rather than fiddly. Finish with top coat and you’ve got a manicure that took ten minutes and looks like December feels: joyful.
CONCLUSION
Easy doesn’t mean boring — these 20 DIY Christmas nails prove that a little polish and a few minutes can carry you through the whole holiday season. Pick your favorite, pour something warm, and paint.
📌 Save this post to your nails board on Pinterest so you have festive inspiration ready!