
25+ Cute Winter Nails 2026 — Stunning Festive Designs
Winter is officially nail season — and cute winter nails are having their biggest moment yet in 2026. Between holiday parties, cozy coffee dates, and endless photo ops, your manicure is front and center from November straight through February. It’s the one accessory you wear every single day.
This year’s trends lean soft and dreamy with a playful edge: frosted finishes, delicate snowflakes, velvet textures, and chrome that catches the winter light. The best part? Most of these designs look far harder than they are — stickers, press-ons, and a few clever techniques do all the heavy lifting.
Ready to find the one that feels like you? Below are 25 cute winter nail designs to carry you through the season — from subtle everyday looks you can wear to work, to full festive glam made for holiday parties — you’re sure to find your signature winter look.
1. Frosted Snowflake Tips
Remember the first snowfall of the year, when everything looks soft and glittering? That’s exactly the feeling these nails capture. A sheer nude or milky pink base keeps things wearable for work and school, while delicate white snowflakes on your ring fingers add that unmistakable winter magic. You don’t need steady artist hands either — snowflake stickers or a stamping plate give you crisp, intricate flakes in seconds, and a glossy top coat melts them into the base so they look hand-painted.
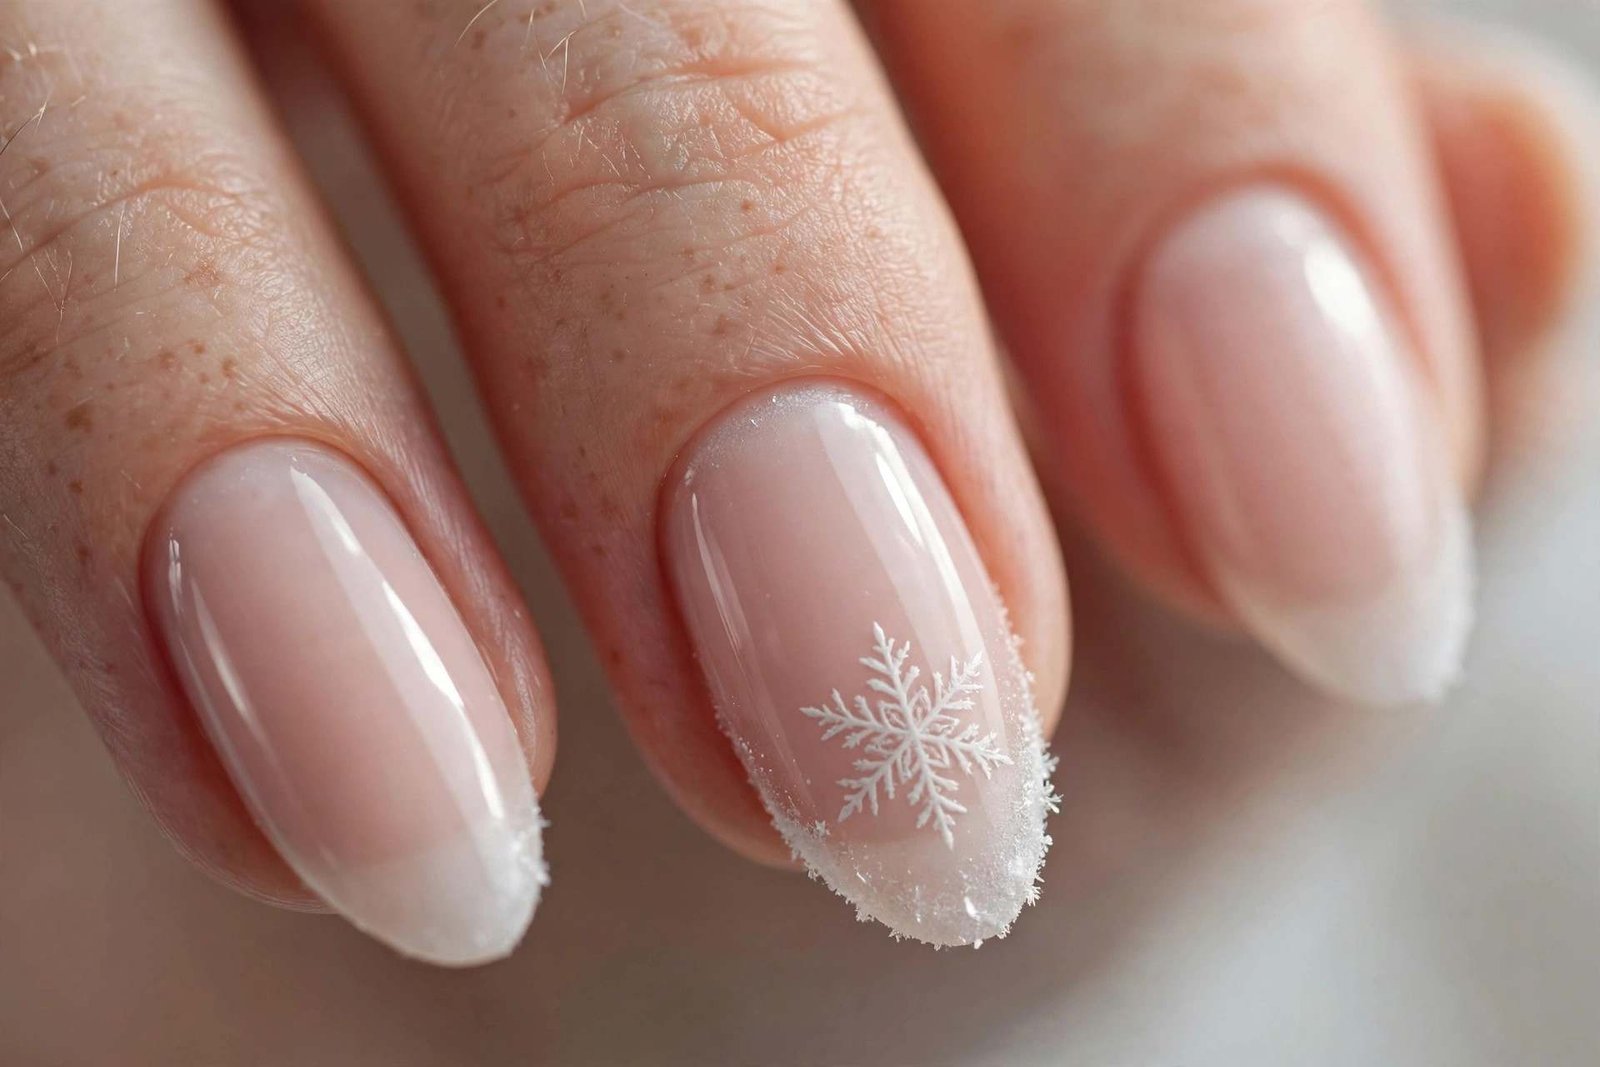
Keep the remaining nails clean and simple so the snowflakes get all the attention, and choose a base shade close to your skin tone so regrowth stays invisible for weeks. A matte top coat over the whole set gives it a frosted, just-stepped-out-of-the-snow effect. This is the kind of design that gets compliments from strangers in the coffee line.
💡 Quick Tip: Place your snowflake decals slightly off-center rather than dead middle — the asymmetry looks more modern and intentional.
2. Icy Blue Velvet Cat-Eye
Magnetic cat-eye gel polish is the cheat code for winter nails that look expensive. Grab an icy blue or steel-grey magnetic shade, apply two coats, and hold the velvet magnet wand over the wet polish for about ten seconds without touching it. The shimmer particles gather into a soft, plush band of light that looks exactly like velvet fabric.
- The finish: Seal with a glossy top coat for icy shine, or matte for a true frosted-velvet look.
- Best shape: Medium almond or oval — the curved surface shows off the magnetic shift.
- DIY level: Easy, but you’ll need a UV/LED lamp since cat-eye only exists in gel.
- Color picks: Look for shades named “frost,” “glacier,” or “ice queen” — avoid anything teal.
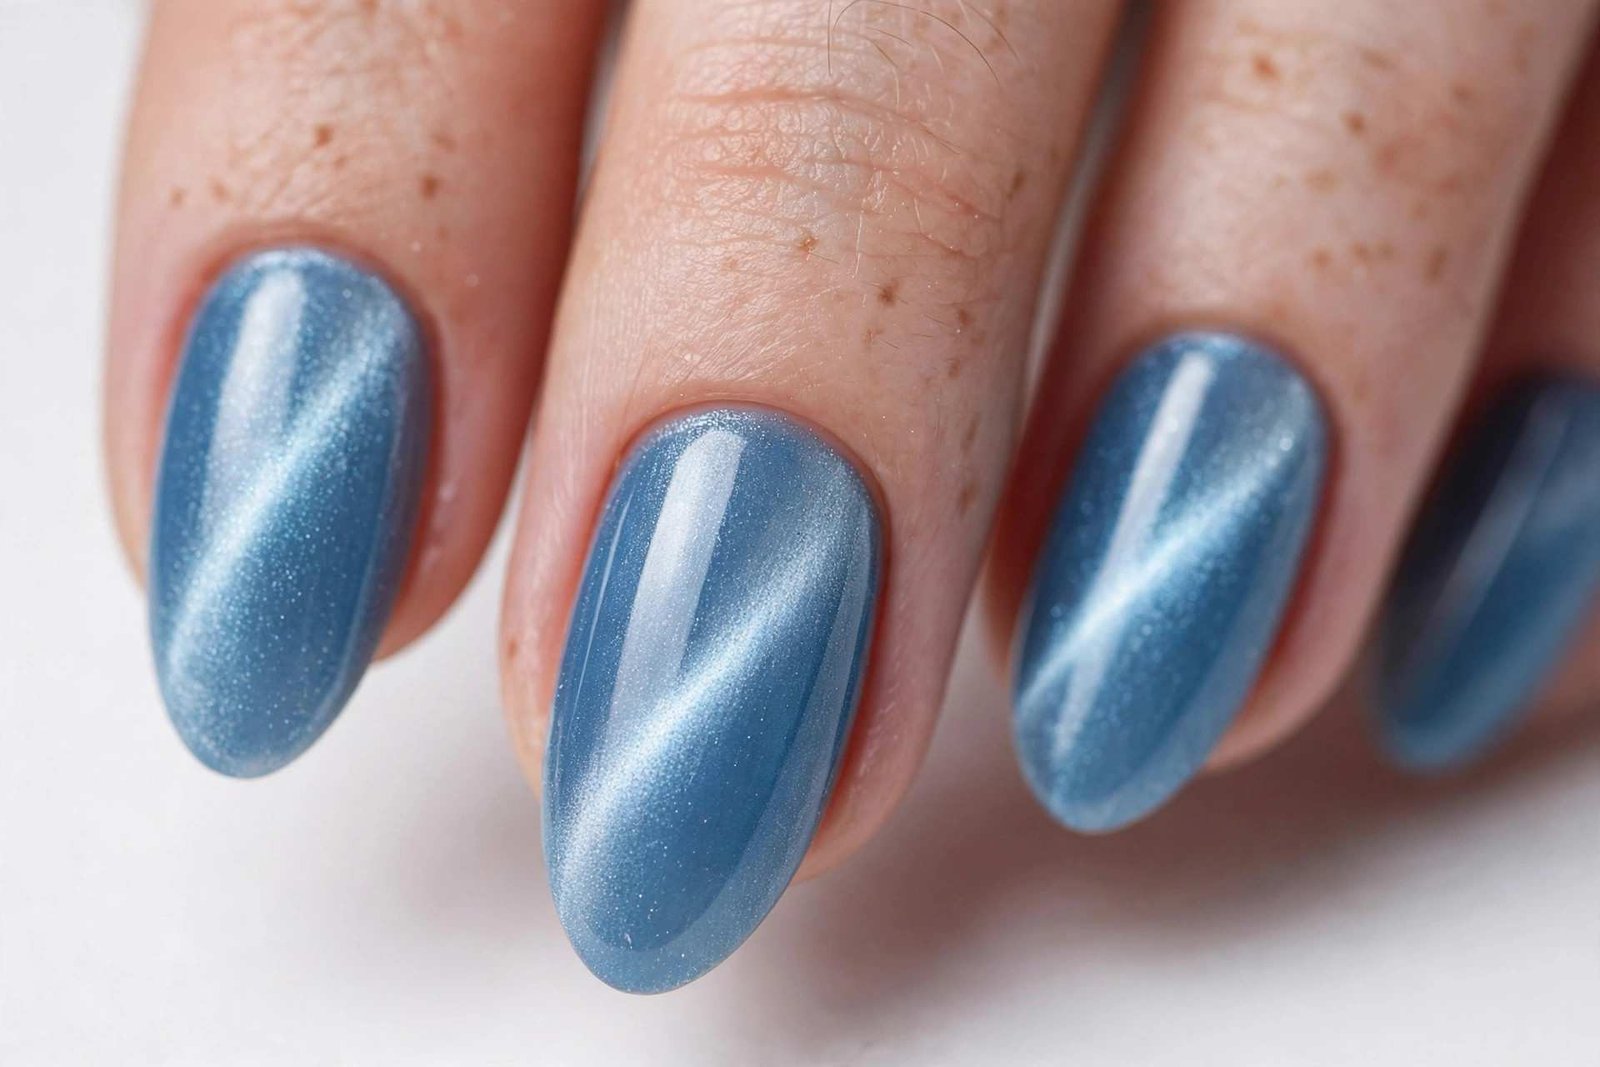
What makes this so perfect for winter is the movement — every time your hands turn, the light band slides across the nail like sun on snow. It photographs beautifully too, so it’s ideal if your season involves lots of content. Pair it with silver jewelry and a chunky grey knit, and you’re basically a walking winter aesthetic.
3. Cozy Cable-Knit Sweater Nails
What if your favorite chunky sweater could live on your fingertips? Cable-knit nails use thick builder gel or 3D gel to paint a raised knit pattern — vertical cables with tiny X-shapes between them — right over your base color. Cure it under the lamp, paint the same base shade over the top so it blends seamlessly, and suddenly your nails have actual texture.
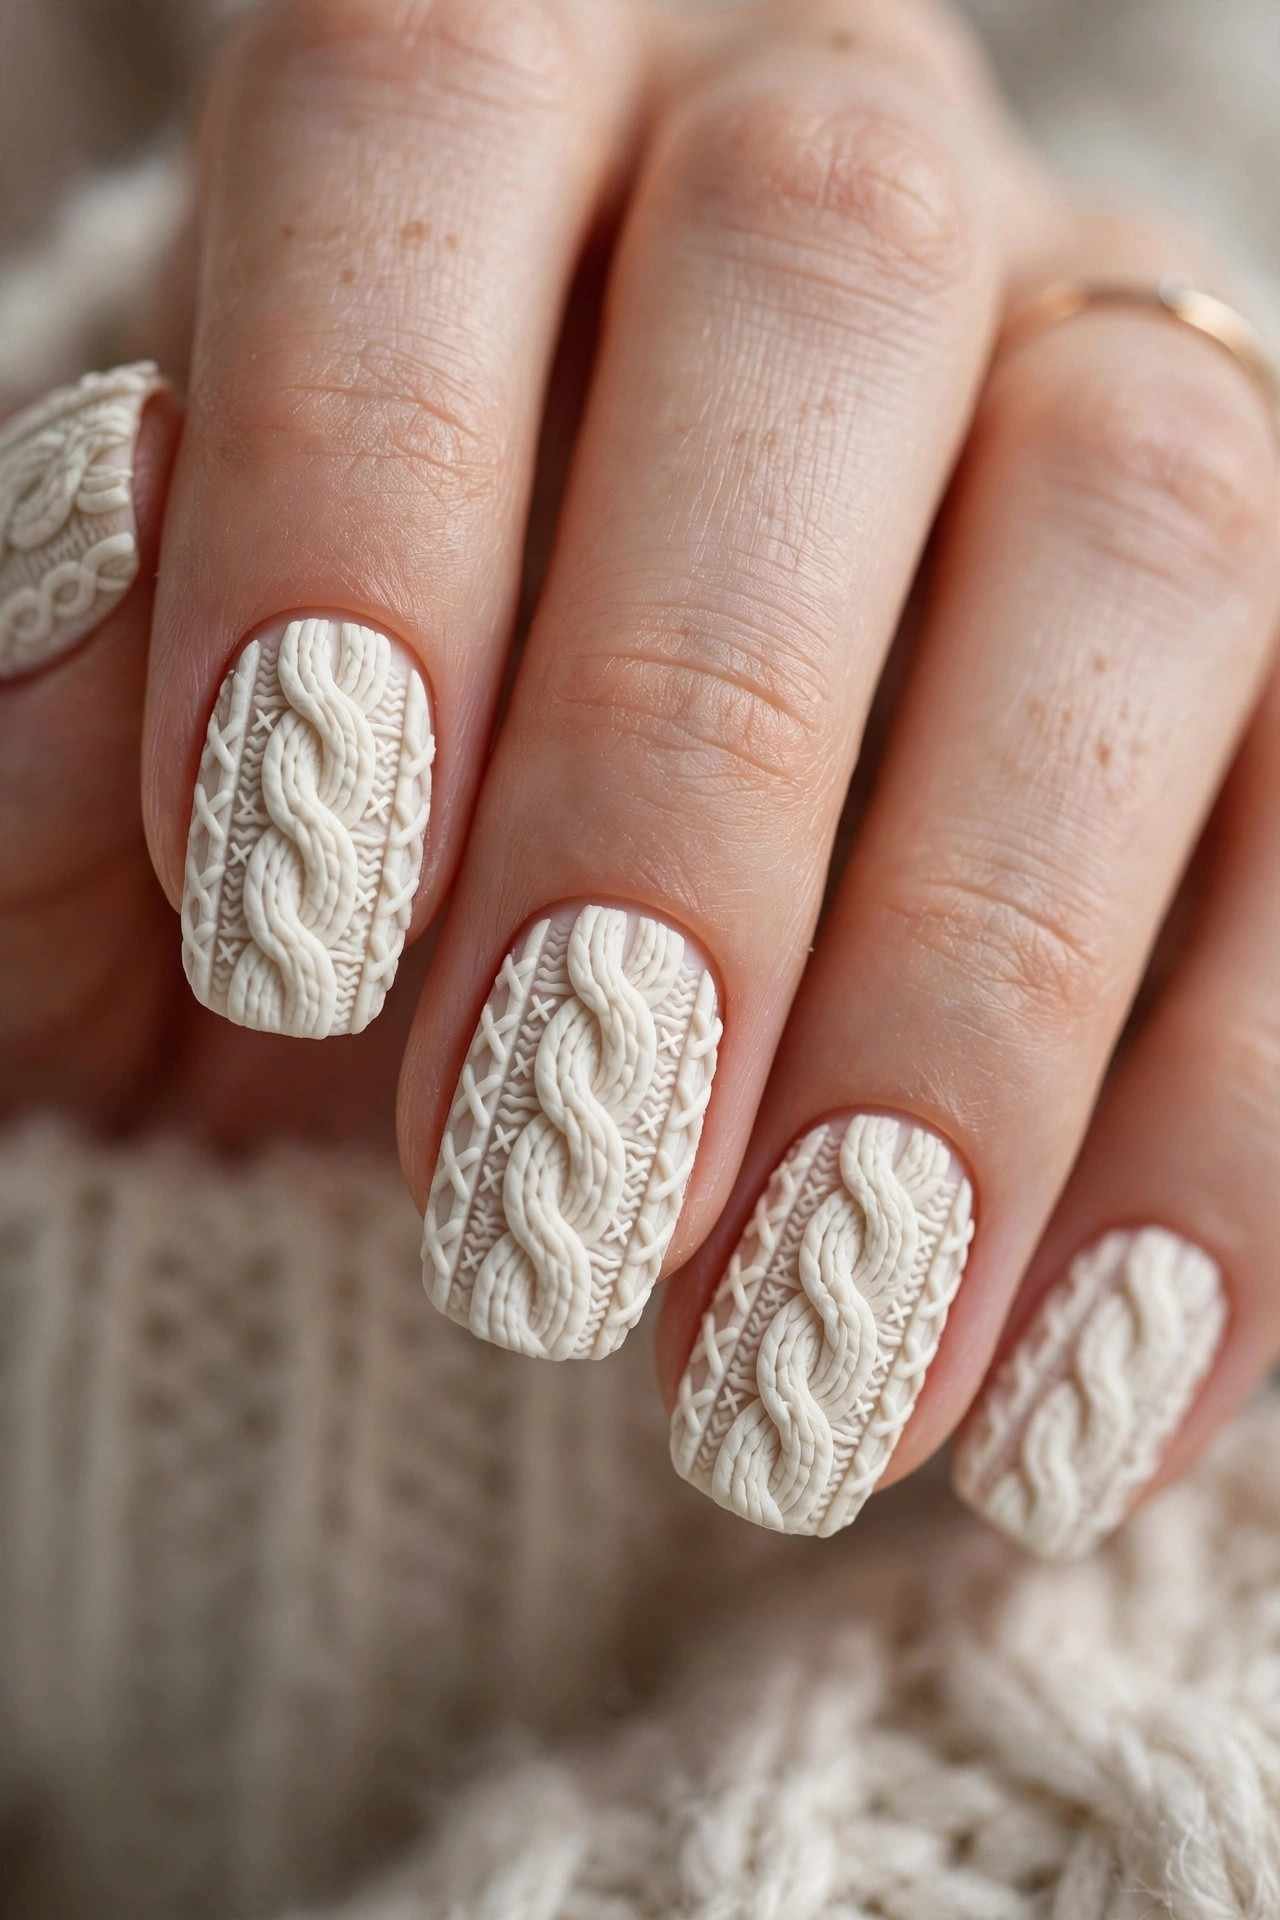
Cream, dusty rose, and heather grey show the 3D texture best, since light colors catch the shadows between the raised lines. Short oval nails suit this design perfectly — the cozy motif feels right at home on a shorter, softer shape. People will genuinely reach out to touch your nails, so be prepared for that — the texture is that realistic.
📌 Good To Know: If 3D gel feels too advanced, knit-pattern nail stickers mimic the look convincingly from a normal viewing distance — perfect for trying the trend without the lamp.
4. Snow Globe Accent Nails
- The look: One or two accent nails designed like tiny snow globes — a clear or pale blue base with miniature trees, falling “snow” glitter, and a glossy dome finish.
- How to fake it: Paint the accent nail pale icy blue, add a tiny tree decal, then seal with a thick layer of clear builder gel for that rounded glass-dome effect.
- Snow effect: Sprinkle fine white glitter over the wet top coat before curing — it suspends in the clear layer like snow in water.
- Keep the rest simple: Solid frosty white or soft blue on the other nails so the globes stay the star.
- Best shape: Almond or oval, which naturally echo the rounded globe silhouette.
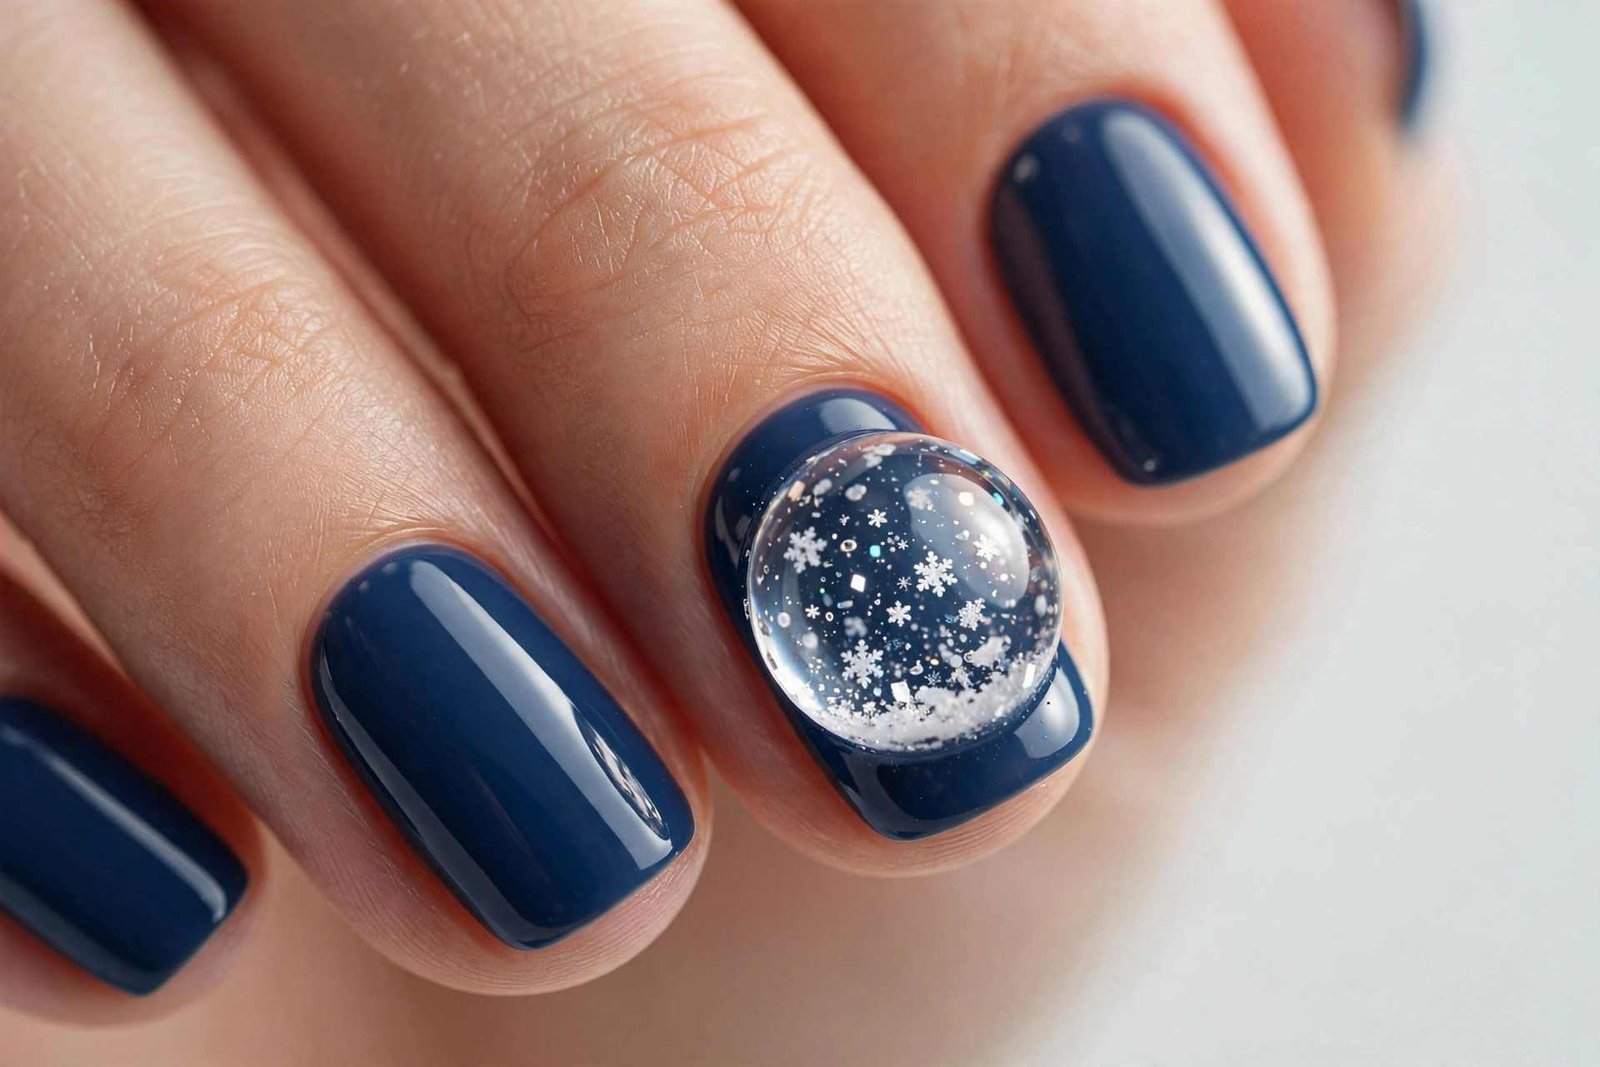
This design is pure nostalgia — it looks like the souvenir snow globes everyone shook as a kid. Because the “wow” lives on just one or two nails, the rest of your manicure stays office-friendly. It’s also a brilliant use for press-ons: buy a plain pale set, decorate two accents yourself, and nobody will know.
💡 Quick Tip: A drop of clear builder gel cured over the accent creates a magnifying-dome effect that makes the tiny scene inside look deeper and more realistic.
5. Peppermint Candy Cane Tips
Some winter designs are elegant; this one is just pure fun. Peppermint tips take the classic French manicure and give it a candy-cane twist — a sheer nude base with tips painted in swirling red and white stripes that mimic peppermint candy discs. Use a thin detail brush and curve the stripes slightly so they spiral like the real thing.
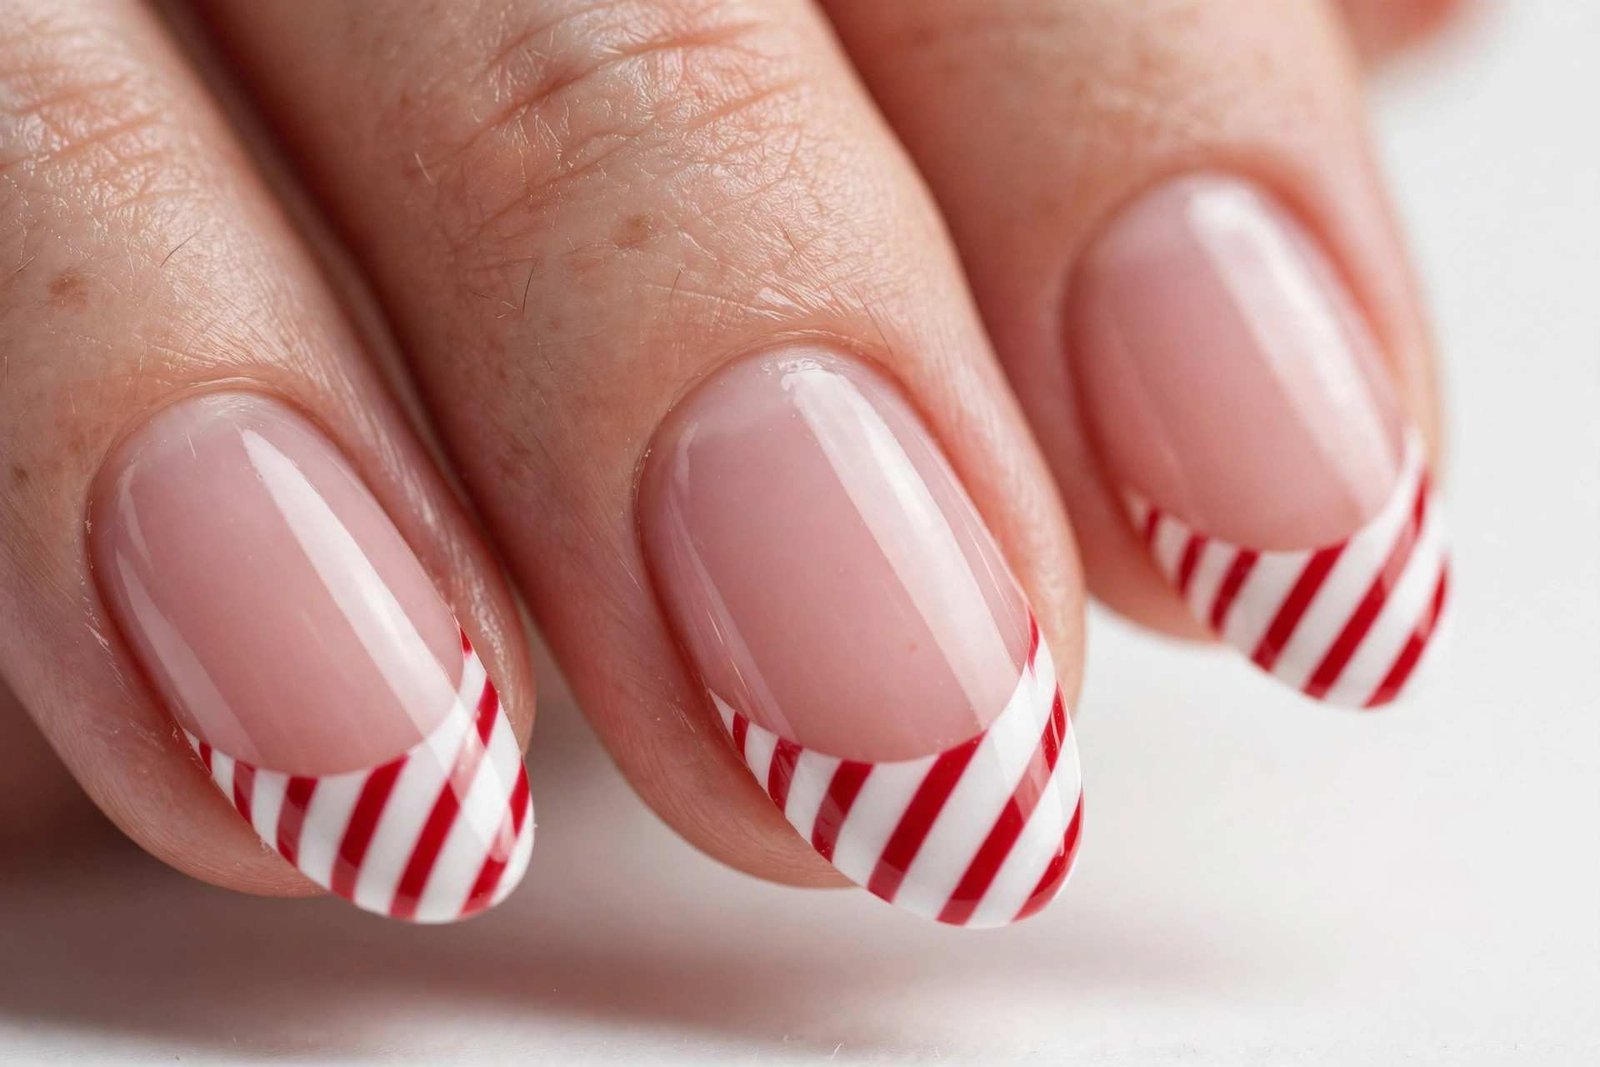
The trick is starting from the center of the tip and working outward, keeping your stripes evenly spaced. If freehand spirals feel intimidating, paint the tip solid red first and add thin white curved lines over it — much easier, same effect. Almond and oval shapes suit the swirled pattern best, since the soft tip echoes the candy’s roundness. This design shines brightest in December, but honestly, the red-and-white combo works all winter long with a chunky white sweater and a red lip. Seal with a glossy top coat to smooth the stripes and add shine.
6. Aurora Borealis Chrome
You know those videos of the northern lights rippling green and purple across a night sky? Now imagine that on your nails. Aurora chrome powder — sometimes sold as “unicorn” or “mermaid” chrome — shifts between teal, violet, and icy blue depending on the angle, giving you a manicure that never looks the same twice.
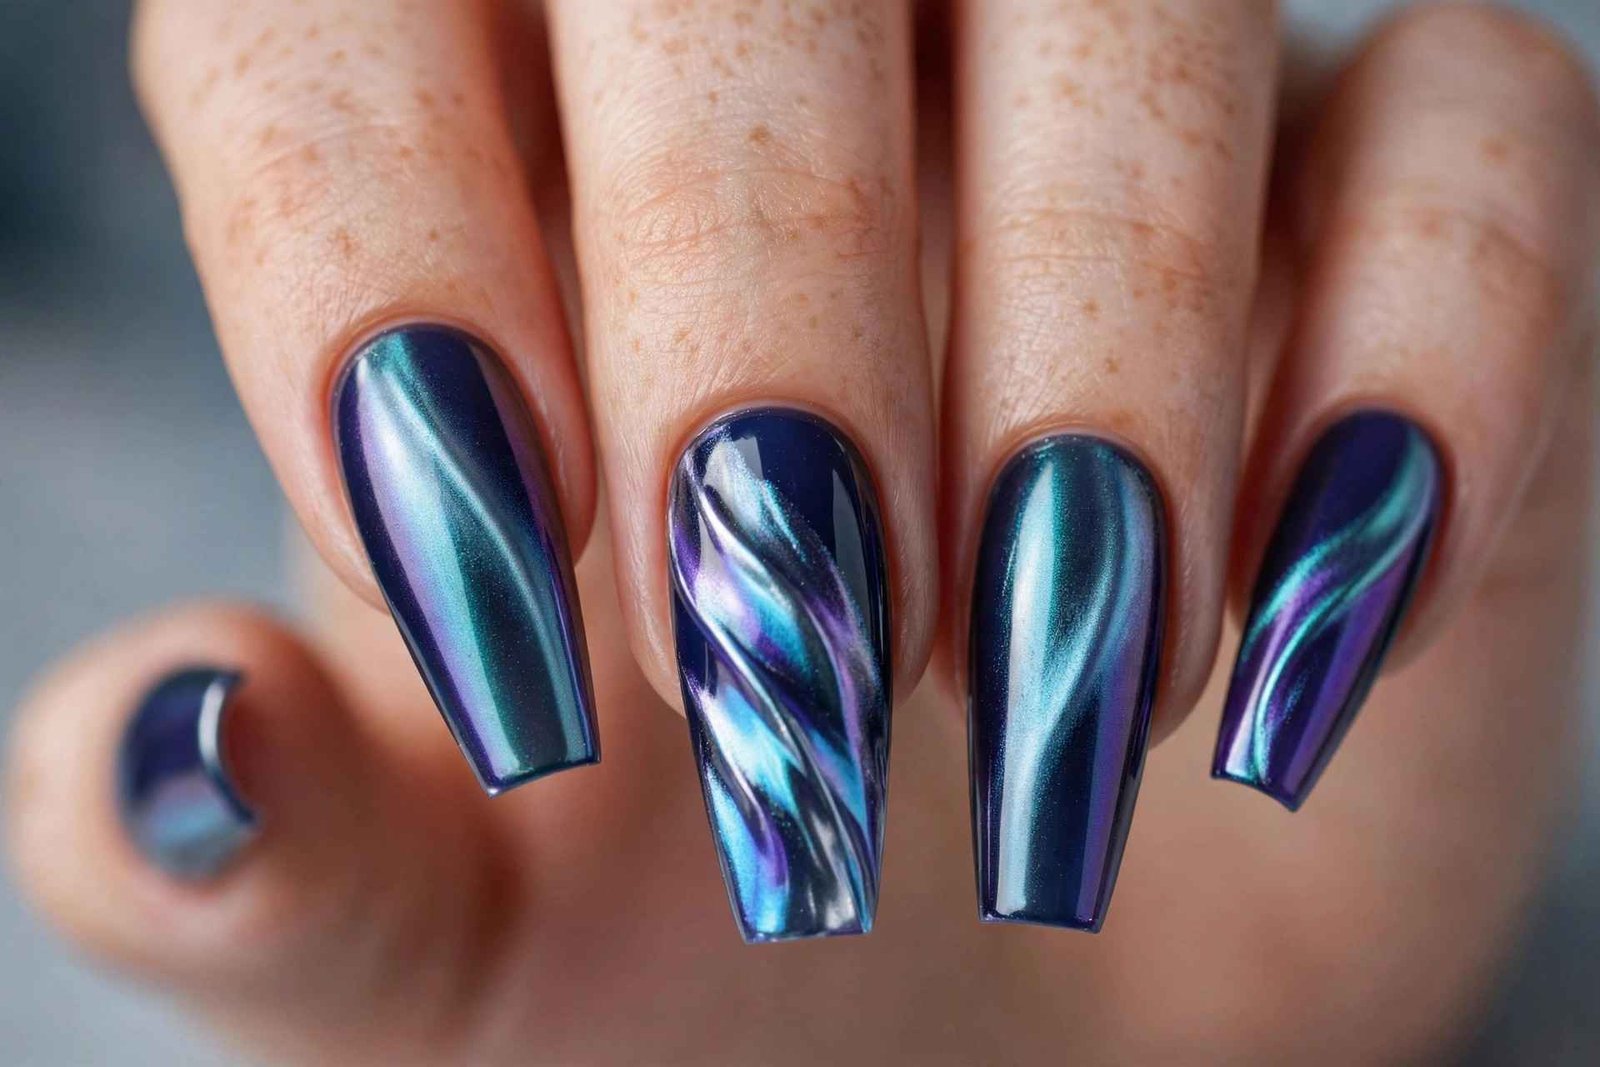
The technique is the same as any chrome: black or dark navy gel base, burnish the powder over a no-wipe top coat with a silicone applicator, then seal. The dark base is what makes the colorshift pop — over a light base, aurora chrome washes out completely. This is a guaranteed conversation starter; expect people to grab your hand to watch the colors move. On long coffin or stiletto nails the shift has maximum surface area to play across, but even short nails look magical.
⚠️ Watch Out: Aurora chrome over regular polish just looks like glitter — the true colorshift only happens over gel with a no-wipe top coat. Don’t skip the lamp.
7. Silver Snow-Dusted French
Take your everyday French manicure, roll it in fresh snow, and you get this. The base stays sheer nude or soft pink — classic and clean — but the tips get a dusting of fine silver glitter instead of stark white. Use a small eyeshadow applicator to press the glitter onto the tacky tip line, then seal with two coats of top coat.
- The glitter: Fine-milled silver (not chunky) reads as “snow dust,” not disco ball.
- Tip width: Keep it slightly thinner than a traditional French — the sparkle adds visual weight.
- Best shape: Squoval or almond; the soft edge keeps the look feminine.
- Wear time: Glitter tips hide tip wear beautifully — this easily lasts two weeks.
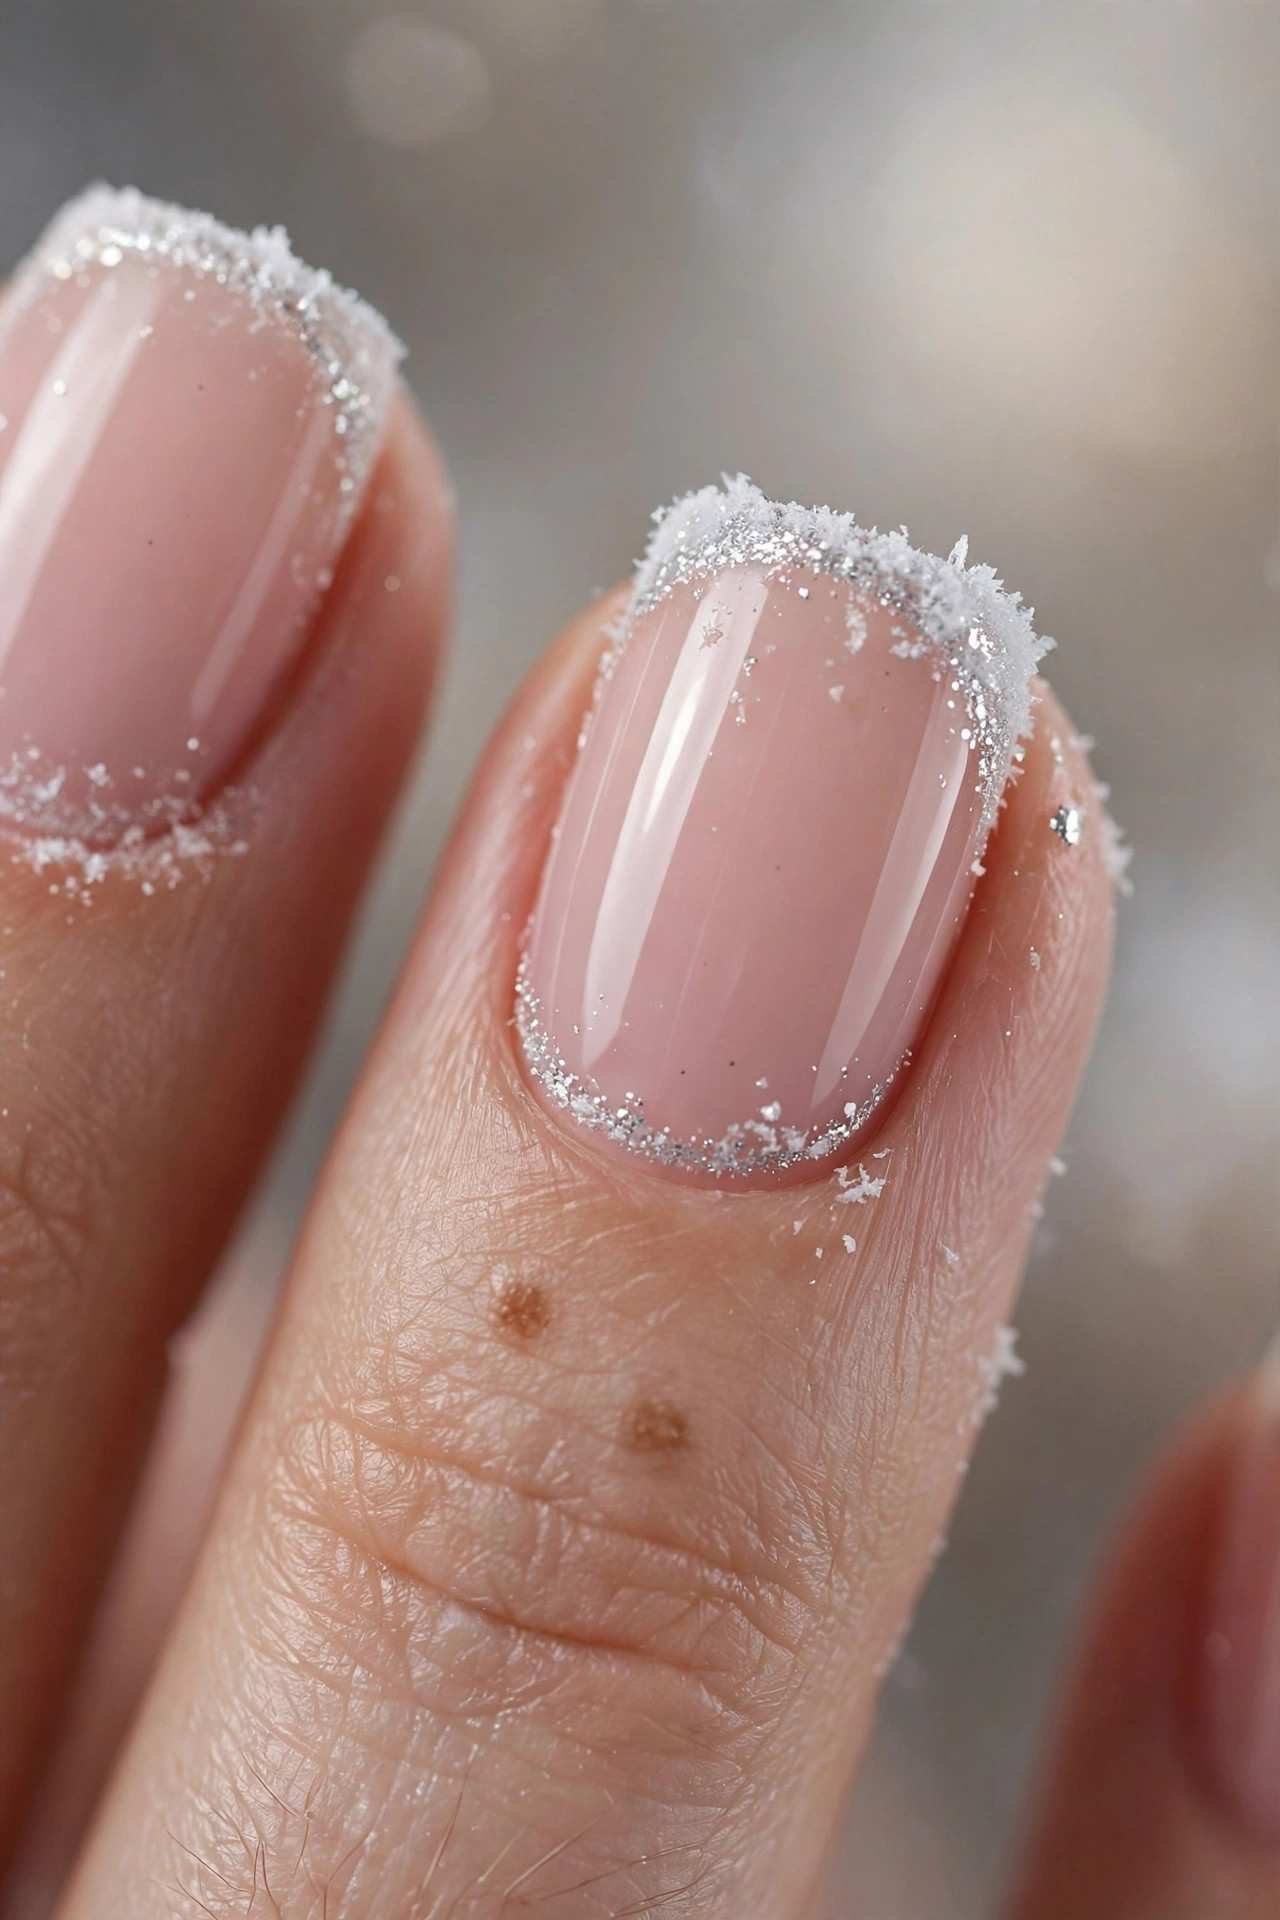
What I love about this one is how it bridges seasons — it’s festive enough for December parties but subtle enough for a January office. The silver catches candlelight and string lights in a way white tips never could. If you wear a lot of silver jewelry, this manicure basically coordinates with your entire accessories drawer.
8. Deep Plum Snowflake Art
Plum is winter’s most underrated nail color — moodier than red, softer than black, and somehow flattering on every skin tone. Start with two coats of a deep plum creme, then paint or stamp white snowflakes on one or two accent nails. The contrast is striking: dark, velvety base against crisp white art that practically glows.
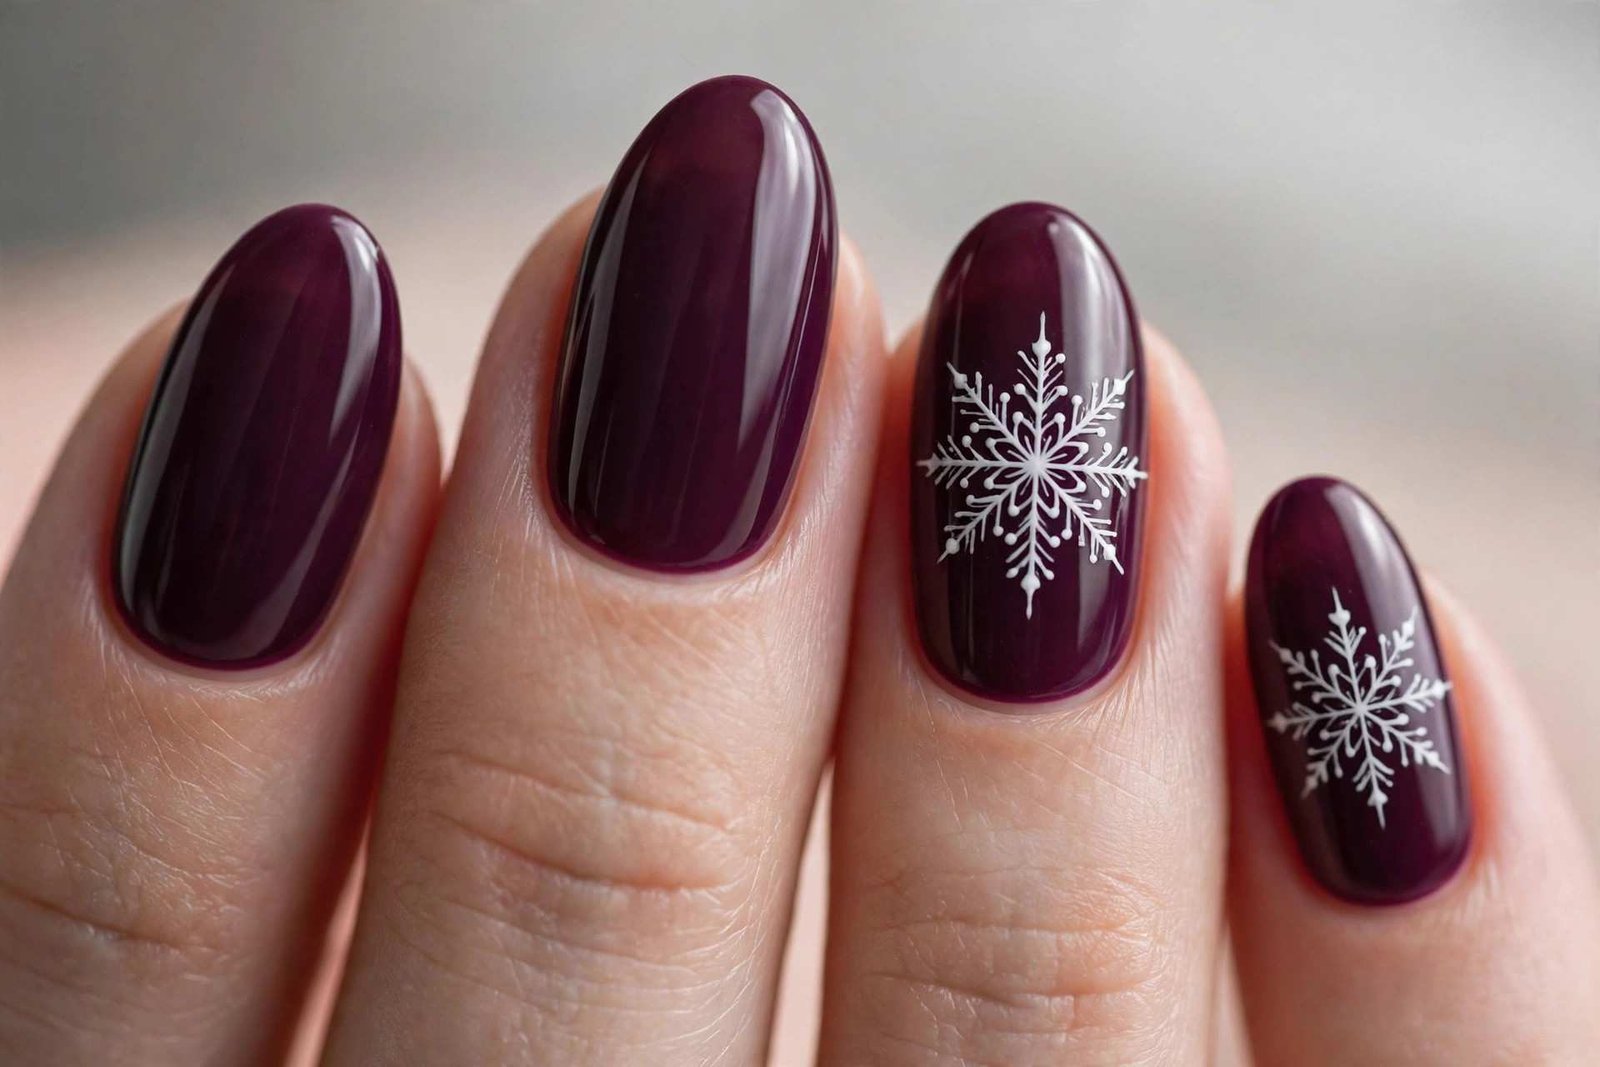
Plum has this wonderful chameleon quality — in daylight it reads purple, in evening light it deepens to near-black with a wine undertone. That means one manicure gives you two different looks depending on where you are. Keep the snowflakes delicate and sparse; on a dark base, a little white art goes a long way. This is the design for anyone who finds bright red too predictable but still wants that rich winter depth.
📌 Good To Know: Dark plum polishes can stain the nail plate — always use a ridge-filling base coat, and give yourself an extra minute of dry time between coats.
9. Frosted White Ombré
Imagine the gradient on a frosted windowpane, soft white melting into clear — that’s this manicure. The ombré fades from a milky white at the tips down to sheer nude at the cuticle, creating a look that’s clean, bright, and impossibly fresh. The sponge technique is your friend here: paint white and nude side by side on a makeup sponge, dab onto the nail, and repeat two to three times for a seamless blend.
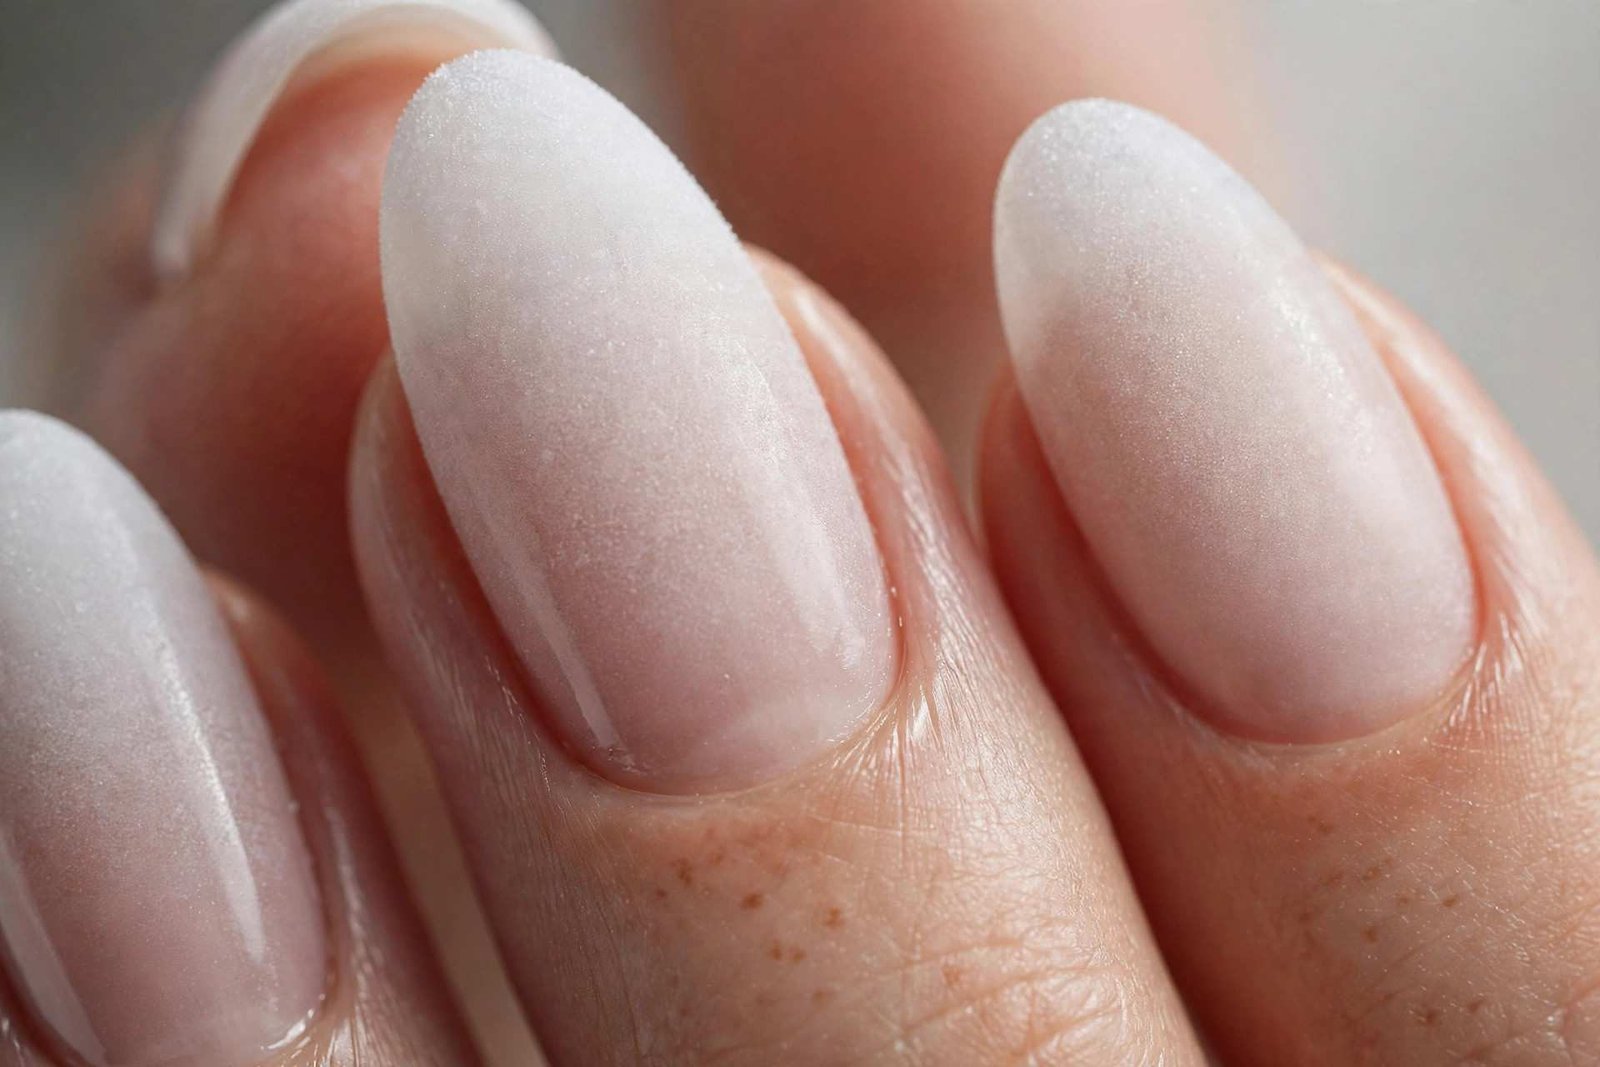
Because the base near the cuticle is sheer, regrowth is nearly invisible — this is one of the longest-wearing designs you can do. It also makes fingers look longer and nails look healthier, which is why it’s a favorite for engagement season. Finish with a glossy top coat for a glassy frost effect, or go matte if you want the true frozen-window look.
💡 Quick Tip: Paint liquid latex around your nails before sponging — it peels right off afterward and saves you ten minutes of cleanup with acetone.
10. Midnight Blue Starry Night
There’s something about deep midnight blue that feels like the sky at 11pm on a clear winter night — and scattered gold stars make it pure magic. Paint all ten nails a rich navy like a true midnight shade, then add tiny gold star decals, stickers, or hand-painted stars with metallic polish. Scatter them asymmetrically, the way real constellations fall.
- Star placement: One larger star near the cuticle, smaller ones drifting toward the tip — it creates depth.
- Extra dimension: Add a few tiny gold dots alongside the stars for distant-star sparkle.
- Best shape: Almond or oval; the soft shape suits the dreamy celestial theme.
- Double duty: This transitions straight from winter into New Year’s Eve without a fill.
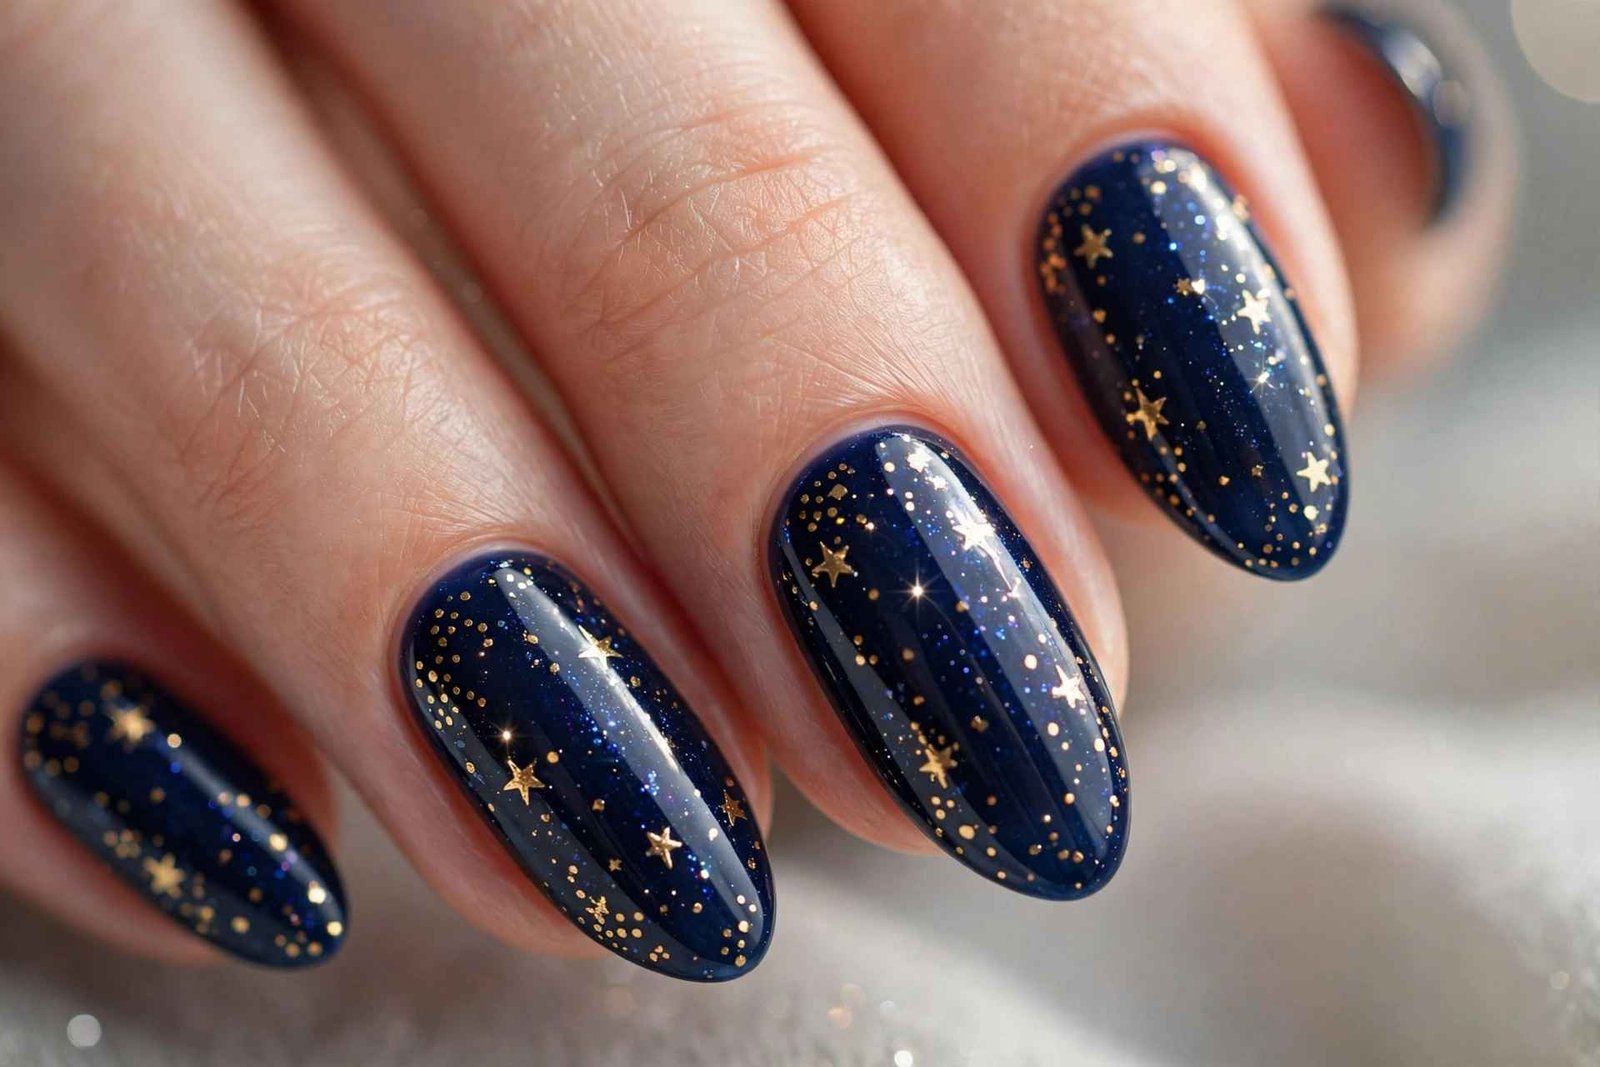
Gold star stickers have gotten so thin and realistic that once sealed under top coat, they genuinely look hand-painted. The glossy finish is essential here — it makes the gold look like it’s actually twinkling. This is the manicure for evening events, candlelit dinners, and anyone whose winter aesthetic runs a little celestial.
11. Pearl White Glazed Chrome
The glazed donut nail trend refuses to leave, and winter is honestly its best season. White pearl chrome over a sheer milky base gives you that frosted, lit-from-within glow — like sunlight hitting fresh snow. It’s subtle, it’s luminous, and it goes with literally everything in your closet.
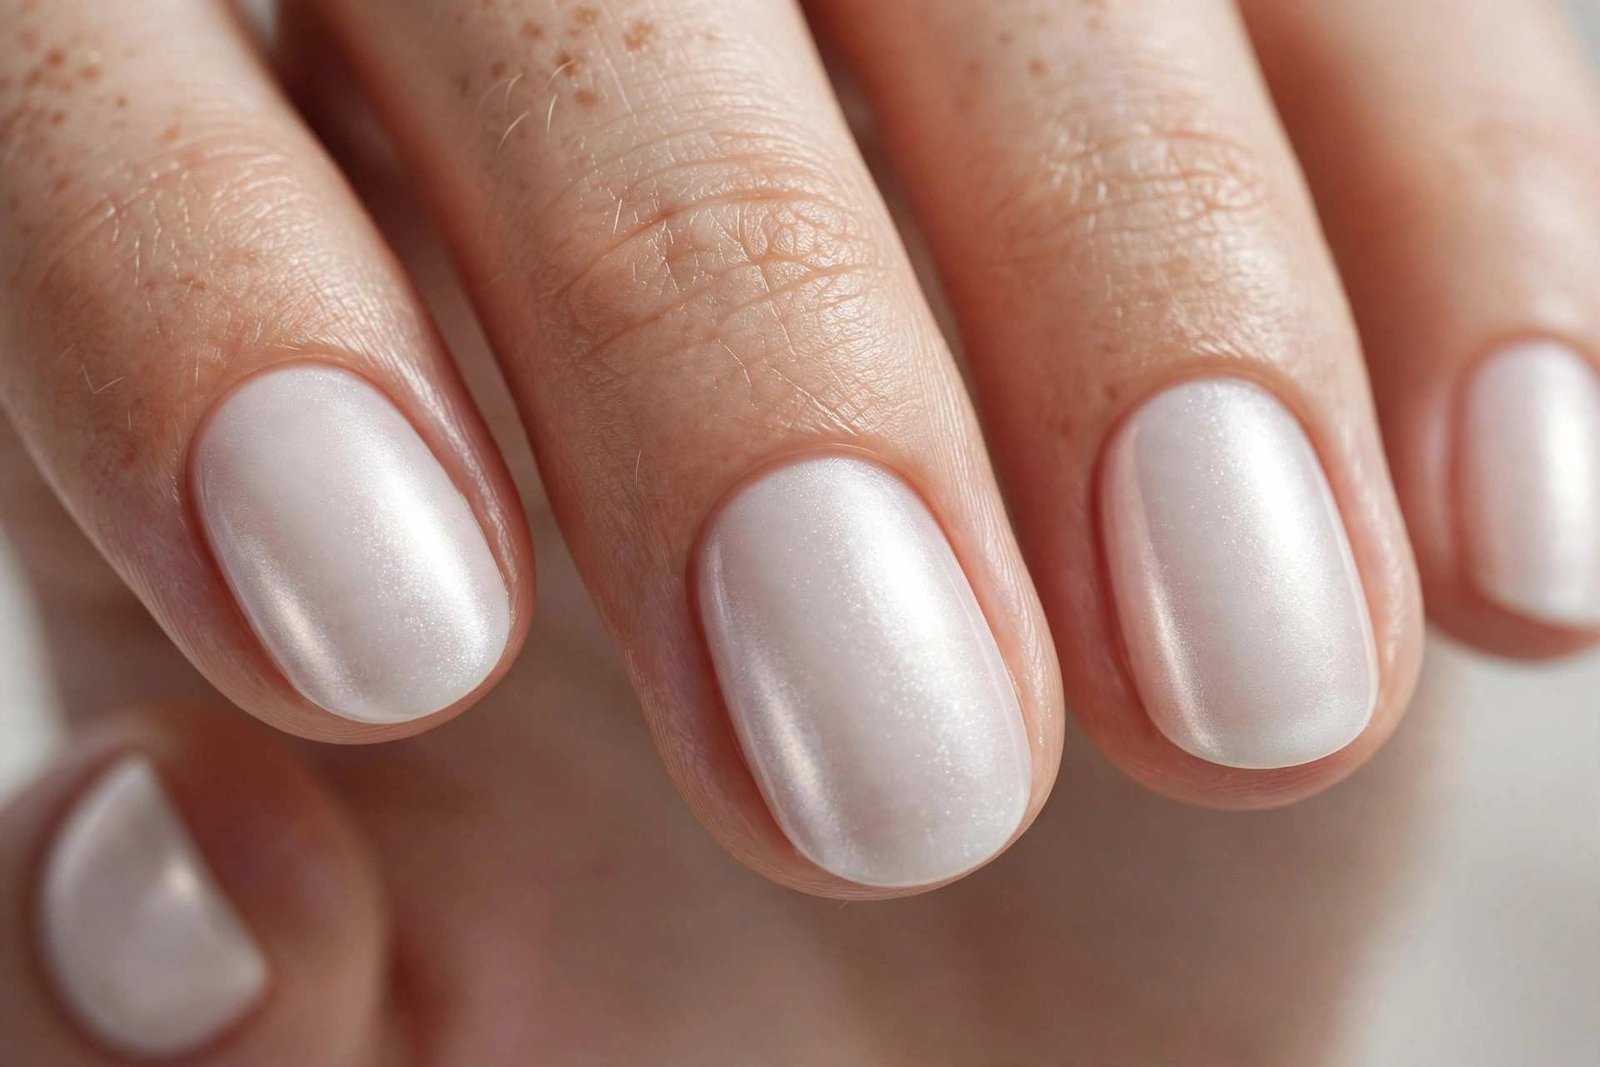
Application is straightforward: milky white gel base, a whisper of pearl chrome powder burnished over no-wipe top coat, then seal. The key word is whisper — press too hard and you get dark spots instead of glow. On short natural nails, this finish makes fingers look longer and cleaner; on longer nails, it’s pure ethereal elegance. It also layers beautifully — add snowflake stickers on top for December, wear it plain for January, and it never looks out of place.
⚠️ Watch Out: Pearl chrome shows every ridge and bump in your base coat. Buff nails smooth first and apply the milky base in thin, even layers.
12. Blush Pink Winter Florals
Who says winter nails can’t be soft and romantic? A blush pink base with delicate white winter florals — tiny painted blossoms, fine branches, or frosted petals — feels like the first flowers pushing through late-winter snow. It’s feminine without being saccharine, and it stands out beautifully in a sea of dark winter shades.
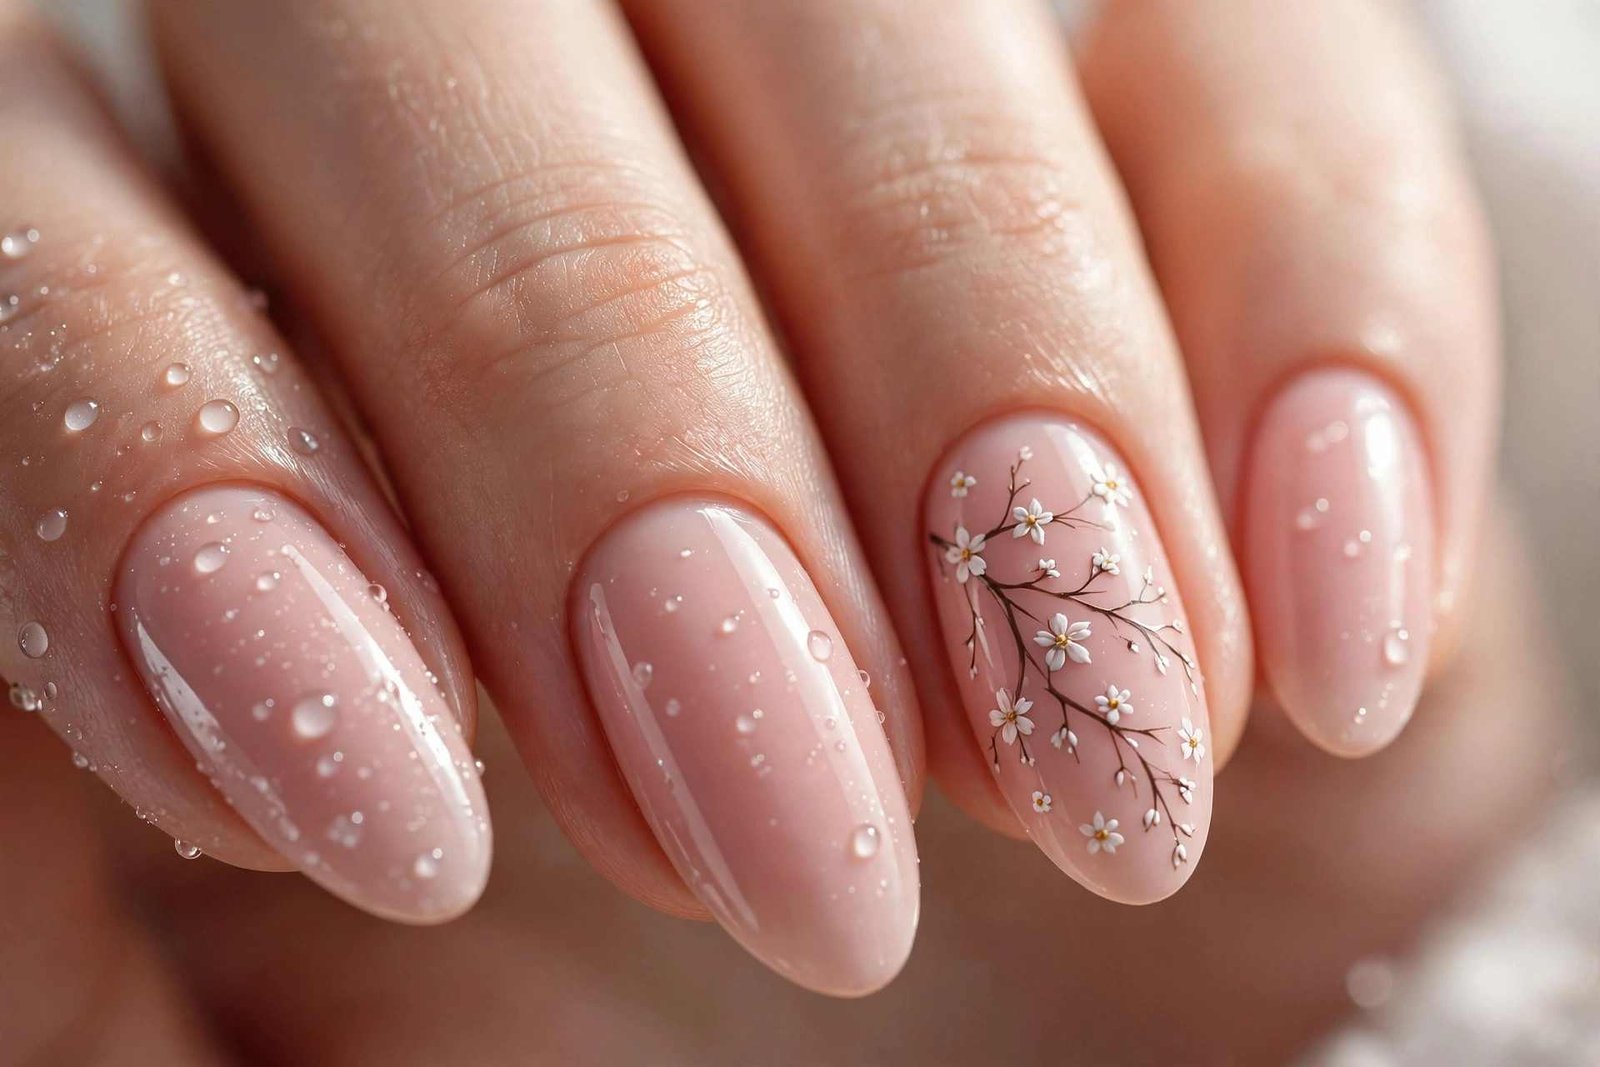
Keep the florals small and sparse — two or three tiny blossoms per accent nail is plenty. A fine detail brush and white gel polish are all you need; simple five-petal shapes and tiny dot centers read as intricate from a normal distance. This palette is especially gorgeous on fair to medium skin tones, and it pairs perfectly with cream knits, gold jewelry, and soft glam makeup. A glossy top coat protects the delicate art and gives the petals a fresh, dewy finish. If your winter style leans cozy-romantic rather than bold-festive, this is your design.
13. Icy Frost Shimmer
- The concept: Nails that look dusted with actual frost — a pale icy blue base with fine silver shimmer suspended throughout.
- Easiest method: Two coats of an icy blue shimmer polish; the micro-glitter does all the work.
- Upgrade option: Add a thin silver glitter stripe down the center of each nail for a frozen-crackle effect.
- Best shape: Short oval or squoval — the frosty finish looks cleanest on neat, shorter nails.
- Finish: Glossy top coat enhances the icy glow; matte makes it look like real frost.
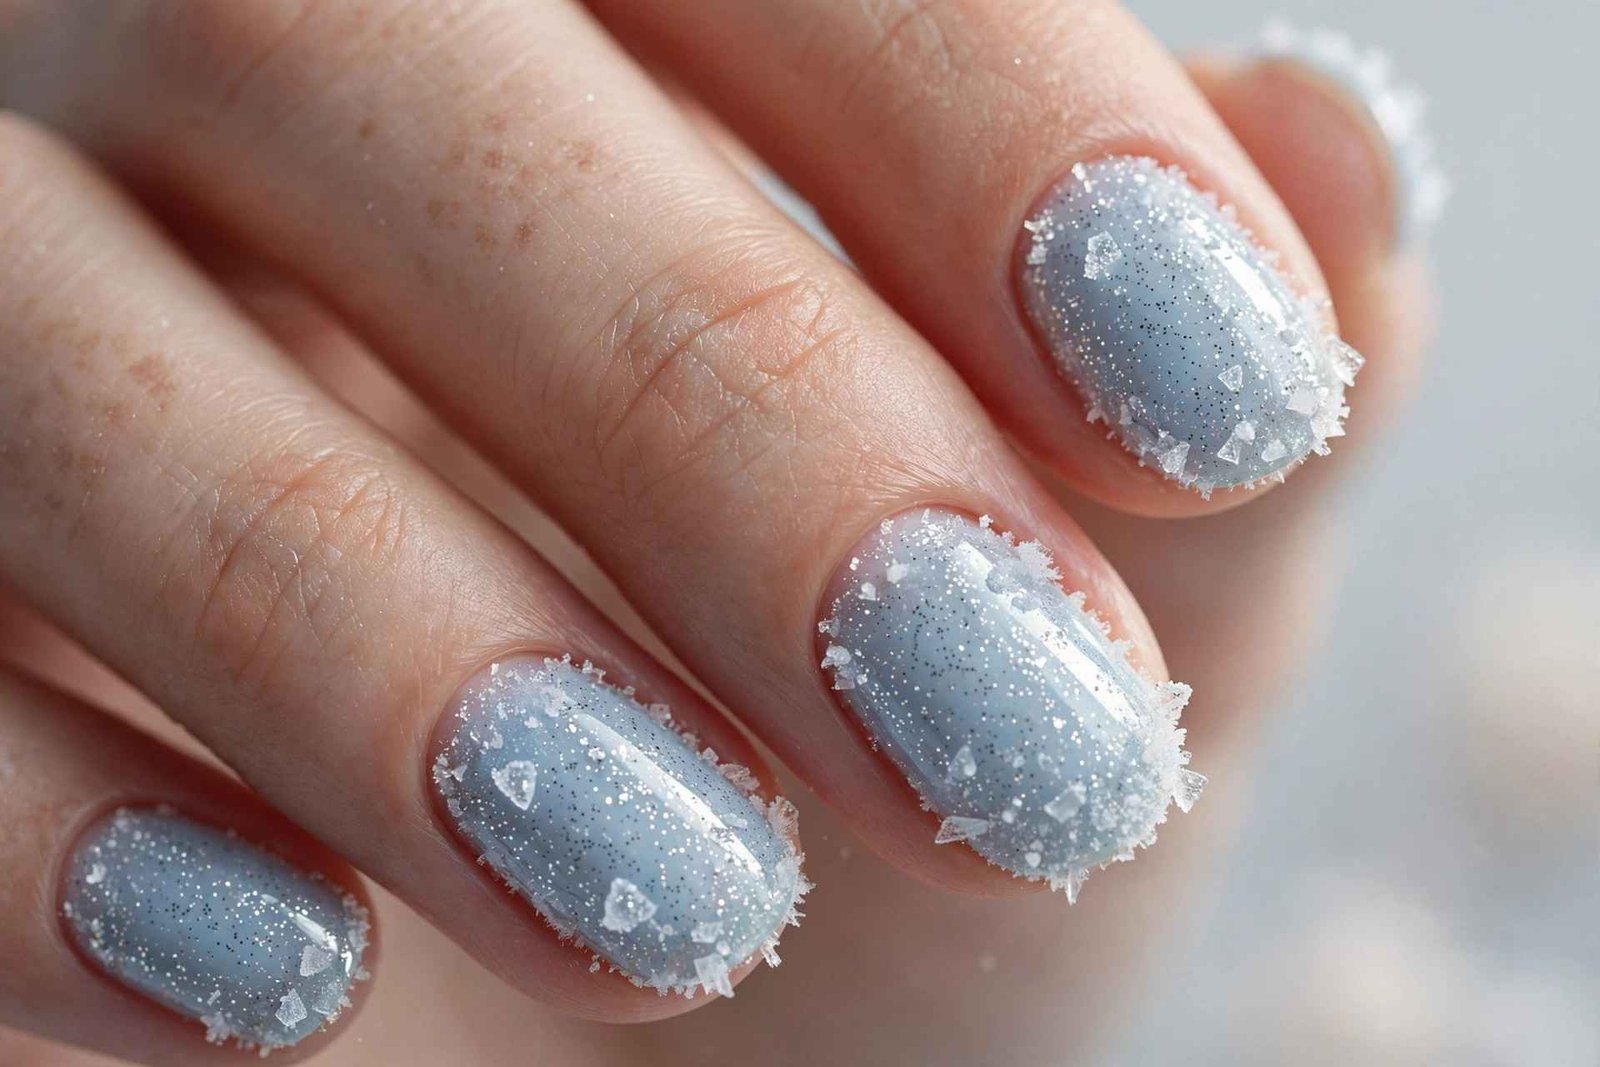
This is the lowest-effort, highest-payoff design on the list — one great polish, no art skills required. The cool blue tones make warm skin glow and complement cool undertones beautifully. It also photographs as that dreamy, soft-focus winter color that stands out on Pinterest and Instagram. When you want to look polished with ten minutes to spare, this is the bottle you reach for.
📌 Good To Know: Icy blues can look streaky — apply three thin coats instead of two thick ones for opaque, even coverage.
14. Evergreen with Gold Foil
Deep forest green and gold foil is the winter color story that never misses. The green reads rich and botanical — like pine branches heavy with snow — while irregular pieces of gold transfer foil add a molten, luxurious texture that catches every bit of light. Press the foil onto a tacky top coat with tweezers, concentrating on one or two accent nails per hand.
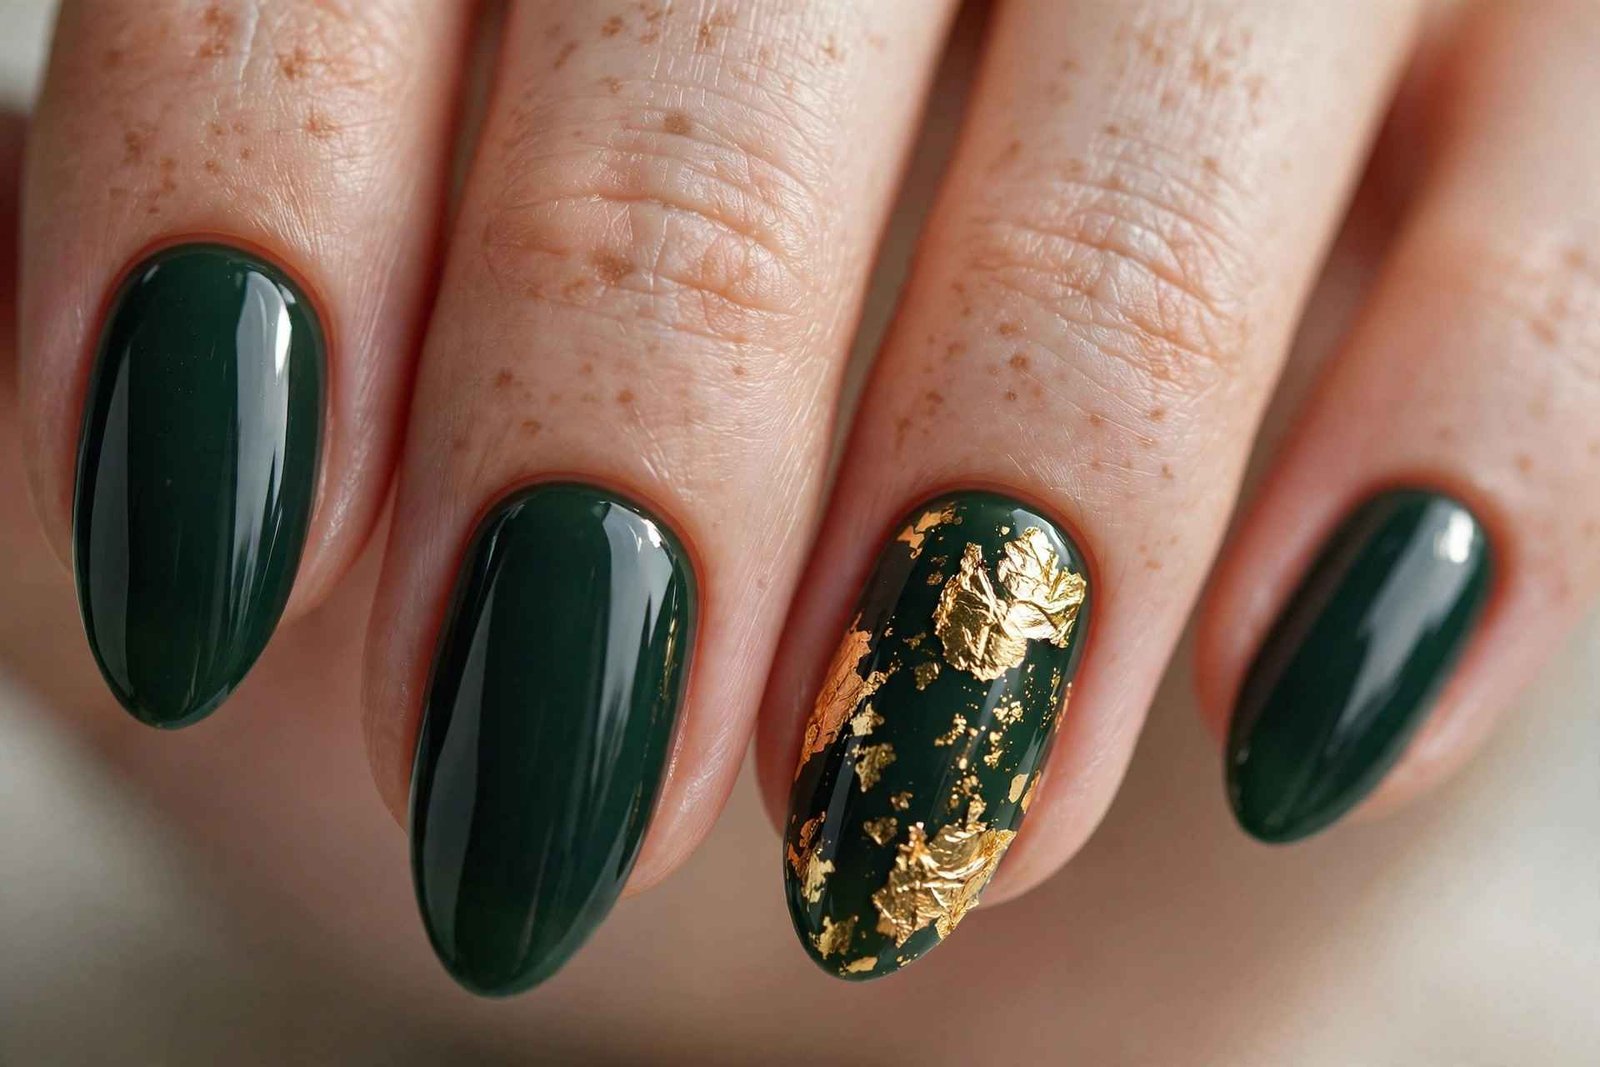
The beauty of foil is its imperfection — torn, irregular edges look intentional and artistic, so there’s zero pressure for precision. Keep the other nails in solid glossy evergreen so the gold accents pop. This combination works on every nail shape, though almond and coffin show off the foil’s texture best. Seal everything with two layers of top coat, capping the free edge, since foil can catch on fabric if it’s not fully sealed.
⚠️ Watch Out: Apply foil to only two accent nails per hand. More than that tips from luxe into busy — restraint is what makes this look expensive.
15. Adorable Snowman Accent
Okay, this one is just pure joy. A tiny snowman face on your ring finger — white circle head, carrot-orange triangle nose, coal-dot eyes, maybe a little striped scarf painted at the base — over a soft blue or warm nude base. The other nails stay solid in a coordinating shade like icy blue or classic red.
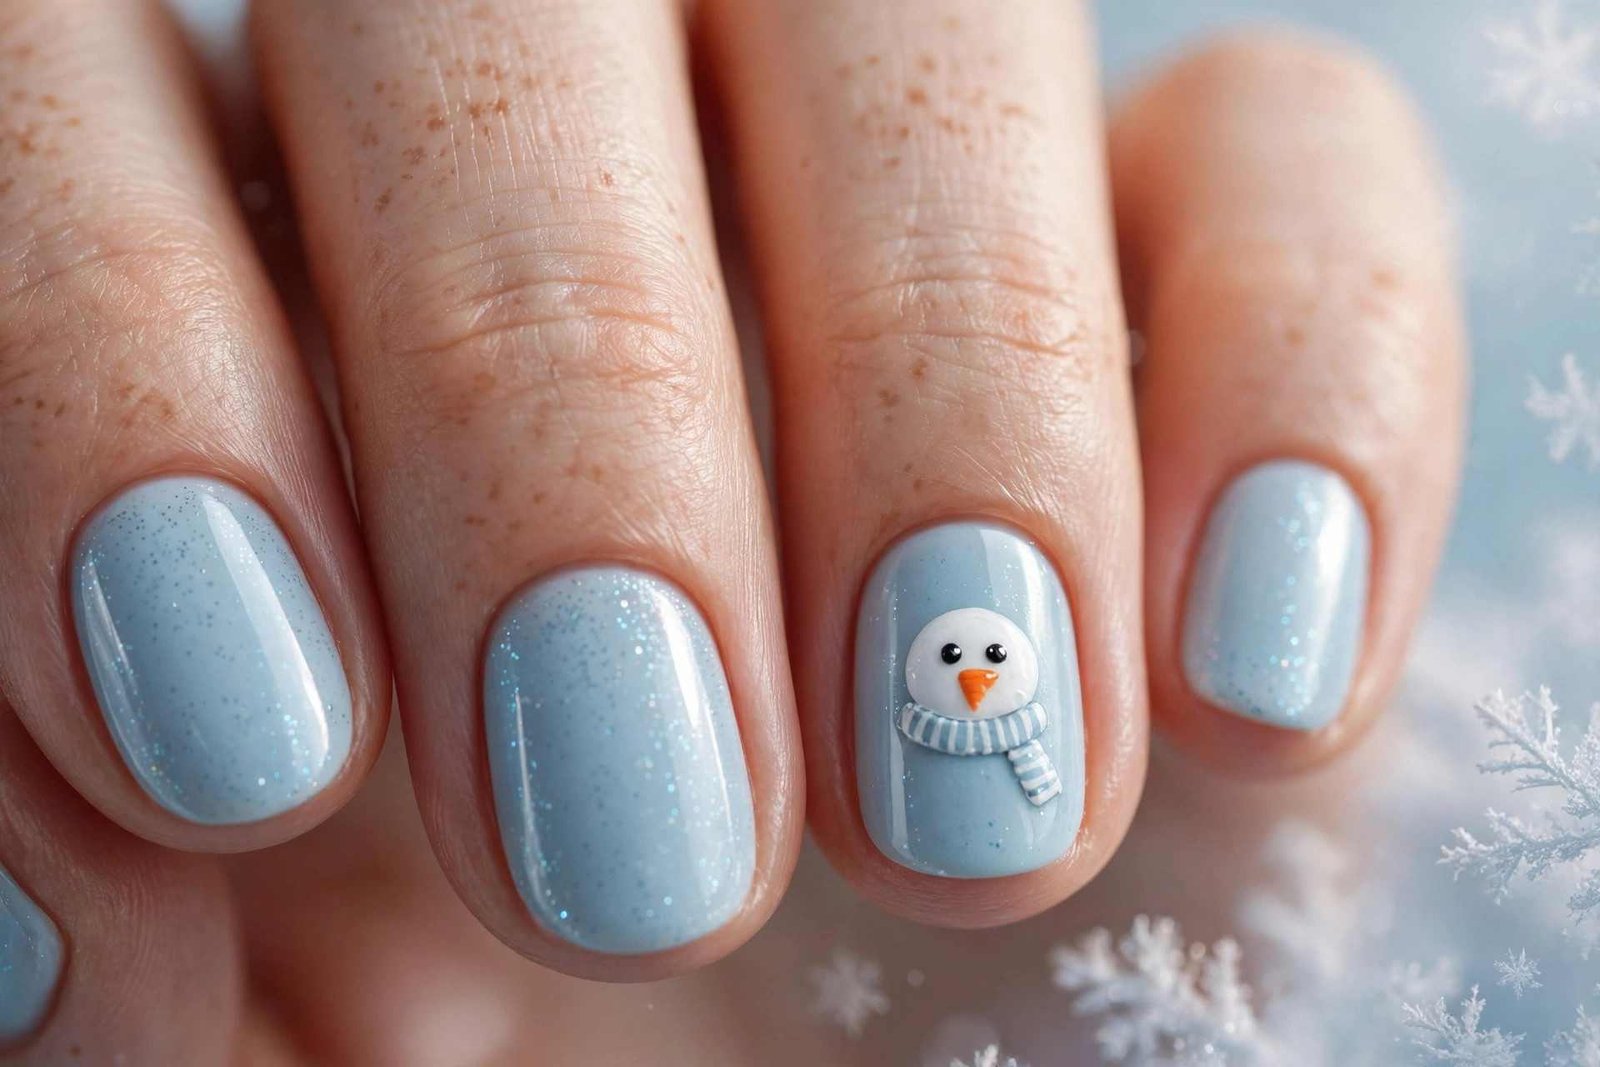
Use a dotting tool for the head and eyes, a detail brush for the nose and scarf — and here’s the secret: slightly wonky snowmen are somehow even cuter than perfect ones. This is the nail equivalent of a Christmas sweater, and it gets compliments everywhere, especially from kids. Keep it to one snowman per hand; a full set of faces is overwhelming. Short round or oval nails suit the playful design best. If freehand faces intimidate you, snowman nail stickers have gotten incredibly detailed and look hand-painted under top coat.
💡 Quick Tip: A toothpick gives you more control than a dotting tool for the tiny coal eyes — and you already have one in the kitchen.
16. Grey Glitter Gradient
Grey is winter’s chicest neutral, and a glitter gradient takes it from office-basic to quietly glamorous. Start with a soft dove-grey base, then sponge fine silver glitter from the tips downward, fading toward the cuticle. Two to three thin sponge layers build a seamless transition that looks airbrushed.
- Glitter choice: Fine silver or holographic glitter — chunky pieces ruin the soft fade.
- Base shade: Dove grey or greige; avoid blue-greys that read cold against warm skin.
- Best shape: Almond or oval — the rounded tip makes the glitter dissolve naturally.
- Why it works: The gradient hides tip wear, so this manicure ages gracefully.
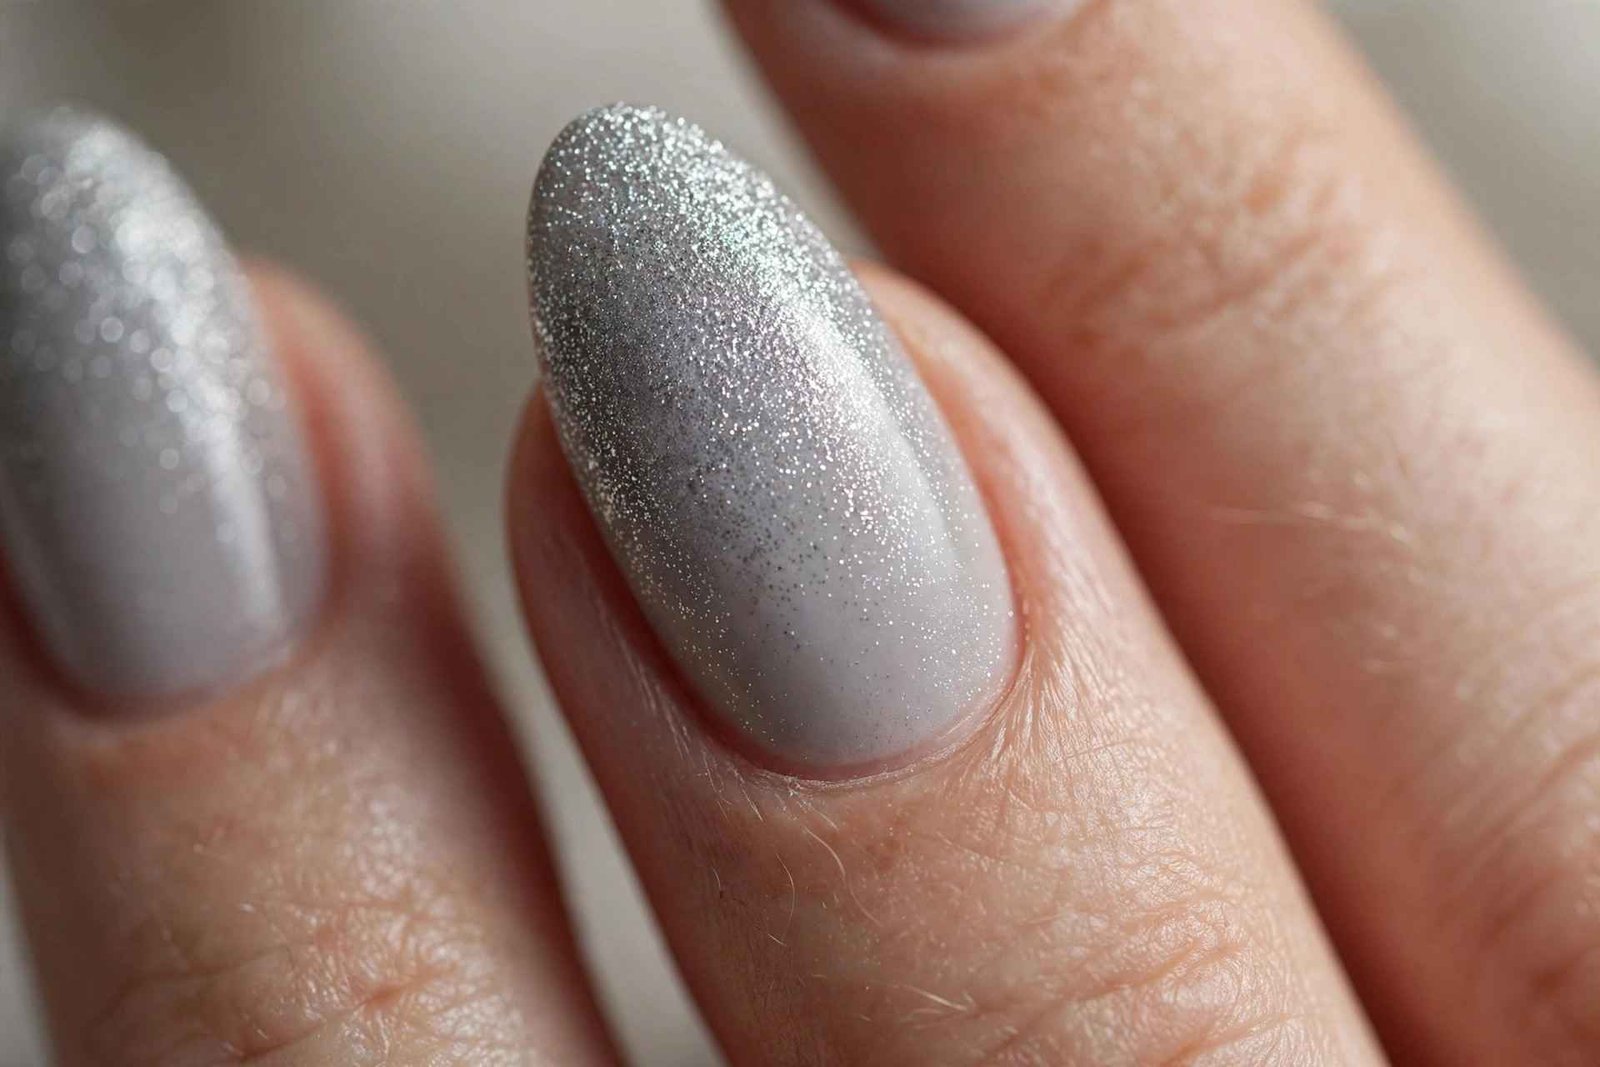
This is the sophisticated answer to glitter — all the sparkle, none of the teenage energy. It pairs with everything from charcoal blazers to cream sweaters, and the neutral palette means it never clashes with your outfit. If you want one winter manicure that works for the office, the party, and everything between, this is it.
17. Cranberry Velvet Matte
What makes cranberry the perfect winter red? It’s deep without being dark, warm without being orange, and flattering on literally every skin tone. Add a velvet matte finish — either a matte top coat over a shimmer cranberry, or magnetic velvet polish — and you get a manicure that looks like actual fabric on your fingertips.
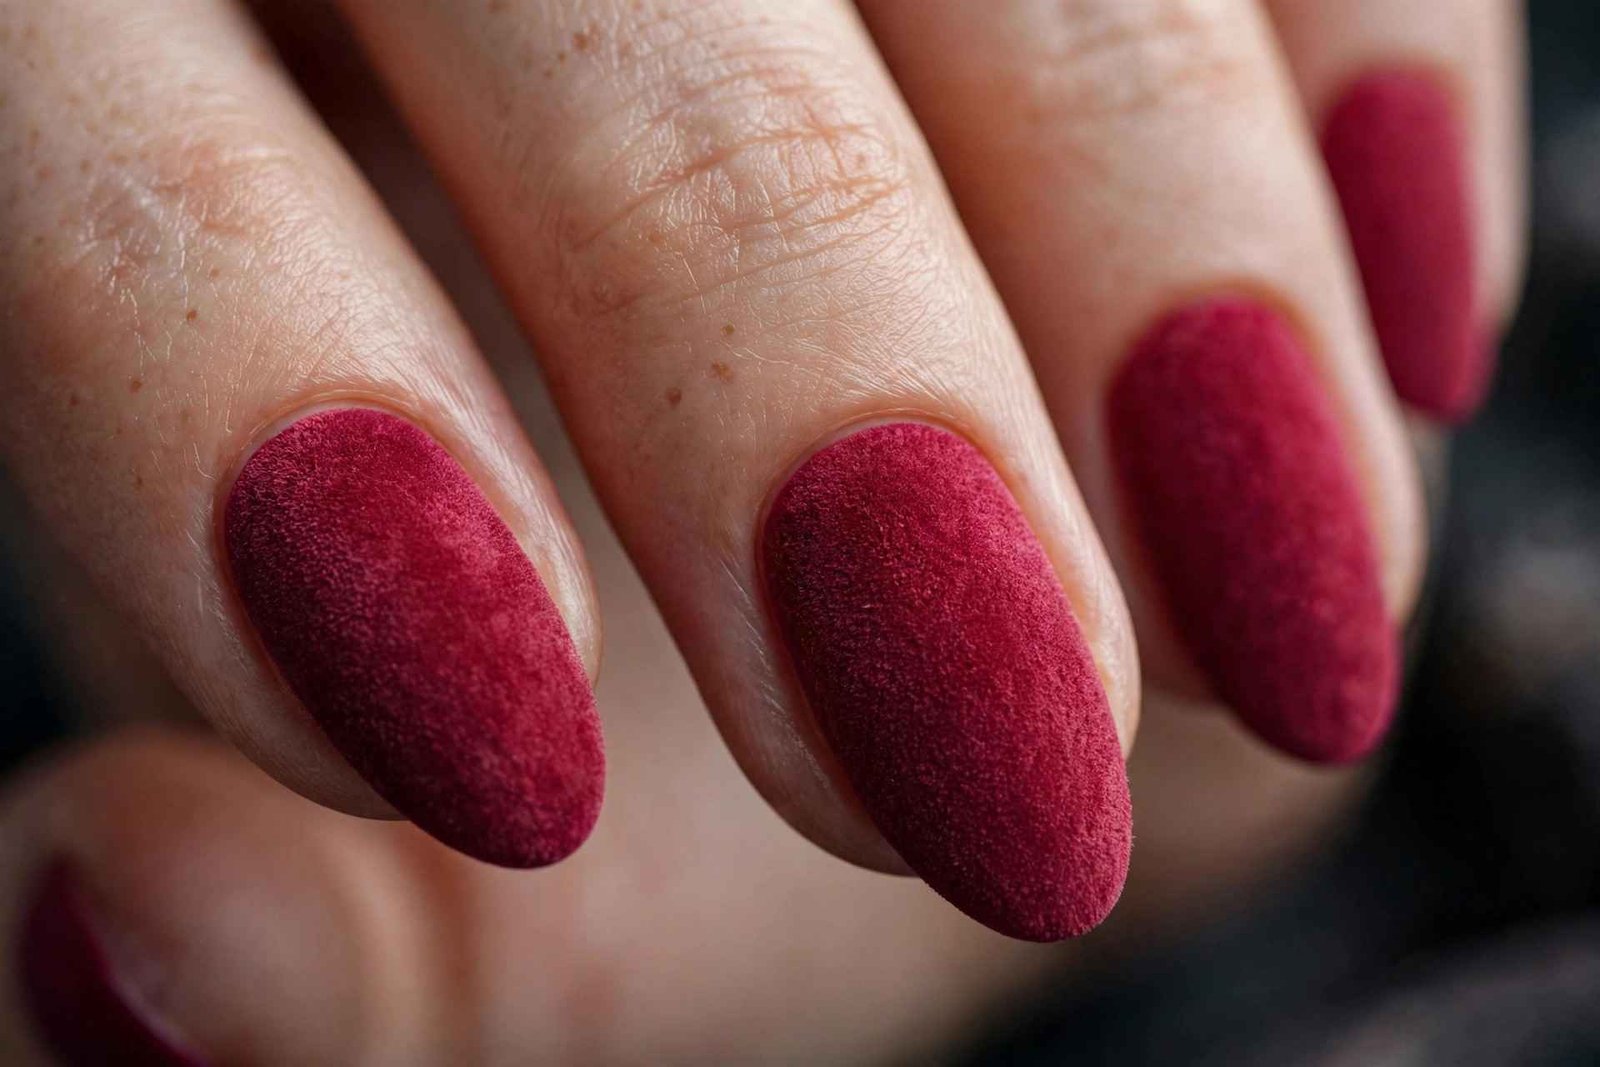
The matte finish transforms the color completely: glossy cranberry is festive and bright, but matte cranberry is moody, plush, and quietly luxurious. Fair warning — matte shows chips faster than glossy, so cap the free edge carefully and keep the matte top coat handy for touch-ups. Also, apply hand cream with the backs of your hands, not your fingertips: the oils in moisturizer create shiny spots on matte polish. The deep red-pink tone makes this a natural bridge into spring too — one winter shade you won’t tire of. This shade carries you from Thanksgiving straight through Valentine’s Day.
18. Frosted Glass Jelly Nails
Jelly nails are having a quiet renaissance, and the winter version is all about frosted, translucent finishes. Milky white or pale blue jelly polish — sheer enough that your natural nail shows through softly — gives you that sea-glass, just-frosted look. Two to three thin coats build the perfect translucent depth.
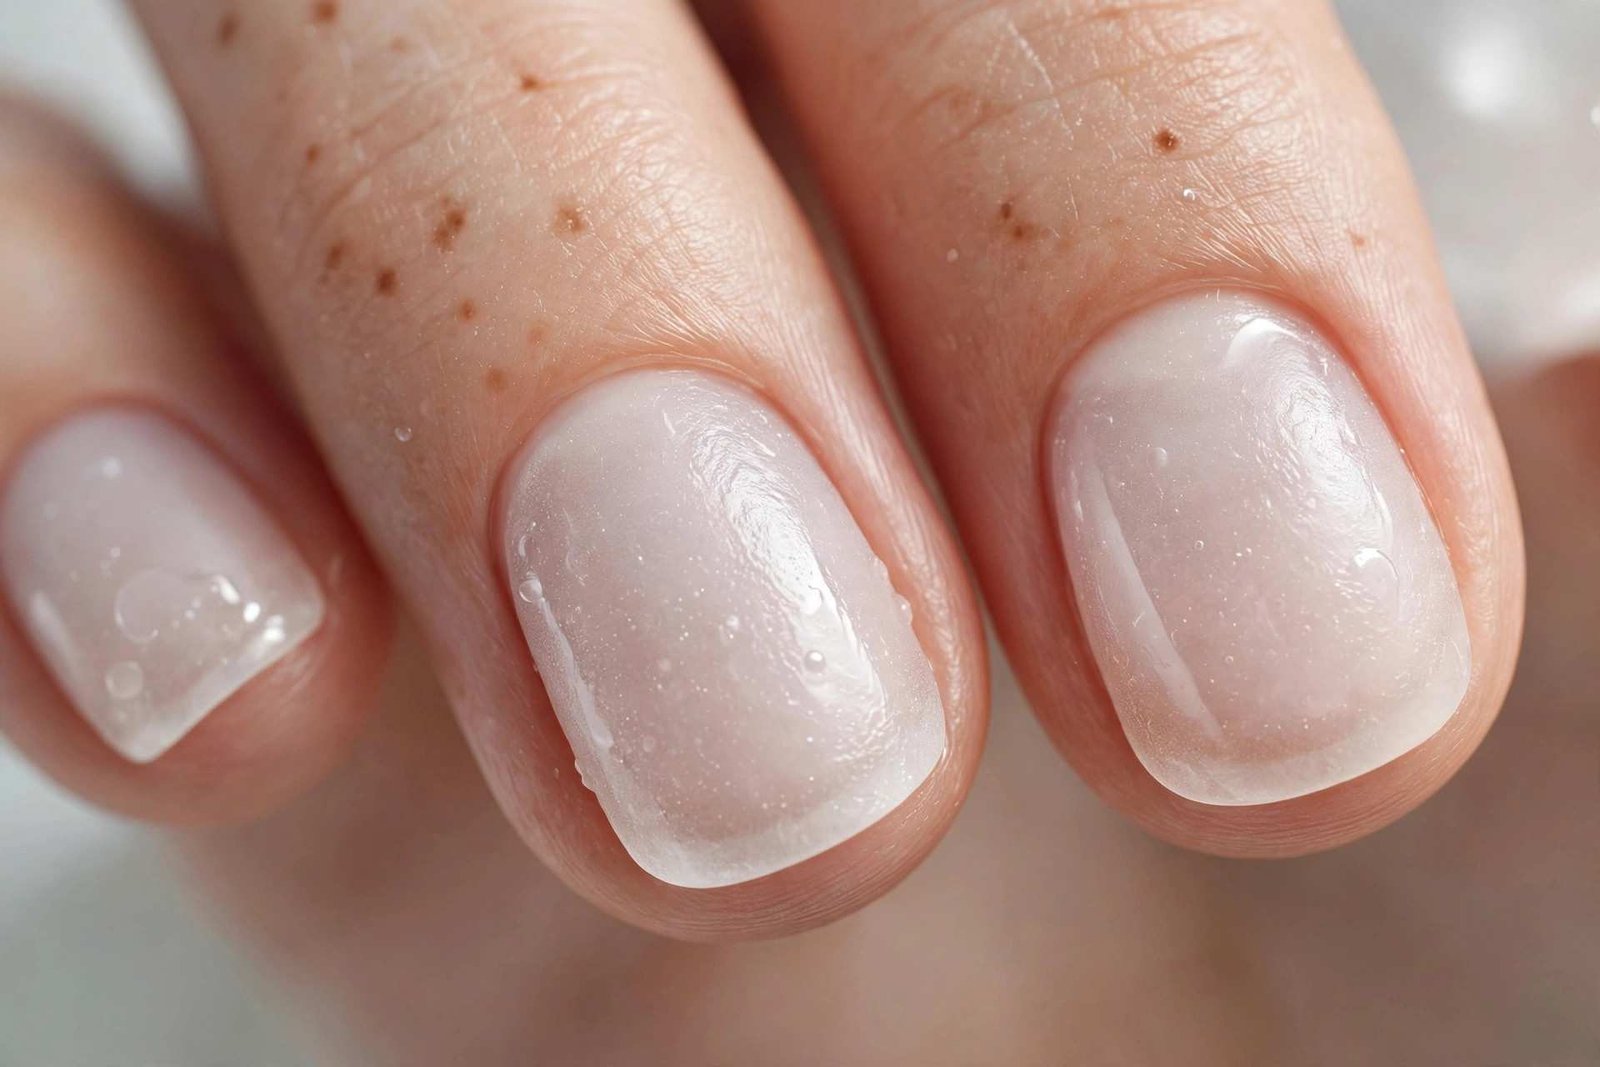
The sheer finish is incredibly forgiving — streaks, bubbles, and uneven edges practically disappear in the translucency, making this one of the most beginner-friendly designs possible. It’s also the most natural-looking option here; from a distance, your nails just look healthy and glossy. Short natural nails are the ideal canvas — keep cuticles tidy, since the sheer finish shows everything. Layer a fine iridescent glitter topper over the jelly for a frozen-pond effect, or wear it plain for minimalist winter elegance.
💡 Quick Tip: Jelly polishes look best over well-hydrated nails — push back cuticles and use cuticle oil the night before for a flawless translucent finish.
19. Gold Snowflake French Tips
- The design: A classic white French tip, but with a delicate gold snowflake painted or stamped on one or two accent nails.
- Base: Sheer nude or milky pink — the traditional French canvas.
- The gold: Metallic gold polish or gold foil flakes for the snowflake; it glows against the white tip.
- Technique: Paint tips first with French guides, then stamp the snowflake with a stamping plate.
- Best shape: Almond or oval — the classic French shapes that flatter every hand.
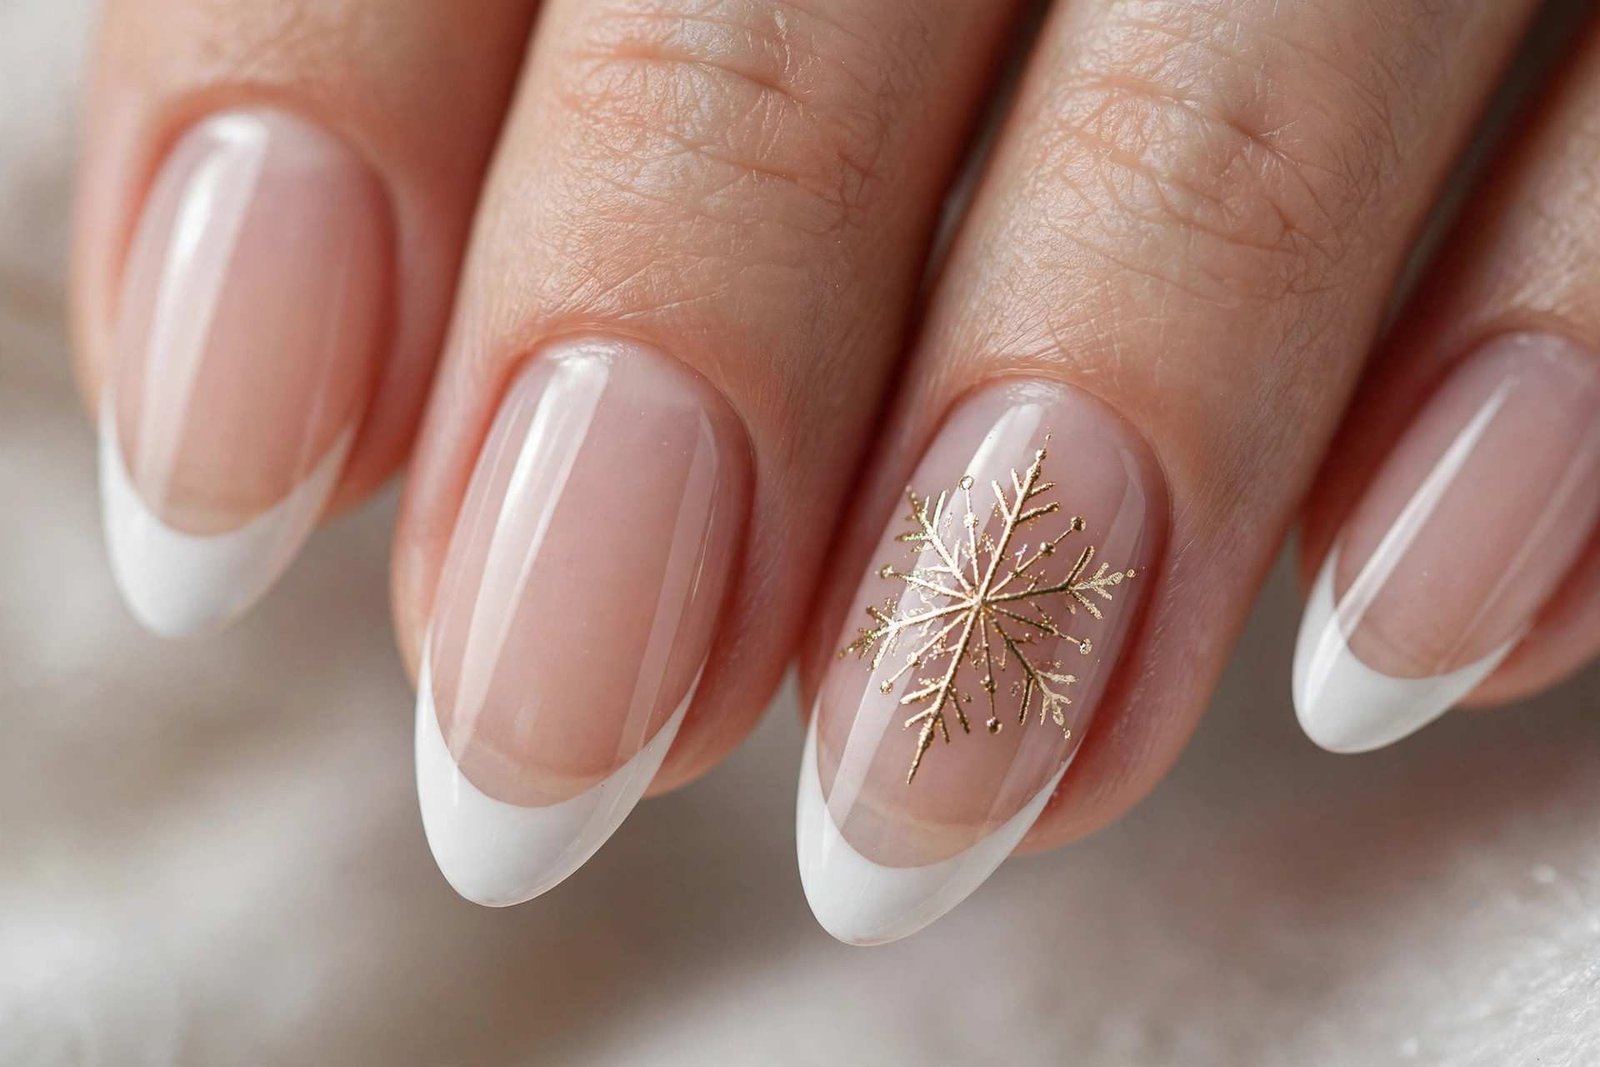
This is the French manicure dressed for a winter wedding — timeless, polished, and just festive enough. The gold snowflake elevates the whole look from everyday to occasion without sacrificing wearability. It photographs beautifully in natural light, making it a favorite for holiday engagement photos and winter brides. Keep the snowflakes small and centered on the tip; oversized art overwhelms the delicate French balance.
📌 Good To Know: Gold stamping polish is more opaque than regular metallic polish — it’s worth buying one bottle if you plan to stamp regularly.
20. Berry Red Snowfall Dots
There’s a special kind of charm in simplicity done well. A rich berry-red base — think raspberry, not fire-engine — dotted with tiny white “snowfall” dots scattered across each nail. Use a dotting tool in two sizes: larger dots near the cuticle, tiny ones drifting toward the tip, like snow caught mid-fall.
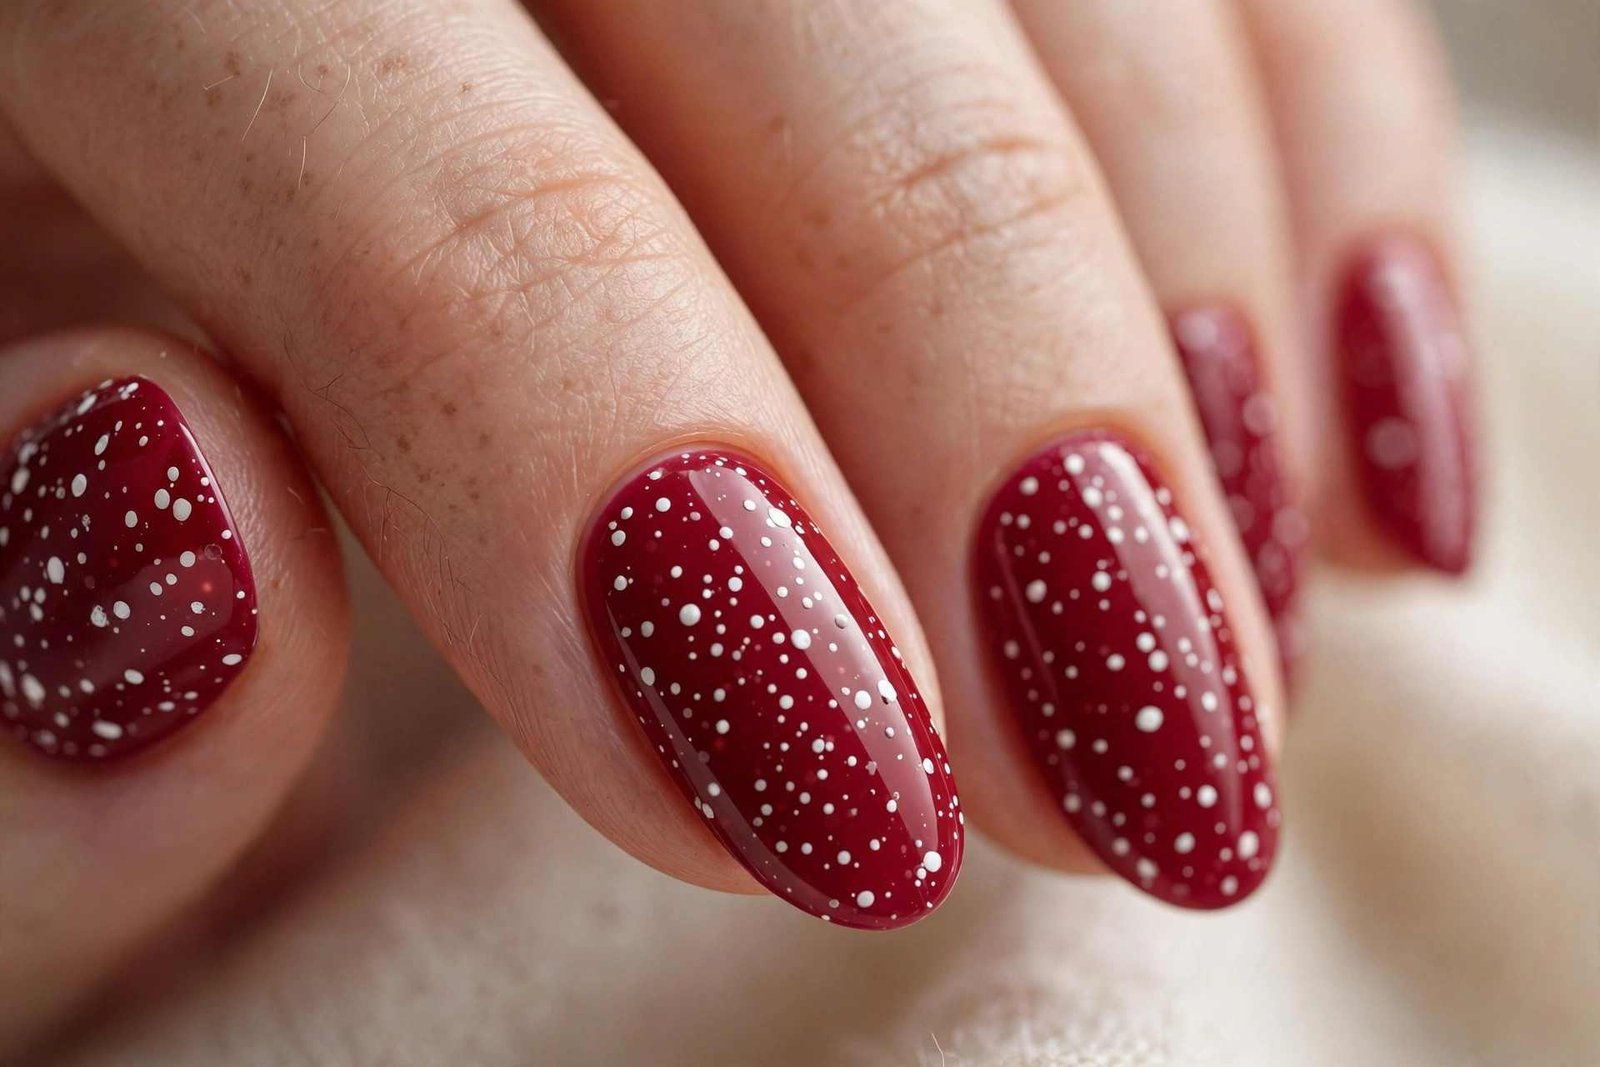
The scattered placement is what makes this look artful rather than polka-dot — think organic, like actual snowfall, not a pattern. Vary the dot sizes and don’t align them in rows. This design takes under fifteen minutes once your base is dry, making it perfect for last-minute holiday plans. The berry tone is festive without screaming Christmas, so it works from late November through February. It also makes a lovely matching pedicure if you like your fingers and toes coordinated. Seal with a glossy top coat and the white dots practically glow against the red. Let each layer dry fully before the next — patience is what keeps the dots crisp.
21. Chrome Ice French Tips
French tips, but make them futuristic. Instead of white polish, the tips get a mirror-shine silver chrome that looks like actual ice. Apply your sheer nude base, paint the tip area, then burnish silver chrome powder over the tips only. The contrast between soft nude and liquid-metal silver is striking.
- Tip precision: Use French tip guides or striping tape for crisp lines — chrome shows every wobble.
- Best shape: Almond or coffin; the tapered tip gives the chrome room to shine.
- Seal twice: Chrome tips chip at the free edge — two layers of top coat, capped carefully.
- Style note: This is the cool-girl French — edgy, modern, and endlessly photographable.
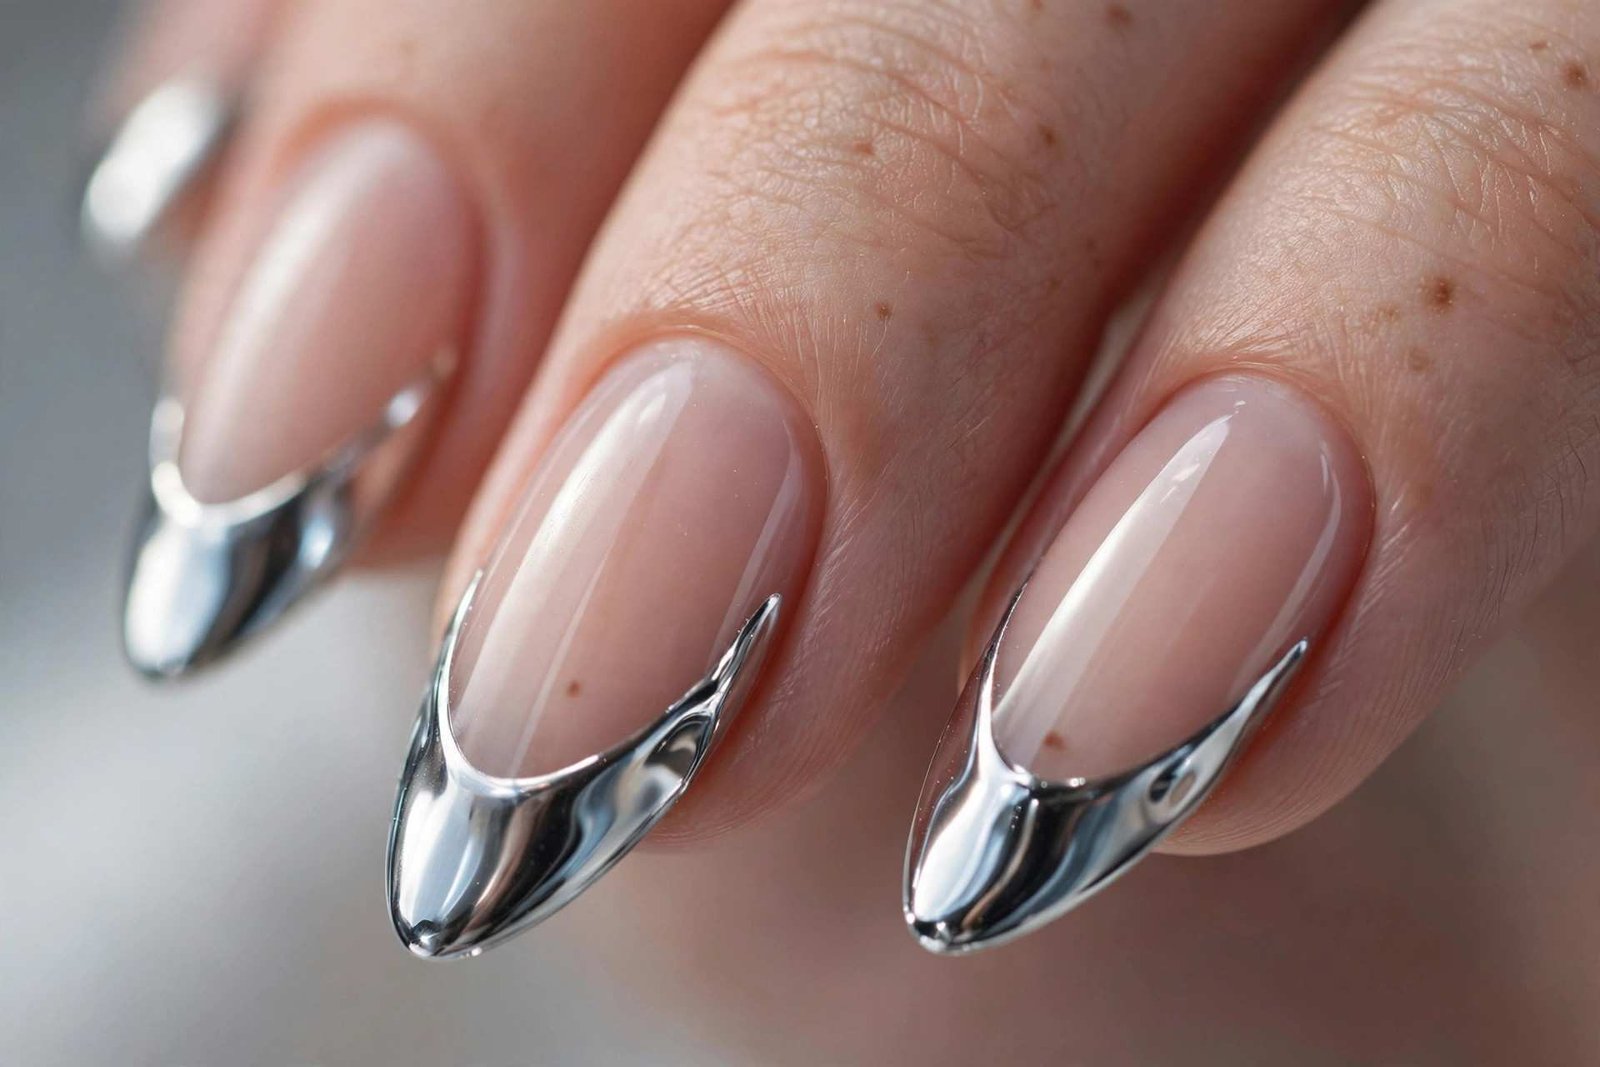
What sets this apart from a regular French is the dimension — the chrome shifts from bright silver to smoky grey as your hands move, so the tips never look flat. It’s bold enough for a night out but clean enough for the office. Pair it with silver jewelry and cool-toned outfits for a cohesive look.
💡 Quick Tip: If freehand chrome tips feel risky, do the whole nail in chrome first, then paint the nude base over the bottom two-thirds — reverse application is far more forgiving.
22. Winter Navy Plaid
Plaid nails are like wrapping your fingertips in a flannel blanket — and a navy-based plaid feels distinctly wintry. Start with a deep navy base, then use striping tape or a thin brush to create intersecting lines in white, silver, and a touch of red. The classic windowpane pattern reads cozy and preppy at once.
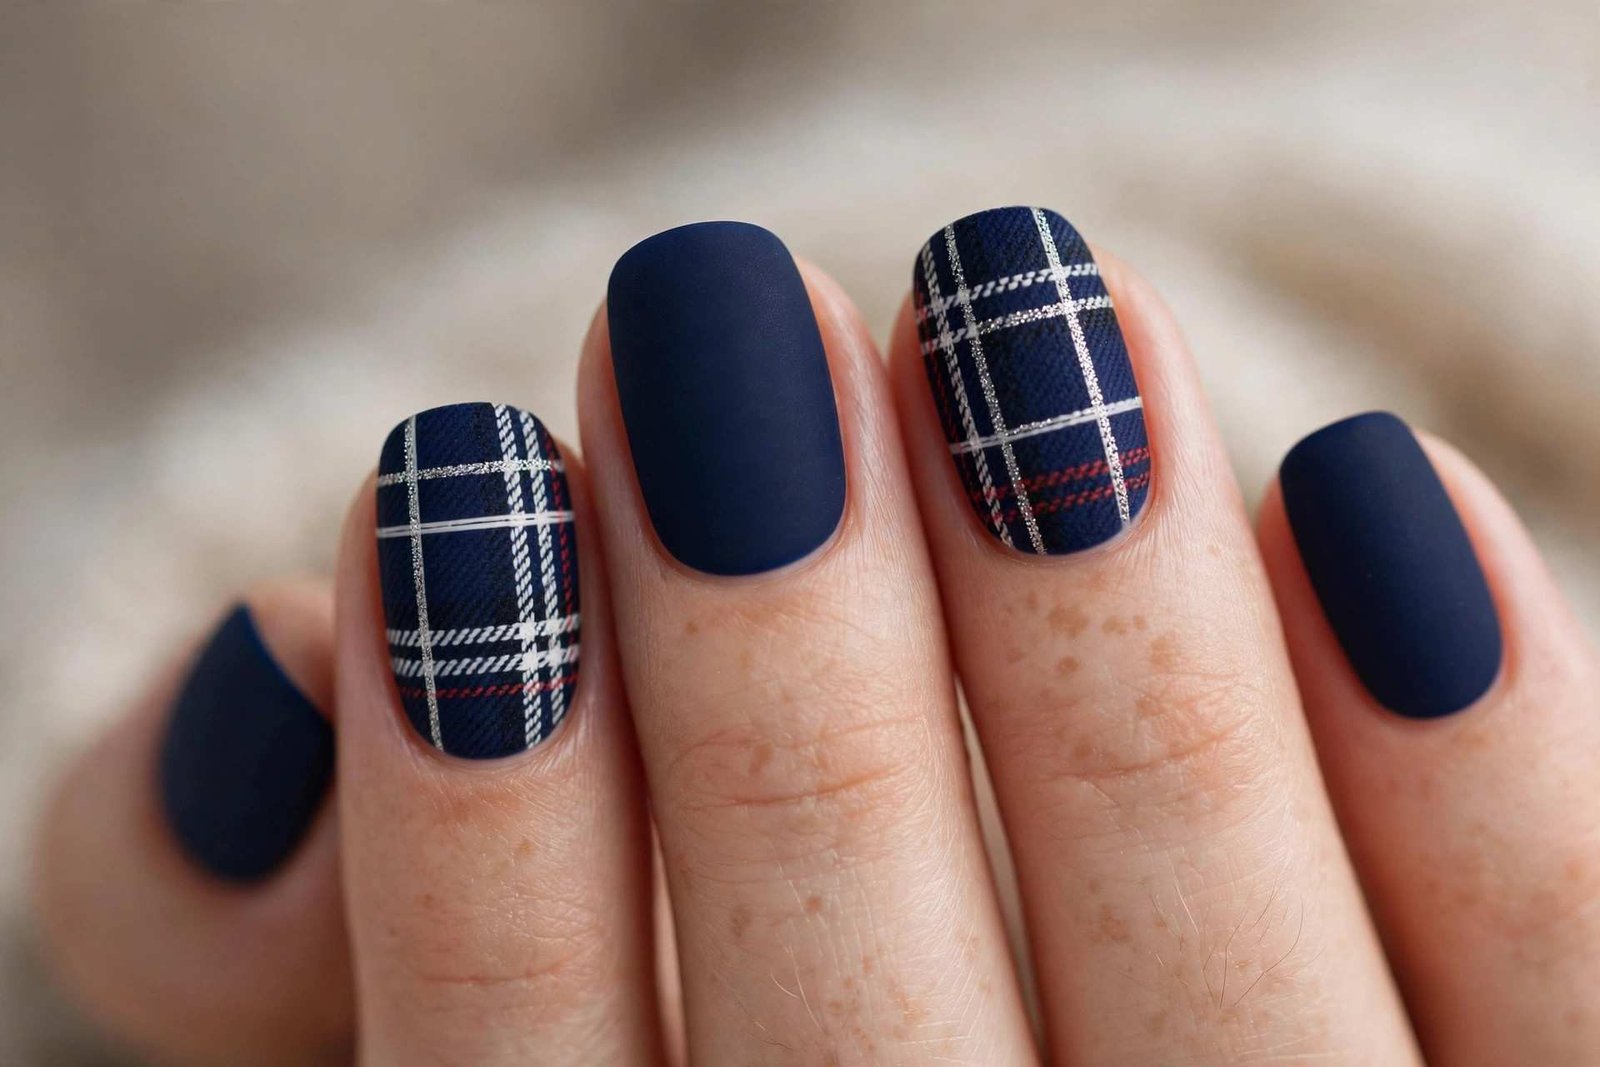
The technique takes patience, but striping tape makes it nearly foolproof: lay vertical lines, let them dry for two minutes, add horizontal lines over them, and peel while the polish is still slightly wet for crisp edges. Do the full plaid on two or three accent nails and keep the rest solid navy — a full set of plaid is visually overwhelming. A matte top coat gives the whole thing a soft flannel texture. Bonus: the busy pattern hides chips better than any solid color.
📌 Good To Know: Pre-cut plaid nail vinyls exist and save enormous time — search “tartan nail vinyls” if freehand lines aren’t your thing.
23. Lavender Frost Ombré
Lavender is winter’s sleeper hit — cool, dreamy, and unexpectedly flattering. This ombré fades from pale lilac at the cuticle to a deeper frosted purple at the tips, like twilight settling over snow. The sponge technique gives you the seamless blend: paint both shades side by side on a makeup sponge and dab, building up two to three layers.
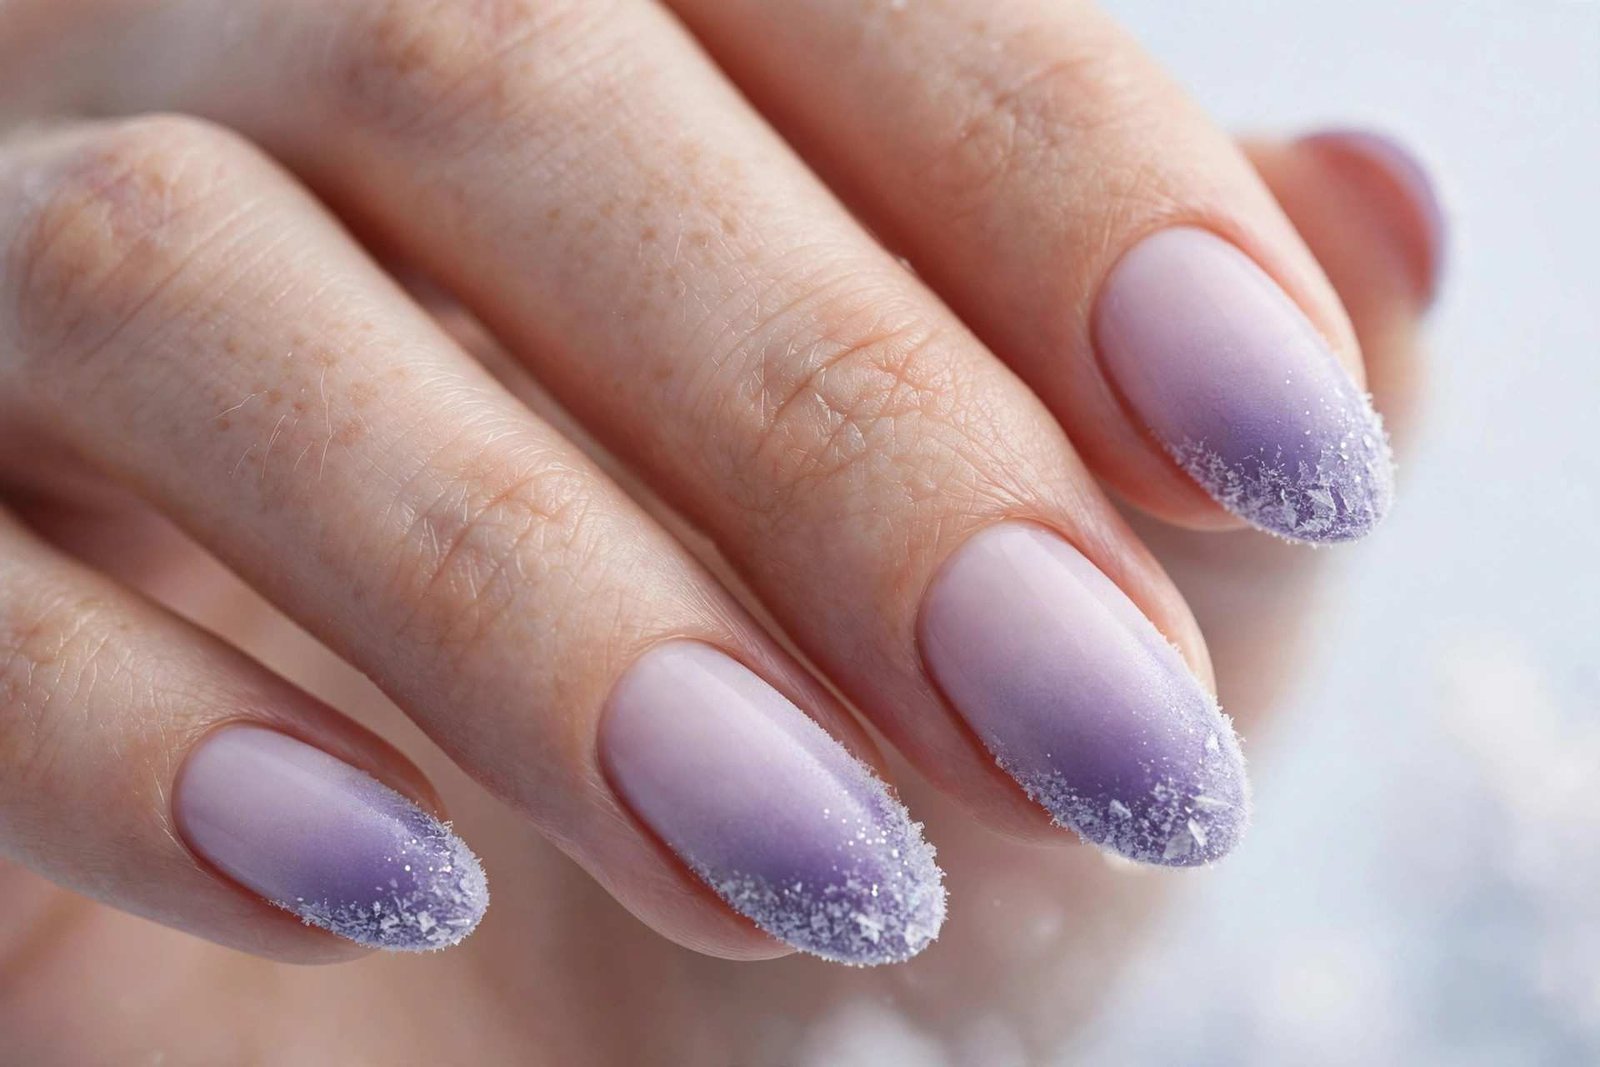
Add a thin silver glitter line where the two shades meet for a frosted sparkle effect, or leave it clean for minimalist vibes. Lavender flatters both warm and cool undertones — it makes warm skin glow and harmonizes with cool skin beautifully. The light base near the cuticle means regrowth stays subtle, so this is one of the longest-wearing art designs you can choose. A glossy top coat deepens the purple tones and gives the gradient a glassy finish. Pair it with silver jewelry and grey or white outfits for a cohesive cool-toned look.
24. Rose Gold Glitter Fade
- The look: A soft nude or blush base melting into dense rose gold glitter at the tips — warm, romantic, and endlessly flattering.
- Technique: Sponge the glitter on from the tips downward, building density at the free edge and fading toward the cuticle.
- Glitter type: Fine rose gold glitter for elegance; add a few larger hex pieces for dimension.
- Best shape: Almond — the tapered tip makes the glitter look like it’s dissolving into the nude.
- Skin tone note: Rose gold flatters every skin tone — it’s the most universal metallic.
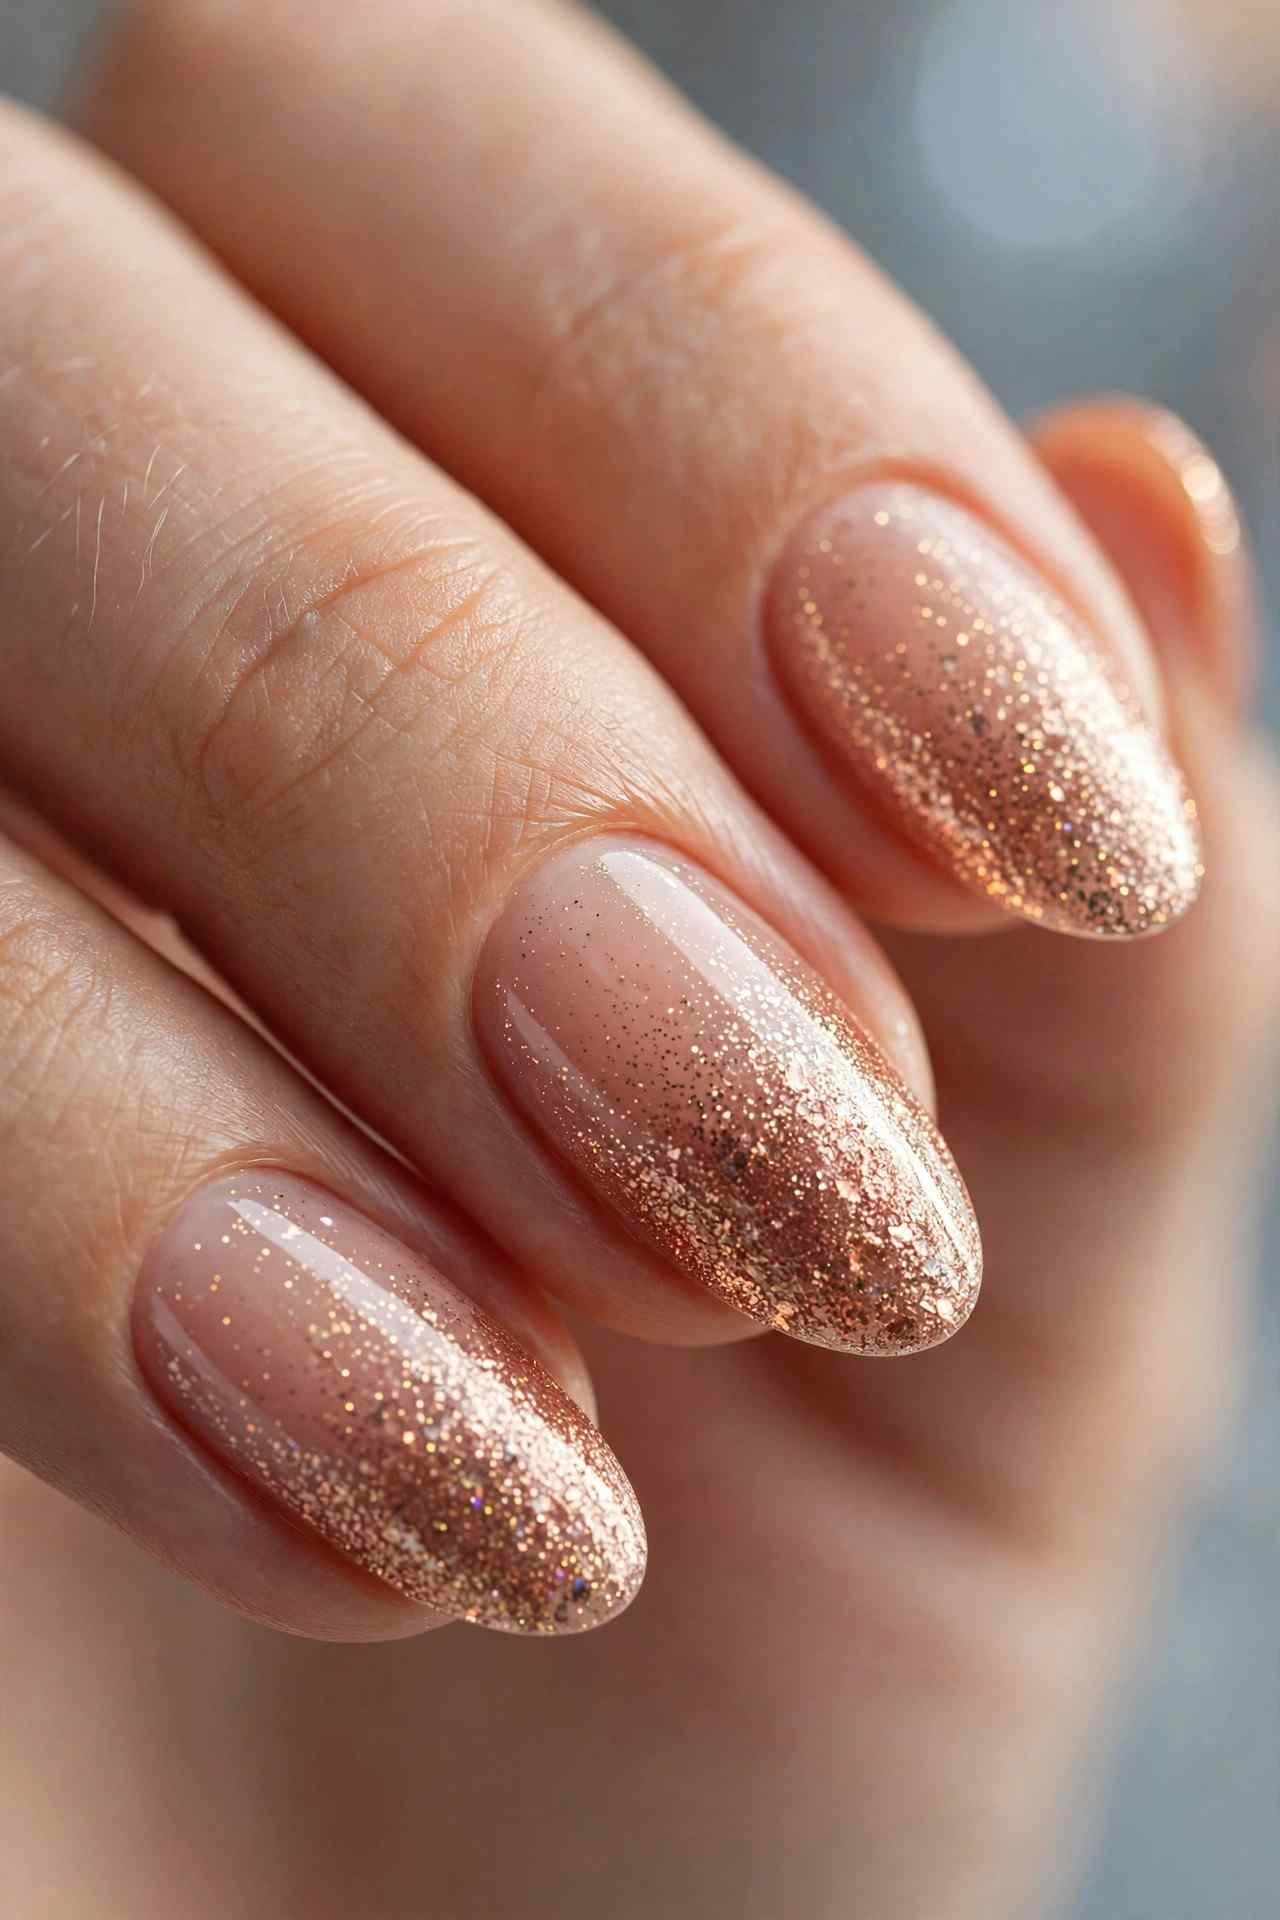
This is the manicure equivalent of golden hour — warm, glowing, and romantic. It’s festive enough for holiday parties but soft enough for everyday wear, and the gradient hides tip wear so it lasts. Two thin coats of top coat lock the glitter in place and smooth the finish. Rose gold pairs beautifully with blush, champagne, and burgundy outfits. If you’re torn between gold and silver this winter, rose gold is the answer that flatters everyone.
25. Winter Wonderland Mix-and-Match
Why choose one design when you can wear five? The mix-and-match manicure gives each nail its own winter personality — a snowflake accent, a glitter nail, a solid frosty blue, a chrome nail, a plaid nail — all tied together by a cohesive color palette of blues, whites, and silvers. The key is keeping every design in the same color family so it reads as curated, not chaotic.
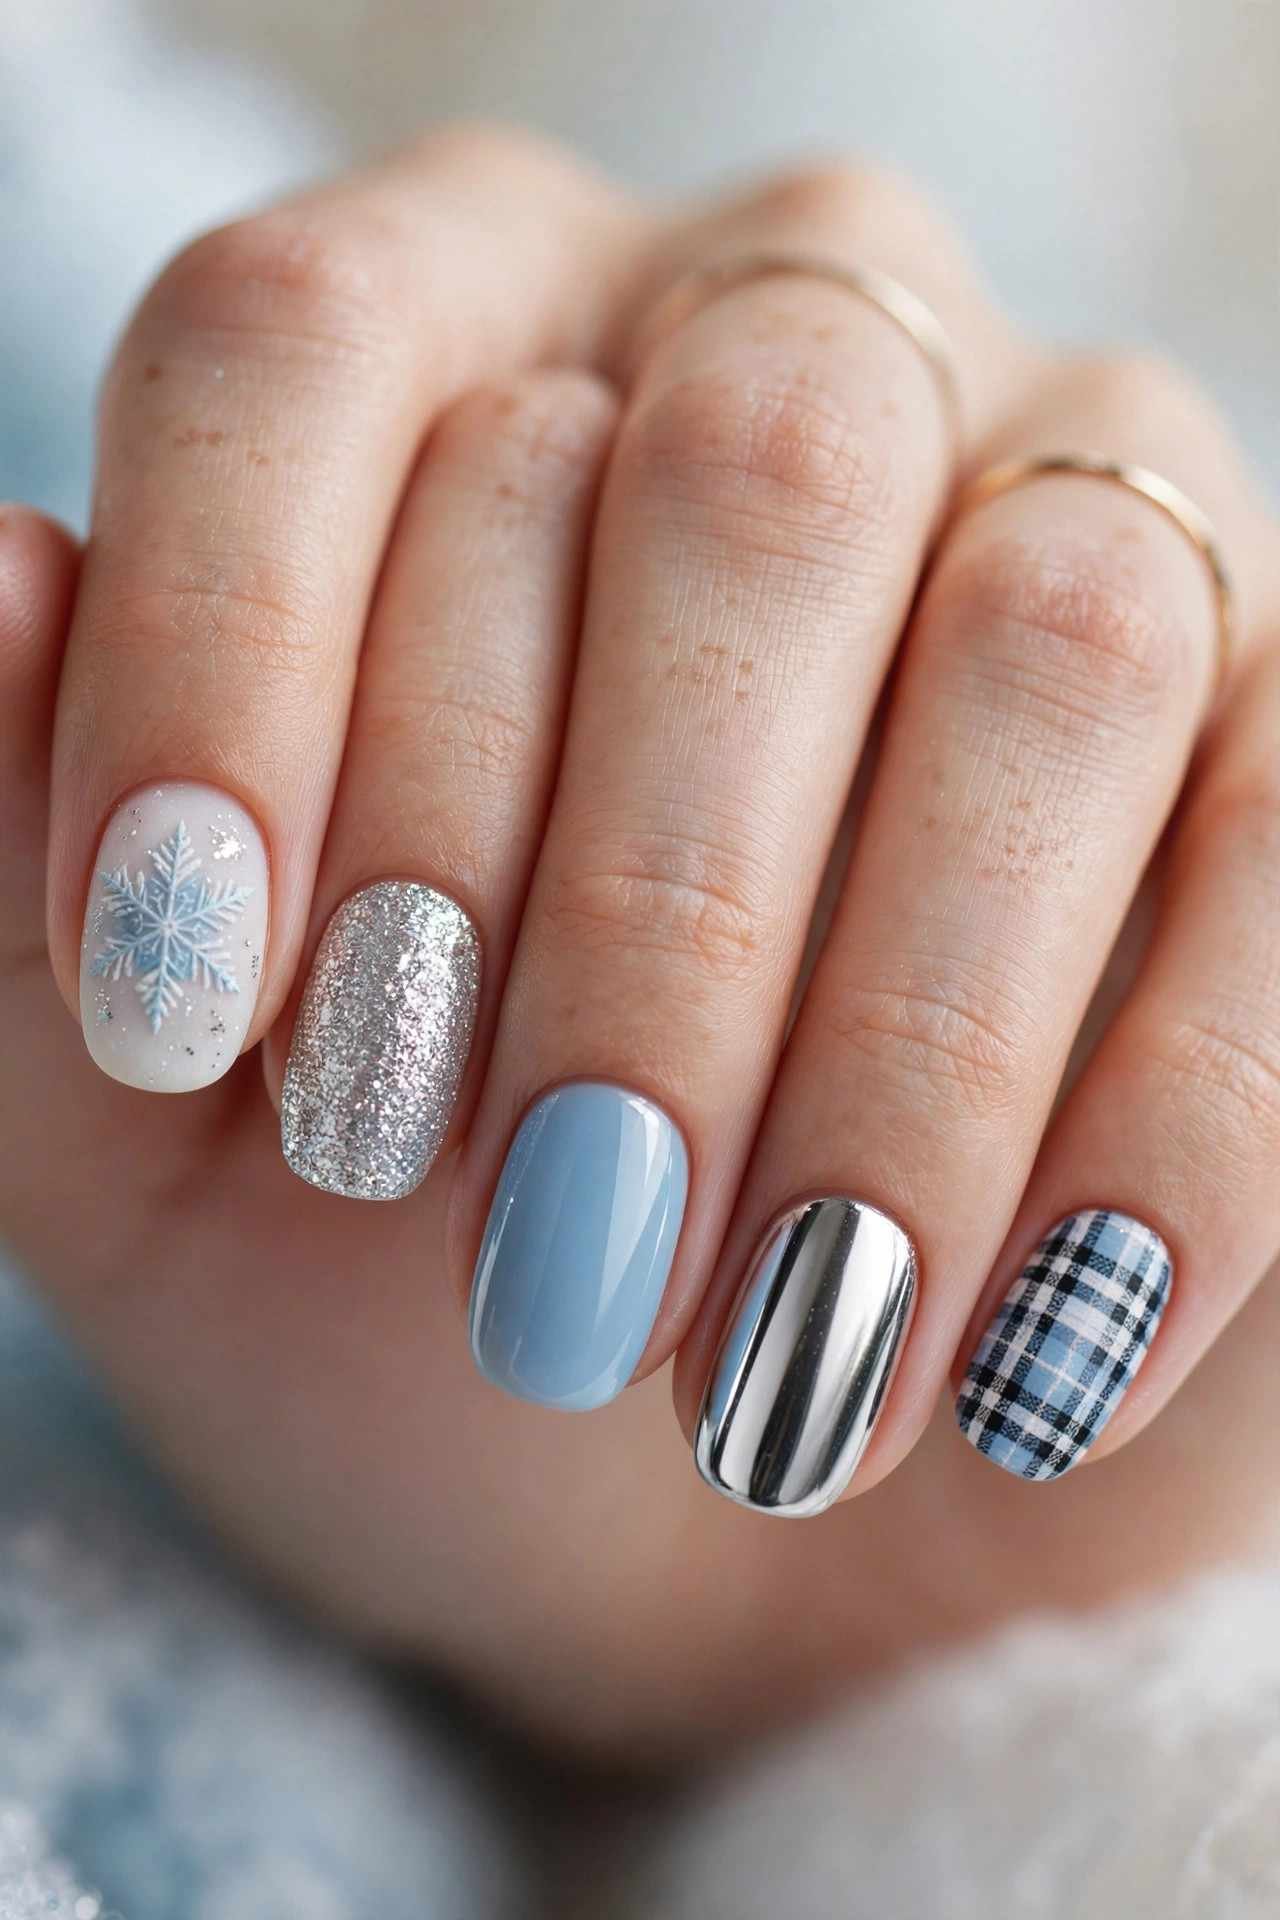
Plan your layout before you start: put the busiest designs (plaid, snowflakes) on the ring fingers, glitter on the middle fingers, and solids on the rest. This is also the perfect way to use up those single press-on nails or test techniques you’re learning — each nail is its own little canvas. It photographs incredibly well for Pinterest and Instagram because there’s always something new to look at. Just keep the palette tight: three colors maximum, or it tips into cluttered.
💡 Quick Tip: Lay out all five designs on a nail wheel first to check the palette works together — it’s much easier to adjust before polish touches your nails.
CONCLUSION
From frosted snowflakes to velvet mattes to chrome that shifts like the northern lights, these 25 cute winter nail designs prove your fingertips deserve just as much seasonal attention as your wardrobe. Whether you go bold with aurora chrome, keep it cozy with cable-knit texture, or stay timeless with a snow-dusted French, the right manicure makes every winter moment feel a little more magical. Pick your favorite and enjoy your most beautiful winter nails yet.
📌 Save this post to your nails board on Pinterest so you have winter nail inspiration ready!