
15+ Quick Wedding Hairstyles Guest for Busy Mornings 2026
Running late for a wedding and your hair is still doing its own thing? Take a breath — you don’t need an hour and a hot-tools arsenal to look like a polished wedding guest. You just need the right shortcuts.
These quick wedding guest hairstyles are built for real, busy mornings: every single one takes fifteen minutes or less, uses tools you already own, and still looks like you tried. Because you did — you just tried smart.
Pick your favorite, keep a few bobby pins in your bag as backup, and walk in like you had all the time in the world.
1. The 5-Minute Low Chignon
When the clock is screaming at you, the low chignon is your emergency elegant button. It’s one twist, a few pins, and suddenly you look like someone who plans ahead.

- Pull hair into a low ponytail, twist it around itself, and pin — don’t overthink the shape.
- Tug the edges gently for softness; a slightly undone chignon looks modern, a severe one looks rushed.
- Keep a mini hairspray in your clutch for touch-ups between the ceremony and reception.
- This works on damp-ish hair too — twist it up, let it set during the drive, and release into soft waves later if you want.
2. Sleek Low Ponytail
Don’t underestimate the power of a really good sleek ponytail. When it’s smooth at the roots, glossy through the lengths, and sitting low at the nape, it reads as deliberate and chic — not “I gave up.” The whole thing takes about seven minutes if your hair is already dry.

Brush everything back with a smoothing serum, secure low, and run a flat iron over the ponytail in two quick passes. Wrap a strand of hair around the elastic to hide it — that one detail is what separates “gym ponytail” from “wedding ponytail.” A center or deep side part both work; pick whichever flatters your face and go. Add a pair of statement earrings and you’re done.
3. Half-Up Top Knot
Half your hair up, half down, zero stress. The half-up top knot gives you the polish of an updo with the ease of leaving your hair down, and it genuinely takes about three minutes once you’ve done it once.

Gather the top section of your hair — roughly from temple to temple — twist it into a small bun, and pin it. That’s it. The trick to making it wedding-worthy instead of weekend-casual is the finish: smooth the front with a little serum, make sure the part is clean, and let the loose hair fall in soft waves rather than air-dried frizz. If you have two extra minutes, curl just the front pieces. It frames your face in every photo.
4. Twisted Side Braid
A regular braid is nice; a twisted side braid looks like you know secrets. Instead of a standard three-strand plait, you simply twist two sections around each other down one side of your head. It takes the same amount of time but looks twice as interesting.
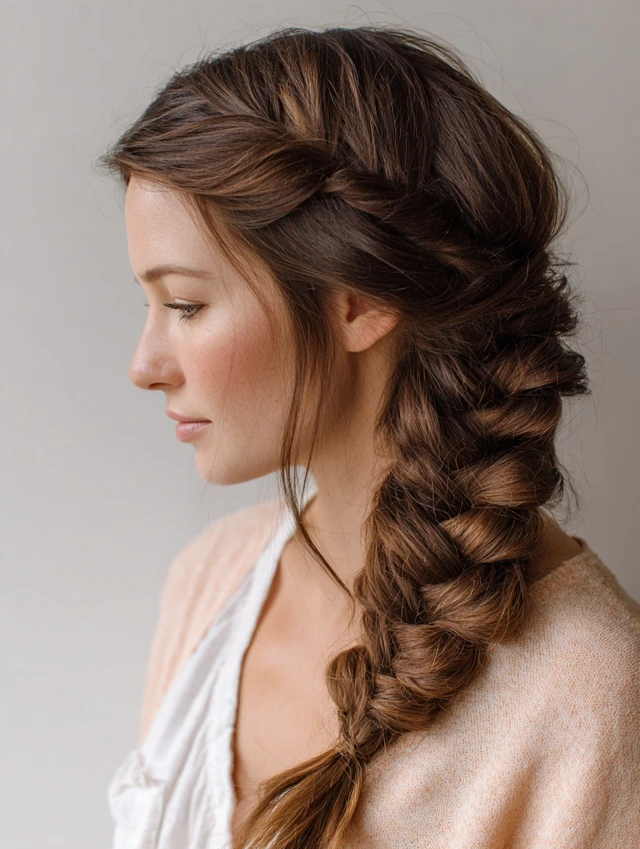
- Sweep all hair to one side and split into two sections.
- Twist each section the same direction, then twist them around each other the opposite way — this locks the twist so it won’t unravel.
- Secure with a small elastic and gently pull the twist wider for fullness.
- Drape it over your shoulder opposite your statement earring for balance.
5. The Low Rolled Bun
This is the hairstyle equivalent of a little black dress — it works for every wedding, every dress code, every hair type. You roll the hair upward from the nape and pin it, creating a soft roll that looks far more polished than the effort involved.

Start with a low ponytail, then roll it up toward your head, tucking as you go, and pin the roll flat against your nape. The beauty of this style is its forgiveness: lumps and bumps just look like texture. If your hair is layered and pieces keep escaping, that’s fine — let them. A few loose ends around the face make the whole thing feel romantic rather than rigid. Ten minutes, tops.
6. Ponytail with a Wrapped Base
Want to know the fastest way to make a ponytail look expensive? Hide the elastic. Wrapping a section of your own hair around the base takes forty-five seconds and completely transforms the look from everyday to event-ready.

Secure your ponytail at whatever height suits your dress — low for classic, mid for modern. Take a half-inch section from underneath the ponytail, wrap it tightly around the elastic two or three times, and pin the end underneath with a bobby pin. Smooth the top with a boar-bristle brush and a drop of serum for that glassy finish. It’s such a small detail, but in photos it reads as genuinely polished. Pair it with a bold lip and nobody will know you did your hair in the car.
7. Braided Headband
Leave your hair down but make it interesting: braid a small section from behind one ear, drape it across the top of your head like a headband, and pin it behind the other ear. It’s boho, it’s pretty, and it keeps hair out of your face during an outdoor ceremony.

- Braid a one-inch section from behind your ear — a simple three-strand braid is perfect.
- Pancake the braid slightly so it looks soft, not skinny.
- Drape it over the crown and pin it behind the opposite ear, tucking the end under your loose hair.
- Do the same on both sides for a fuller headband effect, or keep it to one side for asymmetry.
8. The Quick Sock Bun
The sock bun sounds like a craft project, but it’s actually the fastest route to a perfectly round, full-looking bun — even if your hair is fine or on the shorter side. All you need is a sock (or a foam donut) and about eight minutes.

Pull your hair into a ponytail, thread it through the donut, and roll the hair down and around until you reach the base. Spread the hair to cover the donut completely and pin any loose ends underneath. The donut does all the volume work for you, which is why this is a lifesaver for thinner hair. Position it high for a fun, youthful feel or low at the nape for classic elegance. Smooth the front, add earrings, done.
9. Pinned Side Sweep
Sometimes the quickest style is barely a style at all. A deep side sweep — all your hair brushed dramatically to one side and pinned behind the opposite ear — takes about four minutes and looks stunningly editorial, especially with glossy, healthy-looking hair.

Create a deep side part, sweep everything over, and secure the tucked side with two or three bobby pins placed in a neat row — or hide them completely for a seamless look. A decorative clip or barrette on the pinned side turns this into a real statement. Add loose waves through the lengths if you have five extra minutes, but honestly, straight and shiny works just as well. This is minimal effort with maximum impact.
10. Bubble Braid Ponytail
Fun, fresh, and faster than it looks. The bubble braid ponytail is just a regular ponytail with elastics placed down its length — each section gets puffed out into a “bubble.” It takes maybe ten minutes and looks like something from a styling tutorial.

- Secure a ponytail at mid-height — not too high, not too low.
- Place clear elastics every two inches down the ponytail.
- Gently tug each section outward to create the bubble shape.
- Keep the top smooth and sleek so the bubbles are the star.
It’s playful enough for a daytime or garden wedding and holds up beautifully through hours of celebrating.
11. The Knotted Ponytail
Here’s a trick that looks like magic: instead of securing your ponytail with just an elastic, you tie your hair in an actual knot first. The knot creates a gorgeous, sculptural detail at the base that elevates the entire style.

Split your ponytail section into two, tie them in a single knot like you’re starting to tie your shoes, then secure everything with an elastic underneath the knot. Pull the knot slightly loose for softness. The result looks intricate but took you about six minutes. This works best on medium to long hair — you need enough length to form the knot. Finish with a light-hold spray and let the ends fall naturally.
12. Claw Clip Updo
The claw clip is having a full fashion moment, and the French-twist version is genuinely wedding-appropriate. Twist your hair up, clamp it with a chic claw clip, and you have an updo in literally ninety seconds.

- Gather hair as if making a low ponytail, twist it upward against your head.
- Fold the twist and clamp a medium or large claw clip over it vertically.
- Let the ends fan out over the top of the clip for a soft, deliberate look.
- Choose a clip in tortoiseshell, gold, or matte black — it should look like jewelry, not a gym accessory.
This is the ultimate “I woke up late but still look amazing” style. Keep a spare clip in your bag; they’re light and you might want to re-clamp after dancing.
13. Sleek Center-Part Low Bun
There’s something so confident about a severe center part and a clean low bun. It’s minimal, it’s modern, and it takes about eight minutes — most of which is just getting the part straight.
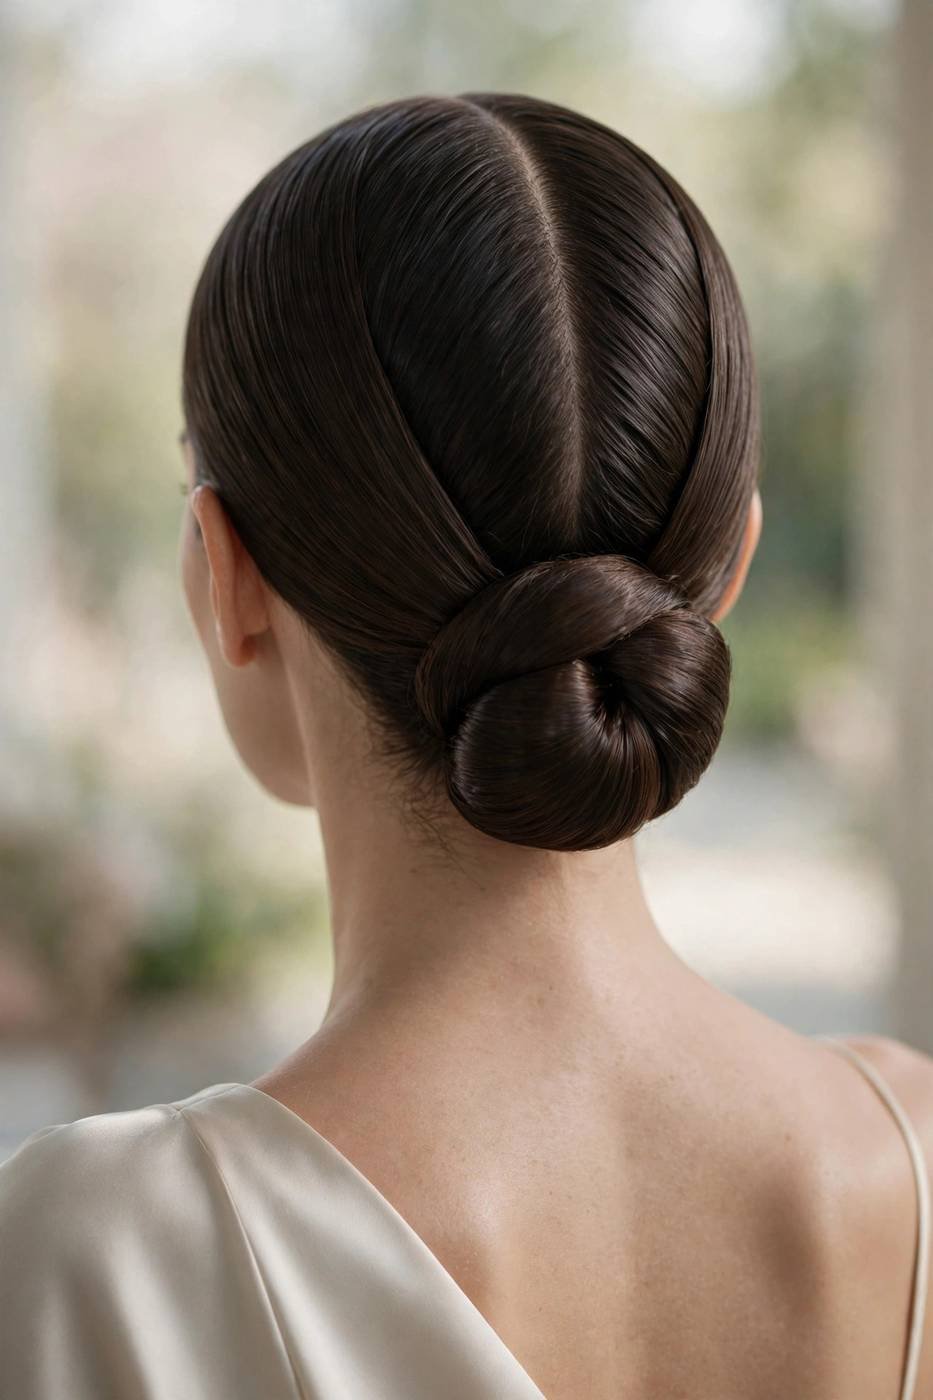
Part your hair precisely down the middle — use the tail of a comb for a sharp line. Smooth both sides back with serum and a fine-tooth comb, gather at the nape, and twist into a neat bun. The key here is control: flyaways ruin the effect, so finish with a strong-hold spray and smooth any strays with a toothbrush misted with hairspray (yes, really — stylists swear by it). This look pairs beautifully with bold makeup or statement jewelry since the hair itself is so understated.
14. Loose Fishtail Braid
The fishtail braid has a reputation for being complicated, but the loose, messy version is actually forgiving and quick. Because it’s supposed to look undone, every “mistake” just adds character.

- Sweep hair to one side and split into two sections.
- Take a thin piece from the outside of one section, cross it over to the other — repeat, alternating sides.
- Don’t aim for perfection; a slightly messy fishtail looks romantic and effortless.
- Once secured, pull the braid gently apart to widen it — this is what makes it look full and lush.
Drape it over one shoulder and you’re ready. The intricate pattern photographs beautifully and looks far more time-consuming than it is.
15. The Twist-and-Tuck Updo
The updo for people who claim they “can’t do updos.” You twist sections of hair and tuck them into each other — no braiding skills, no precision required. If you can twist a towel, you can do this.
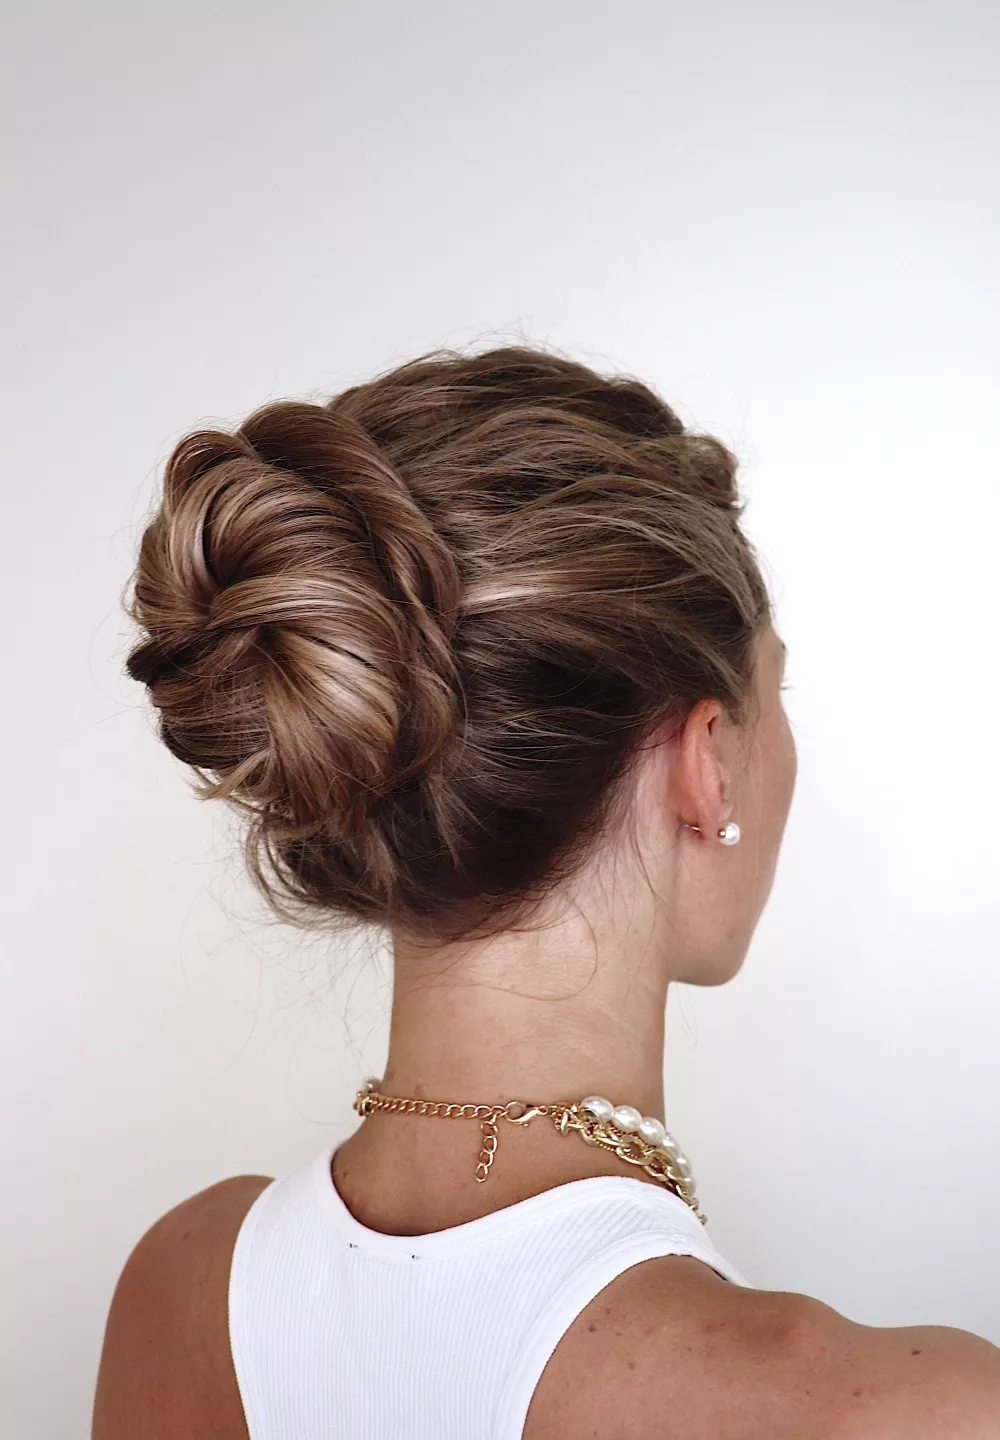
Divide your hair into three or four sections, twist each one loosely, and tuck and pin them into a soft cluster at the nape. Overlap the twists so they look like one continuous, textured updo. Pull a few face-framing pieces loose and mist with hairspray. The whole thing takes about twelve minutes and looks like you spent forty — proof that quick and gorgeous absolutely can coexist.
Conclusion
Busy mornings don’t have to mean boring hair. With these quick wedding guest hairstyles in your back pocket, you can go from bedhead to beautiful in fifteen minutes flat — and actually enjoy the wedding instead of stressing in front of the mirror.
📌 Save this post to your hairstyles board on Pinterest so you always have the perfect look ready!