
20+ Cute Winter Hairstyles for Everyday 2026
Winter has a way of testing your hair. One minute it’s sleek and smooth, the next it’s a static-charged halo under your beanie. The good news? Some of the prettiest winter hairstyles are also the easiest — the kind you can do half-asleep before work.
This list is all about everyday winter hair: low-maintenance, beanie-proof, and cute enough that you’ll actually want to take the hat off indoors. From polished low buns to lived-in braids, here are 20+ winter hairstyles you’ll wear on repeat all season.
1. The Sleek Low Bun That Works With Everything
There’s a reason the low bun never leaves the rotation. It sits exactly where a beanie or hood won’t flatten it, it keeps ends tucked away from dry winter air, and it looks intentional with about four minutes of effort. Brush everything back with a smoothing cream, twist at the nape, and pin.
The trick is the finish. A center part makes it feel polished and modern; a slightly off-center part softens the whole thing. If you have layers that won’t stay put, a tiny claw clip at the base holds strays without looking fussy. Mist with a flexible-hold spray and you’re done — this is the hairstyle equivalent of a perfect black turtleneck.
For all-day hold, crisscross two bobby pins in an X over the twist’s base — it’s far more secure than pins placed parallel. And if you’re wearing this to bed after a long day (we’ve all been there), swap the pins for a silk scrunchie to avoid dents and breakage overnight.

2. The Playful Braid With a Pop of Color
Winter wardrobes run dark — black coat, gray scarf, navy jeans — so your hair is the perfect place for a little color. Weave a few bright elastics or a colored ribbon through a simple three-strand braid and suddenly the whole outfit feels more fun.
- Braid slightly to one side so the color shows from the front.
- Use small clear elastics at intervals, then wrap a velvet ribbon over them.
- Pancake the braid (gently tug the edges) for a fuller, softer look.
- This works best on second-day hair — a little texture keeps it from slipping.
It’s a small detail, but it’s the kind of small detail people compliment in the elevator.
Velvet ribbons from the craft store work even better than elastics — they grip without snagging and come in every winter shade imaginable, from burgundy to forest green. Tie the ribbon into a small bow at the end of the braid rather than a knot; it reads more polished and takes two seconds.
3. The Classic Side Braid, Worn Loose
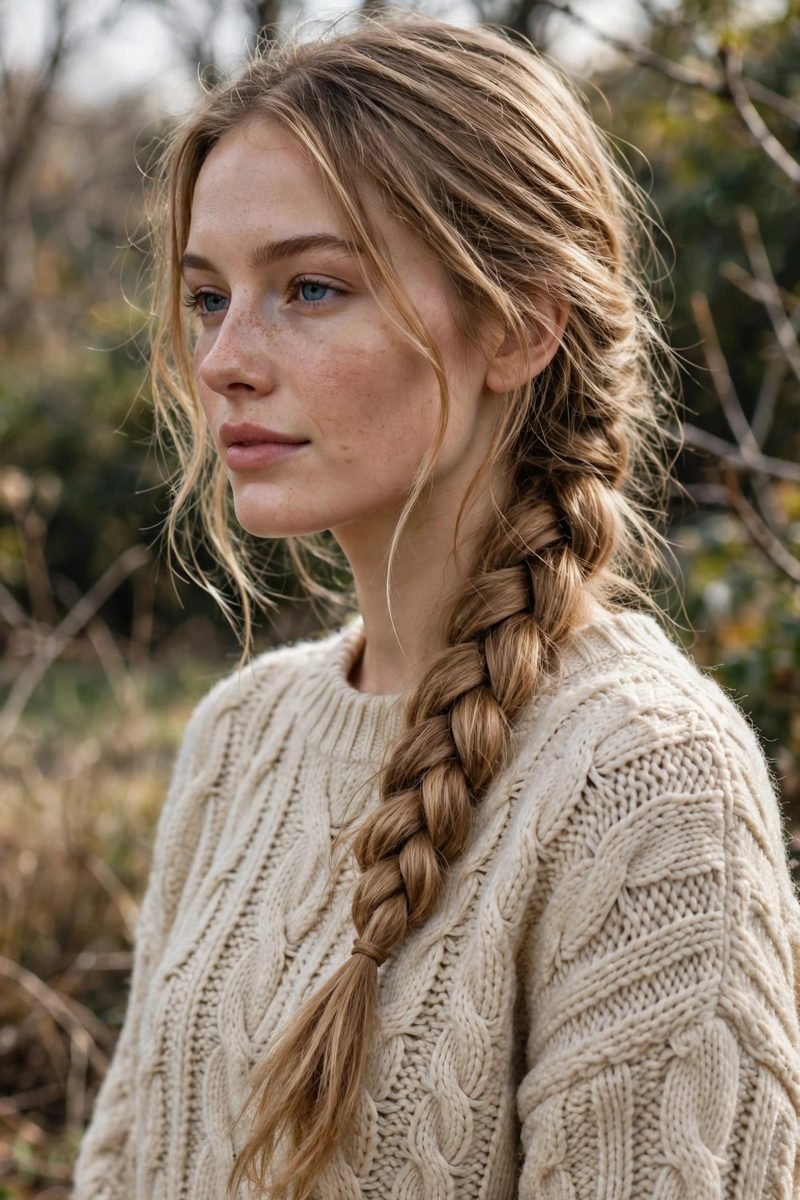
When was the last time you wore a plain braid and felt genuinely pretty in it? The secret isn’t the braid itself — it’s keeping it loose. A tight schoolgirl plait reads severe in winter; a soft, slightly undone braid over one shoulder reads romantic.
Start with a deep side part and sweep everything over. Braid loosely, letting shorter layers fall where they want, and tie it off with a low-profile elastic you then cover by wrapping a thin strand of hair around it. Pull a few face-framing pieces free at the front — they’ll curl a little from the day’s humidity and look completely effortless. This is a five-minute style that photographs beautifully, which matters when every weekend is a holiday party.
A spritz of dry shampoo at the roots before braiding gives fine hair the grip it needs to hold a loose plait all day. And here’s a styling trick: once the braid is done, gently pull it wider with your fingertips starting from the bottom — it creates that thick, romantic fullness in under thirty seconds.
4. Braids That Look Straight Off the Runway
Intricate braiding — cornrow-inspired panels, woven crown sections, a braid that melts into another braid — sounds like a salon appointment, but the everyday version is simpler than you think. Pick one detailed element, like two small accent braids along your part, and let the rest of your hair do whatever it wants.
📌 Good To Know: Detailed braids hold up better in winter than loose styles because there’s less surface area for static and wind to attack. Braid on slightly damp hair with a pea-sized amount of styling cream, and the style will still look fresh on day two.
The contrast is what makes it work: precise little braids against soft, natural texture everywhere else. It’s the kind of style that makes people assume you spent an hour, when you spent ten minutes.
Small gold braid cuffs — those tiny rings that slide onto a plait — elevate detailed braids instantly and cost almost nothing. Slide two or three onto your accent braids near the temples. They catch the light beautifully and make the whole style look far more intricate than the ten minutes it took.

5. The Side Braid and Gold Hoops Combo
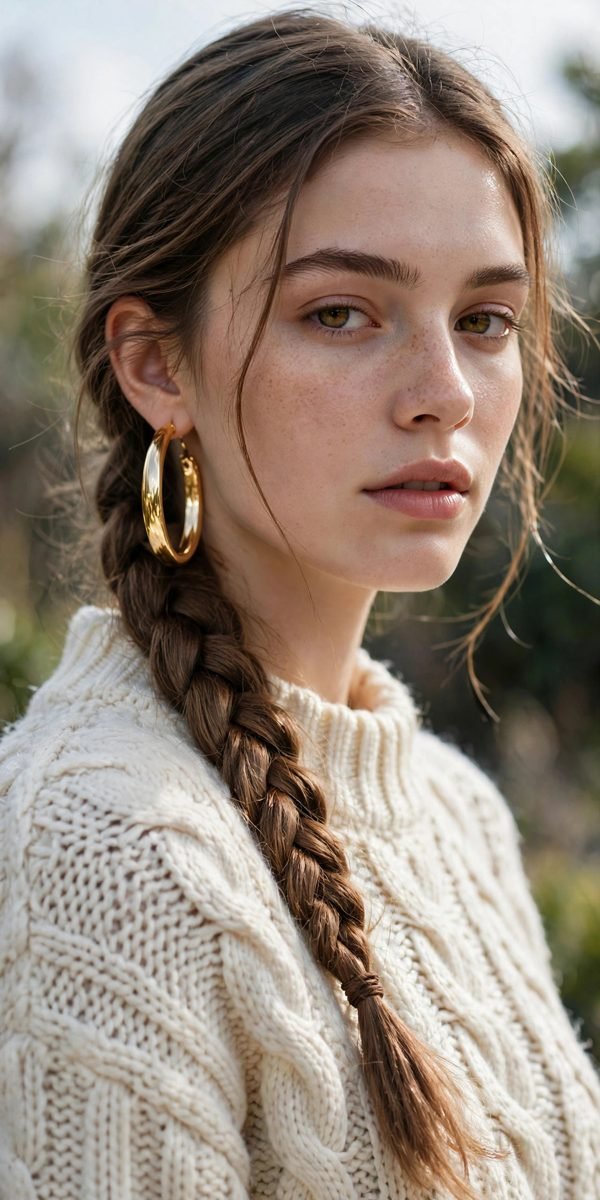
Some pairings just work: gold hoops and a braid are one of them. The earrings frame your face while the braid keeps everything tidy — together they turn a basic errands outfit into something that looks styled.
- Keep the braid chunky and textured rather than sleek.
- Medium hoops (around 30–40mm) hit the sweet spot — visible but not heavy.
- Tuck the braid behind one shoulder so the earring side stays clear.
- A little dry shampoo at the roots keeps the crown from going flat under a hat.
Wear it with a wool coat and sneakers and you’ll look like you tried, even though you absolutely did not.
If your hair is very fine, braid over a texturizing powder at the roots first — it builds the kind of grip that keeps a chunky braid from deflating by noon. And keep the braid slightly messy on purpose: perfectly neat plaits with hoops can read a little severe, while a softer finish feels modern.
6. The Polished Braided Crown
A braided crown sounds like wedding hair, but the everyday version is looser, lower, and far more wearable. Instead of wrapping the braid tightly around your whole head, braid two sections from each temple and pin them across the back of your head, letting the ends blend into the rest of your hair.
What makes it winter-perfect is how well it survives the elements. Scarves, collars, wind — nothing much disturbs a style that’s pinned flat against your head. It also keeps hair off your neck, which sounds minor until you’ve spent a day with damp ends sticking to a turtleneck. Finish with a light-hold spray, and if a few pieces escape by evening, that’s the look anyway.
Hide the braid ends by tucking them under the opposite braid and pinning — no elastic bump, no visible ends, just a seamless crown. If your hair is on the shorter side, two small braids pinned across the back still give the effect; the style is about the shape, not the length.

7. The Ten-Minute Outdoor Braid
Here’s the thing about winter: you’re going to be photographed outdoors — holiday markets, snowy sidewalks, that one friend who insists on golden-hour pictures. A simple textured braid is the most photogenic low-effort style you own, because it gives your hair shape and movement even in flat winter light.
Do it right before you leave so it’s fresh: a quick spritz of texturizing spray, a loose Dutch braid down the back or over the shoulder, and a gentle pancaking for fullness. It won’t frizz in the cold the way curls do, and when you take your beanie off, the braid still looks deliberate instead of demolished. Ten minutes, zero heat tools, endless compliments.
Cold wind is the enemy of a fresh braid, so finish with a flexible-hold hairspray — not the crunchy kind, just enough to seal the surface. If you’re heading somewhere photos will happen, bring the elastic and a couple of pins in your coat pocket; a thirty-second touch-up before pictures makes all the difference.

8. The Slicked-Back High Ponytail
Want to look instantly more polished without actually doing much? Slick your hair into a high ponytail and watch the whole outfit sharpen up. The severe, glossy finish is what makes it — this is not a gym ponytail.
- Brush hair up while your head is tilted back to keep the hairline smooth.
- A boar-bristle brush and a dab of gel or pomade tame every flyaway.
- Wrap a strand of hair around the elastic for a clean finish.
- Straighten the tail for maximum sleekness, or add a bend for softness.
It lifts your features, shows off earrings, and stays perfect under a coat collar. One style, endless polish.
A light pomade or edge-control gel along the hairline is what separates a sleek ponytail from a lumpy one — smooth it on with a soft toothbrush for precision. Position the pony at the crown’s highest point; anything lower reads casual, while up top gives that lifted, snatched effect.

9. The Grab-and-Go Low Ponytail
Some mornings you have exactly ninety seconds for your hair. Gather it low at the nape, secure, and go — but make those ninety seconds count. The difference between a sad ponytail and a chic one is all in the details: smooth the top with your palms and a touch of serum, position it low and slightly to one side, and let it sit over one shoulder.
💡 Quick Tip: Double up your elastic — two thin ones stacked hold better than one thick one and don’t leave a dent. For extra polish, wrap a small section of hair around the base and pin it underneath.
This is the style for school runs, grocery trips, and every ordinary Tuesday. It keeps hair contained under scarves and looks neat from every angle, which is more than most of us can say on a rushed morning.
For extra polish, run a flat iron over just the ponytail itself — smooth ends against a smooth base look intentional, while frizzy ends undo all your good work. And if your hair is layered, a few bobby pins at the nape keep shorter pieces from escaping by midday.

10. Big, Soft Curls With a Deep Side Part
Winter is curl season. The cold air actually helps curls hold longer, and big soft waves look incredible peeking out from under a coat. The deep side part is the key detail — it adds instant volume at the crown and a little old-Hollywood drama.
- Curl away from your face in large sections for soft, brushed-out waves.
- Let curls cool completely before touching them — this sets the shape.
- Brush through gently with a wide-tooth comb for that fluffy finish.
- A pea-sized drop of hair oil on the ends keeps them from looking dry.
Fair warning: this style and a knit beanie are not friends. Save the curls for days you’re going hat-free, or wear a loose beret tilted back instead.
A 1.25-inch curling iron is the sweet spot for this look — smaller barrels give ringlets, larger ones barely bend. Always curl away from your face on the front sections; it opens up your features instead of closing them in. And never skip heat protectant — winter hair is already stressed enough.
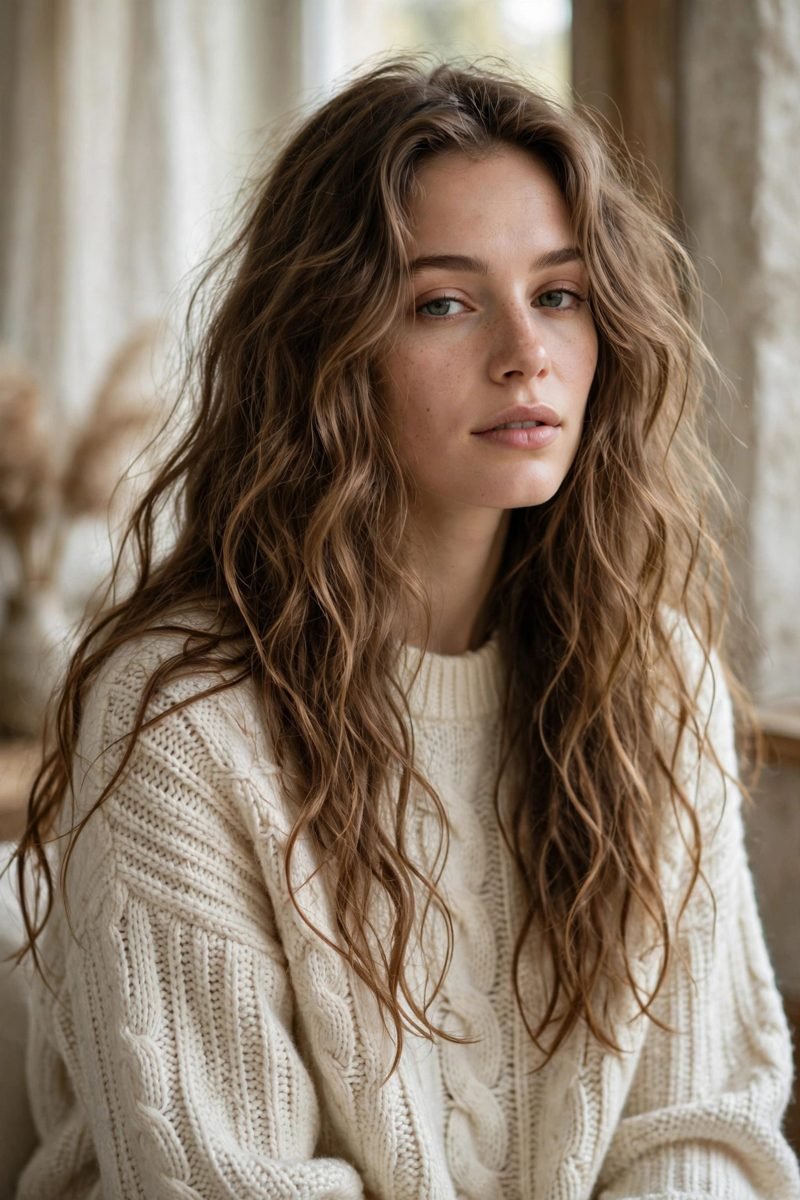
11. The Air-Dried, Do-Nothing Waves
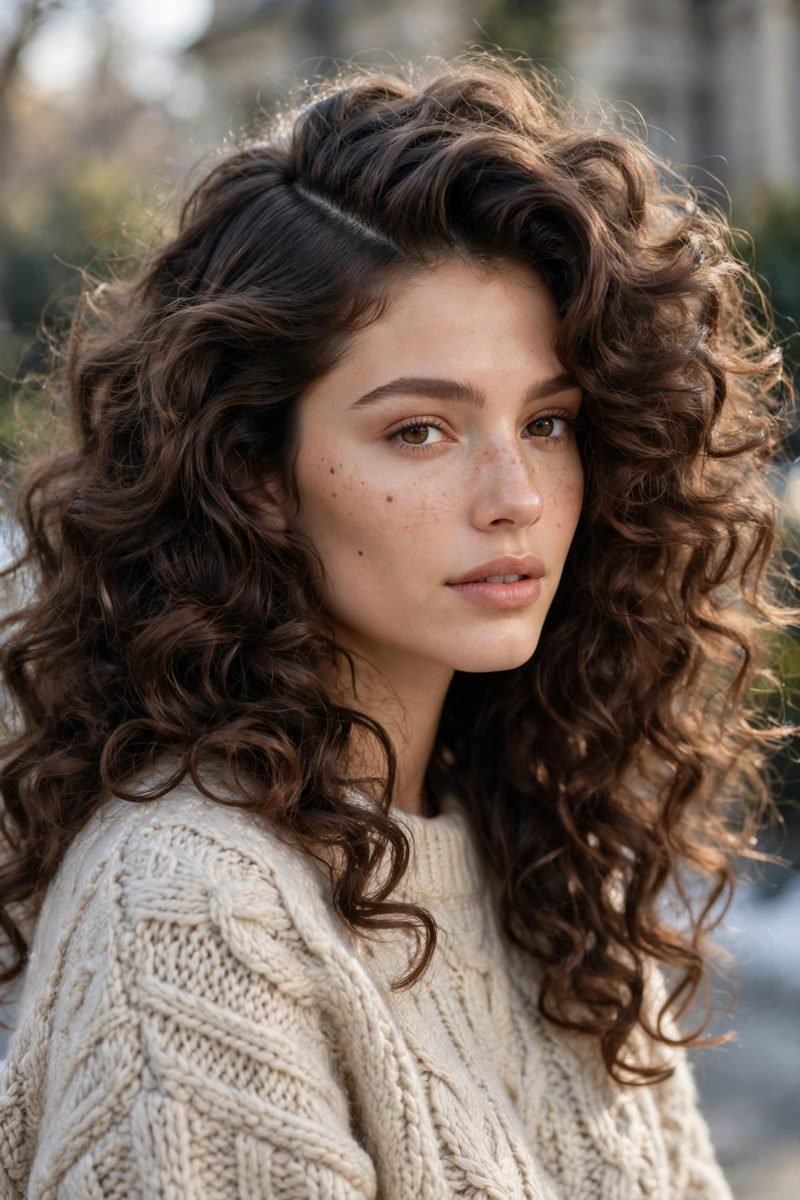
Remember when “wash and go” felt like giving up? It’s actually the most modern winter hairstyle on this list. Healthy, natural texture — waves, bends, a little frizz at the crown — reads confident and effortless in a way that over-styled hair never will.
The trick is in the wash, not the styling. Use a moisturizing shampoo and a rich conditioner, squeeze (don’t rub) with a microfiber towel, and scrunch in a curl cream or light mousse while hair is damp. Then genuinely leave it alone. Winter’s low humidity is kinder to air-drying than summer’s, so you’ll get soft definition without the puff. It’s the lowest-effort style here, and honestly one of the prettiest.
Try “plopping” for better definition: after applying product, pile your damp hair into a microfiber towel or old cotton t-shirt on top of your head for twenty minutes. It encourages your natural wave pattern without heat, and the results genuinely rival a diffuser.
12. The Textured Short Crop
Short hair in winter is wildly underrated. No static clinging to your coat, nothing to get caught in your scarf, and it dries in minutes. A textured crop or short bob with choppy ends looks sharp against a high collar and shows off statement earrings beautifully.
Styling is almost embarrassingly easy: a dab of matte texture paste, worked through dry hair with your fingertips, gives piece-y definition that lasts all day. Grow it out slightly between trims and the texture only gets better. If you’ve been thinking about going short, winter is genuinely the best season to do it — hats sit better on short hair, and you’ll never miss your long layers until spring.
The awkward grow-out phase is real, but texture paste is your best friend through it — it gives even in-between lengths intentional-looking piece-y-ness. And book trims every six to eight weeks to keep the shape; short cuts lose their edge fast when the silhouette goes fuzzy.

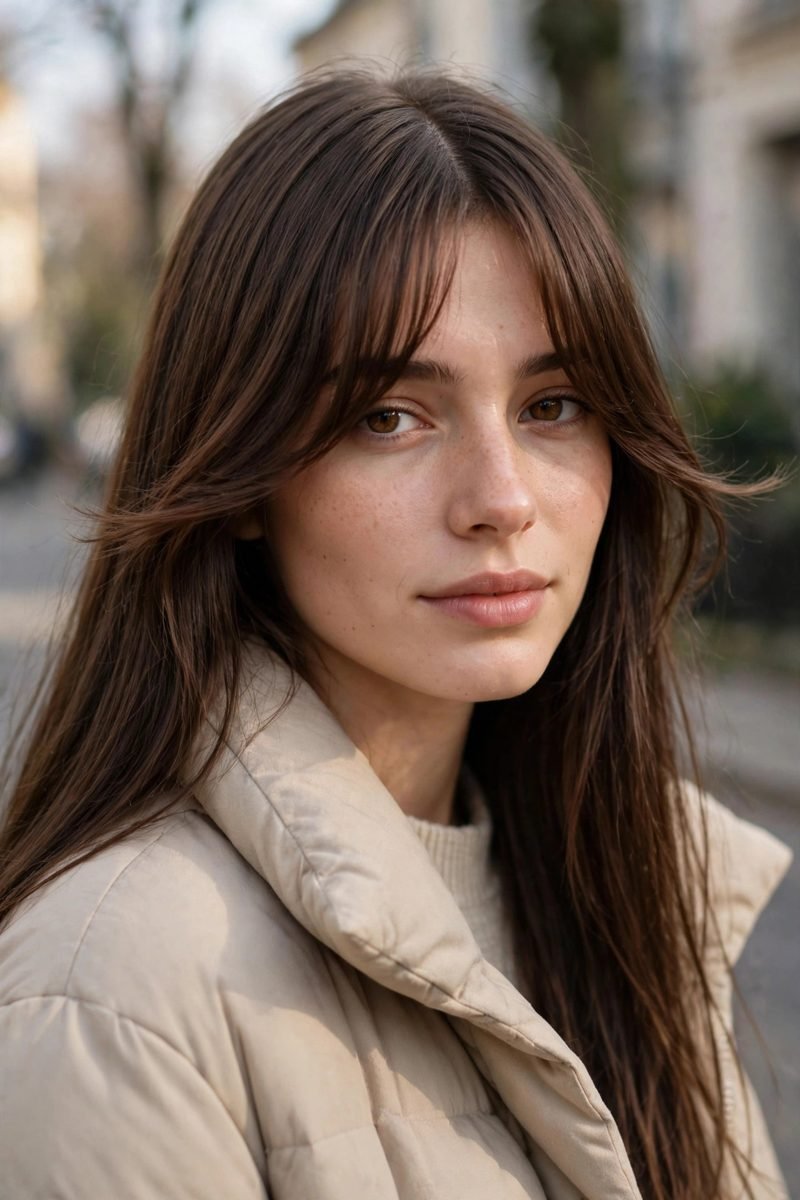
13. Curtain Bangs, Winter Edition
Curtain bangs are the rare trend that actually improves in winter. The face-framing pieces soften a heavy coat-and-scarf silhouette, and they grow out gracefully if you decide you’re over them by March.
⚠️ Watch Out: Bangs and beanies need a truce. If you wear a snug knit hat, your bangs will come out flat and separated. The fix: position the hat further back on your head, or switch to a looser beret or hood on bangs days. A quick blast with the dryer and a round brush revives them in under a minute.
Ask your stylist for bangs that start at the cheekbones and blend into face-framing layers — that length is the most forgiving and the easiest to style with just your fingers and a little heat.
A small round brush and your dryer are all you need for daily styling: wrap the bangs around the brush, blast with heat for ten seconds, then flick outward as you release. It creates that soft, face-framing curve with zero skill required — even on mornings when you’re barely awake.
14. Soft Waves and Barely-There Styling
Not every hairstyle needs a name or a technique. Sometimes the prettiest winter hair is just clean, soft, gently wavy hair worn down — the kind that moves when you walk and catches the light. The “style” here is really just good hair health: regular trims, a weekly mask, and heat protectant when you do style.
To get the wave without the work, braid damp hair loosely before bed and undo it in the morning. You’ll get soft, even bends with zero heat. It’s comfortable under a hood, it doesn’t fight with scarves, and it looks good in every single holiday photo. Understated? Yes. Boring? Never.
For the overnight braid trick, dampen hair lightly with a spray bottle before braiding — not soaking, just enough to hold the bend. Two loose braids give more uniform waves than one; undo them in the morning, shake gently, and finish with a drop of serum on the ends.

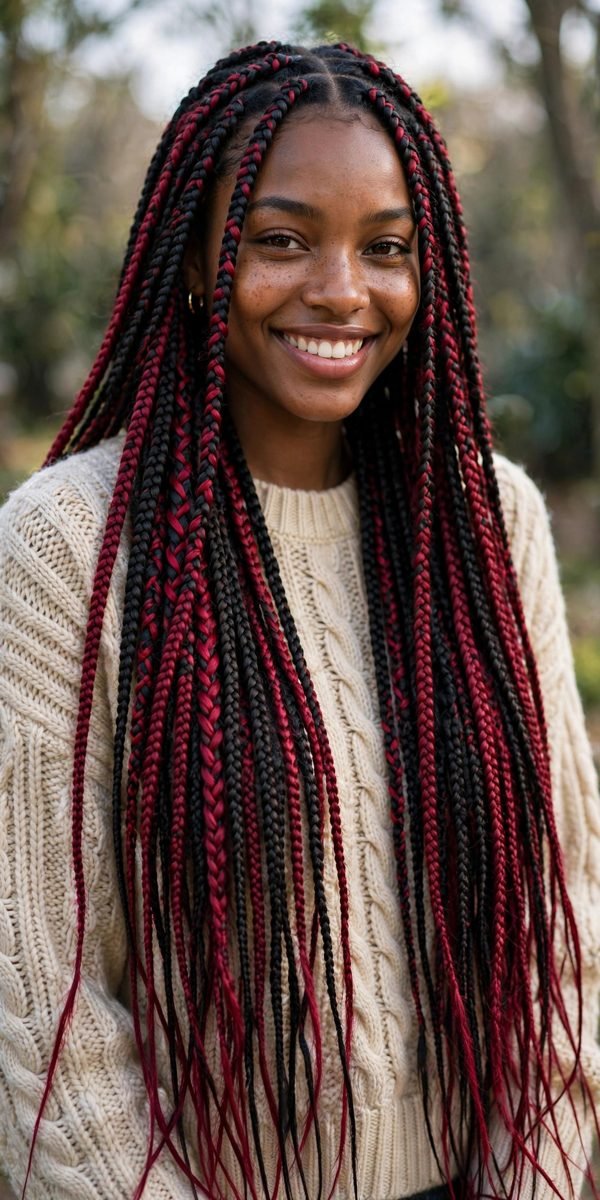
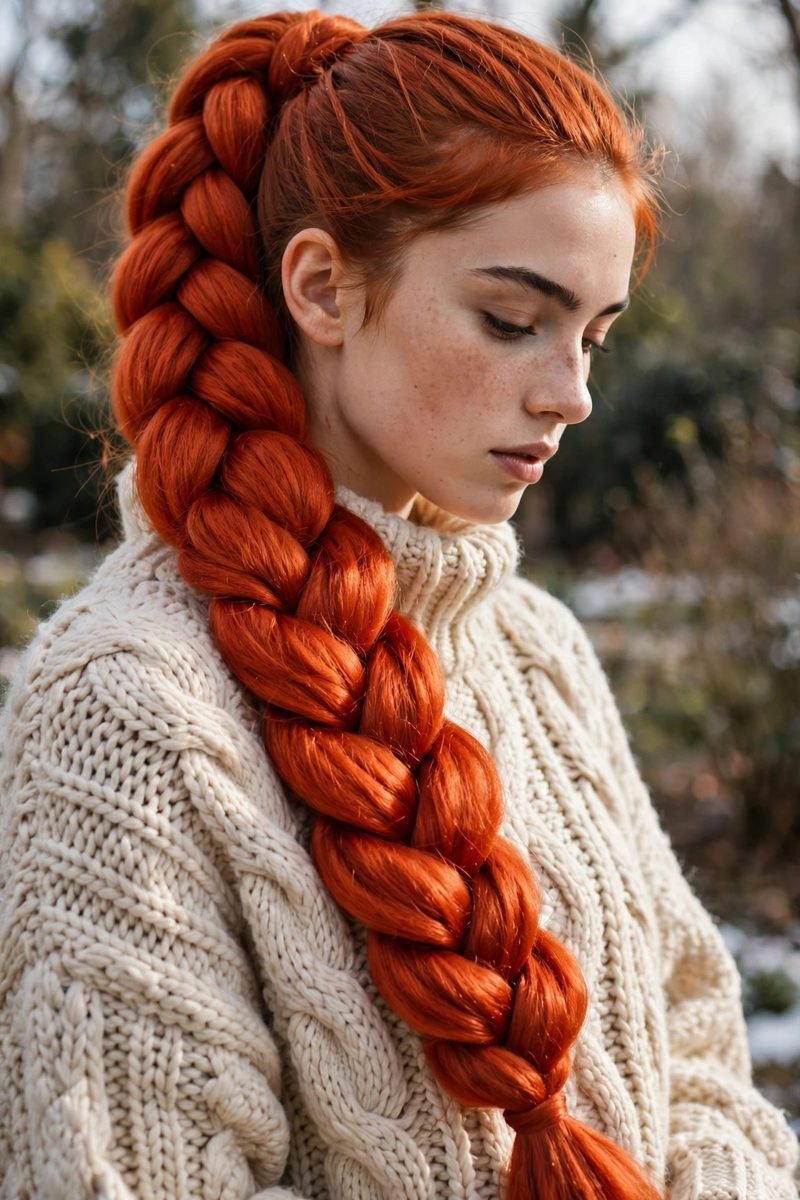
15. The Statement Braid in Bold Color
Why should your winter hair be as muted as your coat? A braid threaded with colored extensions, a bright scarf woven through, or even just vivid elastics turns a basic plait into the focal point of your whole look.
This works especially well if the rest of your outfit is simple — think all-black with one glorious braid doing all the talking. Temporary clip-in color streaks are perfect for commitment-phobes; they take thirty seconds to add and wash out whenever you’re done. It’s playful, it’s photogenic, and it’s a guaranteed conversation starter at every holiday gathering.
Clip-in color streaks are the commitment-free way to try this: they blend into a braid in seconds and pop right out before work on Monday. Place one or two near the front of the braid where they’ll catch the light — that’s where the color payoff is biggest.
16. Sleek, Straight, Middle-Parted
There’s something deeply satisfying about perfectly straight hair with a razor-sharp middle part. It’s minimal, it’s confident, and it goes with literally everything in a winter wardrobe — from a camel coat to an evening dress.
- Blow-dry with a paddle brush, pulling sections taut for maximum smoothness.
- Run a flat iron over just the top layer to lock in the sleek finish.
- A silicone serum on the ends adds shine without weighing hair down.
- Keep the part crisp with the tail of a rattail comb.
The whole look hinges on healthy ends, so this is your sign to book that trim you’ve been postponing.
Work in small sections with the flat iron — about an inch wide — and move slowly rather than cranking up the heat. One slow pass at 350°F beats three fast passes at 450°F, and your ends will thank you. A heat protectant spray beforehand is non-negotiable for this look.

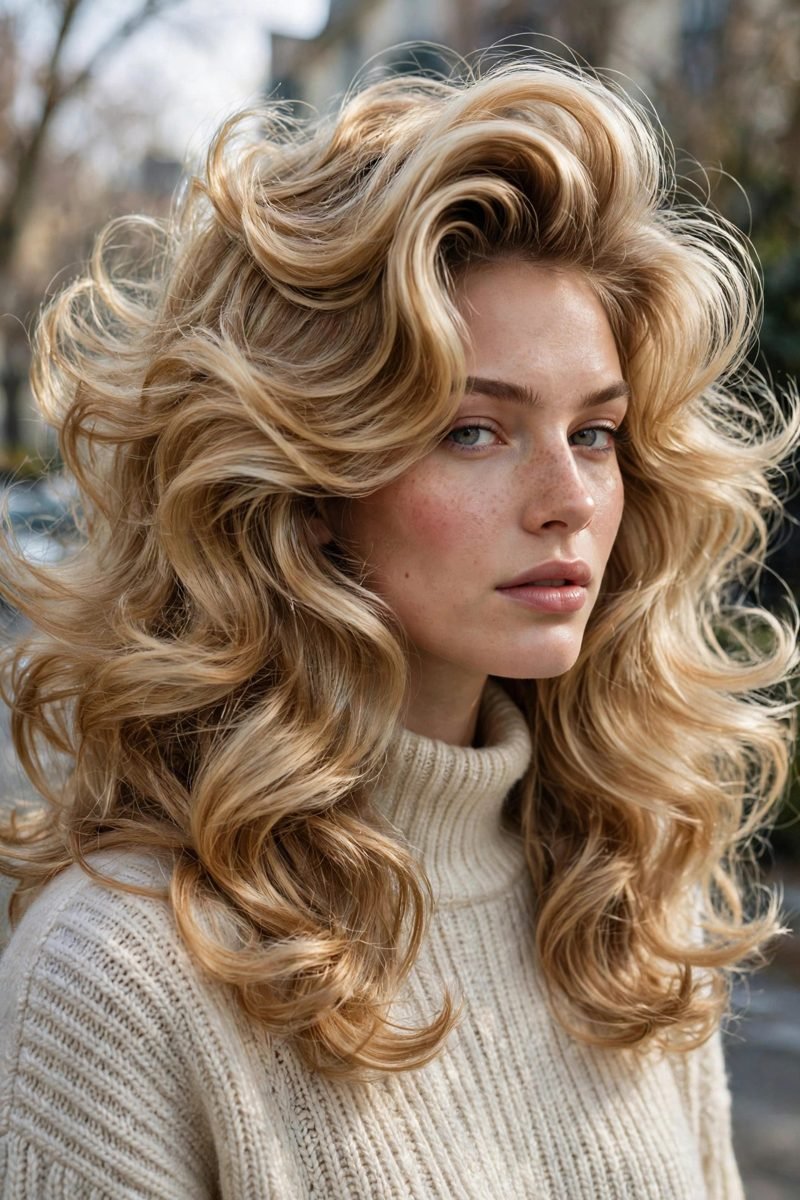
17. The Model-Off-Duty Blowout
You know the look — that bouncy, voluminous blowout that suggests the woman just left a very good salon, even though she did it herself with a round brush and a podcast. The secret is volume at the roots and flipped-under ends, nothing more complicated than that.
Flip your head upside down and rough-dry to about eighty percent, then finish with a large round brush, rolling sections away from your face. A cool shot from the dryer sets everything in place. The result is polished but not stiff, with the kind of movement that makes a simple sweater look expensive. It takes fifteen minutes once you’ve practiced — put on a good playlist and it’s practically self-care.
A two-inch round brush is the tool for this — smaller brushes create curl, but the big barrel gives that smooth, bouncy volume. Roll each section up and blast with the cool shot for five seconds before releasing; the cold air locks the shape in place far longer than heat alone.
18. Pin-Straight With Zero Frizz
Winter air is dry, indoor heating is drier, and your hair pays the price in frizz. The pin-straight look fights back with moisture and heat: a smoothing shampoo, a leave-in conditioner, and a flat iron run slowly through small sections.
The payoff is hair that looks like glass — smooth, reflective, and completely unbothered by the weather. Tuck it behind your ears to show off earrings, or let it fall straight past your shoulders over a turtleneck. Either way, the contrast between the severe, sleek hair and a chunky knit is chef’s kiss.
THE BOTTOM LINE: Frizz-free straight hair is 90% prep and 10% tools. Invest in the prep — a good mask once a week changes everything.
On humid or snowy days, a pea-sized amount of anti-frizz serum through the mid-lengths is your insurance policy. And sleep on a silk pillowcase — cotton creates friction that roughs up the cuticle overnight, while silk keeps that glass-like finish intact until morning.

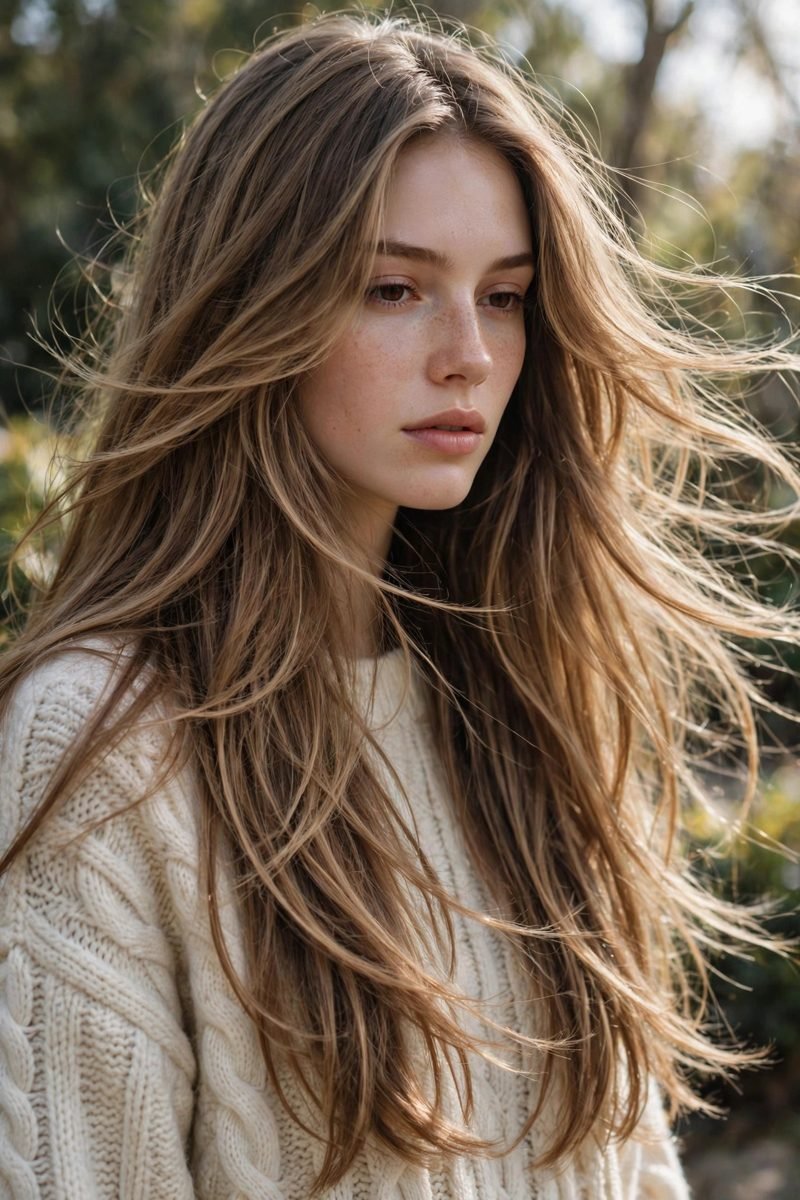
19. Long Layers That Move
If your hair is one length all over, winter will make it look heavier than it is. Long layers — starting around the collarbone and getting gradually shorter toward the ends — give hair movement, lightness, and shape without sacrificing length.
Styling couldn’t be simpler: the layers do the work for you. Air-dry for soft bends, or add a few loose curls through the mid-lengths for extra swing. They also grow out beautifully, so you’re not chained to the salon every six weeks. Ask your stylist to keep the shortest layer no higher than your chin for the most versatile, face-framing effect.
Style the layers, not just the length: curl the shorter face-framing pieces away from your face with a large barrel for that curtain effect, and leave the longer lengths mostly straight. The contrast between the curved front and sleek back is what makes layers look expensive.
20. Tiny Accent Braids
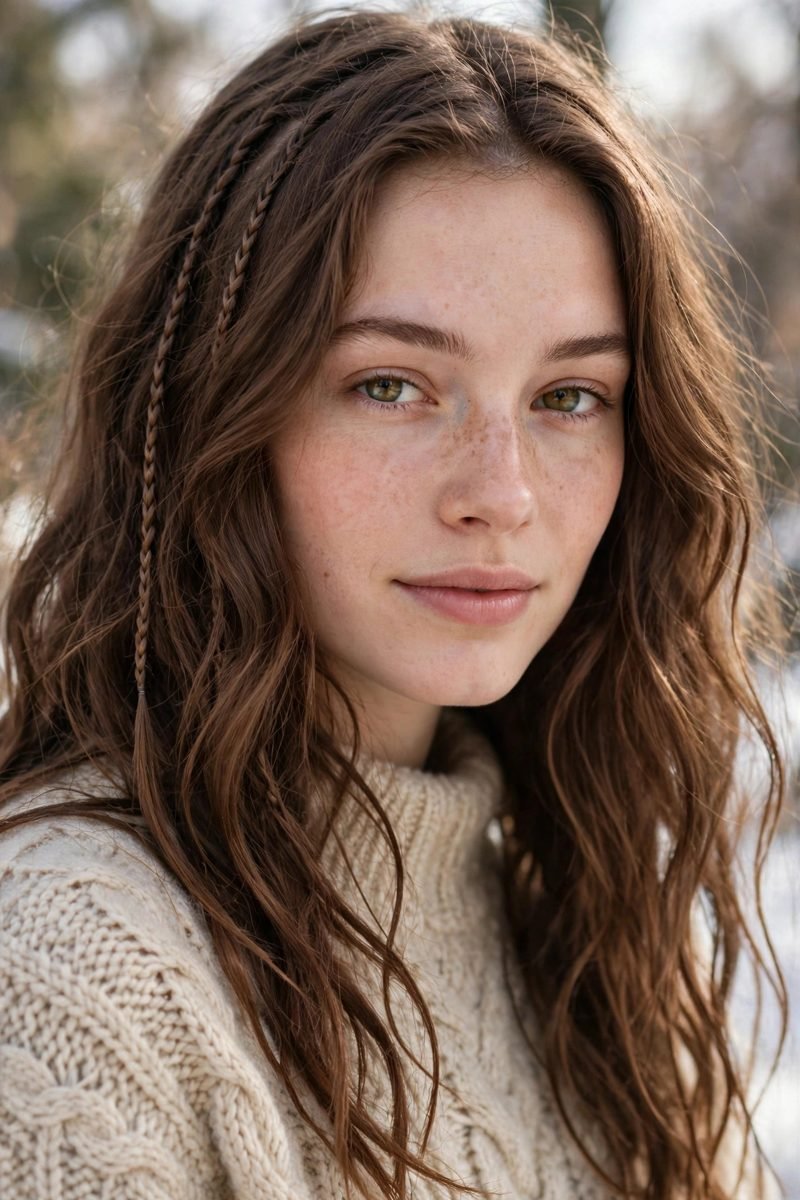
Can’t decide on a full hairstyle? Add two or three tiny braids and call it a day. Worn loose with the rest of your hair down, tucked behind an ear, or framing your face, micro-braids add just enough interest to make “I just brushed it” look like a choice.
They take about two minutes each — braid a thin section, secure with a tiny clear elastic, and tug gently for texture. They hold for days, survive hats and hoods without complaint, and look especially good with beads or small cuffs threaded on. It’s the smallest effort on this list with one of the biggest style payoffs.
Placement is everything with micro-braids: one tucked behind each ear reads polished, a couple scattered through loose hair reads bohemian, and a single braid at the temple reads edgy. Try threading a tiny gold cuff onto one — it’s the smallest detail with the biggest payoff.
CONCLUSION
Winter hair doesn’t have to be a battle. Pick two or three favorites from this list, keep them in your back pocket, and rotate through the season — your mornings (and your beanie) will thank you.
📌 Save this post to your hairstyles board on Pinterest so you have winter hair inspiration ready!