
20+ Simple Classy Winter Nails — Easy DIY Ideas 2026
Here’s the truth nobody tells you: the classiest winter manicures are usually the simplest ones. You don’t need a salon appointment or professional skills to get nails that look polished and festive — just the right shade, a steady hand, and a few clever tricks.
These 20 ideas are all genuinely doable at home, even if your nail art experience stops at “I can paint inside the lines.” Most take under 30 minutes, use polishes you probably already own, and still look like you spent way more effort than you did. Let’s get into it.
1. Two-Coat Nude Polish

The easiest classy manicure in existence is also one of the most elegant. Find a nude that closely matches your skin tone — not too pink, not too beige — and apply two thin, careful coats. The magic is in the prep: push back cuticles, file into a clean oval or squoval, and use a ridge-filling base coat so the color goes on like glass.
Nude polish is forgiving of tiny mistakes and grows out invisibly, making it the perfect low-maintenance winter choice. It lengthens the look of your fingers and goes with every outfit you own. Sometimes simple really is the whole point.
2. Sheer Pink French DIY

You don’t need a salon for a French manicure anymore — the DIY version is easier than you think. Here’s the beginner-friendly method:
- Base: One coat of sheer pink polish over the whole nail.
- Tips: Use French tip guide stickers (a few dollars online) for perfectly even white tips.
- Cleanup: A small brush dipped in remover fixes any wobbles instantly.
- Finish: Glossy top coat blends everything together seamlessly.
The result looks professional, lasts over a week with good top coat, and costs you almost nothing. Win, win, win.
3. Single Stripe Gold Line

I once spent an hour on elaborate nail art for a holiday party, and guess which manicure got all the compliments that season? A nude base with one single gold stripe down the center of each nail. Minimal effort, maximum elegance.
You can do this with gold striping tape (just press it on and seal with top coat) or a metallic gold striper polish if your hand is steady. Place the line vertically for a lengthening effect, or horizontally near the tip for a modern twist. It takes five extra minutes over a plain manicure and looks like abstract art.
4. Matte Top Coat Burgundy

Want to make any polish look instantly more expensive and editorial? Swipe on a matte top coat. Burgundy is the perfect candidate — the deep wine shade turns velvety and rich, like fabric. Two coats of any burgundy crème you own, one coat of matte topper, and you have a manicure that looks straight out of a fashion shoot. Matte top coats are inexpensive, work over any color, and completely change the vibe of polishes you already have. Keep a bottle in your kit and thank yourself all winter.
5. Dotting Tool Snowflakes

Snowflakes sound intimidating until you realize they’re just dots and lines. Paint your nails a deep winter shade — navy, forest green, or burgundy — then use a dotting tool (or the end of a bobby pin) to create simple snowflakes in white polish.
Start with one center dot, add six short lines radiating outward, then tiny dots at the ends. Imperfect is fine — real snowflakes are all unique anyway. One snowflake per ring finger is plenty; keep the rest of the nails solid. It is festive, handmade, and charming.
💡 Quick Tip: Let your base color dry completely before adding the snowflake, or the white will drag and smudge. Patience is the whole technique.
6. Glitter Accent Nail

The accent nail is the DIY lover’s best friend. Paint nine nails in a classy nude or soft neutral, then go full glitter on one ring finger. The contrast is what makes it work — the restraint everywhere else lets that one sparkly nail shine.
Choose a fine glitter rather than chunky for a more refined look, and gold or silver keeps it festive without going overboard. This takes zero artistic skill and about ten extra minutes. It is the manicure equivalent of wearing one statement ring.
7. Nude with White Tips

Think of this as the French manicure’s relaxed cousin. Instead of precise tip guides, you freehand soft white tips over a nude base — slightly imperfect is actually the charm here. The look is fresh, clean, and effortlessly chic.
- Technique: Rest your painting hand on a table and rotate the finger, not the brush.
- Brush: Use the polish brush wiped almost clean for thinner, more controlled tips.
- Shape: Works best on short to medium oval or squoval nails.
- Fix: Small mistakes disappear under a final sheer nude coat over everything.
That last trick — a sheer wash over the whole nail at the end — is what makes DIY French look salon-smooth.
8. French with Thin Gold Outline

What happens when you outline a French tip in gold? Pure magic, that’s what. Do your normal DIY French — sheer base, white tips — then trace the smile line with a thin gold striper. The metallic outline catches the light and elevates the entire manicure from classic to captivating.
The gold line also cleverly hides any wobble in your white tips, making this more forgiving than a standard French. It is the kind of detail that makes people ask which salon you went to. Your secret is safe with us.
9. Deep Green Solid Gloss

One bottle, two coats, done — deep green gloss is proof that a single perfect color needs no decoration. Forest or hunter green feels festive and rich, like a Christmas tree in the best way, but it is sophisticated enough to wear straight through February. The key is choosing a crème formula with great coverage and finishing with a glassy top coat. Dark greens can stain, so never skip the base coat. This is the manicure for busy weeks when you want to look put-together with minimal effort.
10. Grey Matte Minimal

Soft grey in a matte finish is the understated winter neutral you will reach for again and again. It is cooler than nude, softer than black, and looks incredibly modern on short nails. The application is dead simple: two coats of a medium grey crème, one matte top coat. Because grey is so neutral, tiny imperfections in your application are far less visible than with darker shades — very beginner-friendly. It pairs beautifully with silver jewelry and monochrome winter outfits.
💡 Quick Tip: Matte polish shows every fingerprint while wet. Let it dry fully before touching anything, and avoid hand cream for the first hour.
11. Tiny Pearl Accents

Pearl nail charms are the easiest “nail art” you’ll ever do, and they look incredibly luxe. Paint your nails any neutral shade — nude, blush, sheer pink — then place one tiny pearl near the cuticle of each nail (or just the ring fingers) while the polish is tacky. Seal with top coat.
- Tools: Tweezers and a dotting tool with a dab of top coat to pick up the pearl.
- Size: Smaller is classier — 1.5 to 2mm pearls look like dewdrops.
- Placement: Centered near the cuticle, or clustered as a tiny trio.
- Removal: They pop right off with regular remover and an orangewood stick.
Five minutes of work for a manicure that looks straight out of a bridal magazine.
12. Half-Moon Nude French

The half-moon manicure — a curved accent at the base of the nail — is vintage Hollywood glam made DIY-easy with reinforcement stickers. Paint your whole nail nude, let it dry, then place a round sticker (yes, the office-supply kind) over the base and paint the exposed area white, gold, or deep red. Peel off the sticker to reveal a perfect crescent.
Gold half-moons over nude are especially stunning for winter — festive, elegant, and surprisingly simple. The stickers do all the precision work for you.
13. White Snow Dot Gradient

Here’s a snowy effect anyone can create: paint your nails a winter blue or deep teal, then use a dotting tool to place white dots in a gradient — larger and denser near the tip, fading to tiny sparse dots toward the cuticle. It looks like falling snow captured mid-air.
The beauty of this design is that there’s no wrong way to do it. Dots are dots; placement is intuitive. Use two dot sizes (a large and small dotting tool, or a bobby pin and a toothpick) for the most natural gradient. Seal with glossy top coat and you’re done.
14. Clear Polish with Gold Flakes

For the ultimate “my nails but better” festive look, try clear or sheer polish with gold flakes suspended in it. Some brands sell gold-flake top coats ready to go — one or two coats over bare, well-shaped nails gives you subtle golden shimmer that catches the light beautifully.
This is perfect if your workplace frowns on bold color but you still want something special for the season. It is also the fastest manicure on this list: no base color decisions, no precision required. Just shape, flake, and shine.
15. Plum Solid Coffin

Plum is winter’s most flattering dark shade — rich, warm, and dramatic without being harsh. On a coffin shape (easily done with press-ons if your natural nails are short), it looks expensive and festive. The DIY route: two careful coats of a plum crème, glossy top coat, done.
Dark shades demand neat cuticles, so push them back and moisturize before you start. The payoff is a manicure that looks salon-done for the cost of one bottle of polish.
💡 Quick Tip: Wrap the polish slightly over the free edge of each nail (“capping”) — it dramatically extends wear time on dark colors.
16. French Ombré Sponge DIY

The baby-boomer French ombré — pink fading into white — looks like an expensive salon technique, but a makeup sponge does all the work. Paint your nails sheer pink, then dab white polish onto a damp makeup sponge and bounce it gently over the tips, building the fade gradually.
- Sponge: A wedge makeup sponge, slightly damp, gives the smoothest blend.
- Layers: Three to four light dabs beat one heavy one every time.
- Cleanup: Liquid latex around nails (or just remover after) handles the mess.
- Finish: Glossy top coat melts the gradient together perfectly.
It is soft, bridal, and timeless — and nobody will believe you did it at your kitchen table.
17. Navy Solid with Top Coat

Navy blue is the dark shade for people who find black too harsh. Rich, deep, and endlessly classy, it looks like the winter night sky in a glossy finish. Application is straightforward — two coats of a navy crème, one glossy top coat — but take your time with cleanup since dark polish shows every slip. A small angled brush dipped in remover gives you those crisp salon edges. Navy pairs gorgeously with gold jewelry and camel coats, making it a true winter wardrobe staple.
18. Sweater-Texture White Matte

Have you seen those cozy cable-knit nail designs and assumed they were salon-only? They’re not. Paint your nails white or cream, then use the same polish (slightly thickened, or a 3D nail art gel) to draw simple knit lines — vertical stripes with tiny chevrons — and finish with a matte top coat for that soft woolen look.
Keep the pattern to one or two accent nails and leave the rest solid; full-set texture can look busy. The matte finish is what sells the “sweater” illusion. It is adorable, seasonal, and such a conversation starter.
19. Cocoa Brown Gloss Simple

Cocoa brown is the cozy neutral of the season — warm, rich, and flattering on every skin tone. Two coats of a chocolate crème plus a glossy top coat gives you a manicure that looks like melted chocolate and pairs with everything from cream knits to black leather. Brown polish is also wonderfully forgiving: it doesn’t show chips as obviously as black or red, and it grows out gracefully. If you only buy one new polish this winter, make it this shade.
20. Silver Chrome Press-On DIY
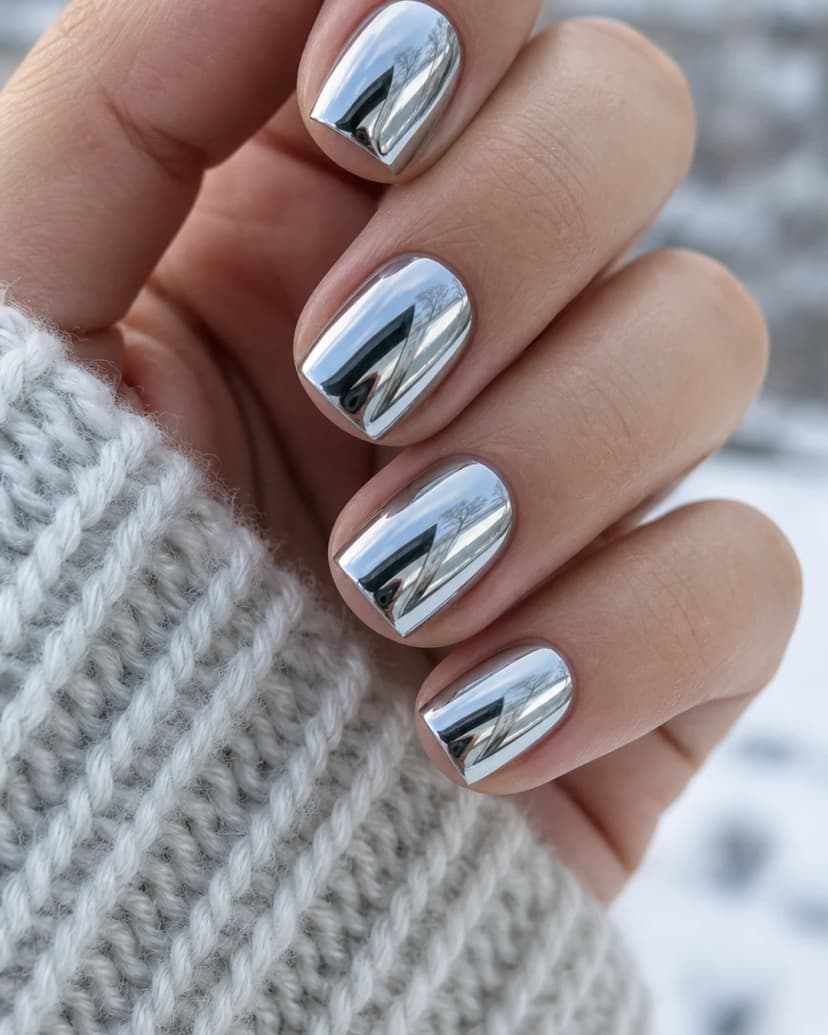
Let’s be honest: sometimes the smartest DIY is knowing when to use press-ons. Silver chrome press-on nails give you a flawless mirror finish in ten minutes flat — no powder, no UV lamp, no skill required. Modern press-ons look remarkably real, last one to two weeks with proper prep, and cost a fraction of a salon chrome manicure.
- Prep: Buff, dehydrate with alcohol, and size every nail before gluing.
- Glue: A thin layer on both nail and press-on holds best.
- Shape: File the free edge gently to blend with your natural nail line.
- Removal: Soak in warm soapy water — never pry them off.
For New Year’s Eve or any big winter event, this is the highest-impact, lowest-effort option on the list.
💡 Quick Tip: Keep the leftover press-ons — with nail glue tabs instead of liquid glue, you can reuse them for your next event.
CONCLUSION
Beautiful winter nails don’t require a salon budget — just a little inspiration and an evening at home. Try one of these simple designs this weekend and enjoy the compliments all week long. 📌 Save this post to your nails board on Pinterest so you always have classy winter inspiration!