
20+ Simple Winter Nails 2026 — Easy DIY Ideas 2026
You do not need a salon appointment to have gorgeous winter nails. Some of the prettiest seasonal designs are also the simplest, and you can absolutely recreate them at your kitchen table with a few basic polishes.
This collection is all about easy DIY winter nail ideas that look polished but take minimal skill. Think simple dots, stickers, one-coat wonders, and clever little tricks that deliver maximum festive impact with minimum effort.
So clear a little space, put on your favorite holiday playlist, and let’s give your nails the winter treatment they deserve.
1. Single Snowflake Accent Nail

Here is the easiest festive upgrade in existence: paint all your nails in a deep winter shade like navy or burgundy, then add one single snowflake to each ring finger. That is it. One nail, one snowflake, instant holiday magic.
You can paint the snowflake with a toothpick dipped in white polish, six tiny lines crossing in the center, or use a snowflake nail sticker for a flawless result in seconds. The single accent keeps the look sophisticated rather than busy, and the whole manicure takes under twenty minutes including drying time.
This is the perfect starter design if you are new to nail art. Low risk, high reward, and endlessly wearable through the entire season.
2. Milky White With Silver Micro-Glitter

Want nails that look like fresh snow? This two-step design is almost embarrassingly simple. Apply two coats of a milky white sheer polish, then finish with one coat of fine silver micro-glitter polish. The glitter catches light like ice crystals and elevates the plain white into something truly wintry.
- The Technique: Sheer white base plus one glitter topper coat, no art skills required.
- Best Shape: Any shape works, though oval keeps the snowy vibe soft.
- Why It Works: The sheer base looks natural while the glitter adds festive sparkle.
- Pro Tip: Micro-glitter removes far more easily than chunky glitter, so this is low-commitment glam.
3. Two-Tone Red And Nude French

The French manicure gets a holiday makeover with the simplest swap imaginable: red tips instead of white. Paint your nails in a sheer nude base, then add cherry red tips using the edge of the brush or a French tip guide sticker. The result is festive, flattering, and takes about fifteen minutes.
💡 Quick Tip: French tip guide stickers from the drugstore make this foolproof. Stick them on, paint the tips, peel off while the polish is still slightly wet for the cleanest line.
This design works for every occasion from office holiday parties to Christmas dinner. It is proof that sometimes the smallest change makes the biggest seasonal statement.
4. Dotted Snowfall Nail Art

Can you make dots? Then you can make this design. Start with a midnight blue or deep teal base, then use the rounded end of a bobby pin dipped in white polish to dot falling snow across each nail. Vary the dot sizes, tiny, medium, and a few larger ones, for a natural snowfall effect.
The beauty of this design is that imperfection looks intentional. Snow does not fall in perfect patterns, so your slightly uneven dots actually look more realistic. Add a glossy top coat and you have a winter wonderland that took ten minutes of actual effort.
5. Frosted Blue Solid Color

- The Technique: Two coats of a dusty powder-blue crème, finished with a matte top coat for the frosted effect.
- Best Shape: Short square or squoval, the clean shape matches the minimal vibe.
- Why It Works: One polish, zero art, yet the cool blue shade screams winter.
- Pro Tip: Matte top coat transforms any ordinary blue into a frosty winter shade instantly.
Sometimes the simplest idea is the best one. This single-color manicure looks intentional and chic, especially against cozy gray sweaters and denim. It is the winter equivalent of a perfect white t-shirt, effortless and always right.
6. Tiny Gold Star Stickers
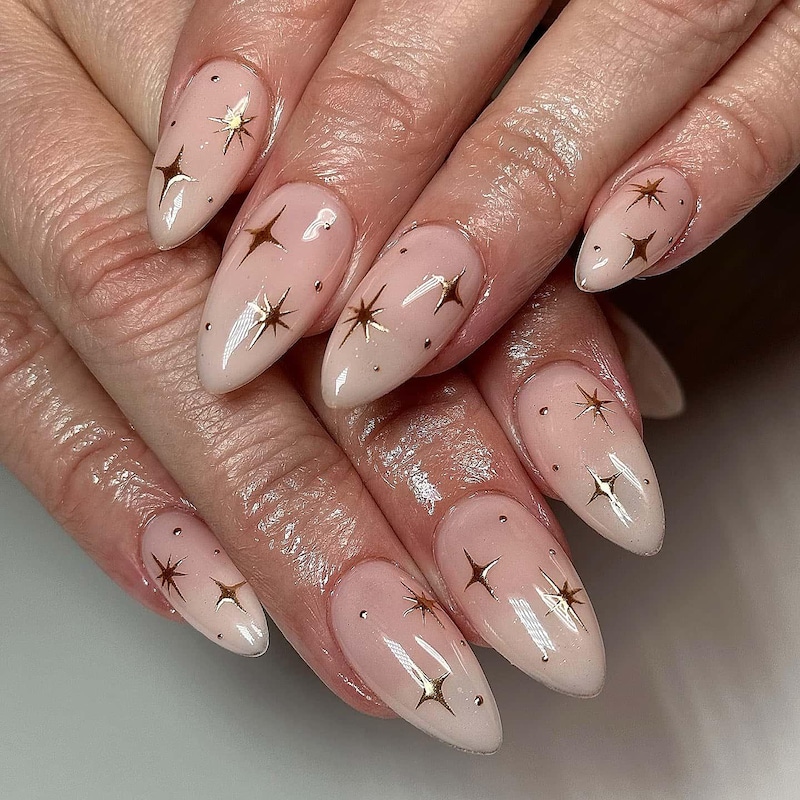
Nail stickers are the DIY girl’s secret weapon, and tiny gold stars are the easiest win of all. Paint your nails in any nude or neutral shade, then press one small gold star sticker near the cuticle of each nail. Seal with top coat and you are done.
📌 Good To Know: The top coat is non-negotiable with stickers. Without it, they peel within a day. With two layers of top coat sealing the edges, they last a full week.
This design looks delicate and expensive, takes five minutes, and works over any base color you already have on. Keep a sheet of star stickers in your drawer and you will never have boring nails in December again.
7. Matte Gray With One Gem
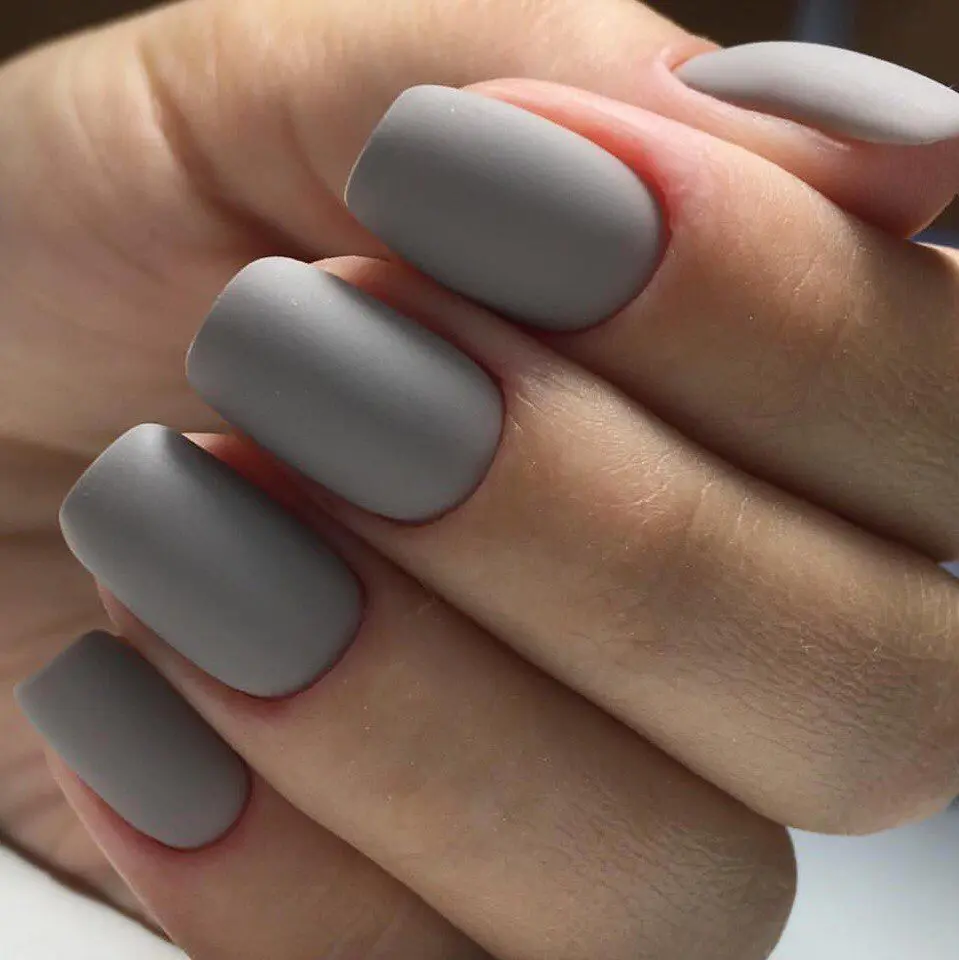
Gray is winter’s most underrated nail color, cool, modern, and endlessly chic. Paint all nails in a medium dove-gray crème and apply a matte top coat. Then place a single tiny crystal gem at the base of each ring finger using a dot of top coat as glue.
The single gem is the whole design, and that restraint is what makes it elegant. It catches light when you gesture and adds just enough sparkle for the season without any actual nail art. This is minimalism done right.
💡 Quick Tip: Use tweezers to place the gem precisely, and press it into wet top coat rather than dry polish so it sits flat and lasts longer.
8. Classic Nude With White Tips
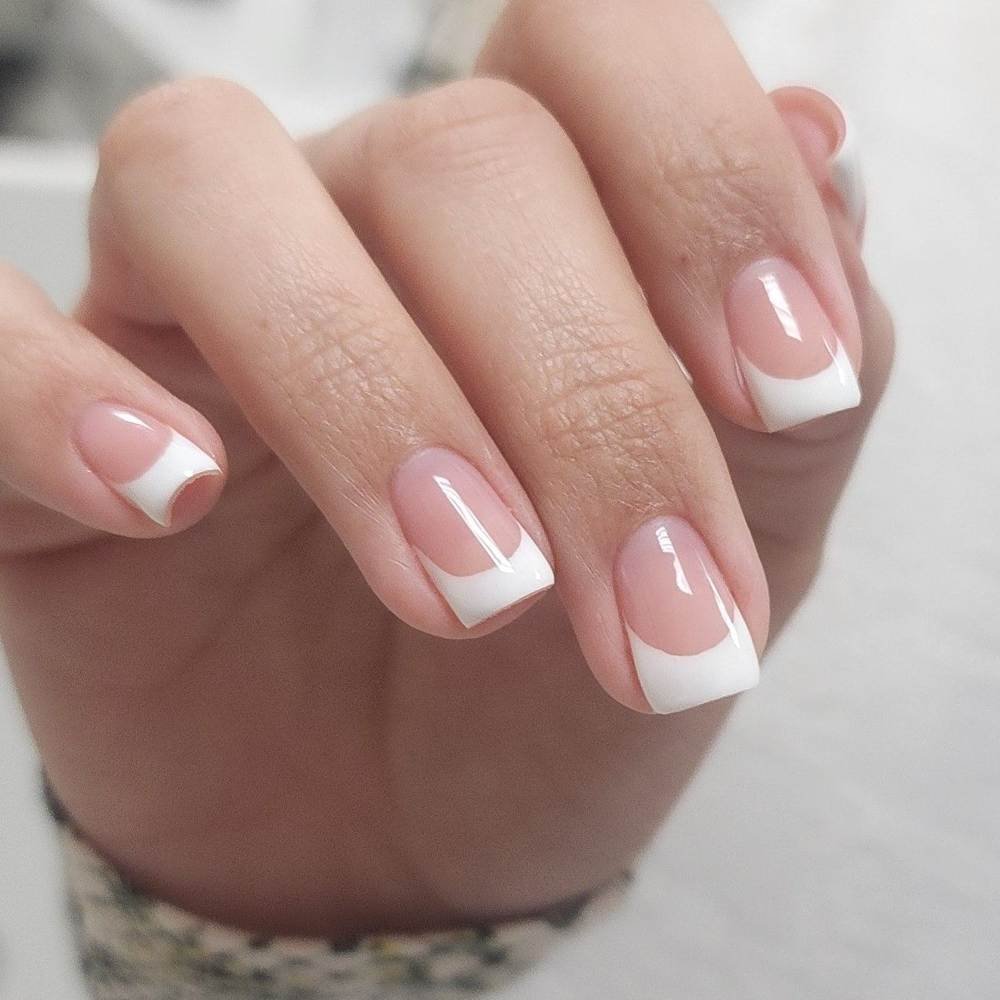
The classic French manicure never goes out of style, and winter is its natural habitat. A sheer pink-nude base with crisp white tips looks clean, polished, and quietly festive, especially when everything around you is decorated and glittery.
For the easiest at-home version, use the rubber-band trick: wrap a small rubber band around each fingertip to create a guide line, paint the tips white, and remove the band. Or simply embrace the modern micro-French, a super-thin white line along the edge that is much more forgiving to paint freehand.
9. Deep Green One-Coat Wonder

Some polishes are so pigmented that one coat does the job, and a rich forest or pine green is the ultimate winter one-coat wonder. Find a highly pigmented formula, apply one careful coat, add top coat, and walk out the door with a perfect festive manicure in under ten minutes.
- The Technique: One thick, even coat of pigmented green, no art needed.
- Best Shape: Short and neat, let the rich color be the star.
- Why It Works: Deep green is inherently Christmassy without any decoration.
- Pro Tip: Dark greens show every imperfection, so push back cuticles and use a ridge-filling base for a smooth finish.
10. White Polka Dots On Navy
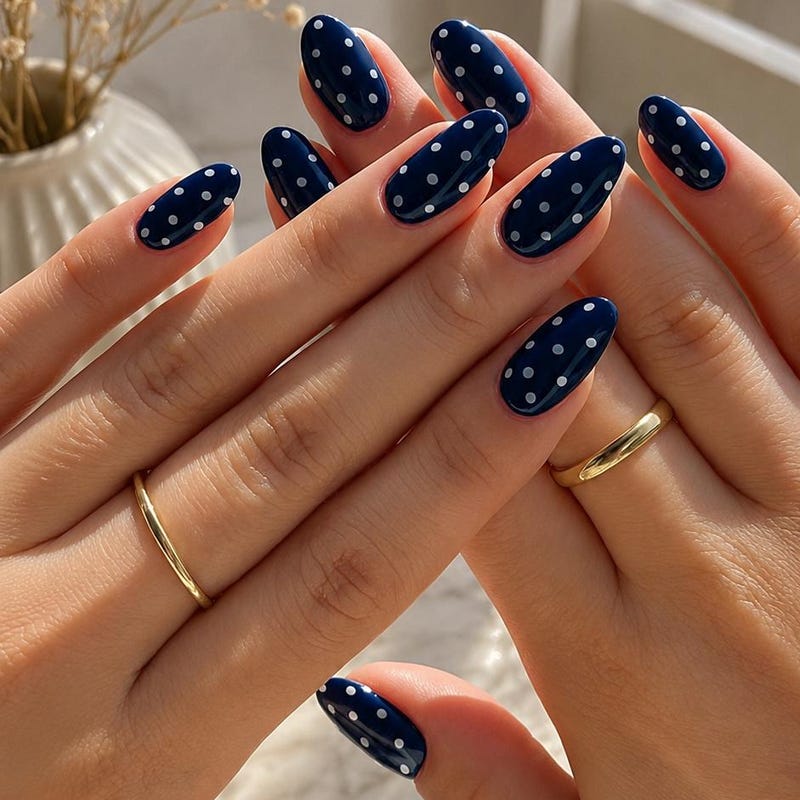
Polka dots are the friendliest nail art in the world, and in white on navy they become instant winter charm. Paint a deep navy base, then dot white polish in a scattered pattern using a dotting tool or the end of a pencil. Cluster a few dots near the tips like snow gathering on branches.
This design has a sweet retro feel that works beautifully for casual holiday gatherings. It is also incredibly forgiving, since dots do not need to be perfect to look adorable. Kids love this one too, making it a fun design to do together.
⚠️ Watch Out: Let the navy base dry completely before dotting, at least twenty minutes. Dotting onto tacky polish drags the base color and ruins the crisp white dots.
11. Simple Red Glitter Accent

Here is a formula that never fails: paint four nails in a classic red crème and one accent nail in red glitter. That single sparkly nail transforms a basic manicure into a party-ready one, and you only needed two polishes to do it.
💡 Quick Tip: Put the glitter on your ring fingers for a balanced look, or on your thumbs if you want the sparkle visible when you hold your phone.
The contrast between the smooth crème and the textured glitter adds visual interest without any art skills. This is the design you do the night before a holiday party when you want to look festive with zero stress.
12. Icy Lilac Chrome Powder

Chrome powder sounds fancy, but the DIY version is surprisingly doable. Apply a pale lilac gel polish, cure it, rub chrome powder over the tacky layer with an eyeshadow applicator, and seal with top coat. The result is a frosty metallic finish that looks straight out of a salon.
- The Technique: Lilac base plus loose chrome powder burnished on top.
- Best Shape: Almond or oval, the curved surface shows off the metallic shift.
- Why It Works: Chrome instantly makes any color look expensive and wintery.
- Pro Tip: Buy an inexpensive chrome powder kit online, one jar lasts for dozens of manicures.
13. Minimalist Black Bow Outline
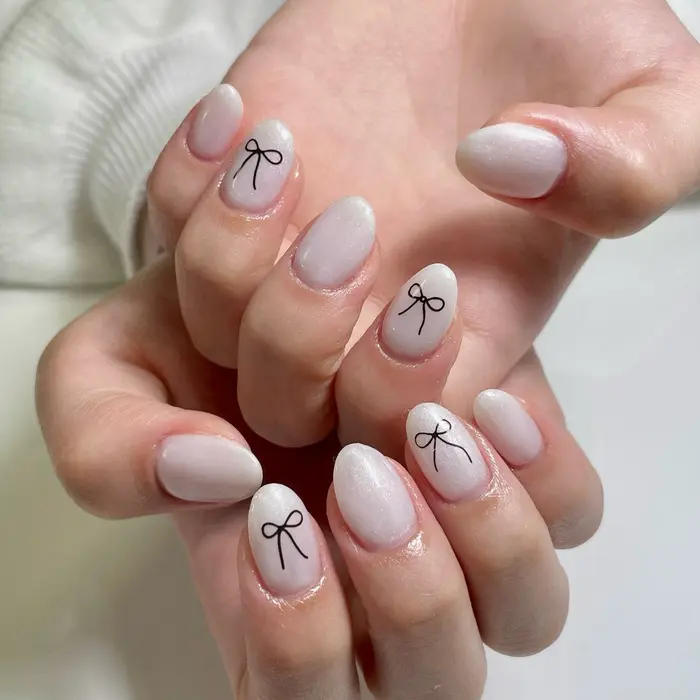
A simple black outline of a bow on a nude nail is the definition of chic minimalism. Using a thin liner brush, draw two small loops and two ribbon tails on your ring fingers. The line-art style means wobbly lines actually add charm, so do not stress about perfection.
This design feels very fashion-forward, like something you would see on a runway rather than a Christmas card. It pairs beautifully with black winter outfits and gold jewelry. Understated, elegant, and quietly festive.
14. Baby Blue Solid Shine

Sometimes you just want a pretty color and nothing else. A glossy baby blue crème is fresh, cheerful, and perfectly wintery, like a clear December sky. Two coats, a shiny top coat, and you are done in fifteen minutes flat.
📌 Good To Know: Light blues can look streaky, so apply thin coats and let each one dry fully. Three thin coats beat two thick ones every time for pale shades.
This is a wonderful everyday winter shade that transitions seamlessly from work to weekend. Simple, sweet, and seasonally spot-on.
15. Glittery Top Coat Over Nude

Already have a nude manicure you love? One coat of glitter topper transforms it into a winter design instantly. Brush a clear polish loaded with fine holographic glitter over your existing nude nails, and suddenly you have festive sparkle with zero base work.
This is the ultimate lazy-girl holiday hack. Keep a glitter topper in your bag and you can upgrade any manicure in two minutes flat, perfect for last-minute party invitations. The holographic particles flash rainbow in the light, giving you maximum glamour for minimum effort.
💡 Quick Tip: One coat of topper gives subtle shimmer, two coats give full sparkle. You control the intensity.
16. One-Stroke White Branches

- The Technique: With a liner brush, paint one curved branch per nail and add tiny side twigs. That is the entire design.
- Best Shape: Any, though longer nails give branches more room.
- Why It Works: Bare winter branches are inherently seasonal and beautifully minimal.
- Pro Tip: Practice on paper first. Five minutes of practice gives you confident, fluid strokes.
Painted over a deep plum or forest green base, white branches look like frost-covered trees against a winter night. It is artistic, elegant, and far easier than it looks. One continuous stroke per branch keeps the design fluid and natural.
17. Rose Gold Foil Tips
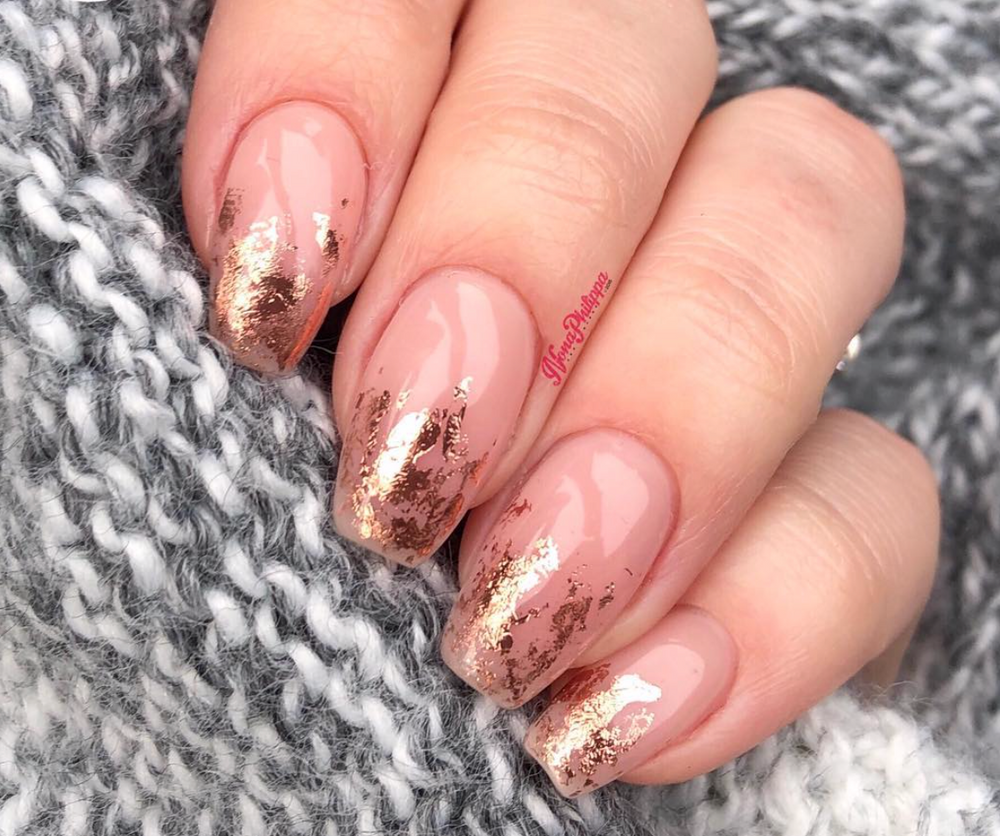
Foil tips are the easiest way to fake a salon-level design. Paint your nails in a soft nude or blush base, then press small pieces of rose gold foil along the tips while the top coat is still tacky. The irregular edges of the foil create a gorgeous textured line that looks intentional and luxe.
No two nails will match exactly, and that is the point. The organic, imperfect foil edge is what makes this look modern. It is festive, feminine, and takes about twenty minutes from start to finish.
18. Soft Pink Winter Blush
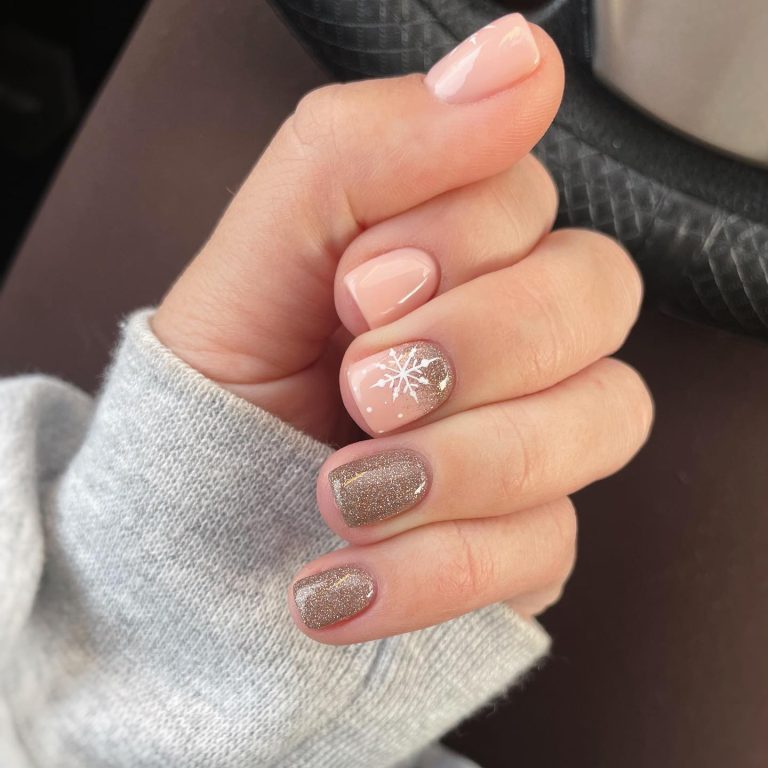
Not everyone wants bold holiday nails, and this soft pink is for you. A sheer rosy polish with a hint of shimmer gives your nails a healthy winter blush, like cheeks pinked by cold air. It is subtle, pretty, and goes with absolutely everything.
📌 Good To Know: Sheer pinks are the most forgiving polish to apply at home. Streaks and uneven edges barely show, making this the perfect shade for beginners or rushed mornings.
Wear it glossy for a fresh look or add a matte top coat for something more modern. Either way, this is winter elegance in its simplest form.
19. Midnight Navy Solid

Midnight navy is the little black dress of winter nails. Dark, glossy, and endlessly sophisticated, it works for every occasion and flatters every skin tone. Two coats of a rich navy crème plus a high-shine top coat is all it takes.
💡 Quick Tip: Navy looks most luxurious with a glass-like shine, so do not skip the top coat. Refresh it mid-week to keep that wet-look gloss going strong.
This shade hides chips well, grows out gracefully, and pairs with both silver and gold jewelry. If you want one winter polish that does everything, this is it.
20. Easy Ombré Sponge Fade

Ombré looks advanced but the sponge method makes it beginner-friendly. Paint your nails in the lighter of your two winter shades, then sponge the darker shade onto the tips using a makeup sponge. Dab, do not drag, and build the color in thin layers.
- The Technique: Base color plus sponged tip color, cleaned up with a small brush dipped in remover.
- Best Shape: Almond or coffin, length shows off the gradient.
- Why It Works: The fade looks professionally airbrushed with drugstore tools.
- Pro Tip: Apply liquid latex around your nails first for mess-free cleanup.
Try deep burgundy fading into black, or navy melting into silver. The gradient does all the visual work, and you get salon-level results at home.
CONCLUSION
Beautiful winter nails do not require professional skills or expensive salon visits. As these twenty ideas prove, a steady hand, a few basic tools, and a little creativity are all you need. Pick the design that speaks to you, pour something warm to drink, and enjoy a cozy DIY manicure session tonight.
📌 Save this post to your winter nails board on Pinterest so you have festive nail inspiration ready!