
22+ Cute Christmas Nails for Short Nails 2026
Short nails deserve just as much Christmas magic as long ones — maybe more, because every design has to be clever about the space. The good news? Some of the cutest festive looks actually work better on shorter lengths, where small details shine.
This list is 22 Christmas designs made specifically for short nails: scaled-down art, smart placement, and color tricks that make short nails look intentional and adorable. No awkward cramped designs here — just festive perfection sized right, plus tips to make every design flatter your nail shape.
1. Micro Santa Hats

Big Santa hats need room; micro Santa hats were made for short nails. On a cherry-red base, paint one tiny white-trimmed hat near the tip of your ring finger nails — small enough to fit comfortably with space to spare.
Scale is everything on short nails. Keep the hat to the top third of the nail and let the red base breathe around it. A fine detail brush is your best friend here. The result is somehow even cuter than the full-size version — like a miniature everything, it just hits different.
💡 Quick Tip: On very short nails, do the hat on just one nail per hand. Restraint reads as chic; crowding reads as cluttered.
Short nails actually make detail work easier in one surprising way: less surface means less polish to control, so your lines stay cleaner. And because the design is small, touch-ups take seconds — keep the white and red handy through party season for instant fixes.
2. Tiny Reindeer Faces

Reindeer faces shrink down beautifully. A warm brown base on short squoval nails, with two dot eyes, a red dot nose, and the simplest two-stroke antlers on your accent nails.
- Keep faces to one or two nails — let the brown shine elsewhere.
- Dotting tools in the smallest size keep features proportional.
- Skip the antlers on ultra-short nails; eyes + red nose still reads as reindeer.
- Matte top coat makes this look like a cozy cartoon.
The charm here is how the small scale makes the faces look extra sweet. Short nails turn every design into a miniature, and miniatures are scientifically cuter. That’s just facts.
If freehand antlers feel intimidating at this scale, skip them entirely — two dot eyes and a red nose on brown still reads unmistakably as reindeer. Knowing what to leave out is the real short-nail superpower.
Brown bases are surprisingly flattering — warm chocolates make hands look elegant and polished even before the reindeer faces go on. The base color earns its place.
3. Single Snowflake Statement

One snowflake. One nail. Maximum impact. On short nails, a single well-placed snowflake per hand beats a flurry every time — there’s simply not room for more without it looking busy.
Choose a deep base — navy, forest, burgundy — and paint or stamp one crisp white snowflake on each ring finger. Center it slightly toward the tip for the most balanced composition. A tiny rhinestone in the middle adds a focal point that draws the eye exactly where you want it.
This is the short-nail philosophy in a nutshell: fewer elements, placed perfectly, beat more elements crammed in. Elegant and easy.
Placement matters more than perfection here: center the flake slightly toward the tip and it elongates the nail visually. Off-center by even a millimeter and the whole nail looks lopsided — take the extra ten seconds to position it right.
A single rhinestone at the snowflake’s center catches light with every gesture, turning a simple design into something quietly mesmerizing. One stone, enormous payoff.
4. Candy Cane Tips

Full candy-cane nails can overwhelm short lengths, but candy-cane tips are perfection. Nude base, then red-and-white diagonal stripes just across the tips — like a French manicure went to the North Pole.
- Keep the striped band narrow — a third of the nail max.
- Thin stripes look more delicate on short nails.
- Use tip guides for a clean smile line.
- Glossy top coat for that hard-candy shine.
💡 Quick Tip: This design actually makes short nails look longer — the eye follows the diagonal stripes upward. Festive and flattering.
Diagonal stripes are secretly slimming for nails — the eye travels along the angle, making short nails look longer and more elegant. It’s the same reason diagonal stripes work in fashion. Festive and flattering is a rare combo; enjoy it.
On very short nails, keep the stripe band to the top quarter — any wider and the nude base disappears, along with the lengthening illusion that makes this design work.
5. Mini Christmas Trees

Tiny trees for tiny nails — it’s a match made in heaven. On a white or pale pink base, paint one miniature tree per accent nail: two stacked triangles, a trunk line, and three ornament dots.
Keep the tree small and centered, with plenty of base color showing around it. The negative space is what keeps it looking modern rather than cramped. A gold dot star on top finishes it. On short almond or oval nails, the tree shape echoes the nail shape beautifully.
If freehand trees feel fiddly at this scale, tree stickers sized for short nails exist and look flawless. No judgment — just cute trees.
On short nails, the tree should occupy roughly the middle third of the nail — too big and it crowds the cuticle, too small and it gets lost. That Goldilocks zone is where the magic happens, so don’t be afraid to wipe and retry until the proportions feel right.
6. Short-Nail Plaid

Plaid works on short nails as long as you scale the pattern down. Red base, then a fine grid of thin black and white stripes — smaller checks than you’d use on long nails.
- Thin stripes are non-negotiable on short nails; thick ones eat the whole nail.
- Try plaid on two accent nails, solids on the rest.
- Red + black + white is classic; green + cream is softer.
- Matte top coat = flannel shirt energy.
The scaled-down checks look incredibly neat and intentional — like a perfectly tailored mini skirt versus one that’s just… short. Proportion is everything.
Here’s a shortcut worth knowing: plaid nail stickers sized for short nails exist and look flawless. There’s no prize for suffering through striping tape when a sticker does it better in a tenth of the time.
Smaller checks suit shorter nails, but don’t go microscopic — the grid should still read clearly at arm’s length. Aim for checks roughly a third of your nail width.
7. Berry Red Solids

Sometimes the best design for short nails is no design at all. A rich berry-red cream polish, applied flawlessly, is timeless Christmas — and short nails wear solid color better than any other length.
The key is application: careful cuticle cleanup, two even coats, and a glassy top coat. On short nails, every edge shows, so take your time with cleanup using a small brush and remover. The payoff is a manicure that looks expensive and deliberate.
💡 Quick Tip: Short red nails + gold rings = the easiest holiday jewelry-nail combo that always photographs well.
The shade of red matters enormously on short nails since there’s no art to distract — go slightly deeper than you think you should. Berry and wine reds look expensive; bright cherry can read a little stark at short lengths. When the color is the whole design, choose it like it matters. Because it does.
8. Gingerbread Dots

Full gingerbread faces need room, but gingerbread dots — simple brown circles with white icing dots — fit anywhere. Scatter them across a nude base like the world’s cutest cookie crumbs.
- Brown circles in varying sizes look like cookie bites.
- White dots on top suggest icing without detail work.
- Add one red dot per nail for a gumdrop accent.
- This is pure dotting-tool territory — no brushes needed.
It’s abstract, it’s adorable, and nobody’s squinting to figure out what it is. Sometimes suggesting a theme beats illustrating it, especially at small scale.
This dotted-cookie technique is also a fantastic base for kids’ nails — the shapes are simple, the colors are cheerful, and little ones love “helping” place the icing dots. A manicure that doubles as quality time is the best kind.
Scatter a few plain brown dots among the iced ones for “chocolate chips” — the mix of decorated and plain reads more natural, like real cookies on a tray.
9. Evergreen Solid With Gold Cuticle Dots

Deep evergreen on every nail, with a single tiny gold dot at the base of each nail near the cuticle. It’s minimal, it’s festive, and it takes five minutes.
The cuticle dot is a genius short-nail trick — it draws the eye to the base and makes the nail bed look longer. Use metallic gold for the dots; flat gold doesn’t have the same jewelry-like pop. Keep the green rich and dark for maximum contrast.
This is the “I want festive nails but I have a job interview” design. Subtle enough for anything, Christmassy enough for everything.
The cuticle-dot trick works with any dark base and any metallic — try navy with silver, or black with copper. Once you learn the formula, you have infinite elegant manicures in your back pocket for every season, not just Christmas.
Place the gold dot dead-center at the cuticle line, not floating above it — anchored dots look deliberate, floating dots look like mistakes. Millimeters matter at this scale.
10. Snowman Tip Faces

Instead of full snowman bodies, just do the faces — right at the nail tips. White tips (like a French), with two dot eyes and a tiny orange nose on each tip. Instant snowman, zero body required.
- Paint white tips first using guides.
- Eyes and nose go on the white area only.
- Keep features tiny and centered on each tip.
- Nude or pale pink base keeps it soft and wearable.
💡 Quick Tip: This is essentially a French manicure with personality — perfect if you love classics with a twist.
Because the faces live only on the tips, this design grows out gracefully — the nude base hides regrowth for weeks. It’s the rare character nail art that doesn’t demand constant maintenance.
Keep the white tip area generous enough for the face features — cramped snowmen look worried, roomy snowmen look cheerful. Give Frosty some breathing room. Frosty has never looked this fresh, and neither have you.
11. Tiny Gold Stars on Green

Forest green nails scattered with tiny gold stars — at short length, this looks like a miniature night sky. Use star stickers in the smallest size, or dot gold stars with a dotting tool.
Scatter 2-3 stars per nail max; on short nails, restraint keeps it chic. Vary the placement so it looks organic, not grid-like. A glossy top coat over the green makes the gold stars gleam like they mean it.
This design has a quiet luxury feel — festive without a single cliché motif. It works for the office, the party, and everything between.
For the most natural scatter, close your eyes and dot — seriously. Random placement looks organic; careful placement looks patterned. Trust the chaos on this one.
Two stars per nail is the sweet spot on short lengths — one can look accidental, three starts to crowd. Design is often just knowing when to stop.
12. Peppermint Dot Swirl

A spiral of red and white dots starting from the center of the nail — like a peppermint candy viewed from above. On short nails, the spiral fills the nail perfectly with no awkward empty space.
- Start with a center dot, then spiral outward alternating colors.
- Keep dots small and evenly spaced.
- White base with red spiral, or red base with white spiral.
- One spiral per nail, centered, is the whole design.
It’s geometric, it’s satisfying, and it’s completely foolproof — dots in a spiral can’t really go wrong. The symmetry is deeply pleasing to look at, too.
The spiral is meditative to paint — dot, dot, dot, round and round — and the result is so geometrically satisfying that people assume it took real skill. Let them assume. Some secrets are worth keeping.
Start the spiral with the tiniest center dot you can manage — a tight center makes the whole swirl look precise and professional, even when the outer rings wobble slightly.
13. Short Glitter Fade

Glitter gradients are actually easier on short nails — less surface to blend. Nude or red base, with gold or silver glitter sponged onto the tips fading downward.
Because the nail is short, you barely need to fade at all — a dense glitter tip with a soft edge is enough. Use a makeup sponge for the smoothest application, and build in thin layers. Two coats of top coat smooth everything into a glassy finish.
💡 Quick Tip: Glitter tips on short nails hide tip wear brilliantly — the sparkle camouflages everything. Practical and pretty.
Keep a small bottle of your glitter polish in your bag through December — glitter tips are the easiest manicure in the world to touch up, and a quick dab keeps them party-perfect all season long.
On short nails you can skip the sponge entirely — just paint glitter polish directly on the tips and feather downward with a clean brush. Less equipment, same gorgeous fade.
14. Mini Bow Accents

One tiny bow per hand, and you’re done. Solid festive base — red, green, or even black — with a single small bow sticker or hand-painted bow on each ring finger.
- Smallest bow size available — scale matters.
- Gold bows on deep green = instant luxury.
- Place near the cuticle for a “gift tag” effect.
- Seal stickers under top coat so edges stay flat.
Bows are the coquette trend’s gift to Christmas nails, and they scale down perfectly. One bow is a statement; ten bows is a craft project. Choose wisely.
Scale is the whole game with bows on short nails: if the bow covers more than a third of the nail, it’s too big. When in doubt, size down — a tiny bow looks intentional, a big one looks like it’s eating the nail.
Try the bow in deep red on a forest-green base for maximum Christmas contrast, or keep it tonal — gold on nude — for everyday subtlety. One sticker, two personalities.
15. Holly Berry Tips

French tips get festive: instead of white tips, paint green tips with three red berry dots on each. It’s holly, it’s a French, it’s adorable — and it fits short nails perfectly because the art lives entirely in the tip zone.
Keep the green band thin and the berries tiny — three small dots clustered together. The nude base keeps the overall look light and wearable. This is another design that visually lengthens short nails while staying firmly in Christmas territory.
It’s giving “put-together holiday guest” energy. The kind of nails that look great holding a wine glass in photos.
This is the design to request when you want something “festive but professional” — it reads as a classic French from across the room, and the holly detail only reveals itself up close. The perfect office-party compromise.
Three berries per tip is traditional, but two looks more modern — play with the count until the cluster feels balanced against your nail width.
16. White Sweater Knit
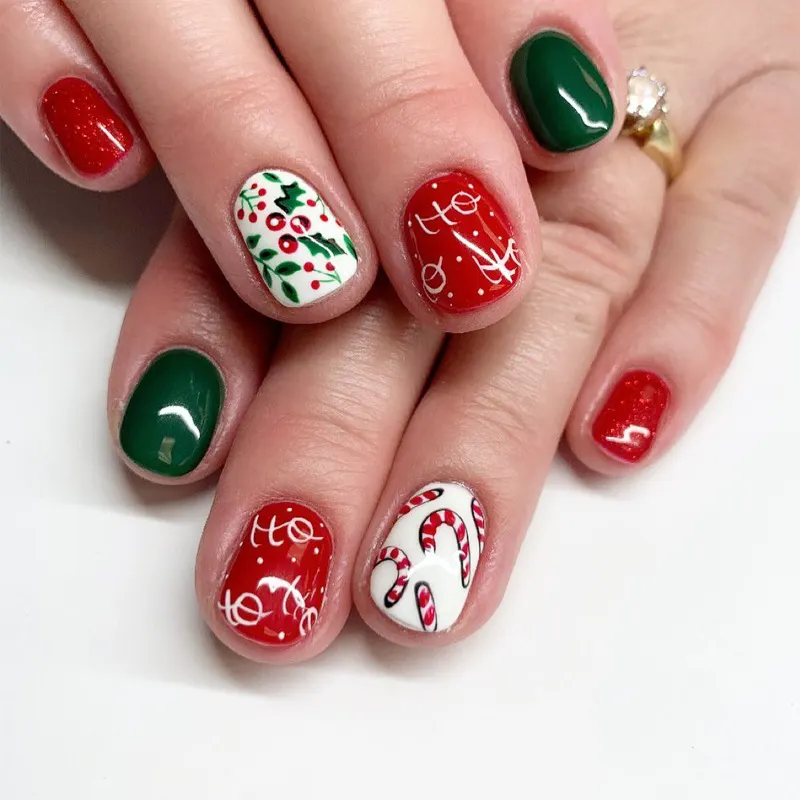
The sweater-knit texture trend translates to short nails beautifully — cable-knit patterns in white or cream 3D gel over a matching base. Cozy, tactile, and so very Christmas.
- Use a 3D gel or thick acrylic paint for the raised texture.
- Simple cable or diamond patterns read best at small scale.
- Keep to one or two accent nails; full texture on all ten is a lot.
- Matte top coat enhances the knit illusion.
💡 Quick Tip: No 3D gel? A thick white polish dotted in a cable pattern, sealed with matte top coat, fakes the texture surprisingly well.
Texture catches light differently than flat polish, so these nails look subtly different in every photo — cozy and dimensional rather than flat. If you love the look, try the same technique in deep green or burgundy for a whole winter wardrobe of knits.
Keep the knit pattern to one or two accent nails — full texture on all ten short nails can overwhelm. Restraint lets the 3D detail be the star it deserves to be.
17. Tiny Ornament Dots

One big ornament dot per nail — that’s it. On a dark base (navy, black, deep green), place a single large dot in metallic red, gold, or silver on each nail, slightly off-center.
The single-dot approach is perfect for short nails because it needs no room to breathe — it’s one confident shape. Add a tiny metallic cap line above each dot if you want the full ornament illusion, but the dot alone reads clearly.
It’s bold, it’s graphic, and it takes about ten minutes. Sometimes one perfect dot beats ten fussy details.
One confident dot beats ten fussy details — this design is proof. And because it’s so simple, application quality matters: take your time with cuticle cleanup and top coat, and the minimalism reads as luxury rather than laziness.
Metallic dots in gold or copper read as ornaments; flat red or green dots read as berries — same one-dot technique, completely different holiday story. Choose your adventure.
18. Red-to-Green Micro Ombre

An ombre from Christmas red to Christmas green across each short nail — the gradient does the festive talking with zero art required. Sponge the blend for smoothness.
- Red at the cuticle fading to green at the tip (or reverse).
- Sponge in thin layers; 3-4 passes beat one heavy one.
- Clean up edges before top coat for crisp lines.
- Glossy finish makes the color shift glow.
On short nails, the color transition happens fast, which actually makes the ombre look more dramatic and saturated. It’s the most color with the least effort — peak efficiency.
Ombre on short nails actually blends faster because there’s less distance to cover — two or three sponge passes usually does it, where long nails might need five. Short nails: easier, faster, just as gorgeous.
Blend red into green directly for a bold Christmas gradient, or buffer them with a gold middle band for a softer, more luxurious transition. The gold bridge is pure genius.
19. Penguin Tip Faces

Like the snowman tips, but penguins: black tips with a white belly oval, dot eyes, and a tiny orange beak. On short nails, the tip zone is the perfect penguin-sized canvas.
Keep every feature miniature — the beak especially should be a mere triangle speck. On very short nails, simplify further: black tip, white belly, skip the eyes. Even the abstract version reads as “penguin” thanks to the tuxedo color blocking.
💡 Quick Tip: Nude base + penguin tips = the cutest short-nail Christmas set that still looks grown-up.
The tuxedo color-blocking is so graphic that it works even in ultra-minimal form — black tip, white belly, done. Sometimes the suggestion of a penguin is cuter than the full portrait.
A nude-pink base under the penguin tips keeps the look soft and feminine; a stark white base makes it graphic and bold. The base color sets the entire mood. Simple, graphic, and utterly adorable — the short-nail trifecta.
20. Gold Foil on Burgundy

Burgundy is Christmas’s sophisticated cousin, and gold foil on top is pure elegance. Deep burgundy base, a few flakes of gold foil pressed on while tacky, sealed glossy.
- Dark bases make gold foil pop hardest.
- Small foil pieces suit short nails better.
- Place 2-3 flakes per nail, asymmetrically.
- Two top coats for a smooth, glassy seal.
This is the short-nail design for the woman who wants festive but make it fashion. It pairs with everything from velvet dresses to cashmere sweaters.
Burgundy and gold is a combination that works year-round, not just at Christmas — swap nothing and wear it into February, or switch the foil to silver for a frostier winter feel. Versatility is the ultimate luxury.
Press foil onto polish that’s tacky but not wet — too wet and it sinks and disappears, too dry and it won’t stick. The tacky window is about sixty seconds; work one nail at a time.
21. String Light Dots
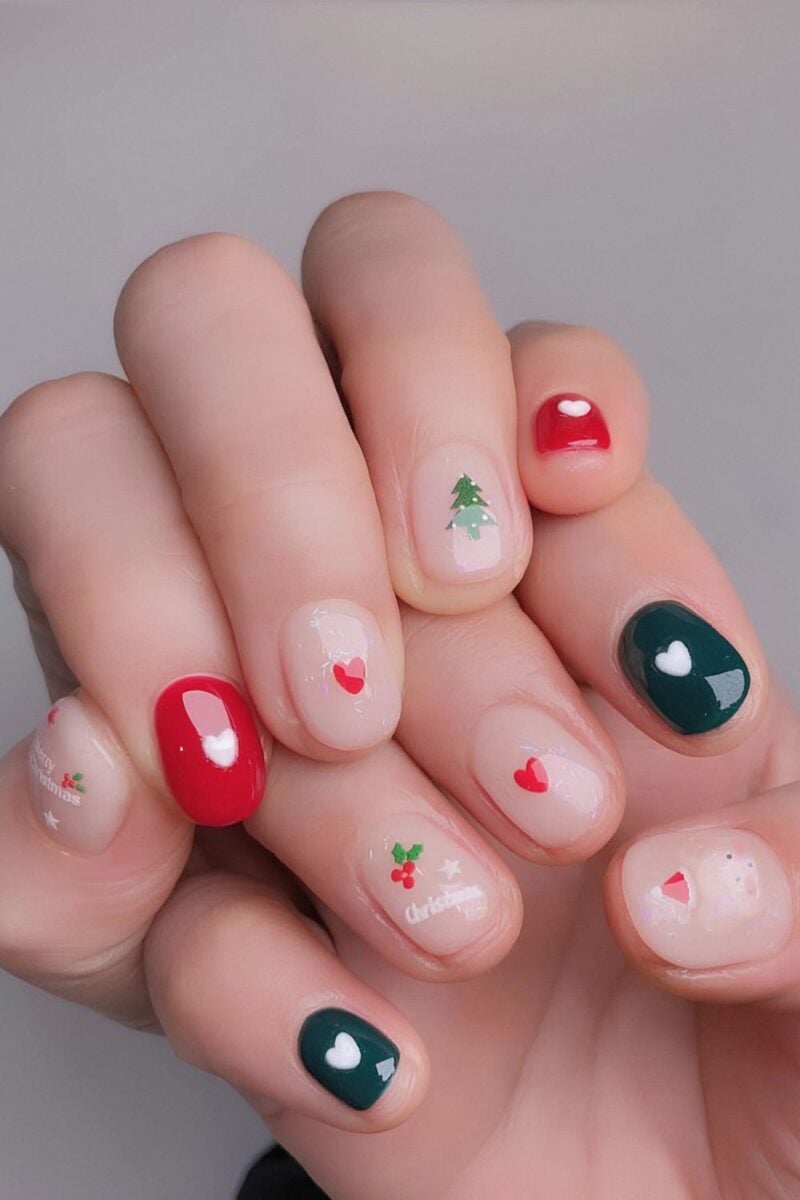
A single swooping line of colorful light-bulb dots across each short nail — simplified to fit. Dark base, one curved line, colorful dots along it. No wire detail needed at this scale.
The curve should follow the nail’s natural arc, with 4-5 dots per nail in alternating Christmas colors. Each dot gets a tiny white highlight for the lit-up effect. It’s the essence of string lights distilled to its simplest, cutest form.
Proof that you don’t need length for detail — you just need to choose the right detail.
Curve the light string to follow your cuticle line rather than running it straight across — it echoes the nail’s natural shape and looks far more elegant. Small compositional choices like this separate good nail art from great nail art.
Alternate warm and cool bulb colors — red, gold, then blue, silver — for a string that looks collected over years rather than bought as a set. Nostalgia is in the mix.
22. Frosted Cranberry Shimmer

End with the easiest showstopper: a cranberry-red shimmer polish worn alone. The frosted metallic finish does all the work — it shifts from red to pink to gold as you move, like Christmas lights reflected in a glass of cranberry juice.
- Shimmer and metallic finishes hide imperfections on short nails.
- Two coats for full frosted coverage.
- No art needed — the polish is the design.
- Glossy top coat amplifies the multidimensional shift.
Sometimes the smartest short-nail move is letting a spectacular polish speak for itself. This is festive, flattering, and foolproof — the perfect finale.
Shimmer polishes are the most forgiving formulas for at-home application — the reflective particles hide streaks and imperfections that cream polishes would show. If you’re new to doing your own nails, frosted shimmers are the perfect training wheels that happen to look spectacular.
Layer a fine holographic topper over the cranberry shimmer for dimension that shifts in every light — the frost deepens and the manicure goes from pretty to hypnotic.
CONCLUSION
Short nails aren’t a limitation — they’re an invitation to be clever, and these 22 designs prove it. From micro Santa hats to frosted cranberry shimmer, your fingertips are ready for every holiday moment ahead. Pick your favorite, keep the scale cute, and enjoy the season. 📌 Save this post to your nails board on Pinterest so you have festive inspiration ready!