
22+ Easy Hairstyles Black Women for Thick Hair 2026
Thick hair is a gift — and on some mornings, a full-time job. If your strands are dense, voluminous, and gloriously abundant, you already know the struggle: styles that work for fine hair collapse under your volume, and buns that look big on others disappear into your thickness.
This list celebrates your fullness instead of fighting it. These are easy hairstyles designed for Black women with thick hair — styles that manage the volume, distribute the weight, protect your ends, and show off exactly how much hair you’re working with.
From chunky twists that take half the time to jumbo braids that last for weeks, every style here was chosen because it actually works on dense, thick textures. Let’s find your new favorites.
1. Chunky Havana Twists
When your hair is thick, small twists are a trap — you’ll be twisting until next Tuesday. Havana twists use chunky Marley hair that matches your density, so you get a full, gorgeous style in a fraction of the time.
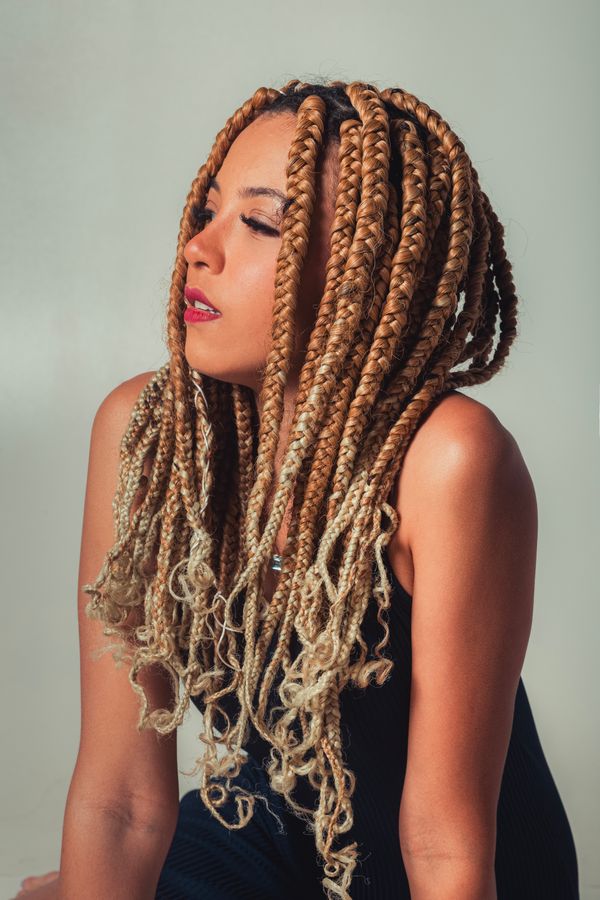
Part your hair into large sections and twist each one with a thick piece of Marley or Havana twist hair, keeping the twist loose and fluffy rather than tight and rope-like. The chunky texture blends seamlessly with thick natural hair and gives you that soft, full look that’s impossible to achieve with skinny twists on dense hair. Installation takes two to three hours, and you’ll get three to four weeks of wear.
- Use fewer, thicker twists — twelve to sixteen is plenty for full coverage.
- Keep the roots loose to avoid tension headaches on dense hair.
- Moisturize your scalp weekly; thick hair hides dryness until it’s a problem.
- At night, gather twists into a loose pineapple inside a satin bonnet.
2. High Volume Pineapple Puff
Thick hair was made for the puff. While others need products and picks to fake fullness, your natural density does it on its own — the pineapple puff just gives all that volume a shape and a direction.
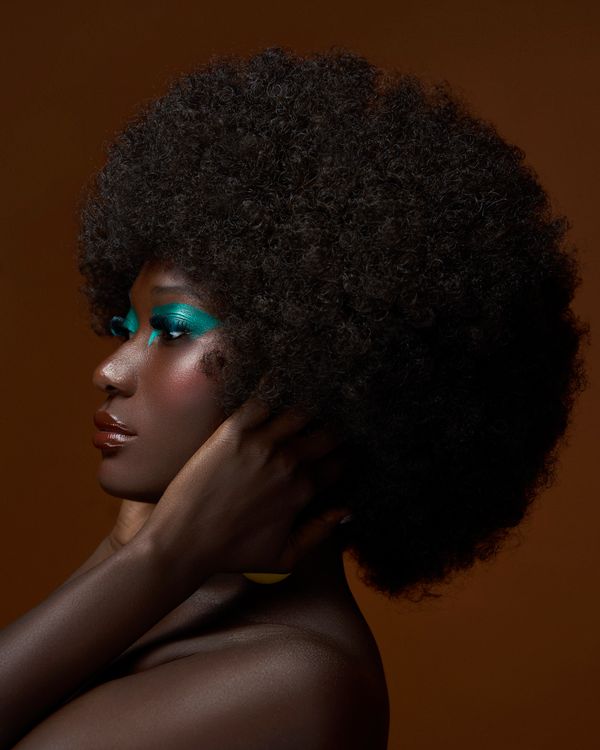
Gather your hair into a high, loose puff with a long stretched headband or a satin scrunchie, positioning it at the very front of your crown for maximum height. Don’t compress the puff — let it expand. Fluff the roots gently with a pick, smooth your edges with edge control, and add a headband behind the hairline if you want extra polish. The result is a glorious halo of texture that takes five minutes.
Thick hair gives you a natural advantage — your puff has built-in volume fine hair can’t replicate. To shape it, gather the hair and mold it round, tucking flat spots underneath. If the front misbehaves, slide the headband on and everything looks deliberate. A two-minute style once you’ve done it twice.
💡 Quick Tip: If your puff is so heavy it slides back during the day, anchor it with two bobby pins crossed in an X at the base — invisible, but it stops the migration completely.
3. Big Twist Out
A twist-out on thick hair doesn’t whisper — it announces. Big sections, big separation, big volume: this is the style that makes people stop you to ask about your hair routine.

Work on stretched hair in eight to twelve large sections — thick hair needs fewer twists, not more. Apply leave-in and a rich twisting cream generously, because dense hair drinks product, and twist each section loosely. Let them dry completely, then unravel with oiled fingers and separate each twist into four or five pieces. Pick the roots aggressively. The volume you get is the kind people pay for.
The hardest part of a big twist-out on thick hair is drying time — don’t rush it. Forty-five minutes under a hooded dryer beats air-drying overnight and waking to damp roots. When separating, be generous: thick hair can be pulled into five or six pieces per twist without looking thin. That’s where the legendary volume comes from.
📌 Good To Know: Thick hair holds a twist-out longer than fine hair does — expect five to seven days. Pineapple at night, fluff in the morning, and refresh the front pieces midweek with a water spritz.
4. Layered Silk Press
A silk press on thick hair is a commitment — but layers are what make it manageable. Long layers remove bulk, create movement, and stop your pressed hair from forming one solid curtain.

Ask your stylist for long, blended layers before the press, focusing on removing weight from the mid-lengths and ends. The press itself follows the classic routine: clarifying cleanse, deep condition, heat protectant, small-section blow-dry, then flat iron in thin passes. The layers mean each section is thinner and presses faster, cutting your appointment time noticeably. The finished look has swing and bounce instead of heaviness.
- Layers also make the grow-out softer — no harsh blunt line as your texture returns.
- Wrap nightly in large sections to keep the press smooth for up to two weeks.
- Avoid heavy oils on pressed thick hair; they cause faster reversion.
- Humidity is the enemy — check the forecast before booking your appointment.
5. Jumbo Knotless Braids
Jumbo knotless braids are the protective style thick hair deserves. The knotless feed-in method lies flat at the scalp — no painful knots pulling on dense roots — and the jumbo size means you’re done in hours, not days.

With large, clean parts, your braider feeds braiding hair in gradually from the root, creating braids that start slim and stay comfortable. On thick hair, jumbo braids look proportional — they match your natural volume instead of looking sparse against it. Style them in a high ponytail, a top bun, or half-up, and expect four to six weeks of wear with proper care.
On thick hair, ask your braider to keep the hairline braids slightly smaller for a natural-looking edge, then go jumbo everywhere else — the speed of jumbo with realism where it counts. Bring reference photos; ‘jumbo’ means different sizes to different braiders, and a picture prevents misunderstandings.
💡 Quick Tip: Ask for the ends to be left slightly tapered rather than blunt-cut. Tapered ends look more natural, tangle less, and make the braids easier to style into updos.
6. Voluminous Wash and Go
Forget everything you’ve heard about wash-and-gos needing to be neat. On thick hair, the goal is glorious, defined volume — curls with presence, shrinkage with pride, and a shape that takes up space unapologetically.
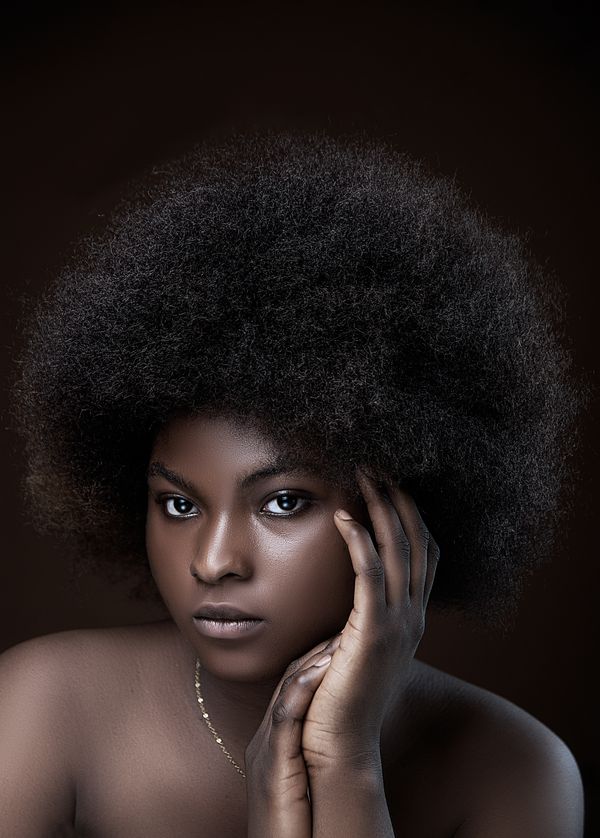
The technique is the classic layering method — leave-in, curl cream, gel — applied in sections on soaking-wet hair. The thick-hair adjustment is product quantity: use more than you think you need, because dense hair absorbs everything. Diffuse upside down on medium heat, lifting at the roots, to maximize volume while setting definition. Once dry, pick the roots and shake. The result is a full, round, defined wash-and-go with serious body.
Thick hair eats product, so don’t be shy — if you think you’ve used enough gel, add a little more. The most common reason thick wash-and-gos fall flat is under-producting. Work in smaller sections than you think you need; the extra ten minutes of sectioning saves you from a frizzy, undefined result.
⚠️ Watch Out: Skipping the diffuser on thick hair means extremely long dry times — and damp roots lead to frizz and undefined curls. If you don’t own a diffuser yet, this is your sign.
7. Thick High Ponytail With a Wrap
A high ponytail on thick hair isn’t just a ponytail — it’s an event. The density gives you that full, swinging, heavy ponytail that turns heads, and wrapping the base makes it look salon-finished.
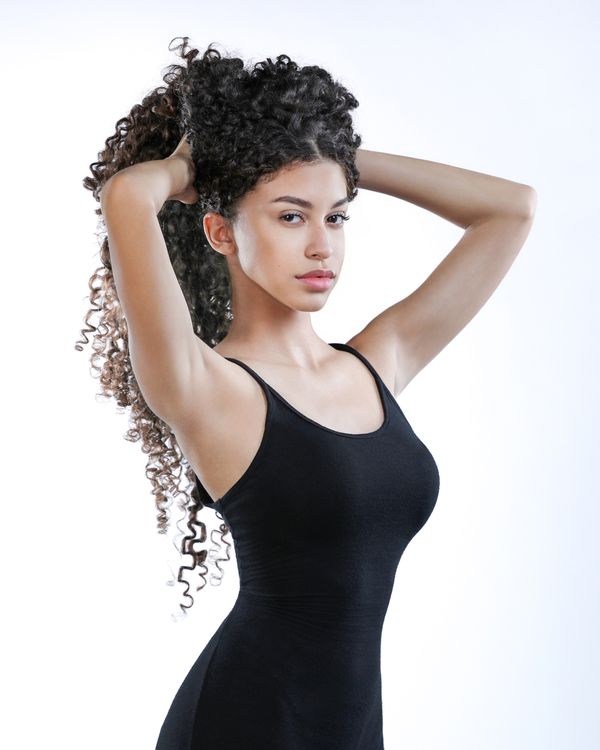
The double-elastic method is non-negotiable for thick hair — one elastic stretches out by noon. For extra security, anchor the ponytail with two bobby pins pushed up into the base from underneath; they act like scaffolding. For more drama, add a drawstring ponytail in a matching texture to double your length instantly.
- Step 1: Brush stretched hair upward with a paddle brush, smoothing as you go.
- Step 2: Secure high on the crown with two strong elastics — one is never enough for thick hair.
- Step 3: Take a thick section from underneath the ponytail and wrap it around the base.
- Step 4: Pin the wrapped section firmly underneath with two bobby pins.
- Step 5: Smooth edges, add shine spray, and fluff the ponytail for fullness.
If your ponytail feels heavy by midday, that’s normal with thick hair — switch to a lower position the next day to give your hairline a break, and never sleep with it up.
8. Big Bouncy Flexi Rod Curls
Flexi rods and thick hair are a match made in heaven. Your density fills out every rod completely, which means juicier, more uniform curls than fine hair could ever produce. This is heat-free curls at their absolute best.
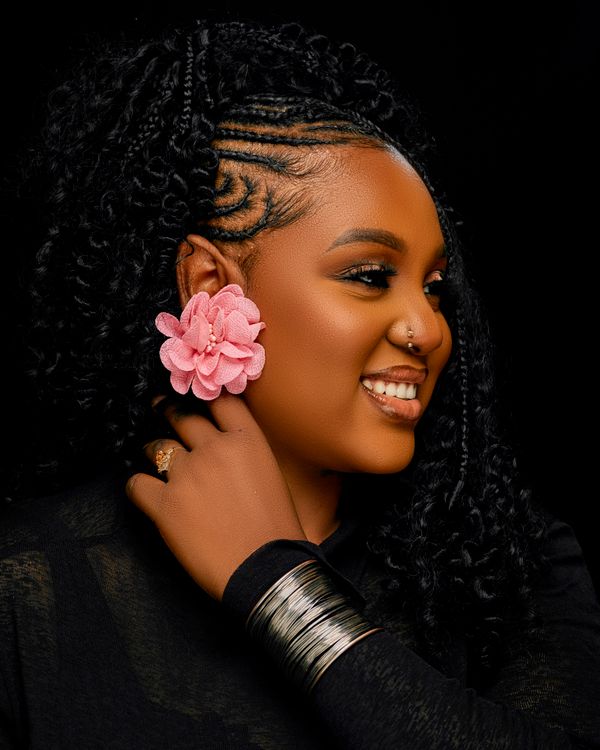
On stretched, moisturized hair, work in medium sections — thick hair needs fewer rods than you’d expect. Apply setting foam to each section, smooth it around the rod from ends to roots, and bend the rod to secure. Use large rods for bouncy, loose curls or medium rods for tighter spirals. Let them dry fully overnight, then unravel carefully and separate with oiled fingers. The bounce lasts for days.
Thick hair holds rods beautifully, but sections must be truly smooth before rolling — bumps get locked in as frizz. Take the extra minute to brush each section with product before wrapping. When you unravel, don’t separate aggressively on day one; let curls stay tight, because thick hair expands naturally over the next few days.
💡 Quick Tip: For extra root volume, sit the rods slightly away from the scalp rather than flush against it — the lift at the base makes the whole style look bigger and more glamorous.
9. Half-Up Cascading Curls
Thick hair in a half-up style gives you the best of both worlds: the top is controlled and out of your face, while the bottom half cascades with all the drama your density provides. It’s romantic without trying too hard.
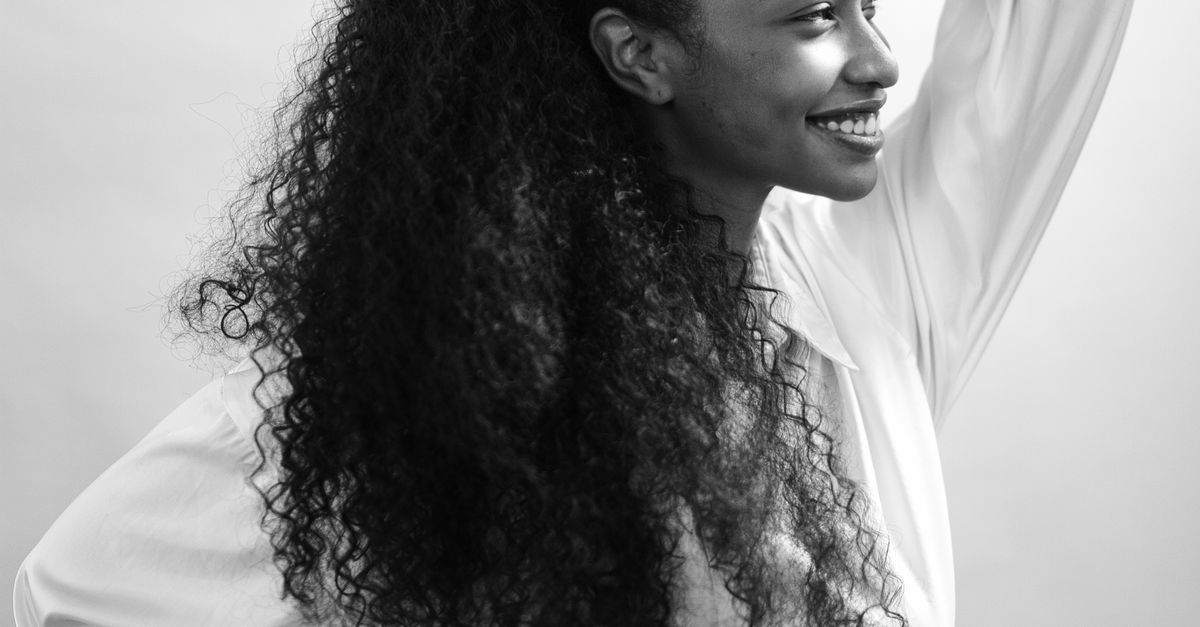
On a twist-out, flexi-rod set, or wash-and-go, gather the top half from temple to temple and secure it into a puff, mini bun, or ponytail at the crown. Leave the bottom half completely free — this is where your thickness shines. Smooth the top section for contrast, pick out the bottom for maximum fullness, and add a decorative clip or cuff to the top section for a finished touch.
- Works on day-two or day-three curls when volume is at its peak.
- A deep side part in the top section adds asymmetry and interest.
- Stretch the bottom half with a pick for an even bigger cascade.
- This style photographs beautifully — it’s a favorite for events.
10. Thick Goddess Locs
Goddess locs on thick hair look exactly as luxurious as they sound — full, textured, with those signature curly ends. Your natural density means the style looks abundant from every angle, no filler needed.
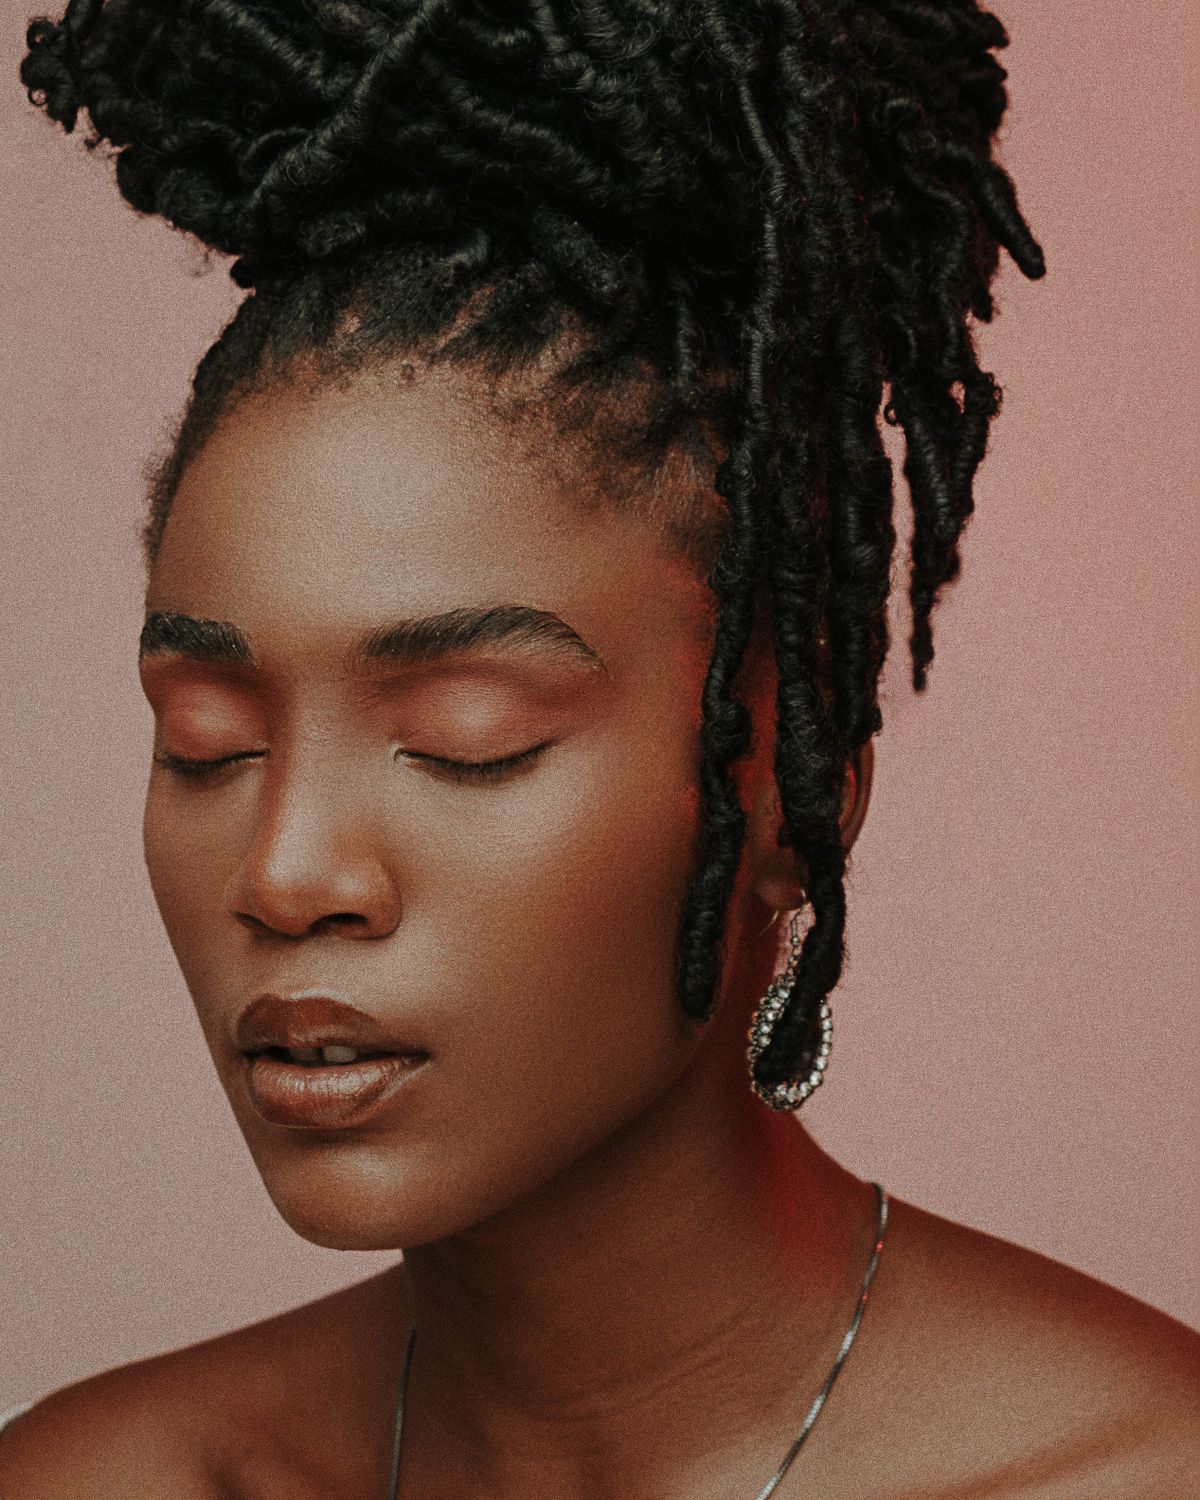
Installation follows the standard method: your hair braided or twisted at the root with loc hair wrapped around each section, curly hair left free at the ends. On thick hair, ask for medium-sized locs rather than small ones — they’ll match your volume, install faster, and feel lighter on your scalp. The curly ends need regular moisture: a water-and-leave-in spritz every few days keeps them soft and defined.
Because thick hair is heavy on its own, keep the loc count moderate — too many locs plus dense natural hair equals a very heavy install. Fewer, chunkier locs look more proportional anyway. Ask your stylist to keep the wrapping slightly looser at the roots; tight wrapping on thick roots causes tension bumps.
📌 Good To Know: Goddess locs are heavier than they look, and thick hair adds to the weight. Keep the length at mid-back or shorter for comfortable long-term wear — your neck will thank you by week three.
11. Pinned-Up Frohawk
The frohawk is the edgiest way to wear your thickness — sides sleeked flat, center standing tall and proud. It’s a mohawk’s cooler, more wearable cousin, and it shows off dense hair better than almost any other style.

Smooth the sides of your hair flat against your head with gel and a brush, pinning them neatly. Leave the center section completely free — pick it out, fluff it up, let it reach for the sky. The contrast between the sleek sides and the towering middle is what makes this style so striking. It works on TWAs, tapered cuts, and longer natural hair alike, and it takes about fifteen minutes.
The key to a frohawk that lasts is strong-hold gel on the sides — brush them down in the direction of growth before pinning. For extra sleekness, tie a silk scarf over the sides for ten minutes while you finish getting ready. The center can be as wild as you want; the contrast is the whole point.
💡 Quick Tip: For extra drama, color just the center section — a bold copper, deep burgundy, or honey blonde stripe down the middle turns the frohawk into a full statement.
12. Large Bantu Knot Out
Large bantu knots on thick hair produce the kind of big, soft waves that fine hair can only dream about. Fewer knots, bigger sections, more volume — the thick-hair formula works in your favor here.
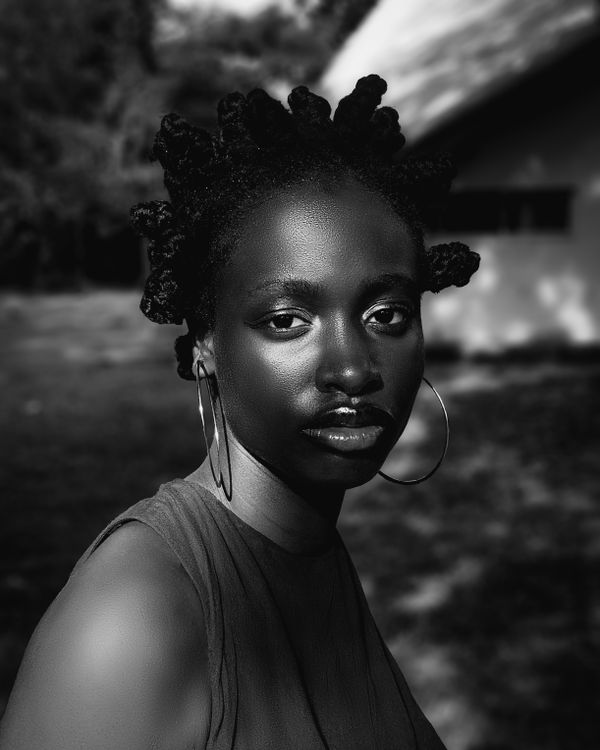
For the biggest, softest waves, keep your separating gentle on day one — over-separating creates frizz instead of volume. If the crown looks flat, pick just the roots while leaving the lengths defined. A light mist of oil sheen finishes the style with a healthy glow that makes the waves look touchable and full.
- Step 1: Section stretched, moisturized hair into 6 to 8 large parts.
- Step 2: Apply twisting cream generously — dense hair needs thorough coverage.
- Step 3: Twist each section and coil it flat against the scalp, tucking the ends.
- Step 4: Dry completely — overnight is best for thick hair.
- Step 5: Unravel with oiled fingers, separate widely, and pick the roots.
The result is big, touchable waves with incredible body. Because the knots were large, the pattern is loose and modern rather than tight and uniform — exactly the effortless look everyone wants right now.
13. Thick Feed-In Cornrows Into a Bun
Cornrows going back into a big, full bun — this style was practically invented for thick hair. The braided front keeps everything neat for weeks while your density creates a bun with real presence.
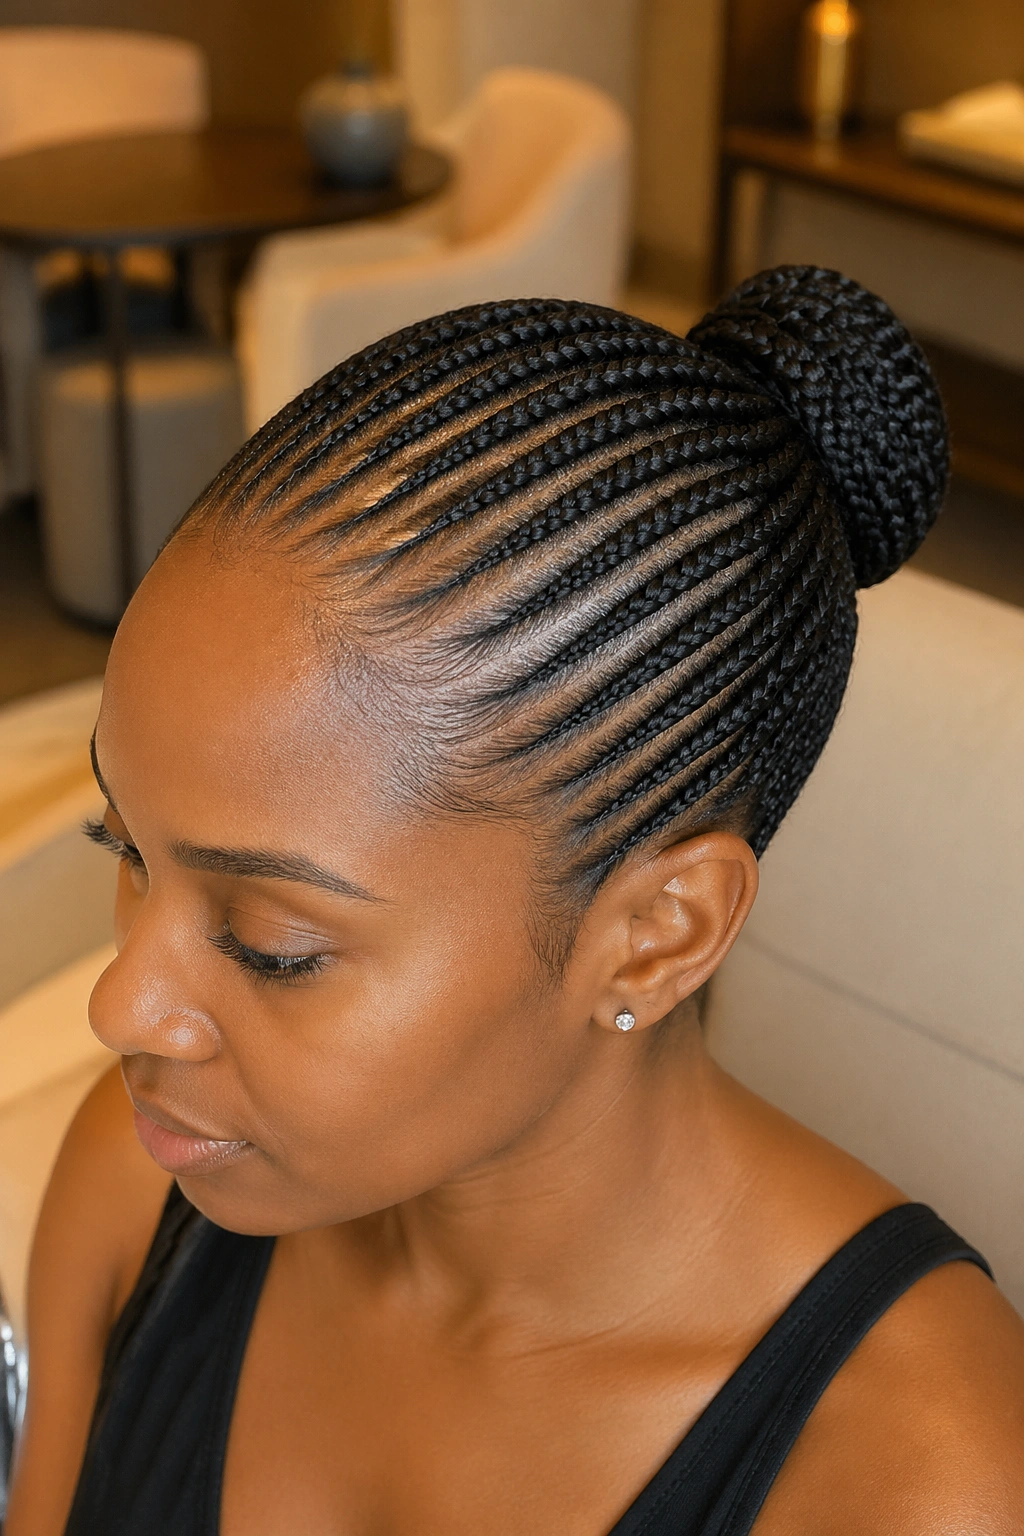
Feed-in cornrow the front and sides straight back toward the crown, keeping parts clean and tension comfortable. Gather everything — braids plus your own hair — into a high bun, adding a little braiding hair if you want extra size. Wrap and pin securely. The style lasts two to three weeks, survives workouts and humidity, and looks polished the entire time.
Thick hair braids up beautifully but takes longer — book a longer appointment than you think you need so your braider never has to rush. Rushed braiding means uneven tension, and uneven tension on thick hair means headaches. Bring your own edge control and moisturizer if you have favorites.
📌 Good To Know: On very thick hair, ask your braider to keep the bun’s foundation braids slightly looser. Overly tight base braids plus a heavy bun is the fastest route to edge damage.
14. Chunky Crochet Curls
Crochet curls are the ultimate thick-hair cheat code: all the volume of a big curly style with a two-hour install and complete protection for your natural hair underneath. Nobody will believe it isn’t all yours.
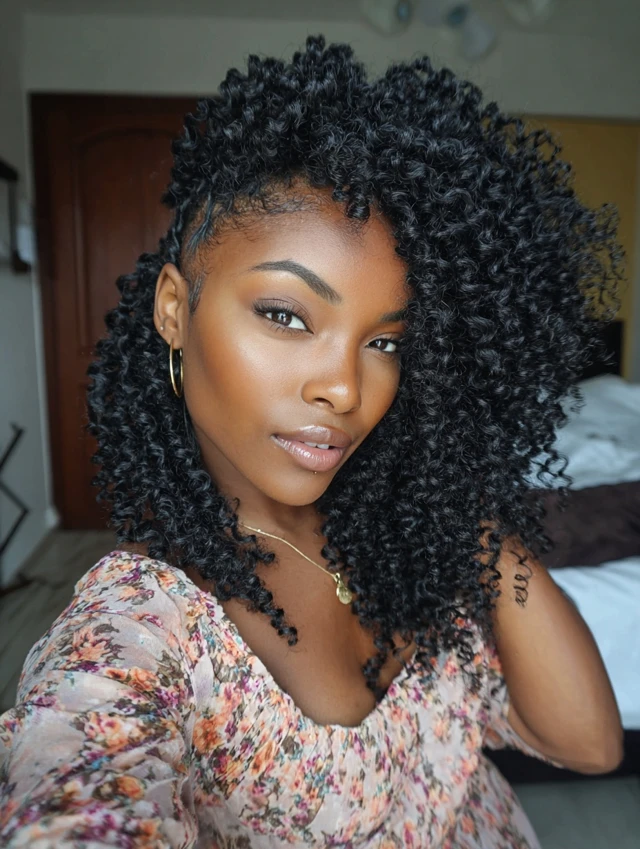
With your natural hair cornrowed flat, loop chunky crochet curl hair through the braids with a latch hook. Choose a curl pattern with some size to it — tight tiny curls can look sparse against thick hair, while medium-to-large curls match your natural volume. Fluff and separate with your fingers, trim for shape, and you’re done. The style lasts four to six weeks.
The density of your cornrow base matters — on thick hair, keep foundation braids flat but not tiny; too many small braids under crochet hair creates bulk that shows through. Medium flat braids give the smoothest base. Vary the crochet loop sizes slightly for a natural look — uniform loops can read artificial in curly textures.
- Chunky curl patterns tangle less than tight ones — easier maintenance.
- Sleep with the curls loosely pineapples inside a satin bonnet every night.
- Refresh with water and mousse whenever the curls look tired.
- Half-up styles look incredible with crochet curls — try it midweek.
15. Low Voluminous Chignon
A chignon sounds delicate, but on thick hair it’s anything but — it’s a substantial, sculptural bun with real weight and presence. This is the updo you wear when you want to look expensive.
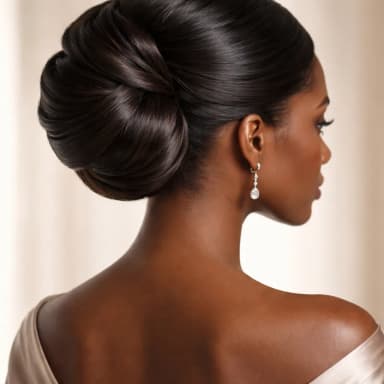
Smooth stretched hair back into a low ponytail at the nape. Twist the ponytail loosely — don’t pull it tight, let the thickness create the shape — and coil it into a wide, flat bun, pinning generously. The key is letting your density do the work: a thick chignon looks intentionally full rather than scraped back. Finish with shine spray and sculpted edges for a red-carpet-ready result.
A thick chignon needs more pins than you think — plan on twelve to fifteen, inserted from different angles so they lock against each other. Pins all going the same direction slide out of dense hair. If the bun feels heavy, split it into two smaller coils side by side; it distributes weight and looks just as elegant.
💡 Quick Tip: Insert bobby pins in an X pattern rather than singly — crossed pins grip thick hair far more securely and the chignon won’t budge all evening.
16. Thick Spiral Perm Rod Set
Perm rods on thick hair give you spirals with serious bounce — the kind of defined, springy curls that hold their shape for days because your density supports them. It’s a wash-day investment that pays off all week.

On clean, damp, deeply moisturized hair, work in medium sections and apply a strong setting foam — thick hair needs hold to keep spirals defined. Roll each section onto a perm rod from ends to roots and secure. Use medium rods for classic spirals or mix medium and large for a more natural varied pattern. Dry completely under a hooded dryer or overnight, then unravel with oiled fingers and separate lightly — don’t over-separate, or you’ll lose the spiral definition.
📌 Good To Know: A perm rod set on thick hair can take a full day to air-dry. A hooded dryer isn’t a luxury here — it’s what makes this style practical on wash day instead of an overnight gamble.
17. Pineapple Updo With Bangs
The pineapple gets even better with bangs. Gathering everything high while letting curly bangs frame your face gives you height, softness, and face-framing all at once — and it’s a lifesaver on day-three hair.

Leave the front section of your hair out, then gather everything else into a high, loose pineapple at the front of the crown. Style the front section as curly bangs — finger-coil them, scrunch them, or let them fall naturally. The bangs draw attention to your eyes and cheekbones while the pineapple shows off your volume. Smooth your edges underneath for polish.
The bangs are the focal point, so finger-coil each curl individually with defining cream for a polished frame around your face. If your natural bangs are too short to pineapple with the rest, clip them forward separately and style them after the pineapple is up — the two-section approach gives more control over the final shape.
- Clip-in curly bangs work perfectly if your own hair is too short in front.
- This style stretches a wash-and-go by two extra days, easily.
- Add a headband behind the bangs for a different look midweek.
- Fluff the pineapple wider for evening; keep it compact for daytime.
18. Jumbo Senegalese Twists
Senegalese twists have that sleek, rope-like finish that’s distinctly different from fluffy Marley twists — and in jumbo size on thick hair, they’re strikingly elegant. Think polished, elongated, and impossibly neat.
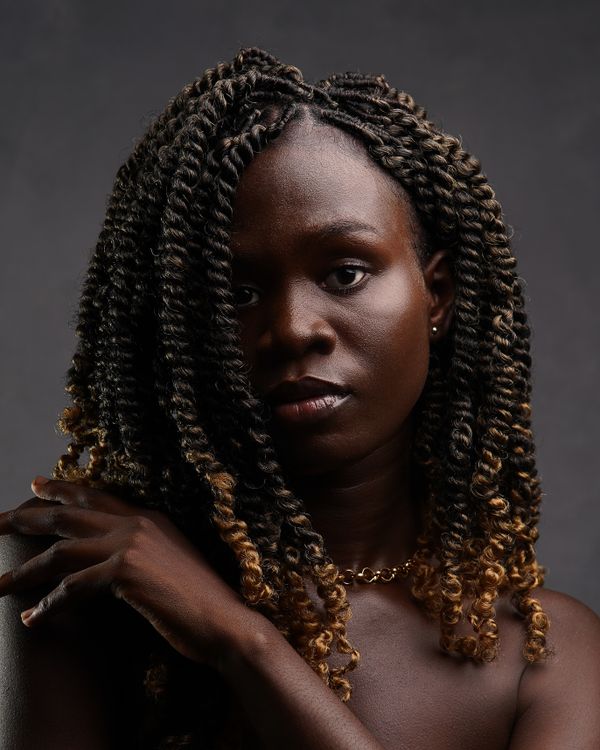
Each twist is created by wrapping two sections around each other in the same direction — the rope technique — which gives that smooth, defined look. On thick hair, use large sections and Kanekalon or Toyokalon braiding hair for the silkiest finish. The jumbo size keeps install time to three to four hours, and the sleek texture means less frizz over time. Expect four to six weeks of wear.
The rope technique has a learning curve — twist both sections in the same direction individually, then wrap them around each other in the opposite direction. It feels backwards until it clicks, usually around the fifth twist. Keep a little oil on your fingertips; it smooths the wrapping and prevents catching.
💡 Quick Tip: Dip the finished twists in hot water and the rope texture will set even smoother, with sealed ends that resist unraveling for the life of the install.
19. Full Sew-In With Layers
Sometimes you want length, fullness, and the freedom to just wake up and go — and a full sew-in with layers delivers exactly that. On thick hair, a sew-in blends beautifully because your natural density matches the extensions.

Your natural hair is braided flat as the foundation, and wefts are sewn in for length and volume. Ask for long layers cut into the extensions — they create movement and stop the hair from looking like a heavy curtain. A middle or side part with face-framing layers is universally flattering. With proper care, a sew-in lasts six to eight weeks, and your natural hair gets a complete rest underneath.
Blending is the make-or-break detail — leave enough of your own hair out around the part and hairline to cover the tracks, and match the extension texture to your leave-out. If your natural hair is thicker than the bundles, ask your stylist to lightly thin the wefts at the top for a seamless transition.
⚠️ Watch Out: The foundation braids must not be too tight — thick hair under tension plus the weight of extensions is a recipe for traction alopecia. If your braids hurt, speak up immediately.
20. Thick Braided Ponytail With Curls
Feed-in braids up into a ponytail, finished with cascading curls — this is the style that dominates every red carpet and Instagram feed, and thick hair makes it look even better. Your density gives the ponytail a fullness that extensions alone can’t fake.

Braid cornrows from the hairline up toward the crown using the feed-in method, then gather into a high ponytail with curly extension hair. Wrap the base with a section of hair for a seamless finish. The contrast between the sleek braided scalp and the voluminous curly ponytail is pure drama — in the best way. Mousse the braids weekly to keep them fresh.
The ponytail hair does the heavy lifting here, so choose quality extension hair — cheap curly hair tangles within days. Spend more on the ponytail piece; the braids are the frame, but the curls are the painting. At night, braid the ponytail loosely into one plait inside your bonnet to prevent matting.
- Curly ends need nighttime protection — wrap the ponytail loosely before bed.
- This style lasts two to three weeks with good maintenance.
- Add gold cuffs to one or two braids for extra detail.
- Works beautifully for weddings, parties, and photoshoots.
21. Big Curly Afro: The Pick-Out
Let’s end the styling tricks and celebrate the main event: your big, beautiful, picked-out afro. No twists, no rods, no heat — just your natural texture, maximized. This is thick hair in its purest, most powerful form.

On a stretched twist-out or braid-out that’s a few days old — when definition has softened but volume has arrived — pick the roots thoroughly with an afro pick, working from the ends upward in small sections. Shape it round by picking outward, not just up. A light oil on your hands prevents frizz while you shape. The result is a magnificent halo that’s 100% you.
Shape as you go — pick a section, step back, check the mirror, then pick the next. Building the shape gradually beats picking everything out and fixing it after. If one side is bigger, pick the smaller side more aggressively. Finish with a light mist of oil sheen for an even glow that catches the light.
💡 Quick Tip: The best pick-outs happen on hair that’s slightly stretched, not freshly shrunken. Band your hair or do loose twists overnight before picking out for maximum size with minimum tangling.
22. Chunky Marley Twists Bob
Short, chunky, and full of personality — the Marley twists bob gives you the texture of twists with the chic silhouette of a bob. It frames the face, swings when you move, and takes a fraction of the time of long twists.

Install chunky Marley twists at chin to shoulder length, keeping them fluffy and full rather than sleek. The bob shape is universally flattering and incredibly easy to style — wear it as-is, pin one side back, or add a headband. Because the length is short, the style feels light despite your hair’s density, and maintenance is minimal: oil the scalp, wrap at night, and enjoy three to four weeks of effortless wear.
📌 Good To Know: A bob-length protective style is perfect for trying a new color — ask for Marley hair in a warm brown, auburn, or honey blonde. Short length means low commitment if you want to switch back.
CONCLUSION
Your thick hair isn’t something to manage or minimize — it’s your best feature, and these styles prove it. Whether you go for chunky twists, a picked-out afro, or a sleek silk press with layers, the secret is working with your volume instead of against it. Pick one style, try it this week, and watch the compliments roll in. 📌 Save this post to your hairstyles board on Pinterest so you always have gorgeous hair inspiration!