
20+ Simple Cute Christmas Nails — Easy DIY Ideas 2026
Here’s the truth nobody tells you: the cutest Christmas nails are often the simplest ones. You don’t need a salon appointment, fancy tools, or an art degree — just a few polishes, a dotting tool (or a bobby pin in a pinch), and about thirty minutes.
These 20 easy DIY Christmas nail ideas are all beginner-friendly, using techniques anyone can master at home with basic supplies. Each one takes minimal tools and delivers maximum festive charm in about thirty minutes. Let’s prove that simple really is stunning.
1. Classic Red With One Gold Accent
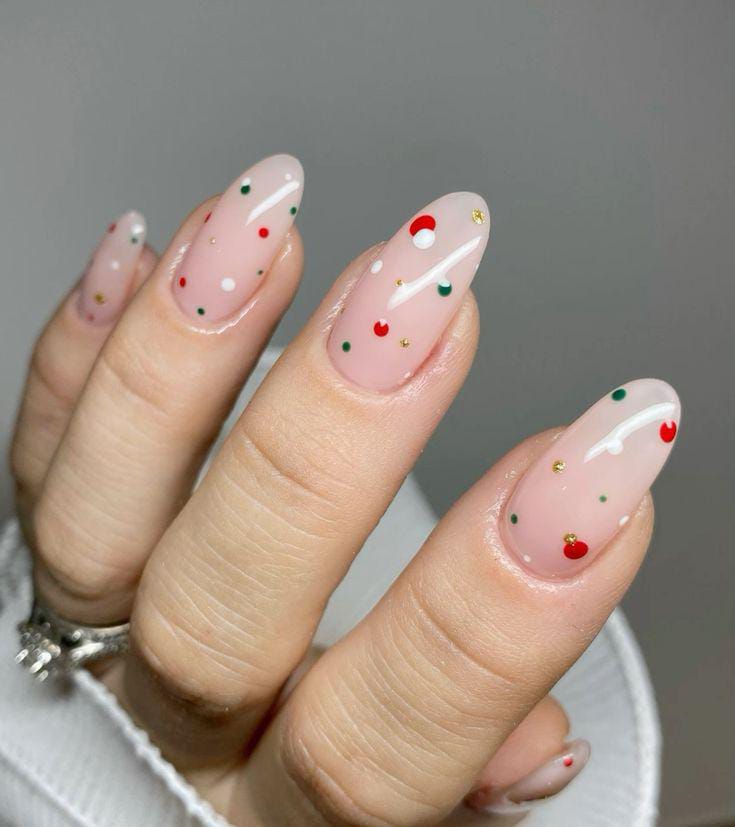
When in doubt, go classic. Paint every nail in a rich, glossy Christmas red — two coats for full coverage — and then paint just one accent nail (your ring finger is the traditional pick) in metallic gold.
That’s it. That’s the whole design. And yet it looks completely intentional and festive. The gold accent elevates the red from “everyday” to “holiday party” in one step. Use a gold chrome or metallic polish for the most luxurious finish, and don’t skip the top coat — it makes both colors look ten times more expensive.
💡 Quick Tip: This is the perfect “I have ten minutes before the party” manicure. It works on every nail shape and length, no exceptions.
Don’t have gold polish? A gold glitter topper over a nude accent nail gives the same festive pop with a little extra texture. The formula is endlessly adaptable — that’s why it’s a classic.
2. White Snowflake Dots

A deep navy or forest green base, and then the easiest snowflakes imaginable — made entirely of dots. No brushes, no steady hand required.
- Paint your base color and let it dry completely.
- With a dotting tool, place one center dot, then six dots around it.
- Connect them with tiny lines, or leave them as a dot-flower — both read as snowflakes.
- One snowflake per nail is plenty; negative space is your friend.
The dot method is brilliantly forgiving. Even if your dots aren’t perfectly even, the overall effect still screams winter wonderland. Seal with glossy top coat and you’re done in under twenty minutes.
Practice your dot snowflakes on a piece of paper first — five minutes of rehearsal saves a lot of remover-soaked frustration. Once you’ve got the rhythm, each nail takes under a minute.
White dots on dark bases also hide chips remarkably well — a quick dot touch-up is invisible, which makes this one of the longest-wearing DIY designs on the list.
3. Simple Candy Cane Stripes

Red and white stripes are Christmas in its purest form, and this version couldn’t be easier. Start with a white base on all nails. Once it’s fully dry, add red diagonal stripes using striping tape — or the edge of regular tape cut into thin strips if you don’t own the fancy stuff.
The secret is patience between steps: white base, dry completely, tape, red stripes, remove tape while the red is still slightly tacky, then top coat. Rushing the drying is the only way to mess this up. On short nails, keep the stripes thin and close together for the most candy-like effect.
This design looks like you spent an hour at the salon. You spent fifteen minutes at your kitchen table. We won’t tell.
If striping tape feels fiddly, try the dry-brush method instead: load a flat brush with red, wipe most of it off, and drag lightly across the white base for a candy-cane suggestion rather than crisp stripes. It’s more rustic, more forgiving, and honestly just as cute.
4. Green Tips on Nude

Take the classic French manicure and give it a Christmas twist: nude base, deep evergreen tips. It’s elegant, it’s festive, and it takes about as much skill as a regular French.
- Use French tip guides or stickers for crisp lines.
- Evergreen, forest, or hunter green all work beautifully.
- Keep the tips thin for a modern, delicate look.
- A glossy top coat blends the line between base and tip.
💡 Quick Tip: Add a single tiny gold dot where the tip meets the base on your ring fingers — it looks like a miniature ornament and takes five seconds.
This is the rare Christmas design that works for every dress code on your calendar — the office party, the family dinner, even a winter wedding. When one manicure does it all, that’s a win.
Evergreen tips look especially striking on short oval nails, where the curved tip mirrors the shape of a pine needle. Small canvas, big impact.
5. Tiny Gold Star Stickers

Nail stickers are the DIY girl’s best friend, and tiny gold stars might be the easiest Christmas nail art in existence. Paint your nails any festive base — deep red, midnight navy, forest green, even plain nude — and press on a star or two per nail.
Placement is everything: one star near the cuticle, or a scattered constellation across the nail, both look deliberate and chic. Press the sticker down firmly, then seal with two layers of top coat so the edges don’t lift. The result looks hand-painted from any reasonable distance.
There’s zero shame in the sticker game. Salons use them too — the difference is you’re paying drugstore prices instead of salon prices.
Stock up on sticker sheets when they’re on sale — a single sheet does dozens of manicures, making this literally the cheapest design on this entire list per wear.
For extra staying power, cap the free edge of each nail with top coat after sealing the stickers — it locks the edges down and prevents holiday-week peeling.
6. Red and White Polka Dots

Polka dots are the gateway drug of nail art — if you can dot, you can do this. Alternate red bases with white dots and white bases with red dots, or keep it uniform with white dots on red across all ten nails.
- A bobby pin tip works perfectly if you don’t own a dotting tool.
- Vary the dot sizes for a playful, confetti-like feel.
- Keep dots away from the very edge to avoid chipping.
- Two thin coats of top coat keep the dots smooth and sealed.
This is retro-cute in the best way — think 1950s Christmas card. It’s cheerful, it’s simple, and it somehow goes with every ugly Christmas sweater ever made.
For a grown-up twist on the retro dots, try tonal polka dots: slightly darker red dots on a red base, or cream dots on white. Same technique, completely different vibe — subtle, chic, and still faintly festive.
7. Minimalist Christmas Tree Line

One continuous green line, zigzagging down the nail like a minimalist Christmas tree — that’s the entire design, and it’s gorgeous. Start with a nude, white, or pale pink base, then draw a single zigzag line from cuticle to tip in green polish.
Use a thin brush or even a toothpick for the line. Top it with a tiny gold dot “star” and you’re done. The beauty here is restraint: the negative space around the tree is what makes it look modern and chic rather than crafty.
💡 Quick Tip: Try this in metallic gold on a deep green base for an inverted, evening-ready version.
The single-line tree looks stunning in metallic gold on a deep green base too — same five-minute technique, evening-ready result. One method, two manicures.
Once you’ve nailed the zigzag, try doubling it — two parallel tree lines in green and gold on the same nail for a more decorated look that still takes minutes.
8. Easy Plaid With Striping Tape

Plaid sounds complicated until you realize it’s just stripes in two directions. Red base, then black or white stripes horizontally and vertically using striping tape. Peel, top coat, done.
- Do all horizontal stripes first, let dry, then verticals.
- Thin stripes look more refined; thick stripes look bolder.
- Red and black is classic buffalo plaid; red and white is sweeter.
- Try plaid on two accent nails with solids elsewhere to keep it simple.
The tape does all the precision work for you — your only job is laying it straight. Even slightly wobbly lines look charmingly handmade rather than wrong. Cozy cabin vibes, zero cabin required.
Striping tape is reusable if you’re careful — peel it off gently, stick it to the back of your hand to de-tack slightly, and it survives several nails. Your wallet says thanks.
Doing plaid on both hands? Paint all the horizontal stripes on every nail first, then go back for verticals — batching each direction keeps your rhythm steady and lines consistent.
9. Glitter Gradient Tips

Here’s a salon-looking technique that’s secretly easy: the glitter fade. Paint your nails a solid base — nude, red, or deep green — then sponge glitter polish onto just the tips, fading it downward.
Use a makeup sponge wedge: dab glitter polish onto the sponge, then bounce it lightly onto the nail tip, building up density at the very edge and fading toward the middle. Two or three light layers beat one heavy one. Gold glitter on red is classic; silver on navy is stunning.
💡 Quick Tip: Clean up the cuticle area with a small brush dipped in remover before top coat — crisp edges make the gradient look professional.
Glitter is stubborn to remove, so save yourself the scrubbing: soak a cotton pad in acetone, wrap each fingertip in foil for five minutes, and the glitter slides right off. Your nails will thank you.
Silver glitter over a deep navy base gives a frosty evening effect, while gold over red stays classic Christmas morning. Same technique, two totally different moods.
10. Simple Holly Dots

Three red dots and two green strokes — that’s a holly sprig, and it’s adorable. On a cream, white, or nude base, cluster three red dots together for berries, then add two small green leaf shapes beside them.
- Berries first, leaves second — the leaves tuck behind naturally.
- Leaves are just pointed ovals; don’t overthink them.
- One sprig per nail near the cuticle looks delicate and intentional.
- A glossy top coat makes the berries look juicy and fresh.
This is proof that you don’t need detailed painting to suggest something clearly. Three dots plus leaves equals holly — your brain fills in the rest, and everyone recognizes it instantly.
Once you’ve mastered the holly sprig, you’ve basically learned the only three skills in beginner nail art: dotting, leaf strokes, and placement. Everything else on this list is just a variation. You’re officially a nail artist now.
Cluster the sprig near the cuticle rather than centering it — the asymmetry looks modern and leaves the tip clean, which visually lengthens the nail.
11. Two-Tone Red and Green

Sometimes the simplest idea is just… two colors. Paint alternating nails in Christmas red and Christmas green. No art, no tools, no stress — just the two most festive colors in the world taking turns.
The trick to making this look deliberate rather than lazy is choosing rich, saturated shades. A deep cherry red and a true evergreen — not neon, not pastel — keep it classy. Gel polish or a good glossy top coat gives both colors that expensive, glassy depth.
Want a tiny upgrade? Add a gold stripe of tape or a thin glitter line where the colors would meet on… well, they don’t meet. Okay, add a gold accent nail. There. Perfect.
Choose your reds and greens from the same finish family — both creams, or both shimmers — and the alternating pattern looks intentional and polished rather than random. Cohesion is the difference between “I ran out of ideas” and “I planned this.”
12. White on White Snowflakes

White polish on a white base sounds invisible, but with texture it becomes magic. Paint nails in a milky white, then stamp or draw snowflakes in a brighter opaque white on top — the subtle contrast catches light beautifully.
- Sheer milky base + opaque white art = the perfect contrast.
- Stamping plates make this foolproof; stickers work too.
- A matte top coat makes it look like fresh snow.
- Add one silver rhinestone per flake for a frosty sparkle.
💡 Quick Tip: This monochrome look is incredibly elegant — it’s the Christmas manicure for minimalists who still want to participate.
White-on-white is gorgeous in person but tricky to photograph — if you want Pinterest-worthy pics, shoot in natural daylight against a dark background. The subtle contrast shows up beautifully.
If stamping feels intimidating, snowflake stickers in opaque white give the same monochrome effect with zero learning curve. The result is indistinguishable at arm’s length.
13. Easy Ornament Circles

Big colorful circles on a dark background read instantly as Christmas ornaments — no drawing skills needed. Deep navy, black, or dark green base, then large dots in red, gold, silver, and white.
Make the circles generous — they should dominate the nail. Add a tiny metallic “cap” rectangle at the top of each circle if you’re feeling fancy, but honestly the dots alone do the job. Vary the sizes across nails for a playful, tree-trimmed look.
This is a fantastic design for kids or nail-art beginners because bigger shapes are more forgiving. Bold, cheerful, and done in fifteen minutes flat.
Let kids pick the ornament colors — they’ll be thrilled to “help,” and the mismatched brights look even more joyful. This is the rare manicure that’s better as a family activity.
Vary the ornament sizes deliberately — one large statement dot per hand surrounded by smaller ones creates a focal point that looks designed rather than random.
14. Simple Gold Foil Flakes

Gold foil looks like a million bucks and applies like kindergarten craft time. Paint a dark base — black, deep green, or burgundy — then press tiny torn pieces of gold foil onto the tacky polish with tweezers.
- Tear foil into small irregular pieces; imperfect shapes look best.
- Press onto polish that’s tacky but not wet.
- Seal with two coats of top coat to lock everything flat.
- Less is more — a few flakes per nail beats full coverage.
Each nail comes out unique, which is the whole charm. The foil catches light with every movement, making even the simplest manicure look red-carpet ready. Five minutes of effort, endless compliments.
A little foil goes a long way, so resist the urge to cover the whole nail — the dark base showing through is what makes the gold look like treasure rather than clutter. Negative space is a design choice, not empty space.
15. Candy Cane French Tips

French tips, but make them Christmas. Instead of white tips, paint red-and-white diagonal stripes just on the tips over a nude base. All the elegance of a French manicure with a peppermint twist.
Use tip guides to keep the smile line crisp, then add the tiny stripes with a detail brush or striping tape cut small. Because the art is confined to the tips, mistakes are minimal and cleanup is easy. Short nails actually suit this best — the smaller canvas keeps the stripes delicate.
💡 Quick Tip: This is office-party perfection — festive enough to notice, professional enough for Monday morning.
Because the art stays on the tips, grow-out is nearly invisible with this design — the nude base camouflages regrowth for an extra week of wear. Low maintenance and cute.
Keep the striped tip band narrow on short nails and slightly wider on long ones — proportioning the art to the nail keeps the French elegant at every length.
16. Tiny Bow Stickers

If you can place a sticker, you can do this manicure. Solid festive base — red, green, pink, whatever makes you happy — plus one tiny bow sticker per nail, placed near the cuticle or the tip.
- Gold bows on red = classic luxury.
- White bows on green = sweet and fresh.
- Red bows on nude = subtle and chic.
- Seal stickers under two layers of top coat.
Bows are having a massive moment in 2026, and Christmas is their natural habitat. This takes literally five minutes plus drying time, and it looks like you tried much harder than you did.
Mix bow colors across your nails — gold on some, white on others — for a playful wrapped-present variety. Matching exactly is overrated when presents never match.
A dotting tool dipped in polish can paint a surprisingly convincing tiny bow if stickers aren’t your thing — two small loops, one center dot, done in under a minute per nail.
17. Simple Evergreen Sprig
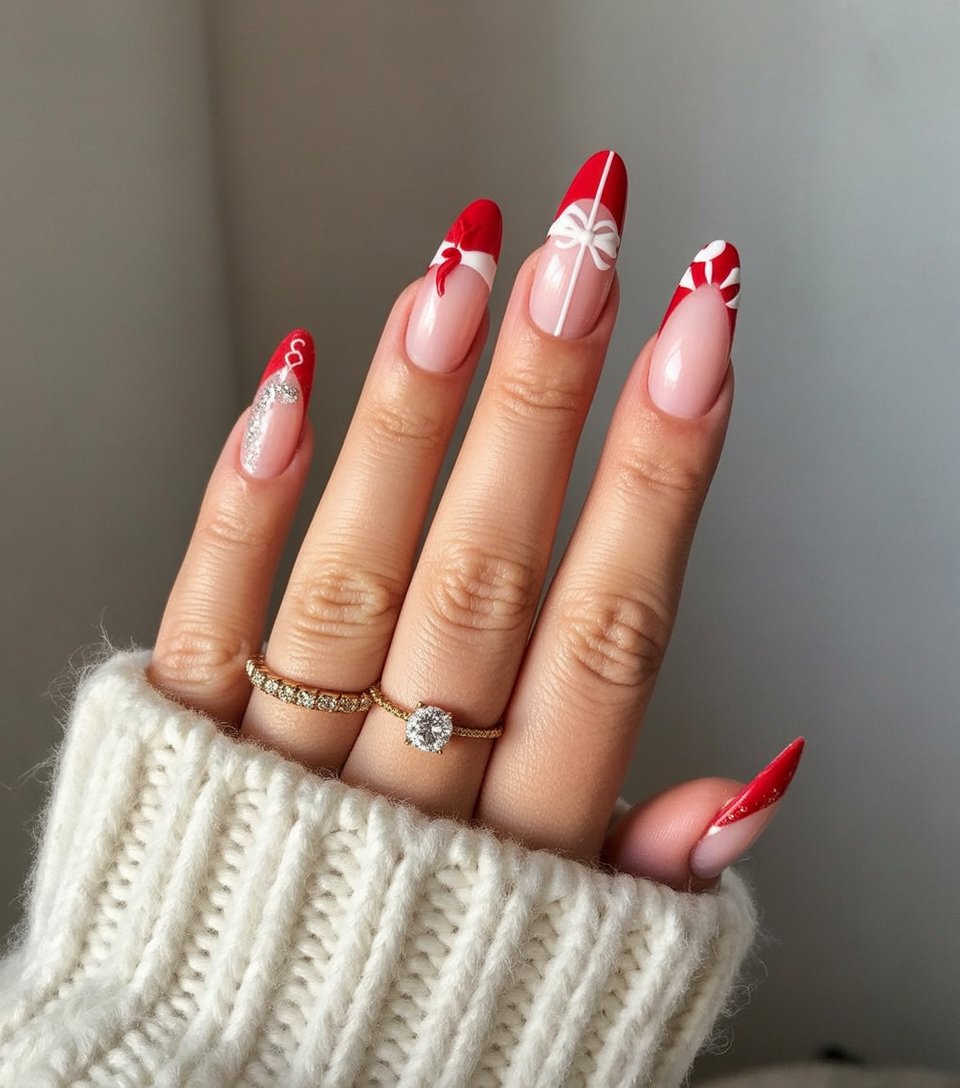
One green branch, a few red dots — a minimalist evergreen sprig that looks straight out of a Scandinavian Christmas card. On a white, cream, or pale gray base, draw a simple curved stem with short angled strokes branching off it.
The strokes don’t need to be perfect; slightly irregular branches look more natural, like a real pine bough. Add three tiny red dots as berries and you’re done. Keep it to one sprig per nail, positioned diagonally for the most elegant composition.
This is the design for people who find most Christmas nails “too much.” It’s quiet, it’s botanical, and it’s quietly perfect.
This Scandinavian simplicity pairs perfectly with minimalist jewelry and neutral outfits — let the single sprig be the one decorative thing in your whole look. Restraint is a power move.
Angle the sprig diagonally from lower-left to upper-right on each nail — the diagonal line tricks the eye into seeing length, a classic nail-artist illusion.
18. Red French With White Edge

Flip the French: red base, white tips. It’s bold, it’s graphic, and it takes the same skill as a regular French manicure — which is to say, tip guides do the heavy lifting.
- Two coats of red first, fully dry before tips.
- White tip polish should be opaque — no streaks.
- Keep the tip band medium width for balance.
- Glossy top coat for that patent-leather shine.
💡 Quick Tip: Add a thin gold line between the red and white for a Santa-suit-inspired detail that takes thirty seconds.
The gold divider line is optional but transformative — it’s a thirty-second addition that makes the whole manicure look custom-designed rather than DIY. Always take the thirty seconds.
Two thin coats of red always beat one thick coat — the color builds richer, dries faster, and chips less. It’s the least glamorous advice on this list and the most important. It’s the kind of advice that sounds boring until your manicure lasts two full weeks.
19. Easy Tinsel Glitter Line
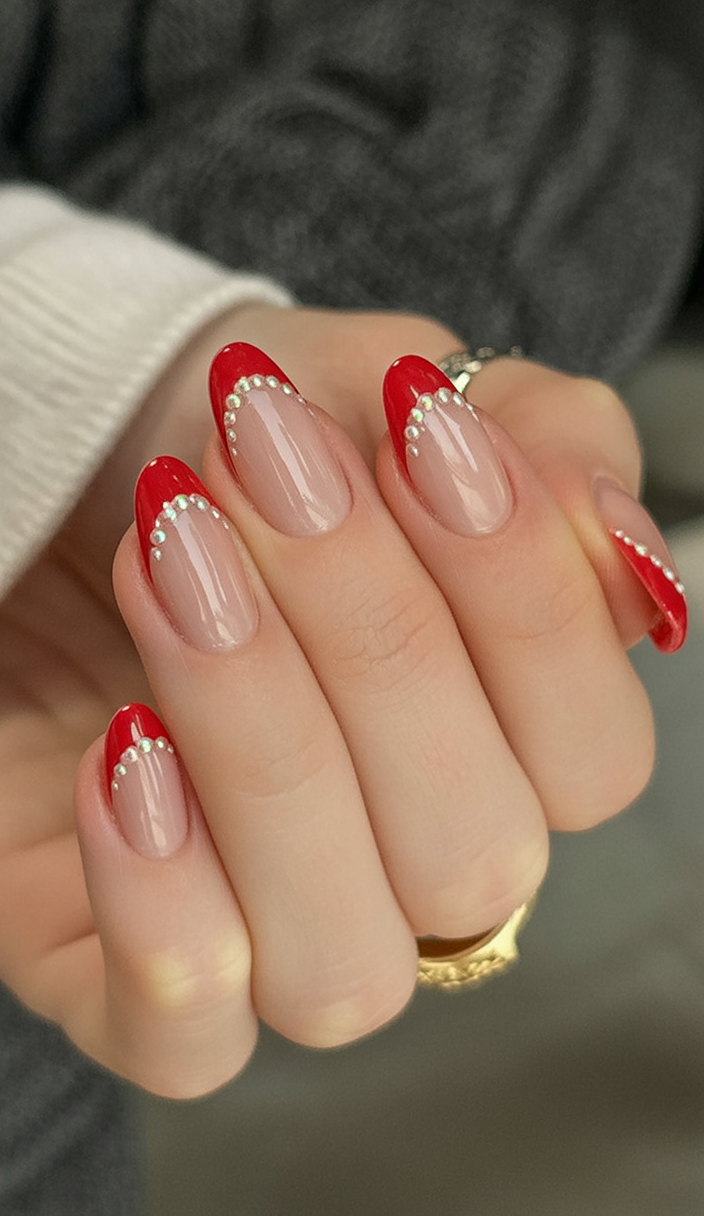
One stripe of glitter down the center of each nail — that’s tinsel, and it’s fabulous. Paint a solid base in any Christmas color, then run a striping brush loaded with silver or gold glitter polish straight down the middle.
The line doesn’t have to be laser-straight; tinsel drapes and wobbles in real life. If freehand makes you nervous, striping tape gives you a perfect channel to fill. Either way, one glitter stripe transforms a plain manicure into something party-ready.
This is also a great “rescue” design — if your solid manicure has a small chip or smudge, a glitter stripe covers a multitude of sins.
Try the tinsel stripe in holographic silver over a black base for a New Year’s-ready version — same technique, completely different party. One skill, endless holidays.
Run the glitter stripe slightly off-center for a modern asymmetric twist — perfectly centered reads classic, off-center reads editorial. Both are correct; choose your vibe.
20. Simple Mistletoe Dots
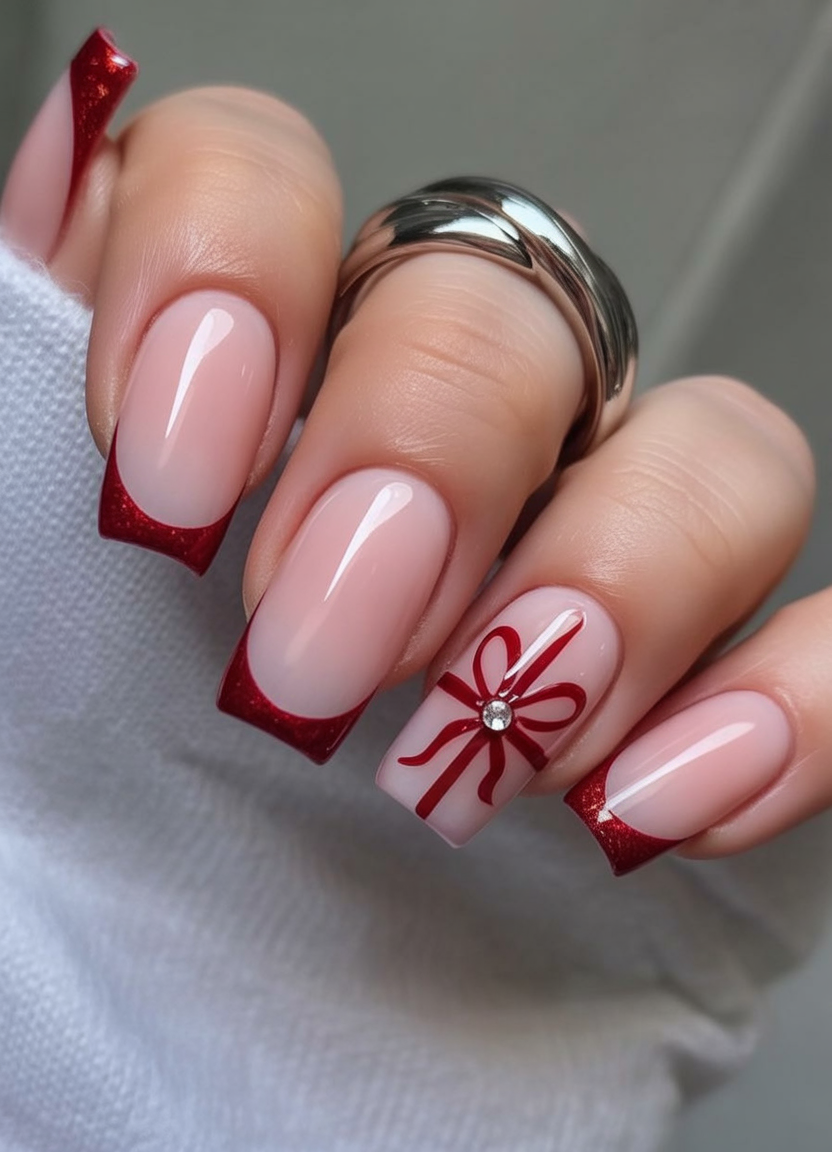
We end where all good Christmas parties end: under the mistletoe. Deep red or berry base, then tiny mistletoe sprigs made of green dots (leaves) and white dots (berries) on one or two accent nails.
- Three green dots in a triangle = leaves.
- Two white dots in the center = berries.
- That’s the whole sprig — no drawing required.
- Pearl-white polish makes the berries look extra kissable.
It’s sweet, it’s simple, and it’s the perfect final design for this list. Romantic, festive, and done entirely with dots — the ultimate beginner victory lap.
And just like that, you’re done — twenty designs, zero stress, and nails that look like you tried much harder than you did. That’s the DIY dream, delivered.
Dot the berries in two sizes — one larger pearl-white dot with a tiny one beside it — and the mistletoe instantly looks more botanical and less geometric. Tiny details, enormous charm — that’s the whole philosophy here.
CONCLUSION
See? Gorgeous Christmas nails don’t require a salon chair or an art degree — just a little polish, a little patience, and one of these 20 easy ideas. Pick your favorite, clear thirty minutes this weekend, and enjoy the compliments all season long. 📌 Save this post to your nails board on Pinterest so you have festive inspiration ready!