
20+ Simple Simple Winter Nails — Easy DIY Ideas 2026
You do not need a salon appointment to have great winter nails. Some of the prettiest December manicures are also the simplest — dots, stickers, a steady hand and ten spare minutes.
DIY nail art has one unfair advantage: you can redo it whenever you want. Smudge a snowflake on Tuesday? Fix it Tuesday night. That freedom makes experimenting genuinely fun instead of stressful.
These 20 easy ideas are all beginner-friendly, using tools you probably own already. Grab your polish and let us make something cute.
1. Dotticure Snowfall
If you can make a dot, you can make this manicure. A dark winter base — navy, forest, or burgundy — covered in white dots of different sizes instantly reads as falling snow, and the whole thing takes about fifteen minutes.

You do not need a dotting tool, though they cost almost nothing. The rounded end of a bobby pin, a toothpick, even the tip of a mechanical pencil with the lead retracted — all make perfect dots. Vary your pressure for different sizes, place them randomly, and seal with top coat. Randomness is the whole trick: neat rows look like polka dots, scattered dots look like weather.
2. Snowman Accent Nail
One snowman, nine simple nails. Paint your ring fingers white, then stack two or three white dots into a snowman body and add the tiniest details — coal eyes, a carrot nose, stick arms. It is adorable and far easier than it looks.

- Base: white polish on the accent nails; a winter solid on the rest.
- Body: two dots of white polish stacked — dotting tool or bobby pin.
- Face: black dots for eyes, an orange triangle or line for the nose.
- Details: a thin brush for stick arms and a tiny scarf line.
3. Stamped Snowflake Nails
Nail stamping is the closest thing to cheating that still counts as DIY. A metal stamping plate etched with snowflakes, a stamper, and some stamping polish give you crisp, intricate flakes in seconds — no drawing skills required.

The technique takes one practice round to learn: scrape the polish across the plate firmly at 45 degrees, press the stamper straight down, then roll it onto your nail. Work quickly — stamping polish dries fast, which is the point. White over navy, silver over black, gold over deep green: pick a high-contrast combo and the flakes practically glow.
4. Beginner Christmas Nail Art
Starting from zero? This is your on-ramp. A simple red base with one easy accent — a gold dot, a white stripe, a tiny tree triangle — teaches you the fundamental DIY skill: restraint makes simple art look professional.

- Step one: paint all nails a solid Christmas red, two thin coats.
- Step two: add ONE accent per hand — a gold dot near the cuticle of each ring finger.
- Step three: glossy top coat over everything to unify it.
💡 Quick Tip: your first attempt at nail art should always be simpler than you think it should be. One well-placed dot looks chic; five wobbly attempts look messy. Master the dot, then level up next week.
5. White Snow Nails
What if winter, but literally? An all-white manicure with a soft snowy texture — think white polish with a fine shimmer topper — looks like fresh powder on your fingertips. Clean, bright, and striking against dark winter clothes.

- Start with a ridge-filling base — white shows every imperfection.
- Two thin coats of white; thick coats go lumpy and take forever to dry.
- Add a fine white or iridescent shimmer topper for the “snow” effect.
📌 Good To Know: white polish yellows in the bottle over time, so if yours is more than a year old, treat yourself to a fresh one. The difference between fresh white and aged white is the difference between snow and old socks.
6. Winter Blue Crème
A rich winter blue crème is one of the easiest impressive manicures you can do at home — it is just a solid color, but the shade does all the work. Deep, saturated, and unmistakably December.

⚠️ Watch Out: blue is the number-one stainer in the polish world. Skipping base coat with a deep blue is how you end up with Smurf nails for two weeks after removal. Use base coat — two layers if your nails stain easily — and remove with the foil-wrap soak method, never by scrubbing. Your future self will thank you.
7. Minimalist Falling Dots
My favorite lazy-girl winter manicure: a nude base with a few scattered white dots, like the first snowflakes of the season. It takes five minutes, requires zero skill, and looks effortlessly chic.

Paint your nude base and let it dry fully — this matters because you will be dotting with white over it, and wet nude plus white equals pink mush. Then scatter five to seven dots per nail in random spots, varying the sizes. That is the entire tutorial. It is the manicure equivalent of “I woke up like this,” and nobody needs to know it took five minutes.
8. Tape Stripe Holiday Nails
Striping tape turns anyone into a nail artist. Lay thin strips across a dry base color, paint a second shade over the top, peel the tape while it is tacky — and you have razor-sharp stripes that look airbrushed.

- Base: any winter shade, fully dry — this step cannot be rushed.
- Tape: nail striping tape or thin washi tape; press edges down firmly.
- Second color: paint over everything, then peel tape immediately while tacky.
- Seal: top coat smooths the slight ridge where the tape was.
9. Snowflake Stickers on White
Water-slide decals and nail stickers have gotten so good that nobody can tell the difference anymore. White base, a few delicate snowflake stickers, top coat — done in under ten minutes with salon-looking results.

Placement is everything with stickers: use tweezers, not fingers, and press from the center outward to avoid air bubbles. One or two stickers per nail maximum — a sticker-bombed nail looks busy, while a single flake looks elegant. Float your top coat over the sticker rather than brushing hard, or you will drag the edges up.
10. Classic Christmas Red, DIY Edition
The simplest idea on this list is also the most powerful: a perfect at-home red manicure. No art, no tools beyond the bottle — just clean application and a glossy finish that looks like you paid for it.

- Prep: push back cuticles and shape nails first — red magnifies ragged edges.
- Application: three strokes per nail (center, left, right), two thin coats.
- Cleanup: a small brush dipped in remover, run around each nail while still wet.
- Finish: glossy top coat, then reapply top coat on day three to extend wear.
11. Snowflakes on a Nude Base
A sheer nude base with white snowflakes is the DIY sweet spot — forgiving to apply, pretty to look at, and the nude hides every imperfection while the flakes add the winter magic. It is the manicure I recommend to every nervous beginner.
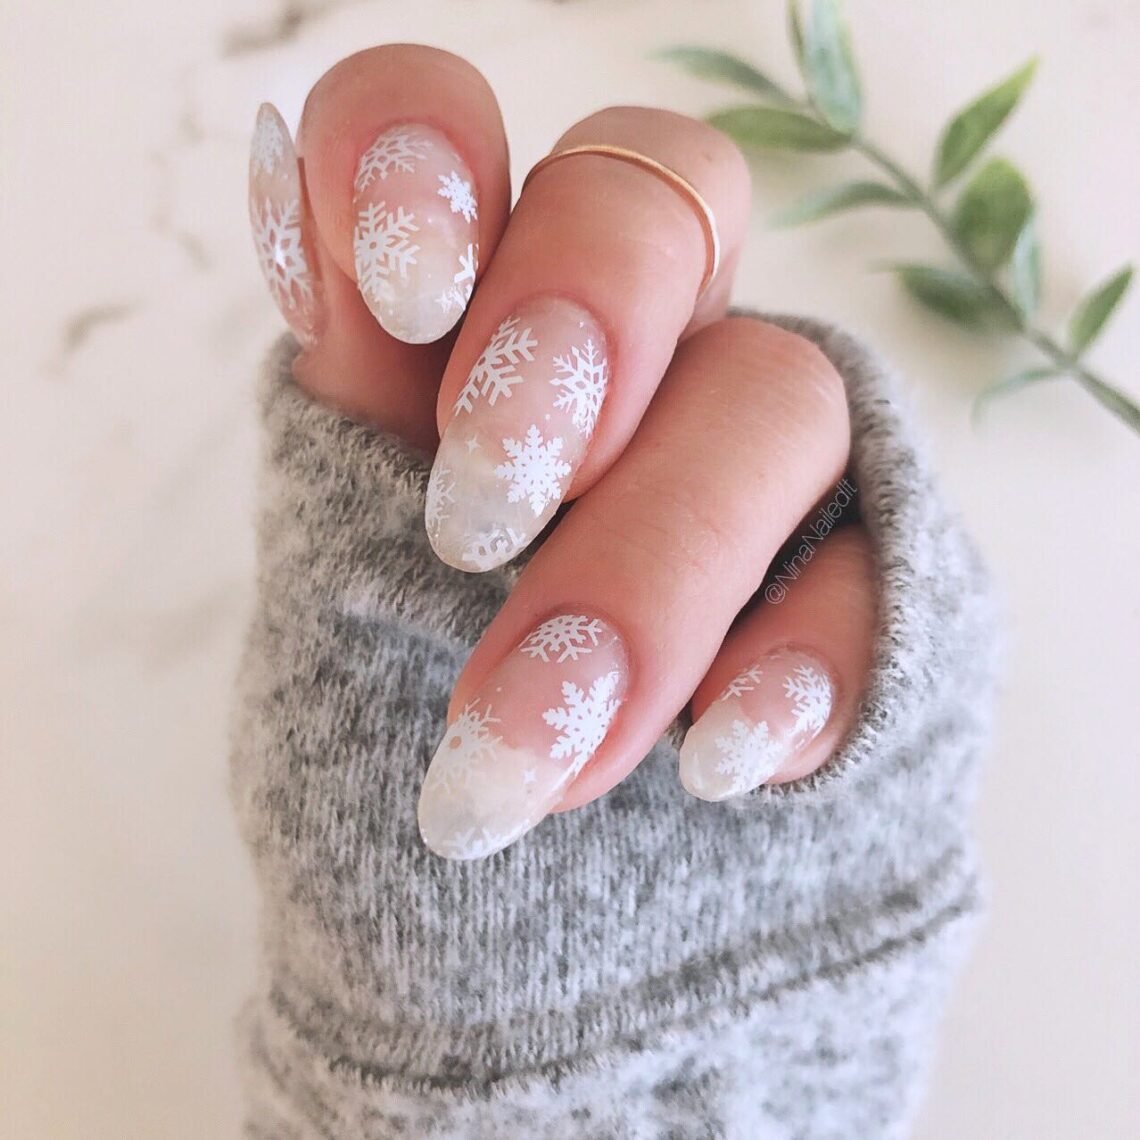
- Two coats of sheer nude — streaks disappear into the sheerness.
- White snowflakes via stamping, stickers, or a nail art pen — your choice.
- One flake per nail, placed off-center for a natural look.
💡 Quick Tip: if freehand flakes intimidate you, draw just three lines crossing at the center and add tiny dots at the ends. From normal viewing distance, it reads as a snowflake every single time.
12. Icy Snowflake Statement Set
Go bolder: an icy blue or silver base with prominent white snowflakes on every nail. It is more “look at my nails” than the subtle versions, and around the holidays, that energy is exactly right.

- Paint the icy base on all ten nails and let it dry completely.
- Stamp or sticker large snowflakes — bigger flakes suit this bolder look.
- Alternate flake sizes between nails for a dynamic, non-uniform feel.
📌 Good To Know: when every nail has art, consistency matters more than perfection. Use the same stamping plate or sticker sheet for all ten so the style matches — mismatched flake styles are what make full-art manicures look chaotic.
13. Glitter Snowflake Mix
Combine two winter favorites: paint a glitter base, then add snowflakes on top. The glitter gives you sparkle and texture; the flakes give you the seasonal detail. Together they look far more complex than the fifteen minutes they take.
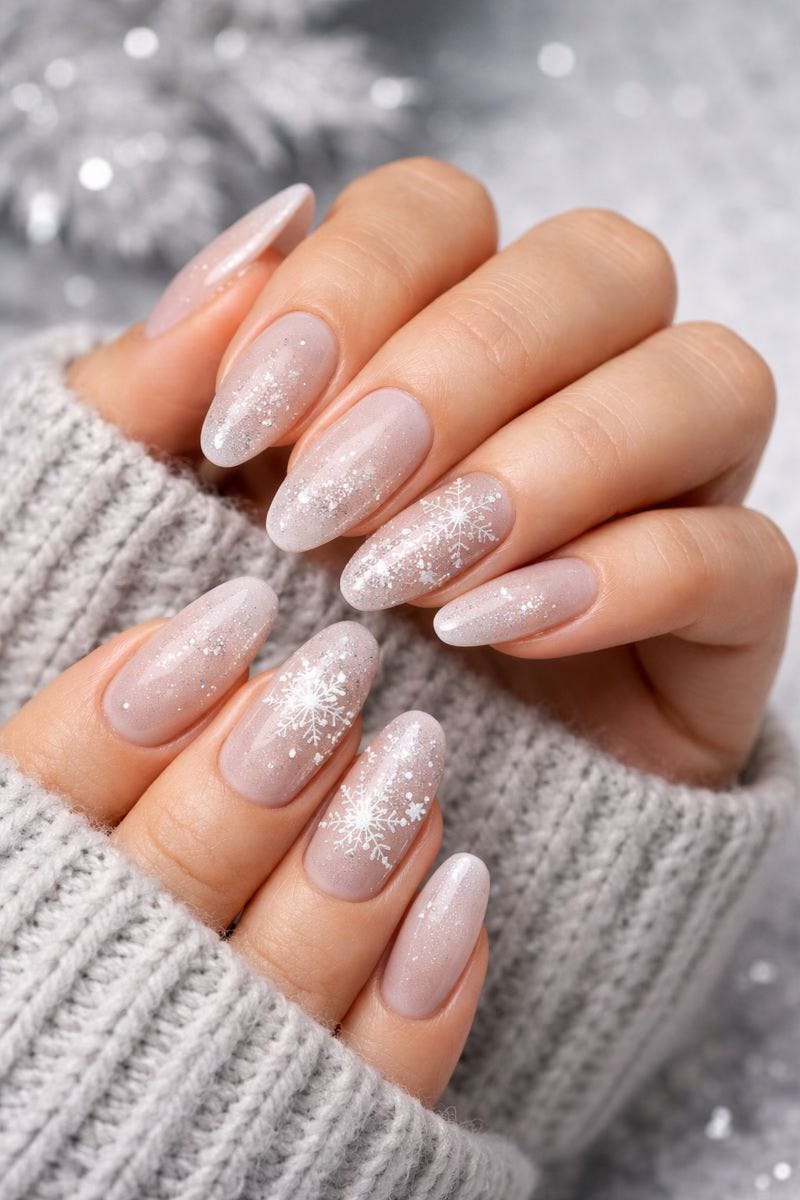
⚠️ Watch Out: glitter polish leaves a textured surface, and stamping over texture gives you broken, patchy images. The fix is simple: after your glitter coats dry, add one layer of glossy top coat and let it dry fully to create a smooth canvas. Then stamp your flakes, then top coat again. That sandwich — glitter, top coat, art, top coat — is the professional order of operations.
14. Blue Snowflake Nail Art
White snowflakes pop hardest against blue — it is just color theory doing its thing. A medium winter blue with crisp white flakes is high-contrast, cheerful, and unmistakably seasonal.
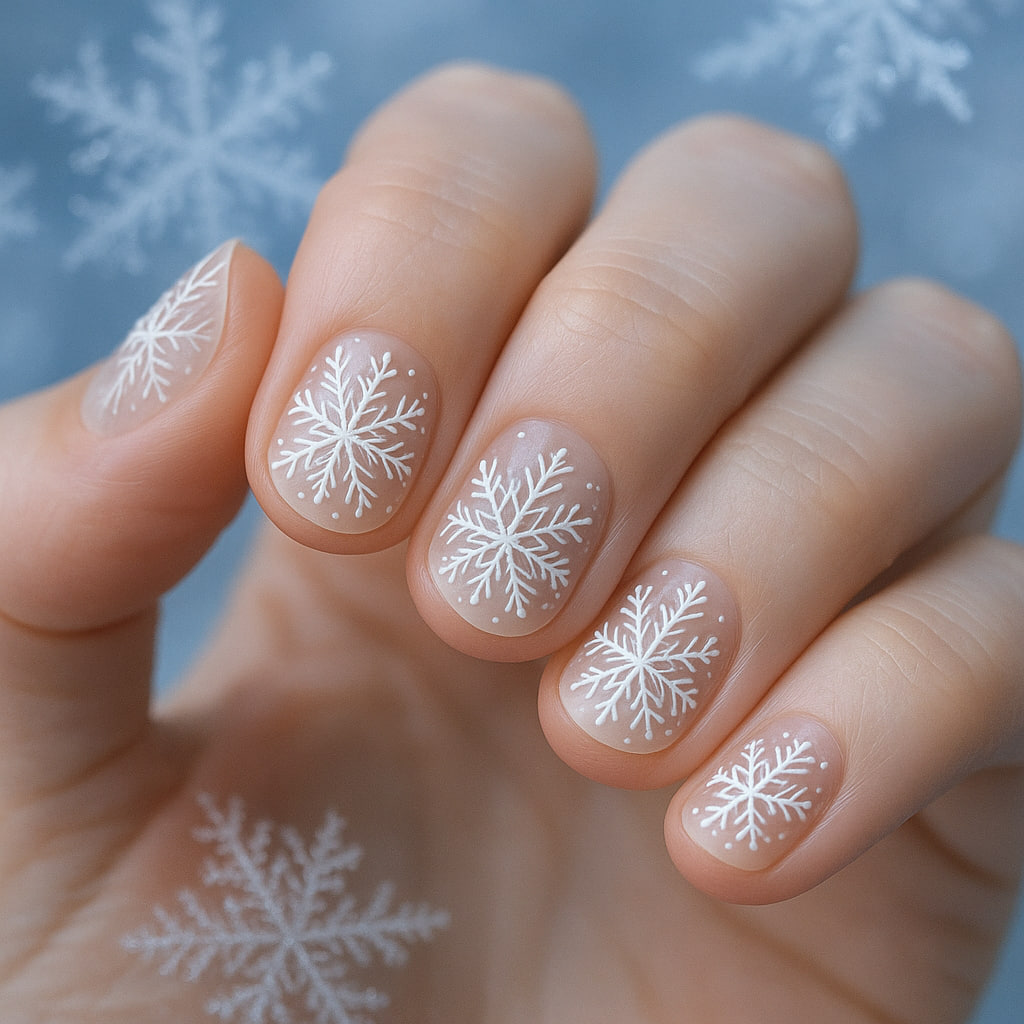
I love this one for beginners because the contrast does the heavy lifting — even slightly wobbly flakes look intentional against the blue. Use a white stamping polish (regular white polish is too sheer for stamping) or stickers for guaranteed crispness. Two thin blue coats underneath, since blues tend toward streakiness on coat one, and you are set.
15. Snowflake Plaid Accent
Plaid is winter’s signature pattern, and it is shockingly easy with striping tape: crisscrossing lines in white and red over a nude or gray base, with one snowflake accent nail to tie the theme together.

- Base: nude, gray, or deep green — plaid works over all of them.
- Lines: striping tape in both directions; white lines first, then a few red ones.
- Accent: one snowflake nail per hand to break up the pattern.
- Scale: keep the plaid small — big checks look like a tablecloth.
16. Gold-Tipped Holiday Nails
A nude base with gold tips is the DIY French manicure’s festive cousin — easier than white tips because gold is more forgiving of wobbly lines, and somehow it looks more expensive too.

- Base: sheer nude or pale pink, two coats.
- Tips: metallic gold polish, applied freehand with the bottle brush.
- Cleanup: gold is forgiving, but a cleanup brush still sharpens the smile line.
💡 Quick Tip: metallic polishes look best in two thin coats — one coat goes on patchy and dull, but the second coat transforms it into liquid metal. Do not judge a metallic by its first coat.
17. Short and Sweet Winter Set
Short nails are actually easier for DIY — less surface to mess up, faster drying, and every design looks cleaner at a smaller scale. A simple winter solid or a single accent is all short nails need to look fantastic.

- Keep nails filed to a uniform length — uneven short nails are very noticeable.
- Choose deep winter shades; they make short nails look intentional, not stubby.
- One accent nail maximum — small canvases get busy fast.
📌 Good To Know: short nails dry faster and smudge less, which makes them the ideal DIY length. If you are new to doing your own nails, trim first and thank yourself later.
18. Frosted White Almond
File your nails into a soft almond, paint them milky white, and finish with a shimmer topper. The almond shape elongates your fingers, the white brightens everything, and the whole thing looks like you spent an hour when you spent twenty minutes.

⚠️ Watch Out: filing an almond shape freehand is where most DIYers go wrong — one side always ends up pointier. File with the nail pointing away from you, work both sides equally, and check your progress by flipping your hand over and looking at the silhouette. Symmetry check takes five seconds and saves the whole manicure.
19. Watercolor Snowflake Wash
My favorite artsy DIY trick: dab diluted white and blue polish onto a nude base with a sponge for a soft watercolor wash, then add a snowflake on top. It looks like a winter watercolor painting and every single one comes out unique.

Thin your polish with a drop of polish thinner or just use a nearly-dry brush — you want translucency, not opacity. Dab, do not drag, building the wash in two or three sheer layers. The beauty of watercolor is that there are no mistakes, only happy accidents. Seal it well, because the thin layers can look dull without a glossy top coat.
20. Press-On Winter Set
The ultimate DIY hack is skipping the polish entirely. Today’s press-on nails — especially winter collections with snowflakes, plaids, and glitters — look genuinely salon-done and take ten minutes to apply.

- Prep: buff, dehydrate, and push back cuticles — adhesion lives or dies here.
- Glue: a drop on the nail and a drop on the press-on, press and hold 30 seconds.
- Fit: size down if between sizes; a too-big press-on lifts within hours.
- Wear: expect 7-10 days with glue, 3-5 with adhesive tabs.
CONCLUSION
Twenty ideas, zero salon appointments required. The best part of DIY winter nails is the freedom to experiment — try the dotticure tonight, the stamping this weekend, and the press-ons when life gets busy.
📌 Save this post to your nails board on Pinterest so you have winter nail inspiration ready!