20+ Easy Christmas Party Hairstyles — Quick Tutorials 2026
Here’s the truth about Christmas party hair: nobody at the party knows how long it took you. They just see the result. These 20 styles are the ones I recommend when time is short and expectations are high — every single one takes under 20 minutes, most under 10, and none require professional skills.
Each style below comes with a quick tutorial you can actually follow — real steps, real tools, no “simply create an intricate woven chignon” nonsense. Whether you’ve got five minutes or twenty, there’s a gorgeous party look here with your name on it.
1. 5-Minute Messy Bun With a Silk Scarf
This is the fastest party transformation I know. Make a high ponytail, twist it loosely, wrap it into a bun, and pin — then tie a silk scarf around the base and knot it with the ends flowing. The scarf instantly makes a basic bun look styled and festive.
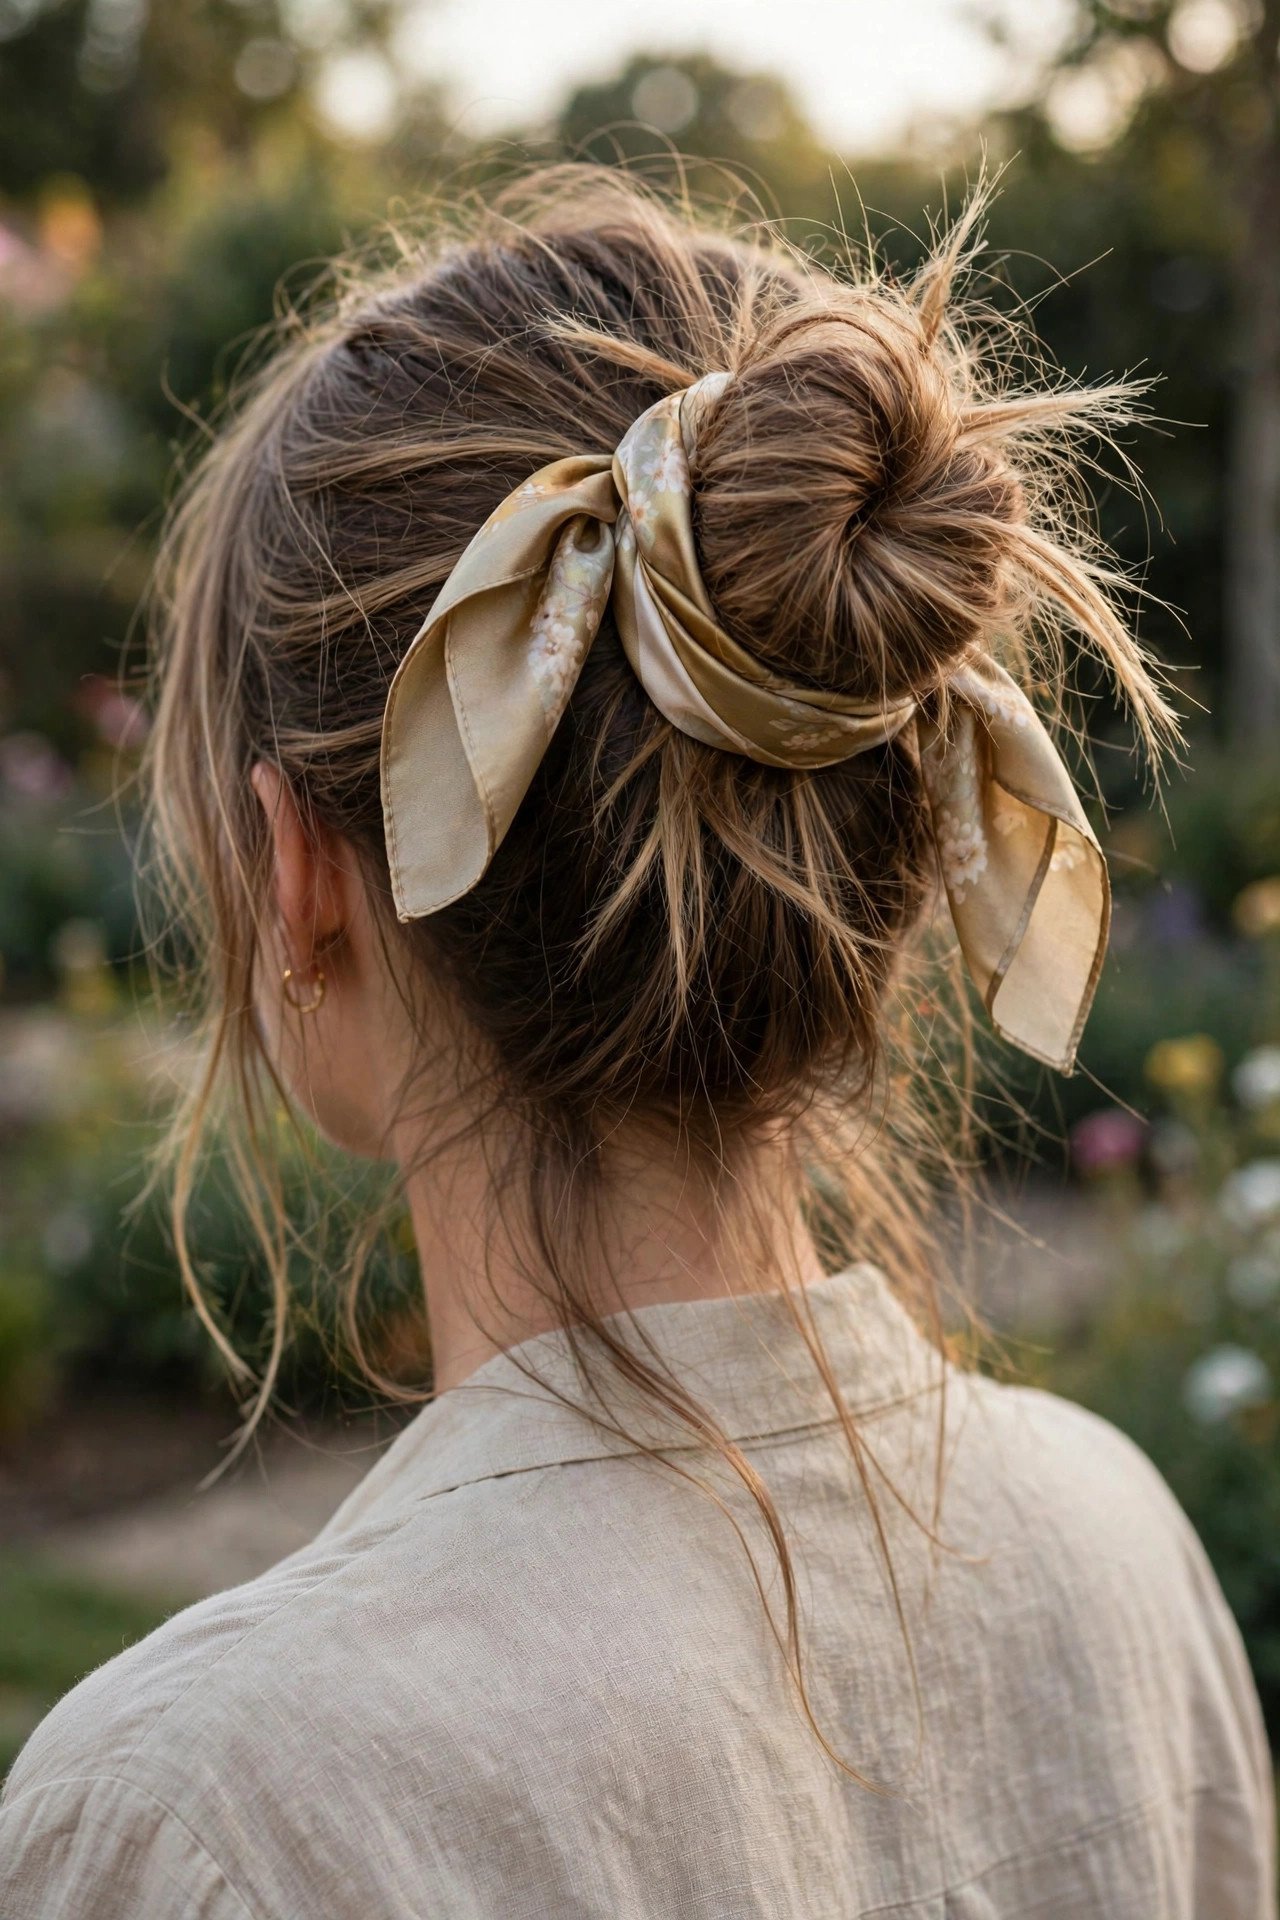
- Step 1: Flip your head upside down and gather into a high ponytail — the flip gives natural volume.
- Step 2: Twist the ponytail loosely and wrap it around the base. Pin wherever it lands.
- Step 3: Fold a silk scarf into a band, wrap around the bun’s base, and tie in a bow.
Pull out a few face-framing pieces and you’re done. Choose a scarf with red, green, or gold in the print and it’s instantly Christmas.
Choose a scarf at least 26 inches long — shorter scarves will not wrap the bun twice, and the double wrap is what looks deliberate.
2. Twisted Front Sections Pinned Back
When your hair looks good down but your face needs framing help, this is the answer. Take a two-inch section from each temple, twist them back, cross them over each other, and pin. It takes three minutes and makes loose hair look instantly party-ready.
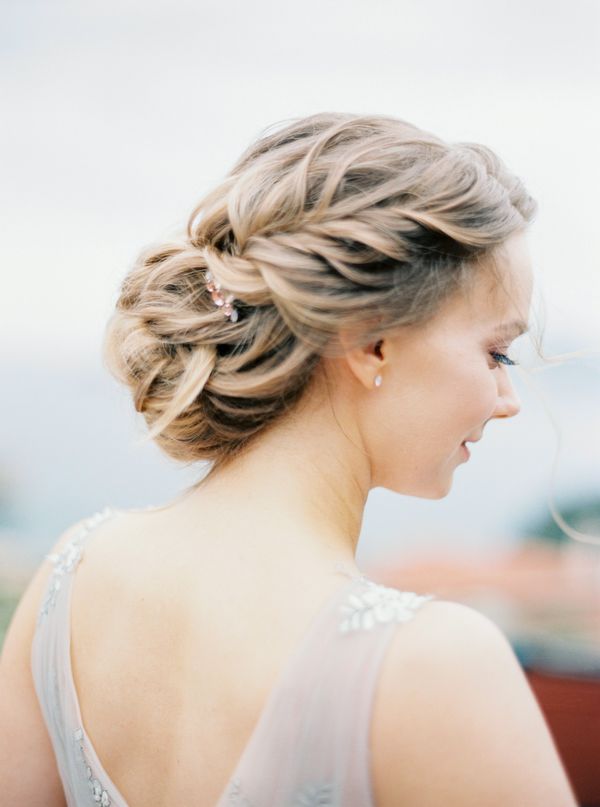
The trick is twisting away from your face on each side — this opens up your features instead of closing them in. Cross the twists at the back of your head and secure with two bobby pins in an X. Curl the rest of your hair loosely or leave it natural; either way, the twists add the “I made an effort” signal. This works on every hair length past the shoulders and every texture.
💡 Quick Tip: Tease the crown just slightly before twisting — it gives the style lift so it doesn’t sit flat.
3. Sleek Low Ponytail With a Hair Wrap
A low ponytail sounds boring until you make it sleek and wrap the elastic. Brush everything smooth and tight to the nape — use a boar-bristle brush and a little gel for glass-like roots — secure with an elastic, then wrap a half-inch section of hair around the base and pin underneath.
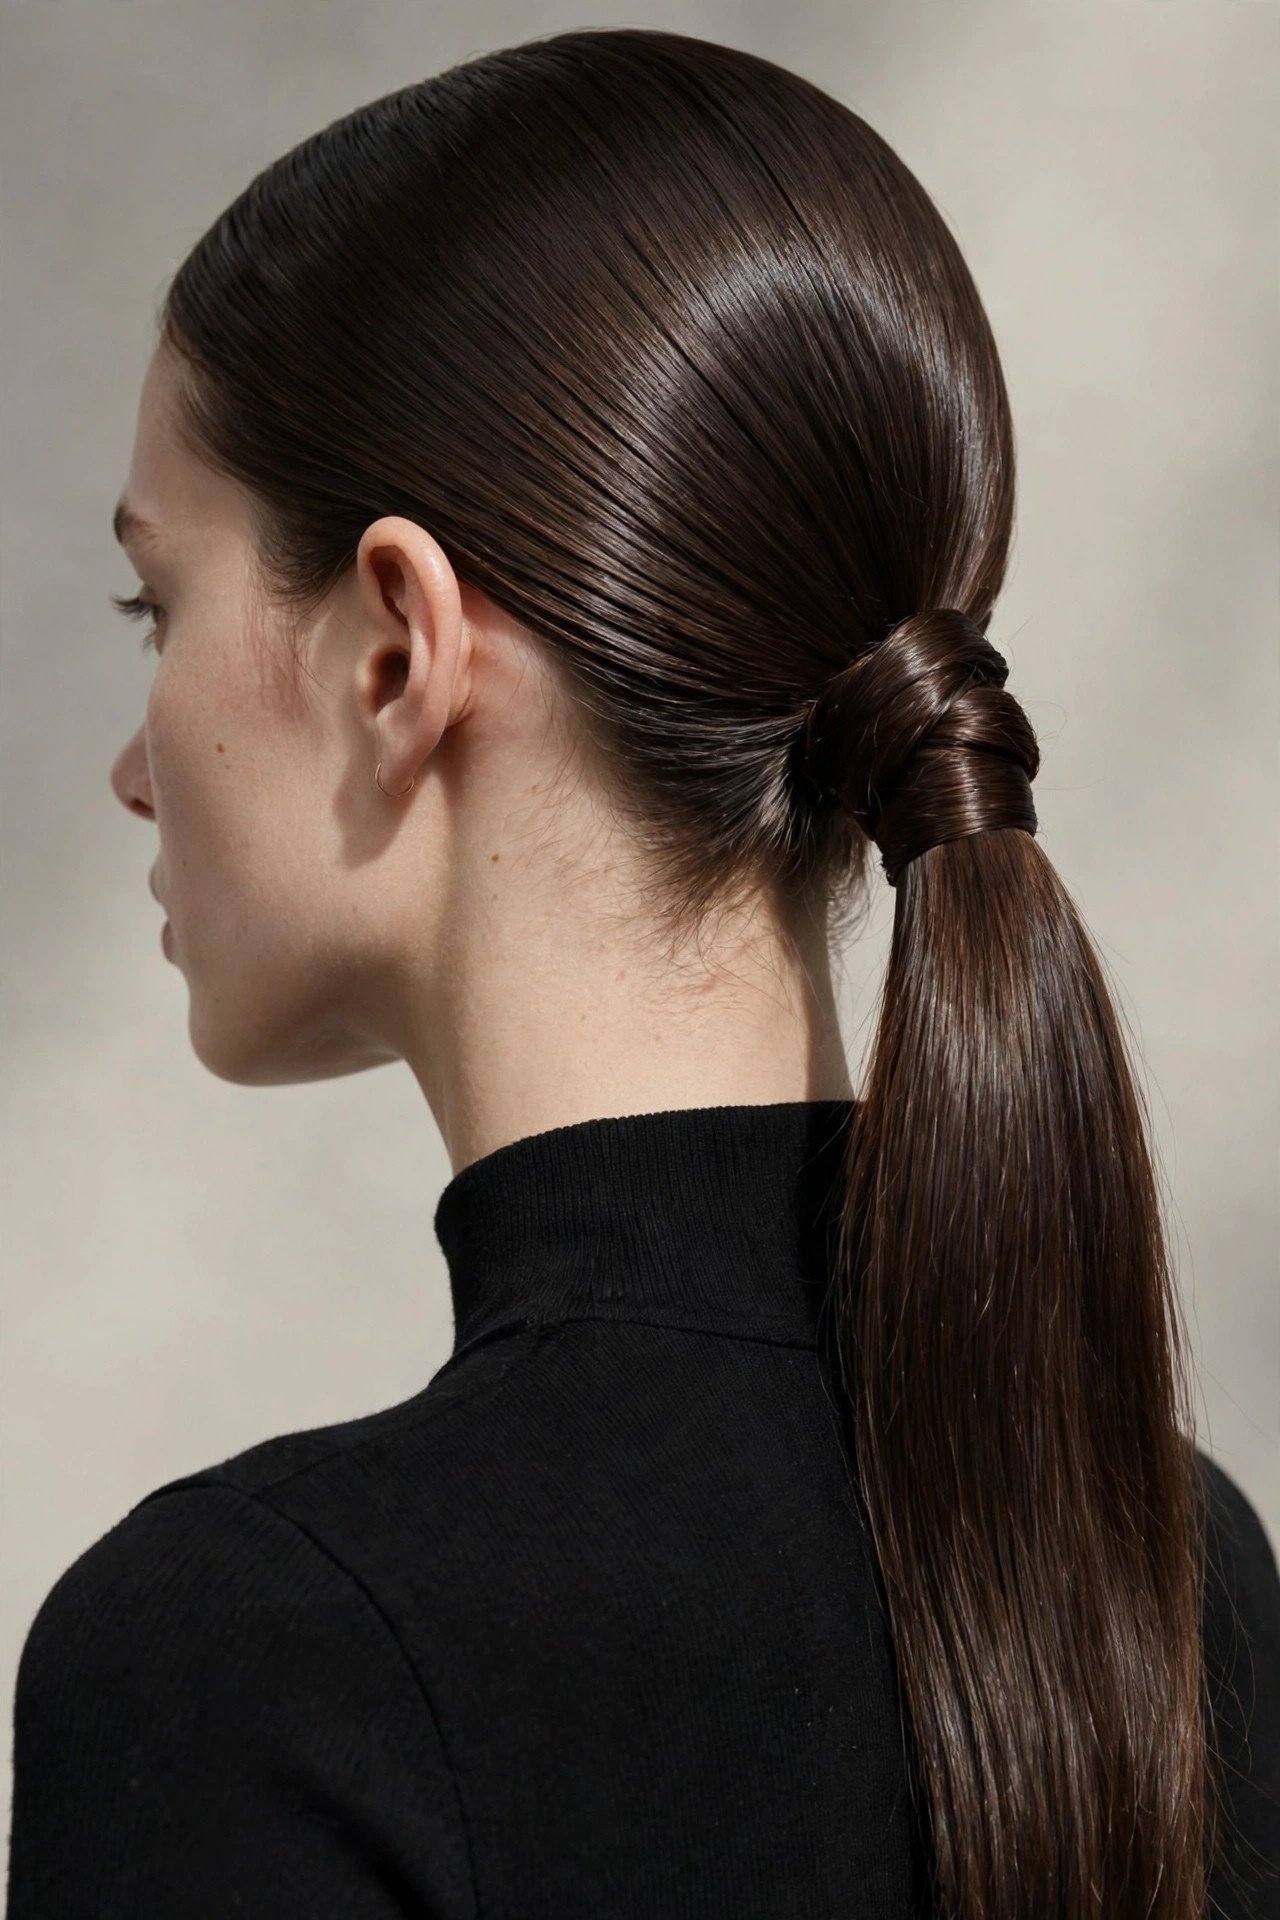
- Smoothing: A pea-sized amount of gel on damp roots, brushed through, kills every flyaway.
- The part: A sharp middle or deep side part elevates the whole look.
- The wrap: Take hair from the underside of the ponytail so the top stays perfectly smooth.
Flat-iron the ponytail itself for extra polish, or curl the ends under. Add a pair of statement earrings and this five-minute style holds its own at any party.
For extra sleekness, run a flat iron over the gathered ponytail in one smooth pass — it melds the hair into a single polished ribbon that looks incredibly expensive.
4. Easy Half-Up Twist With a Claw Clip
Claw clips are the low-effort hero of party season. Gather the top half of your hair, twist it once, and clamp a claw clip over the twist. That’s it. The 2026 trick is choosing an elevated clip — tortoiseshell, gold, or one with pearl details — instead of a basic plastic one.

This works best with a little texture in the hair, so don’t do it on freshly washed, slippery hair — day-two hair or a spritz of texture spray gives the clip something to grip. Leave the bottom half down in loose waves or straight; pull out two front pieces and curl them softly. It’s giving French-girl party, and it takes literally two minutes.
📌 Good To Know: For thick hair, use a large clip and twist in two sections; one clip can’t hold it all and it’ll slide by dessert.
5. Quick Braided Headband From Your Own Hair
A headband you can’t lose, that matches your hair perfectly, and costs nothing. Take a one-inch section from behind your right ear, do a simple three-strand braid across your hairline to the left side, and pin behind your left ear. Instant accessory.
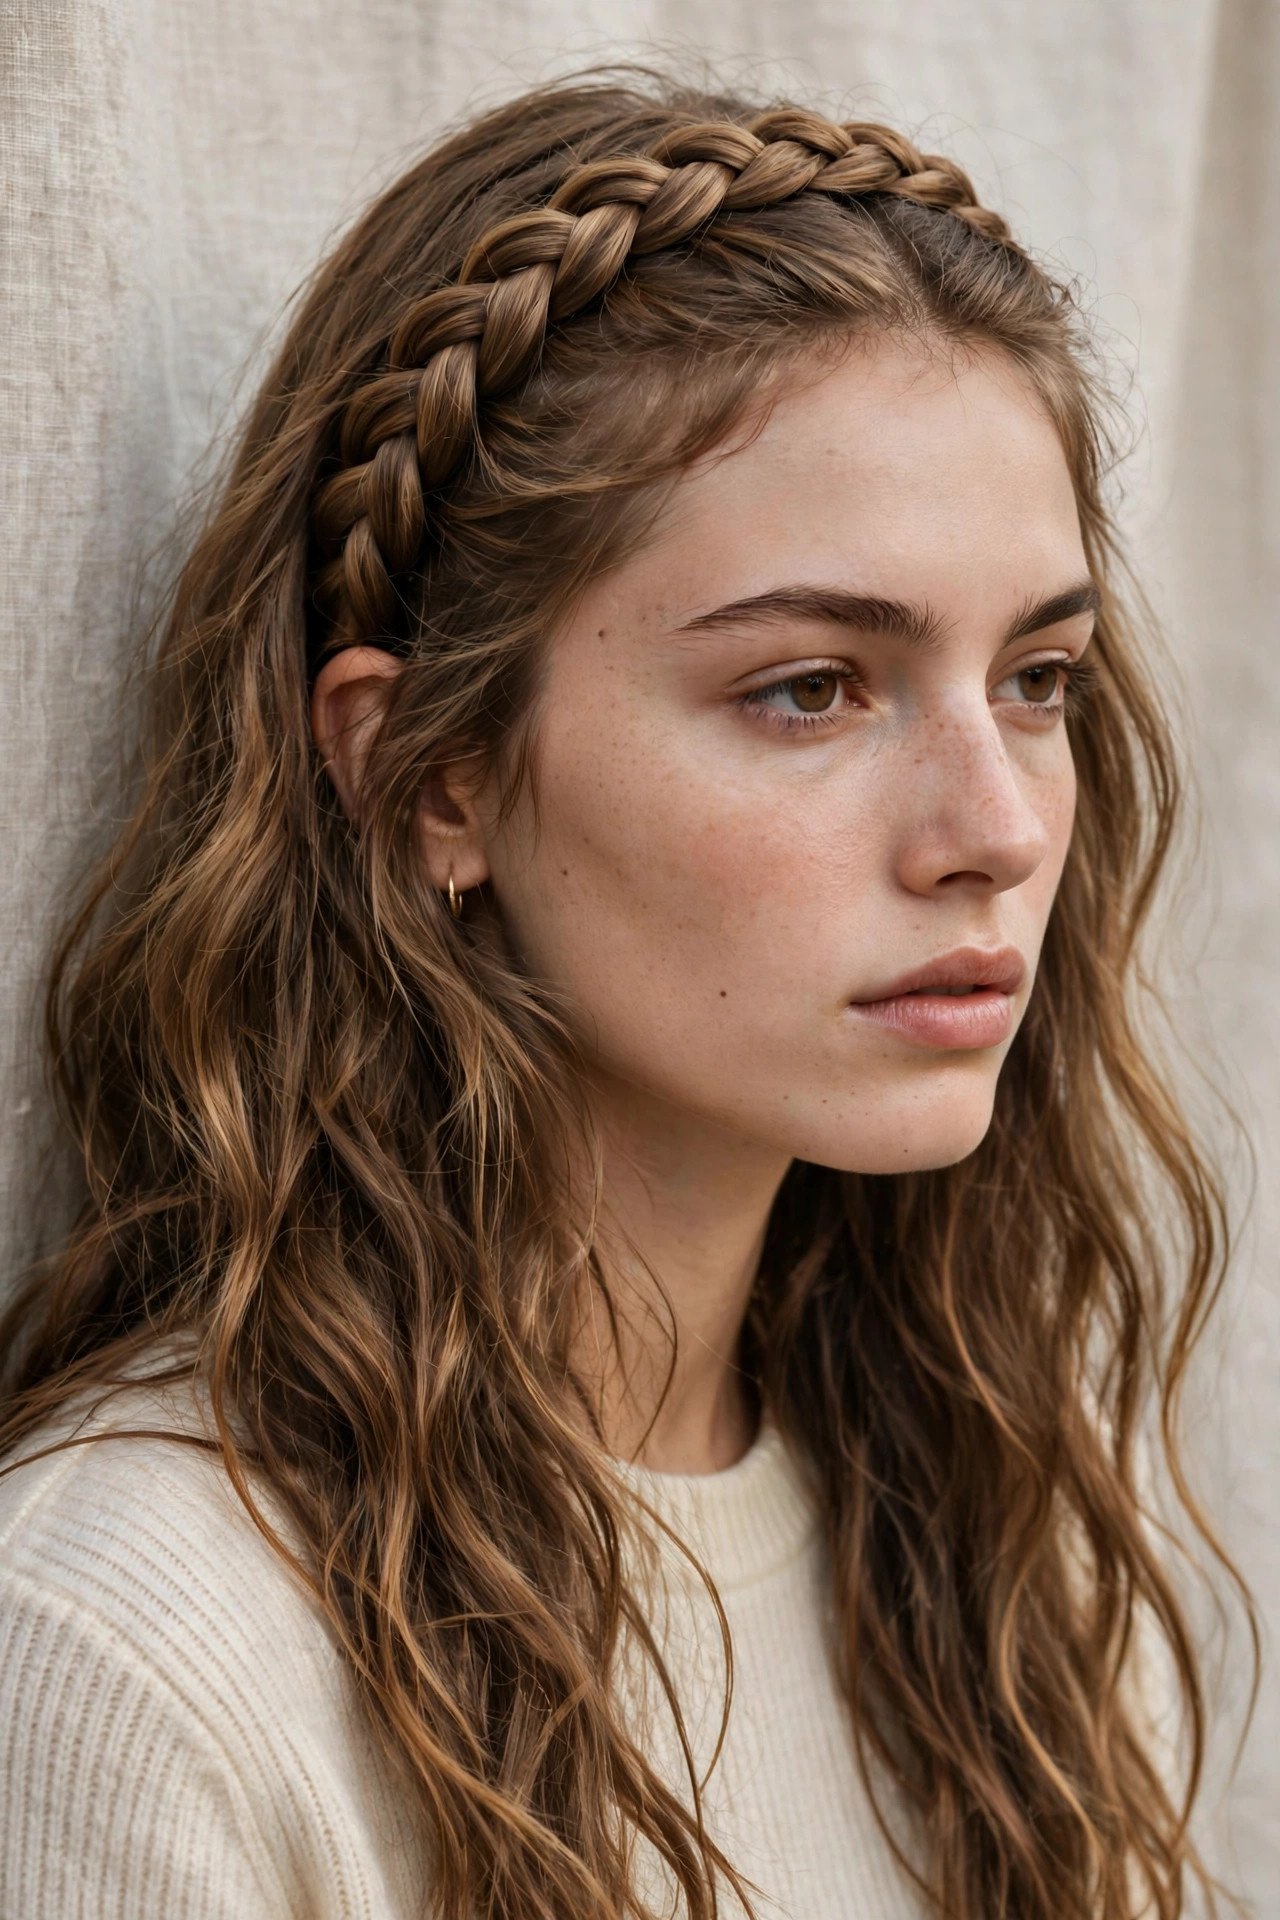
- Step 1: Section the hair and clip the rest back so it stays out of your way.
- Step 2: Braid loosely — pancake the edges for a fuller headband.
- Step 3: Pin behind the opposite ear and let surrounding hair fall over the pins.
Wear the rest down in waves or a low ponytail. On highlighted hair this looks especially gorgeous — the braid shows off every tone.
If the braid feels too tight across your forehead, gently tug it wider after pinning — a pancaked braid sits softer against the skin and looks more like a real headband.
6. 3-Minute Top Knot With Curtain Bangs Out
The top knot is the ultimate “I have no time” style, and leaving curtain bangs (or face-framing pieces) out makes it party-appropriate. Pile everything into a high ponytail, twist into a knot, pin, and let the front pieces fall free.
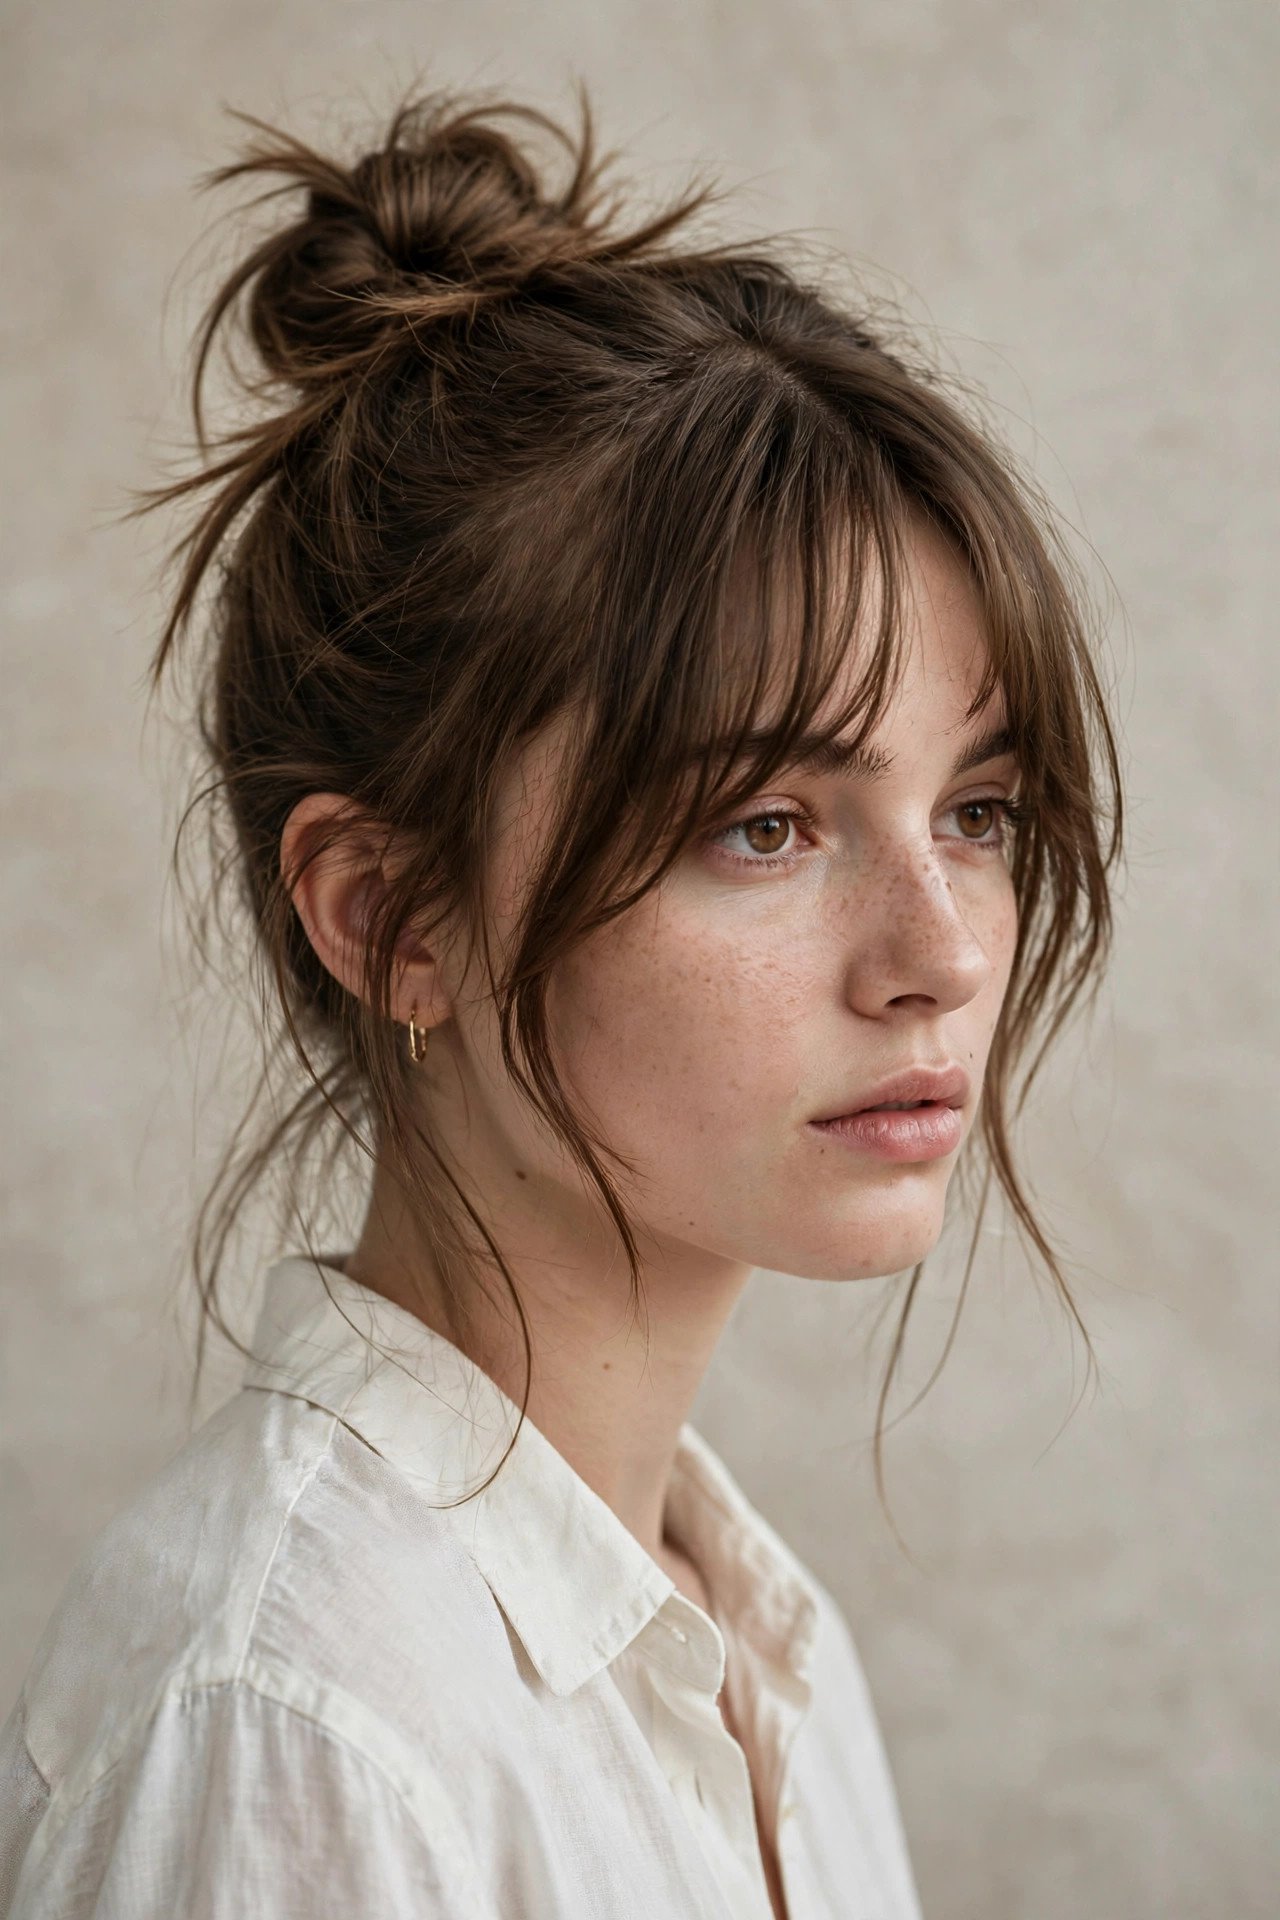
Don’t aim for neat — a slightly undone knot with texture looks more expensive than a perfect ballerina bun here. Backcomb the ponytail before twisting for fullness, and pull the knot gently wider after pinning. The loose front pieces soften the whole look and frame your face for photos. A spritz of texture spray instead of hairspray keeps it touchable. Earrings do the rest of the talking.
💡 Quick Tip: Secure the ponytail first with a strong elastic, then pin the knot — the elastic does the heavy lifting so pins just shape.
7. Lazy Side French Braid
A French braid doesn’t have to be tight or perfect — a lazy, loose one draped over one shoulder is romantic and takes five minutes once you know the basic stitch. Start at the temple, add hair as you go down the side, and finish in a regular braid over your shoulder.
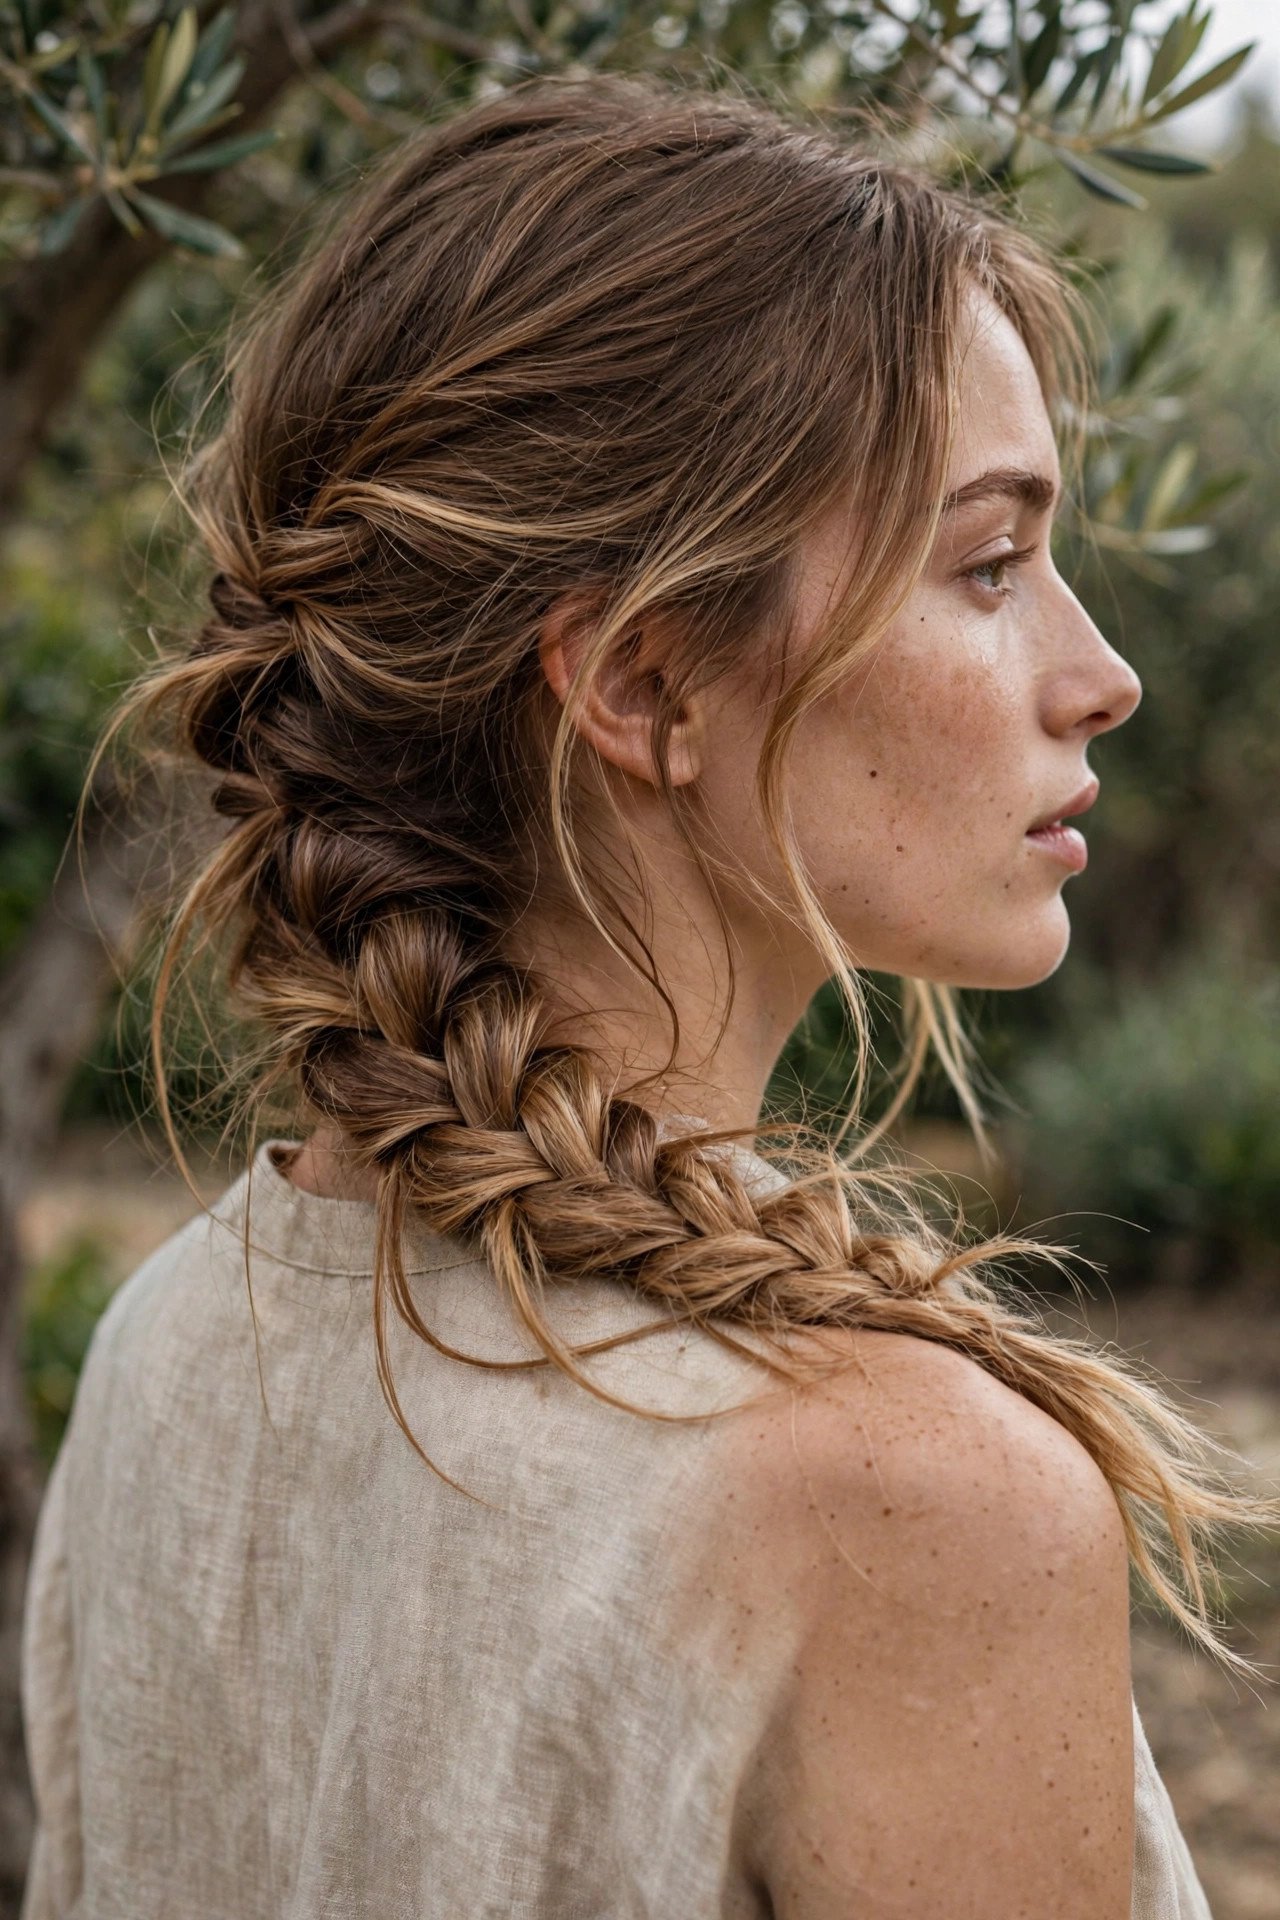
- Keep it loose: Don’t pull sections tight — loose braiding is faster and looks softer.
- Pancake it: Tug each stitch wider after braiding for instant fullness.
- Finish: Tie with a velvet ribbon instead of an elastic for Christmas points.
⚠️ Watch Out: If your layers are short, they’ll poke out — that’s fine, just smooth them with a little pomade rather than fighting them.
Braid with your head tilted slightly toward the side you are working on — gravity helps the sections fall into place and the whole thing goes twice as fast.
8. Bubble Ponytail in Four Steps
The bubble ponytail looks complicated and takes four steps. High ponytail, elastics every two inches, tug each section wider, done. It’s playful, it’s photogenic, and it holds all night — what more do you want from party hair?
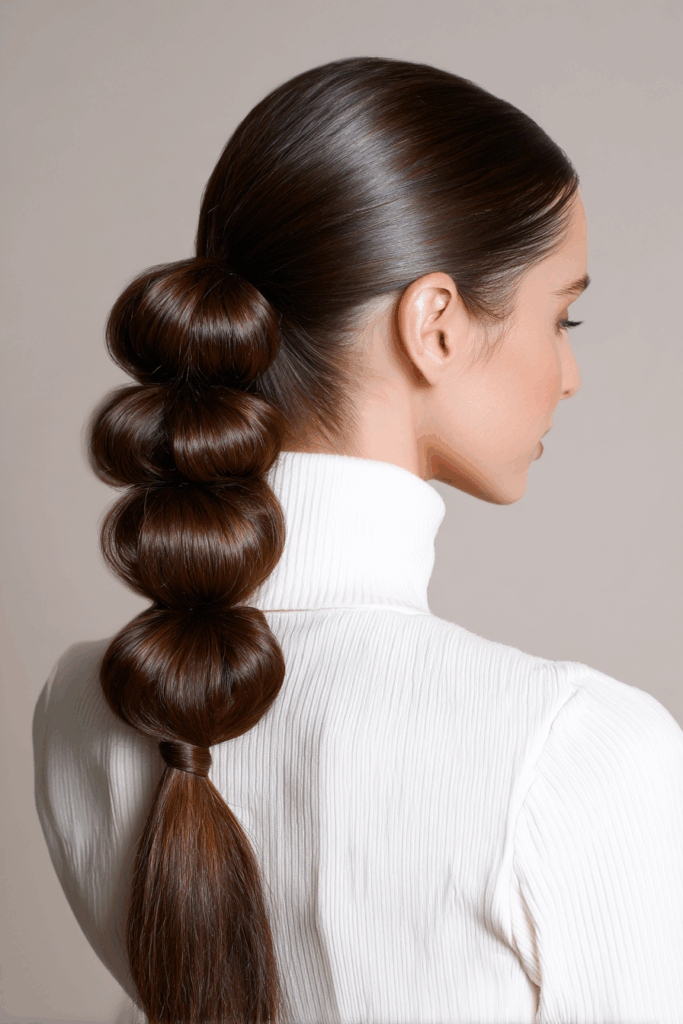
Use clear mini elastics so they disappear, and backcomb each section lightly before tugging for maximum bubble volume. The key detail: wrap a thin strand of hair around each elastic and pin it — this one step takes it from playground to party. Tie a ribbon at the top for festive flair. Long hair shows this off best, but medium hair works with slightly smaller bubbles.
Try alternating bubble sizes — one large, one small — for a more organic, high-fashion effect rather than uniform playground bubbles.
Wrap the top elastic with a ribbon before adding the lower ones — the dressed-up base sets the tone for the whole ponytail.
9. Twist-and-Pin Low Chignon
No braiding skills required: split your hair into two low ponytails, twist each one, cross them over each other at the nape, and pin the ends under. The crossed twists create beautiful texture that looks far more complex than it is.

- Step 1: Two low ponytails at the nape, side by side.
- Step 2: Twist each ponytail tightly and pin the ends up and under.
- Step 3: Cross the twists over each other and pin everything flat.
Tuck the ends well and mist with hairspray. Add a jeweled comb or a few pearl pins at the side. Fifteen minutes, zero braiding, total elegance.
📌 Good To Know: This is a fantastic style for fine hair — the twists create the illusion of much more hair than you have.
Cross the twists loosely rather than pulling them tight — the soft crossover reads romantic, while a tight one can look severe.
10. Face-Framing Braids With Loose Waves
Two tiny braids, huge impact. Braid a thin section on each side of your part — just an inch or two back from the hairline — and let the rest fall in loose waves. It’s boho, it’s pretty, and it keeps hair out of your face while you eat, drink, and dance.
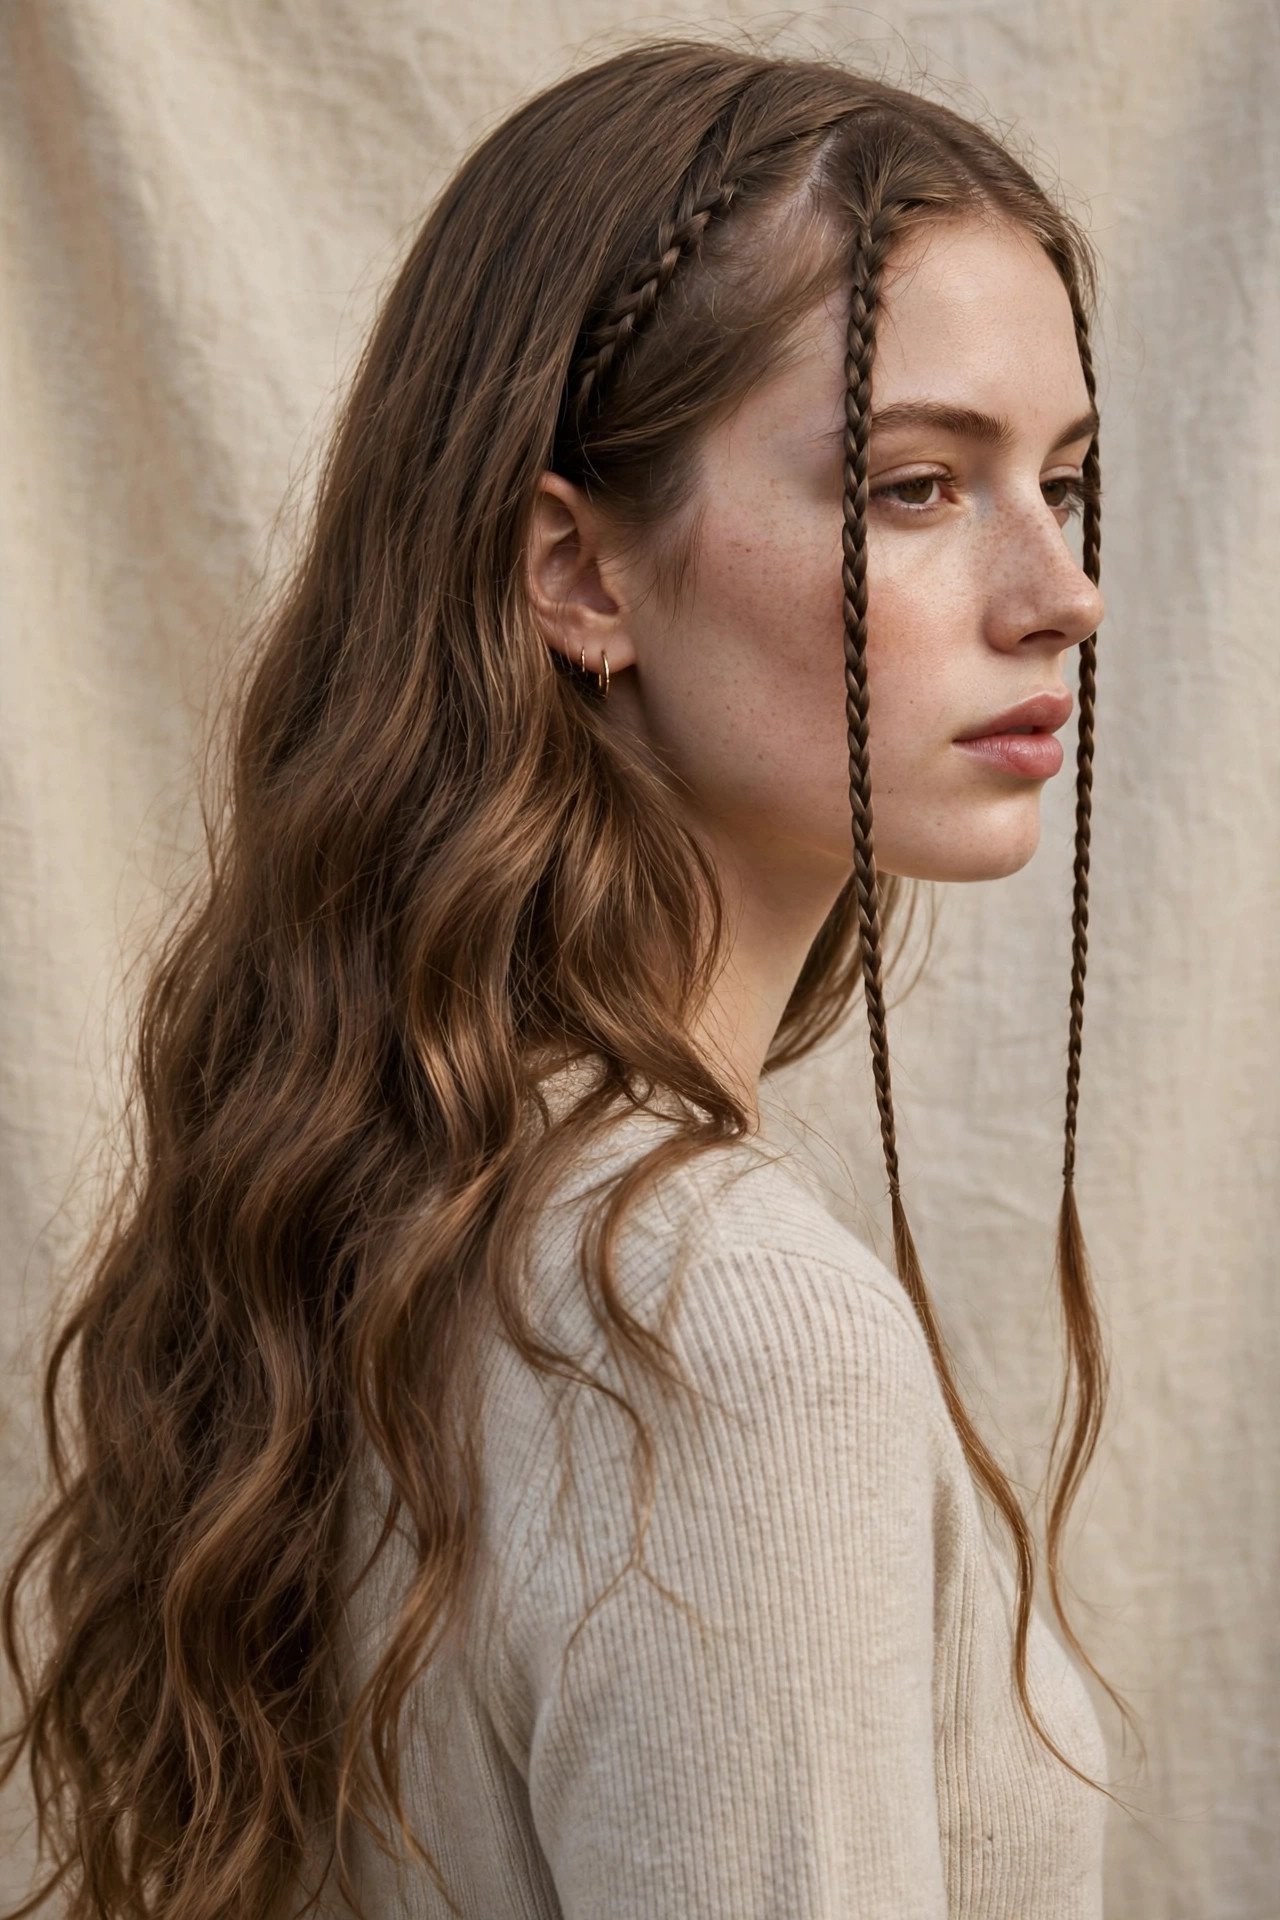
Keep the braids small — pencil-thin is the goal — and tie them with clear elastics. They should start right at the part and angle slightly back. Curl the rest of your hair with a 1.5-inch iron, brushing through for softness. The contrast between the neat little braids and the loose waves is what makes this special. Add tiny gold cuffs to the braids if you’re feeling festive.
Keep the braids tucked behind your ears once tied — worn back they read as delicate detail, while hanging forward they can look a little juvenile.
11. Quick Sock Bun (No Donut Needed)
No hair donut? No problem. A clean sock with the toe cut off, rolled into a ring, works exactly the same. Pull your ponytail through the sock ring, spread the ends over it, roll down, and pin. Perfect bun, zero special tools.
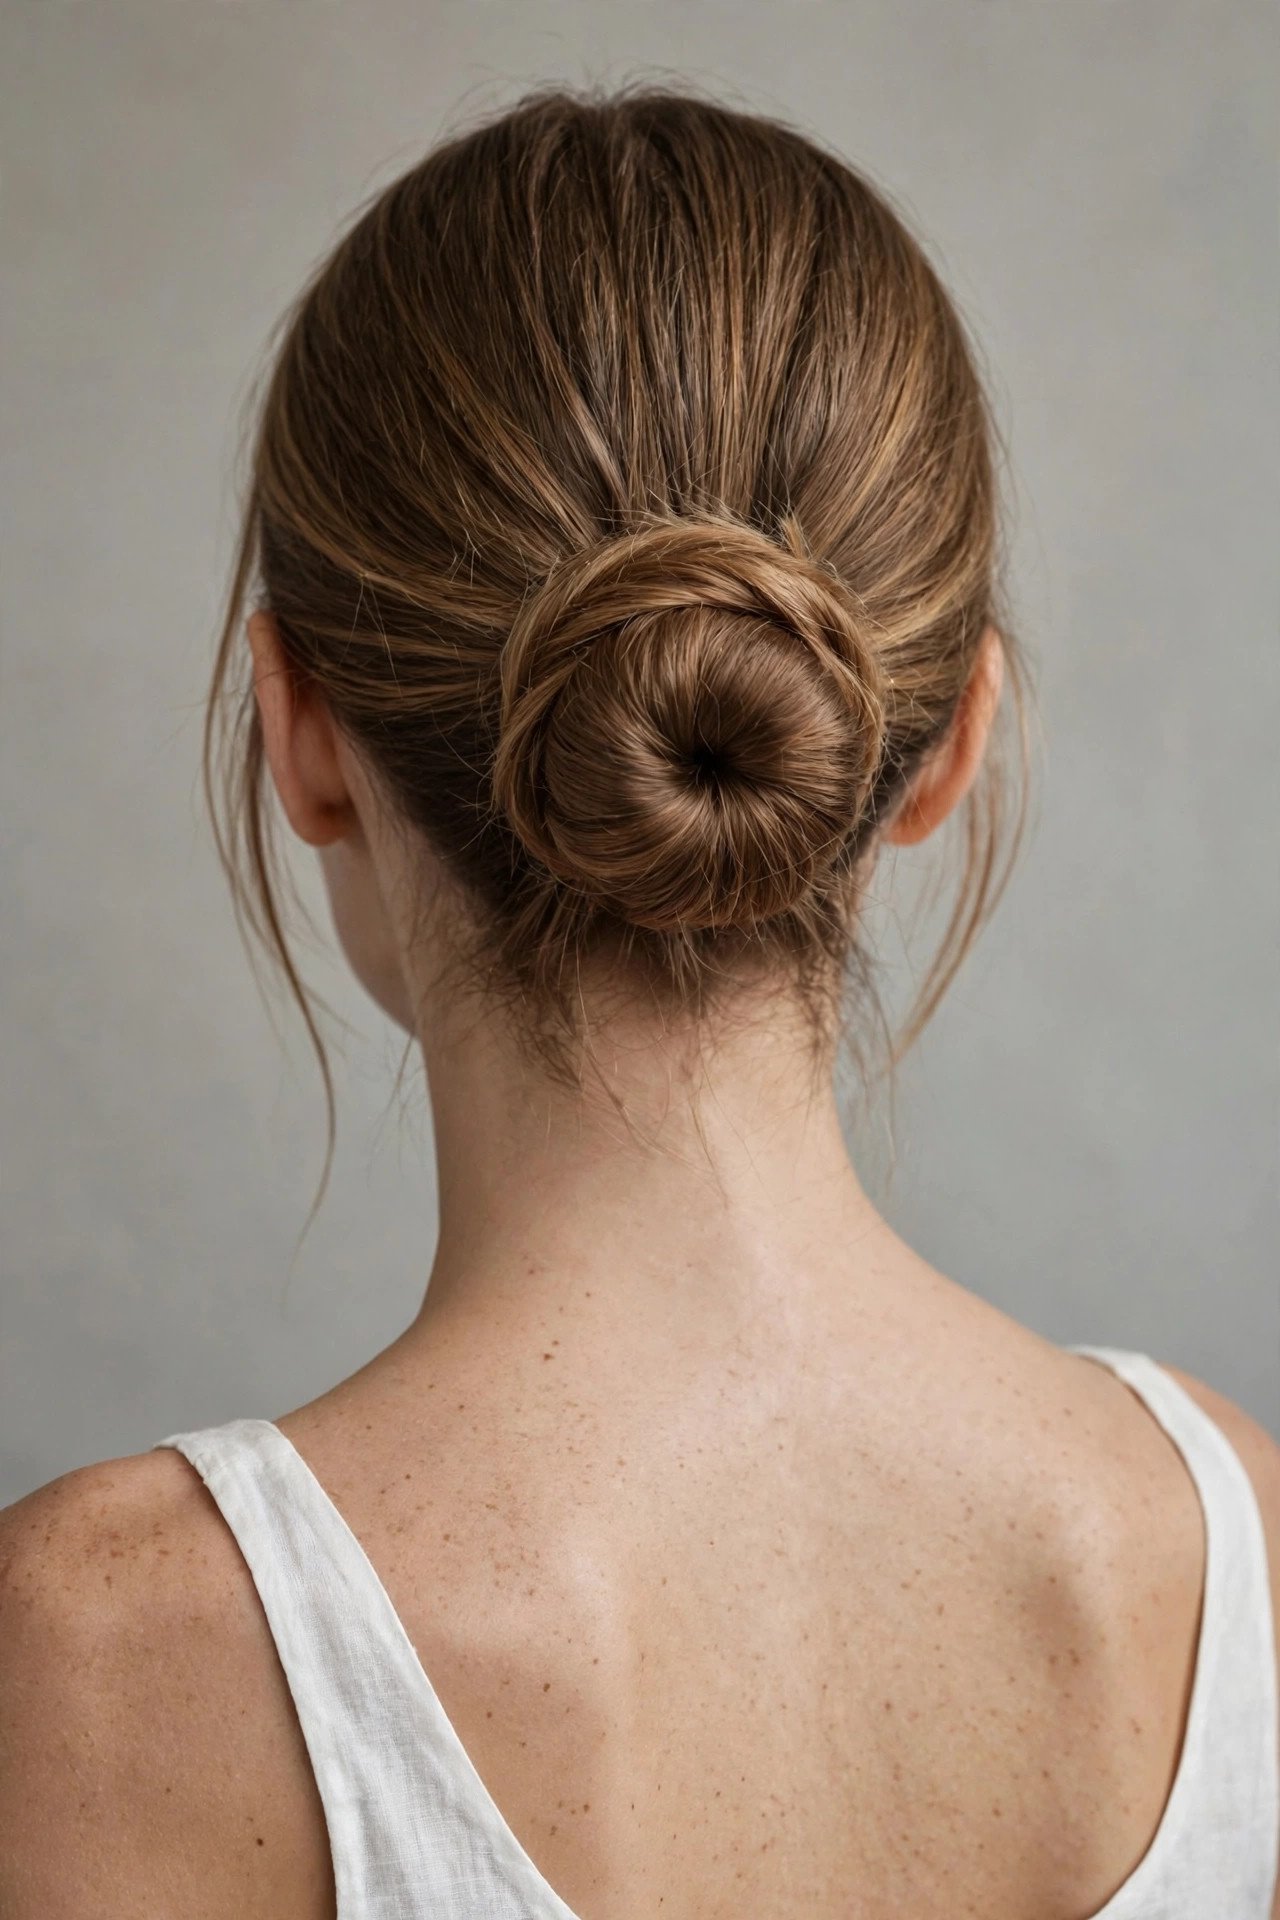
- Sock choice: A sock close to your hair color disappears best.
- Smooth first: Brush the ponytail completely smooth — lumps show through the bun.
- Roll, don’t twist: Rolling down over the sock gives an even, round shape.
Wrap a velvet scrunchie around the base for instant Christmas party status. This is also the most secure updo on this list — it’ll survive the dance floor.
💡 Quick Tip: Slightly damp hair rolls smoother than dry hair — mist the ponytail before you start.
Roll the sock a little tighter than feels natural — a firm donut gives a rounder, more polished bun than a loose one.
12. Half-Up Space Buns, Party-Ready
Space buns aren’t just for festivals — done small and sleek as a half-up style, they’re playful party hair. Section off the top half, split it in two, twist each into a mini bun on either side of the crown, and pin. Leave the rest down.

Keep the buns small and positioned high but not too far apart — you want cute, not costume. Smooth the top with a little gel for polish, and curl the down section loosely. This is adorable with a velvet dress and gives major cool-girl energy. Add glitter roots or star pins to the buns for full Christmas commitment.
Position the buns slightly back from your hairline rather than right on top — set back they look playful-chic, while too far forward reads costume.
Twist each section in the same direction for symmetry — mirrored twists sit unevenly and one bun always ends up bigger.
13. Simple Side Braid With Ribbon Woven In
Take a regular three-strand side braid and weave a ribbon through it as you braid — that’s the whole tutorial, and the result looks like you hired someone. Tie the ribbon to the top of the section before you start, then treat it as a fourth strand, weaving it in and out.
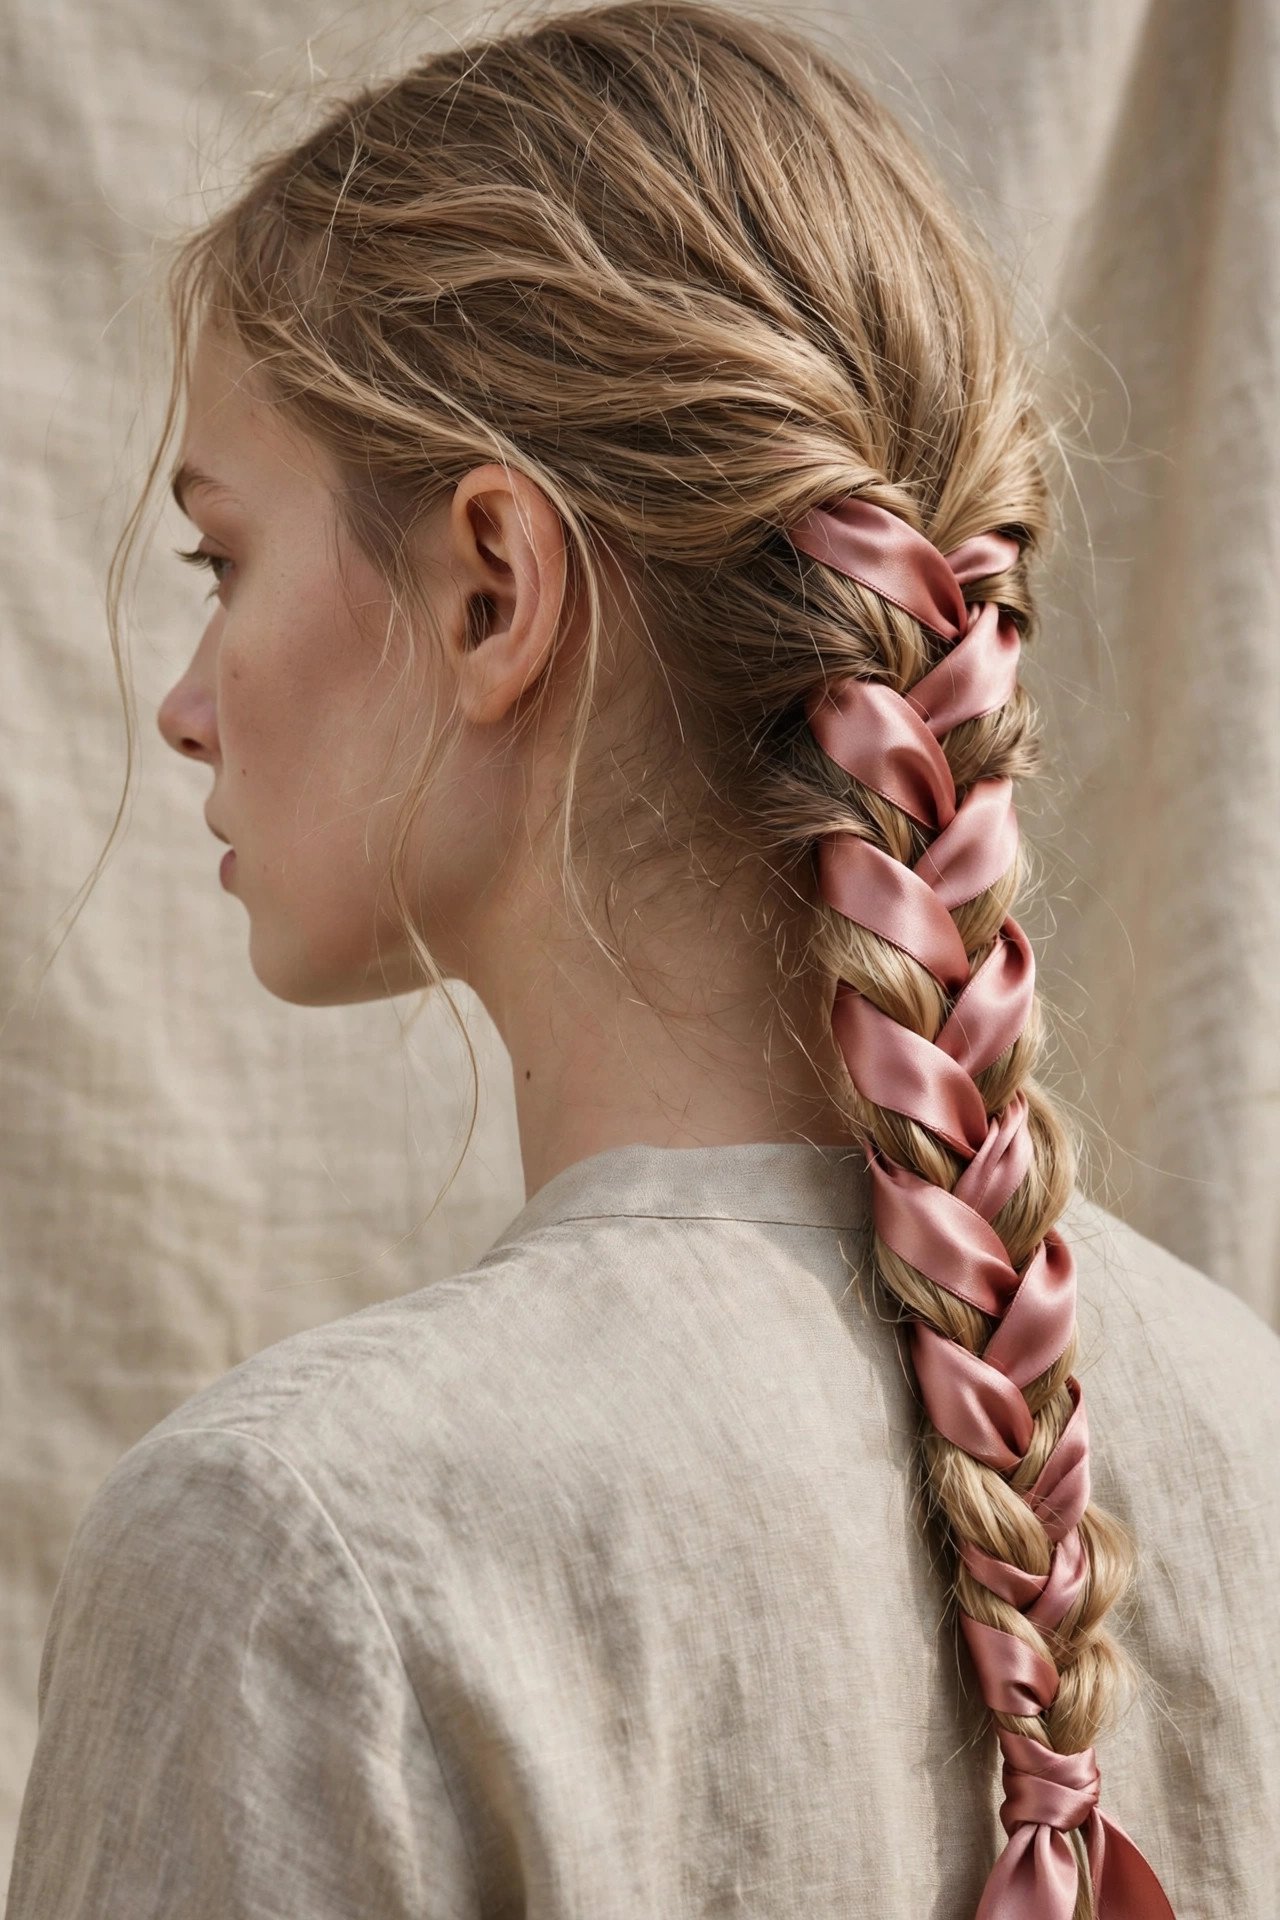
- Ribbon length: Twice the length of your hair gives you enough to work with and a pretty tail.
- Weave: Cross the ribbon over one strand, under the next — keep it visible on top.
- Finish: Tie the ribbon in a bow at the end instead of using an elastic.
⚠️ Watch Out: Satin ribbon slips — velvet or grosgrain grips the hair much better and stays put all night.
Start the braid a little loosely at the top — the ribbon naturally tightens the weave as you work down, so a loose start prevents a painfully tight crown.
14. Overnight Heatless Curls Method
The ultimate lazy-girl party prep: go to bed with damp hair in a robe-belt or sock curls, wake up with perfect waves. Wrap slightly damp sections around a robe belt (or long socks), tie it up, sleep, unwrap in the morning. Zero heat, zero morning effort.
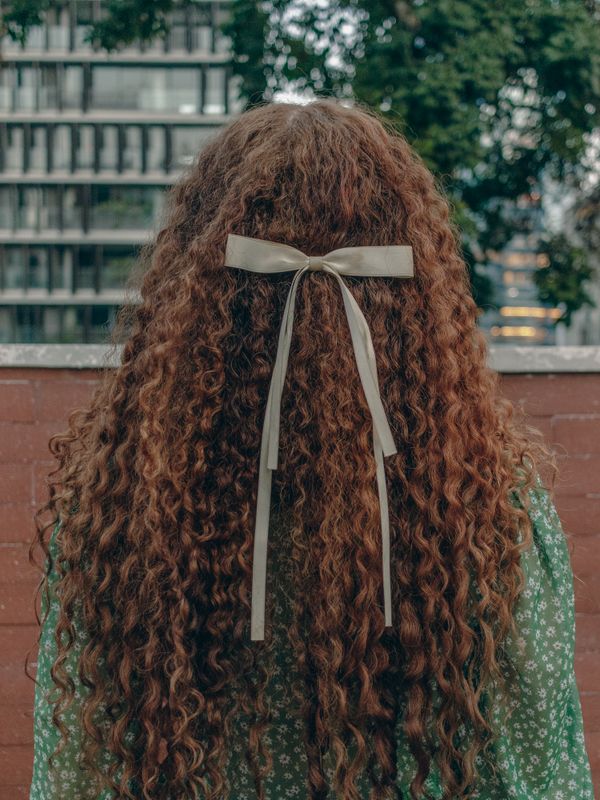
Apply a light mousse to damp hair before wrapping — it gives the curls memory so they last through the party. In the morning, unwrap, shake out, and scrunch with a tiny bit of serum. The curls will be soft and bouncy, not tight ringlets. This is genuinely the easiest way to get party hair if you plan ahead by one night.
📌 Good To Know: Hair should be about 80% dry when you wrap it — too wet and it won’t dry overnight; too dry and the curls won’t set.
15. Pinned-Back Curls With Bobby Pins Only
Already have curly hair? You barely need a tutorial. Define your curls, then pin back the front sections — one twist on each side, pinned behind the ears — and let everything else do its thing. Your texture is the style.
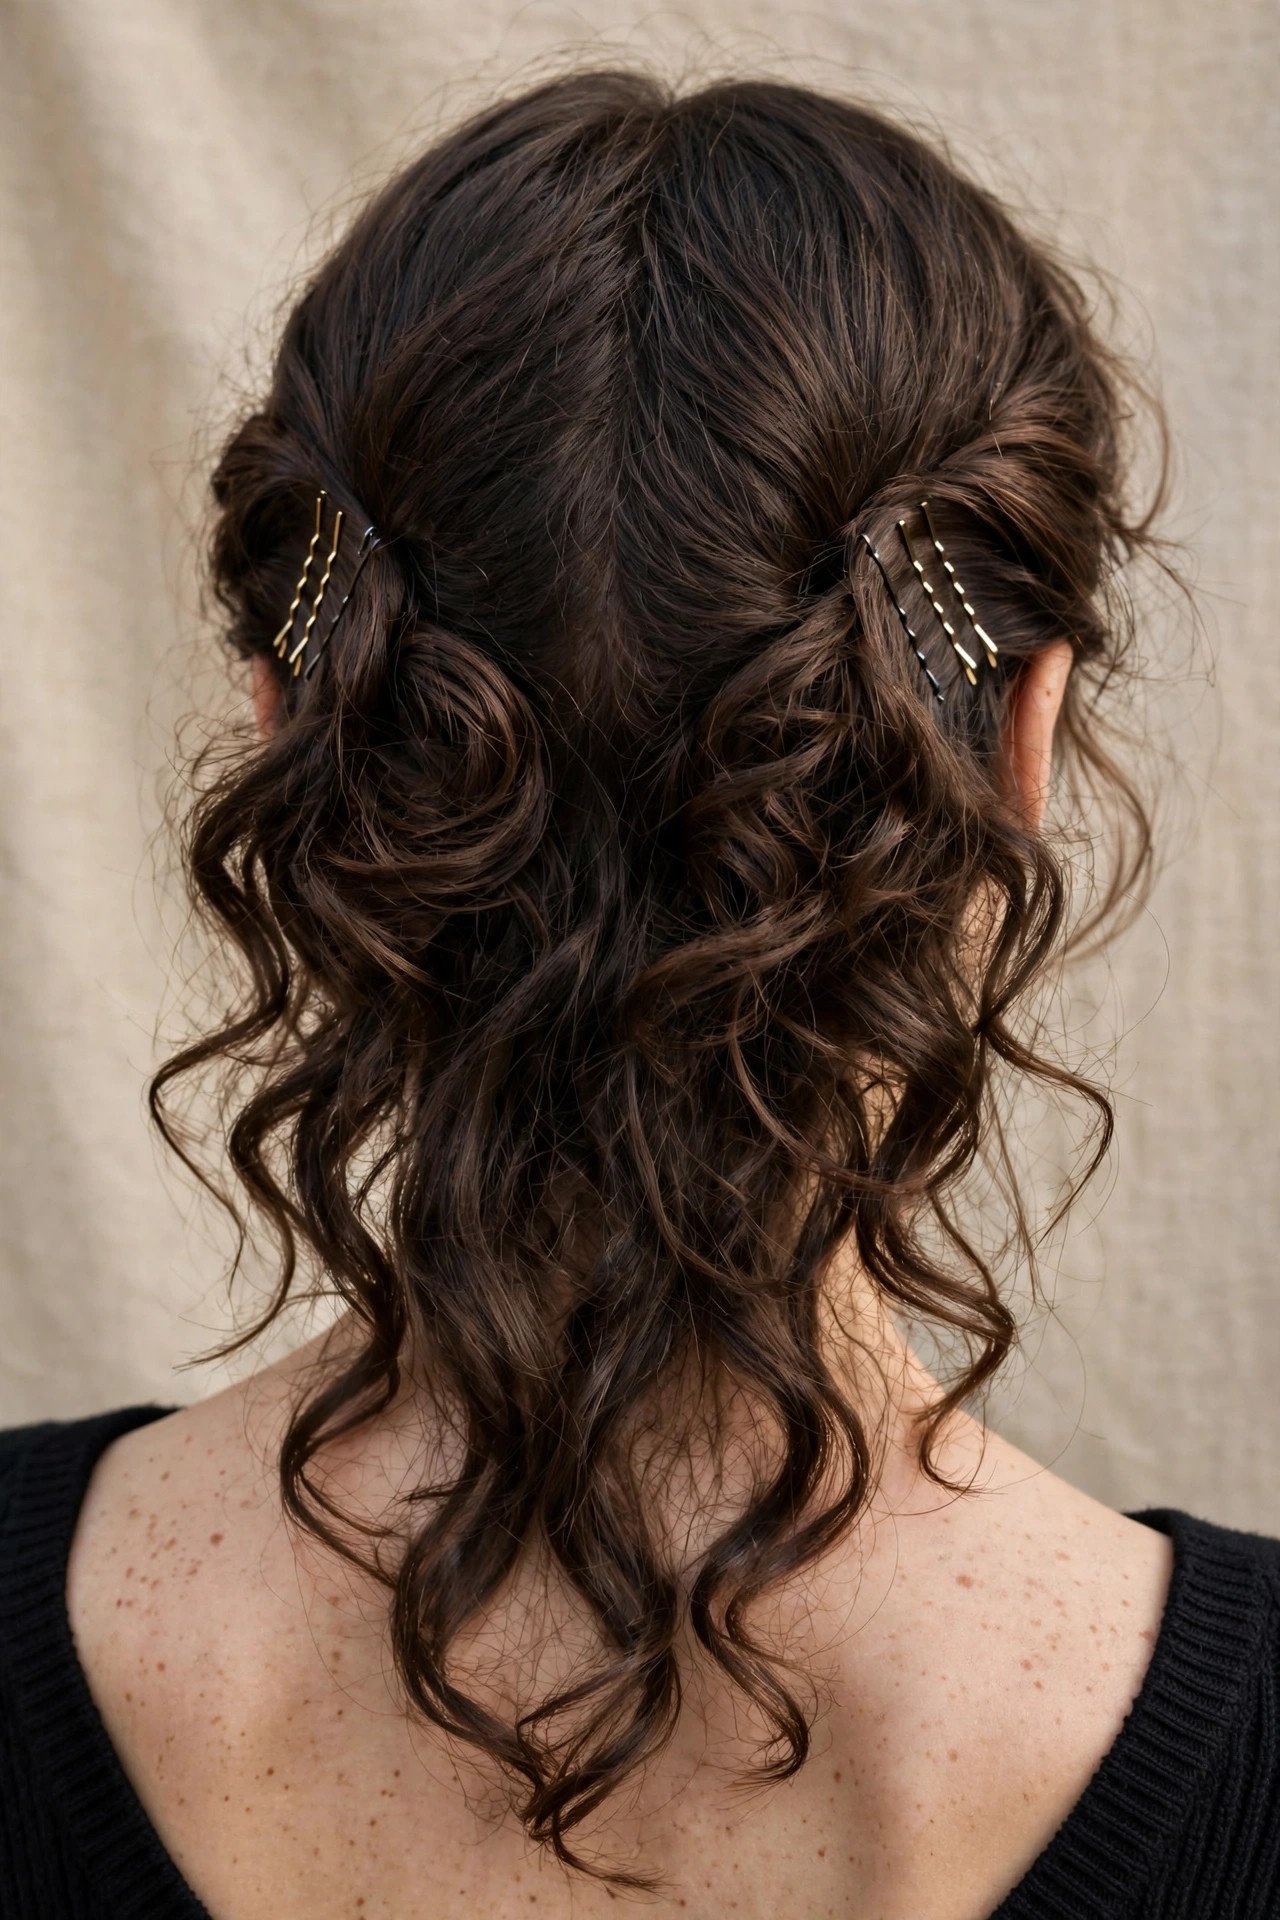
Refresh curls with a little water and curl cream, scrunching upward. The pinned-back front keeps hair out of your face and shows off your features, while the volume behind does all the talking. Slide in a couple of decorative pins — gold, pearl, crystal — at the pin site to make it deliberate. This is a five-minute style that celebrates what your hair already does naturally.
Twist each front section once before pinning instead of pulling it straight back — the twist adds pretty texture at the pin site and holds far more securely.
16. Easy Low Twisted Ponytail
Make a low ponytail, then split the hair above the elastic, flip the ponytail up and through the gap — the classic topsy-tail — and tighten. It creates an elegant twisted effect at the base that looks like actual styling skill. Repeat once more down the length for extra detail.
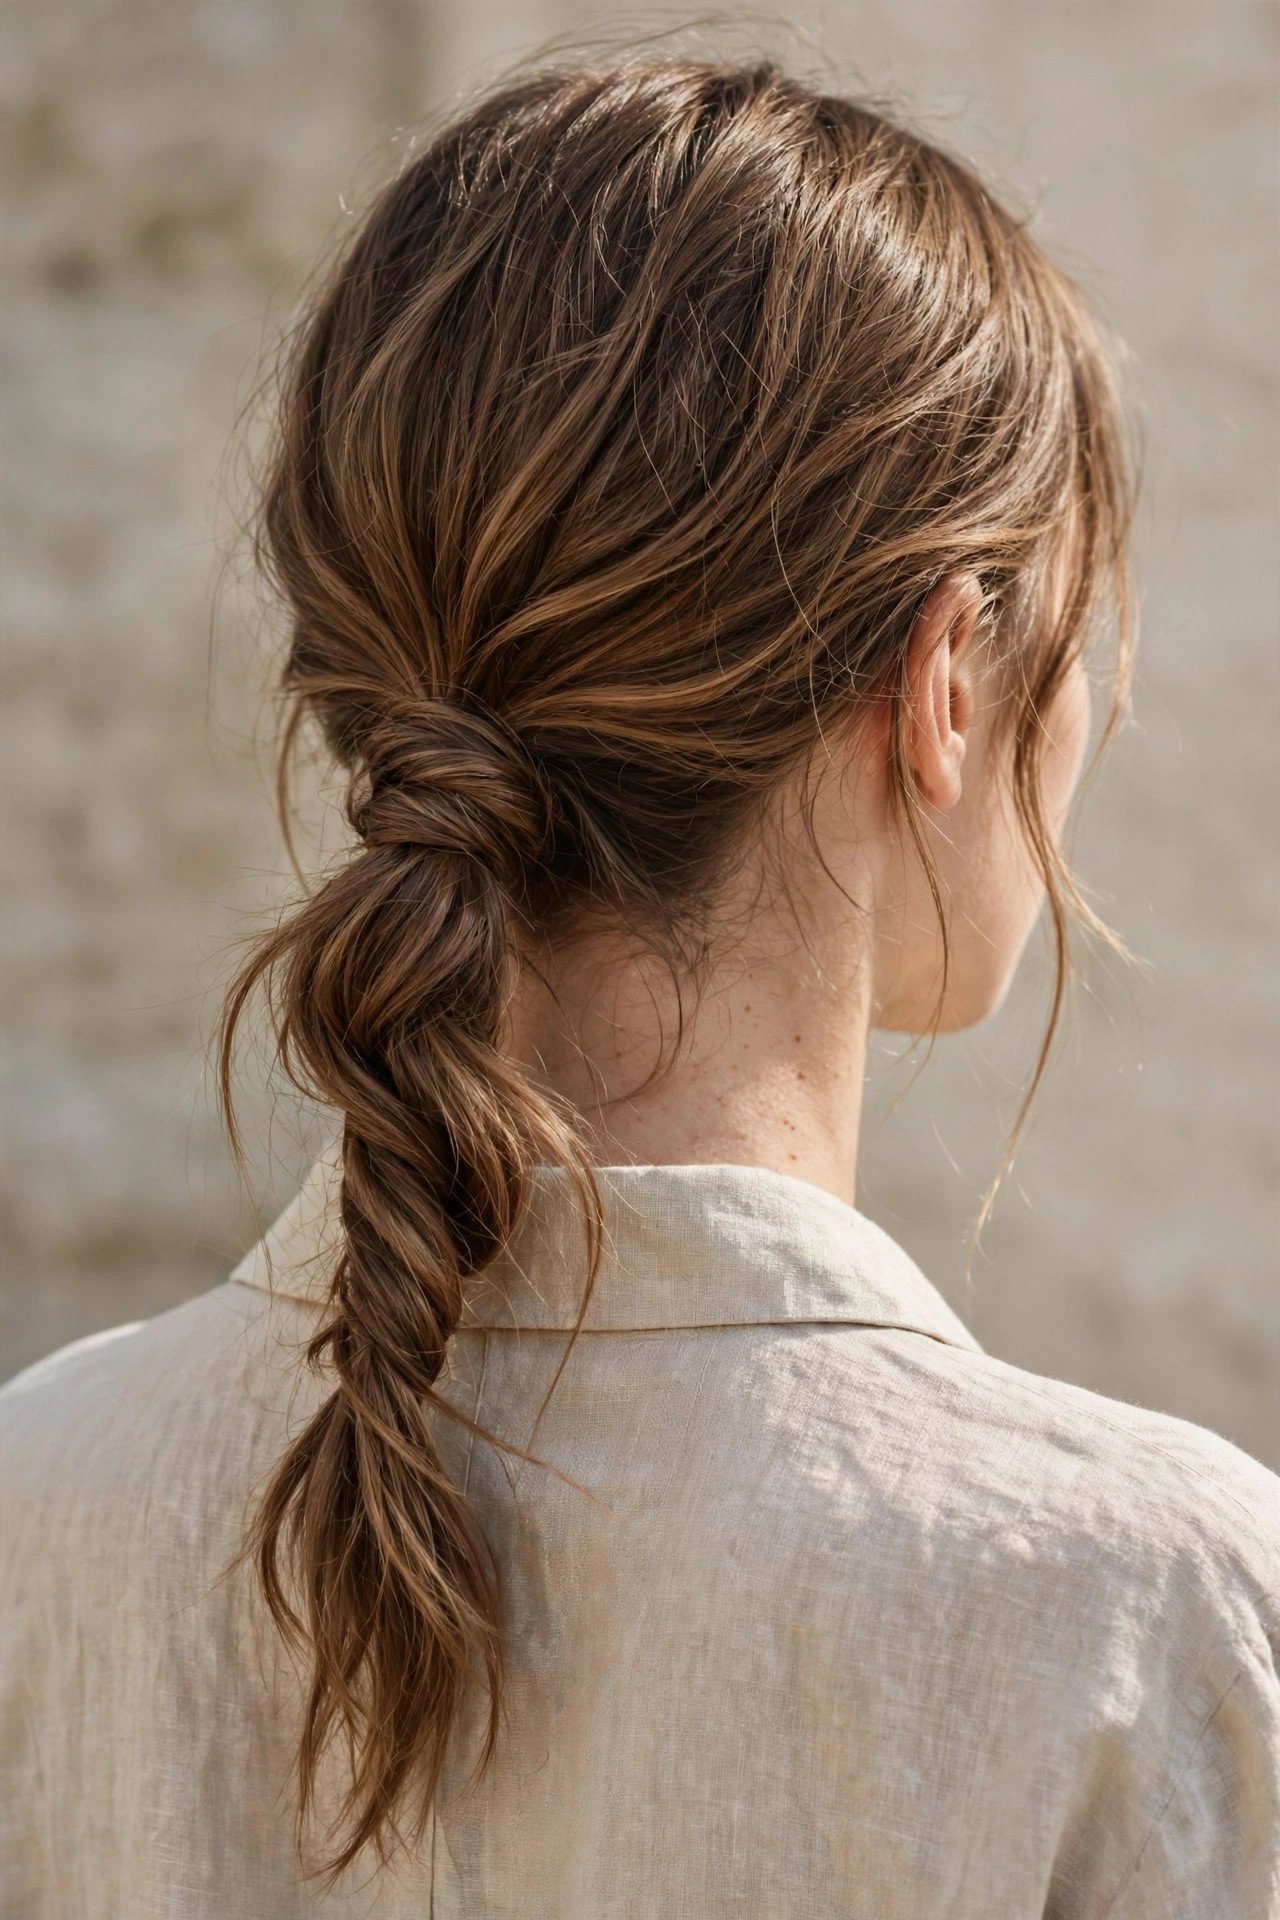
- Step 1: Low ponytail, slightly loose at the base.
- Step 2: Split hair above the elastic into two halves.
- Step 3: Flip the ponytail up and through, then pull down to tighten.
Curl the ponytail ends for polish. This 90s-classic trick still looks chic because the twist detail reads as intentional styling — and it takes under five minutes.
💡 Quick Tip: Two topsy-tails stacked down the ponytail look like an intricate twist — guests will assume it took an hour.
17. Quick Faux Bob With Pins
Want short hair for one night without the commitment? The faux bob: curl your hair, gather it into a low loose ponytail, roll the ponytail up under itself, and pin it flat against the nape. Tuck and pin until it reads as a bob from the front.
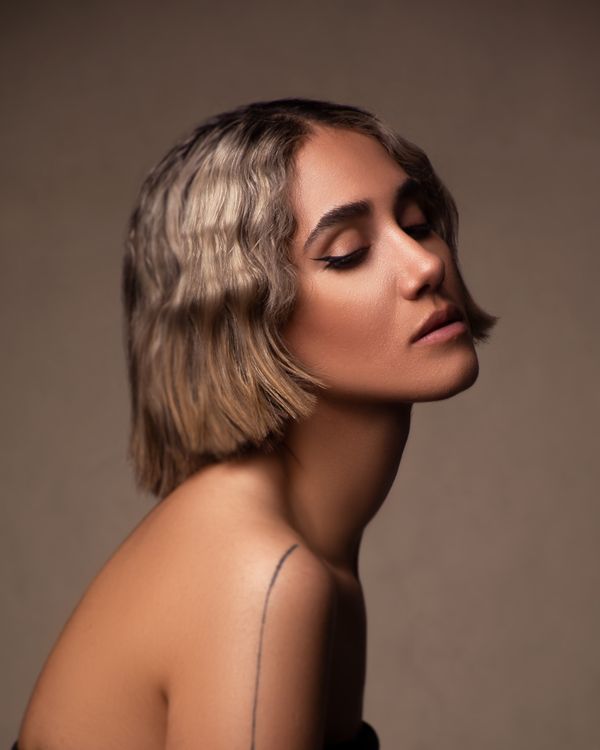
Curls are essential — straight hair won’t give you the volume to fake the bob’s shape. Roll the ponytail under loosely and pin generously; bobby pins in an X pattern hold best. Let the front pieces fall naturally over the pinned section to hide the mechanics. Pair with bold earrings and red lips for full vintage-glam effect. Nobody will believe it’s not real.
Check the back with a hand mirror before you leave — the illusion only works if the pinned roll is completely hidden, and one quick check saves a party-long worry.
18. Scarf-Wrapped High Ponytail
A high ponytail plus a printed scarf wrapped around the base is instant retro glamour — very 60s starlet, very party. Make your ponytail as high and smooth as you can, then wrap a long scarf around the base several times and tie it with the ends flowing down.
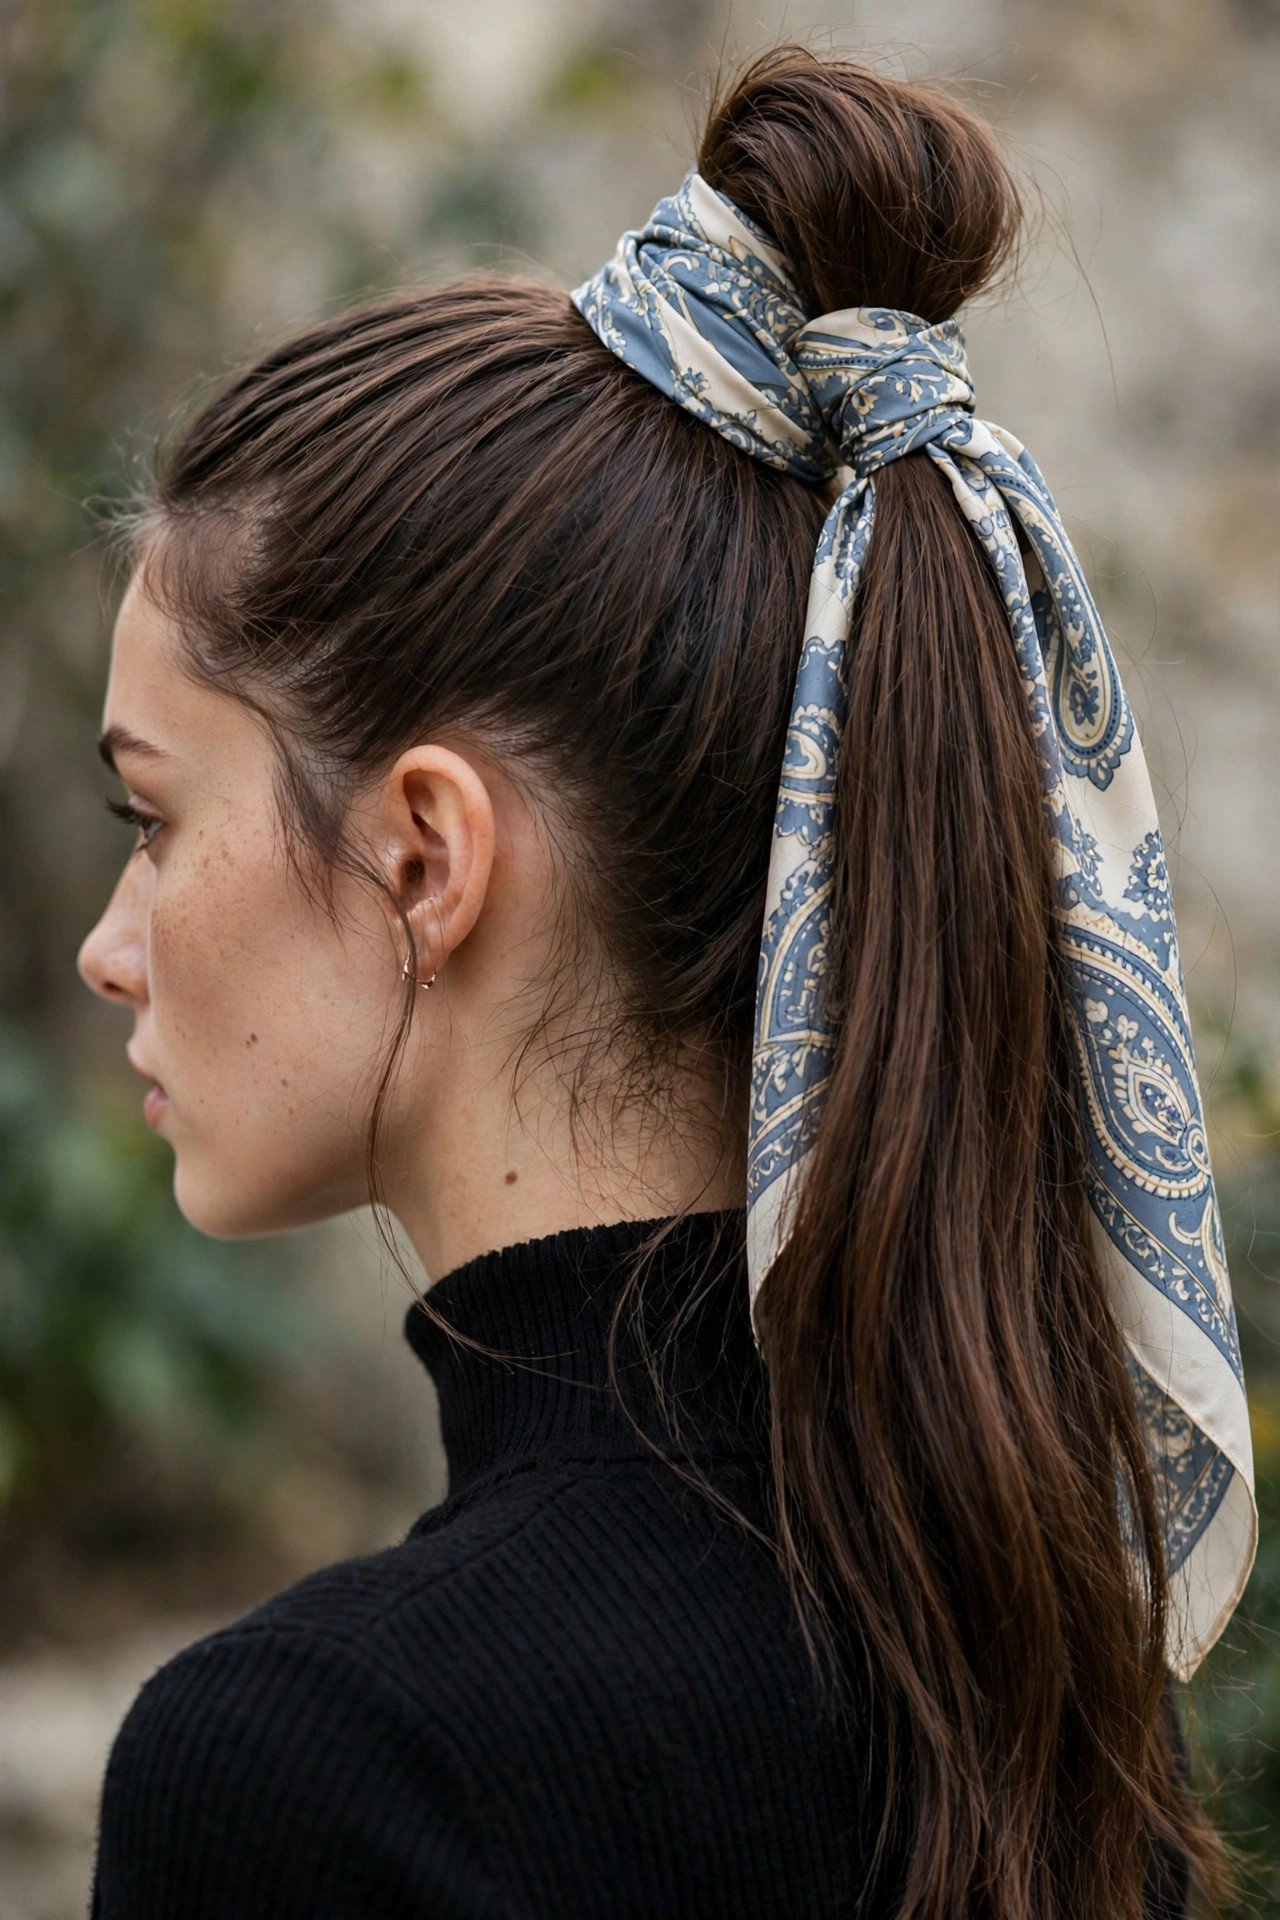
- Height: The higher the ponytail, the more dramatic — aim for the crown.
- Smooth: Brush with gel for a sleek finish; this style demands polish.
- Scarf: A long, narrow scarf wraps cleanest — fold a square one diagonally first.
Curl the ponytail itself in big, bouncy curls for maximum impact. This is a fantastic choice with a simple dress — the hair becomes the accessory.
⚠️ Watch Out: Tie the scarf snugly — a loose wrap slides down the ponytail by the second hour.
19. Beginner Dutch Braid Crown
A Dutch braid crown sounds advanced, but the beginner version is just two Dutch braids pinned across the top of your head. Dutch braiding means crossing strands under instead of over — that’s the only difference from a French braid — and it makes the braid pop beautifully.
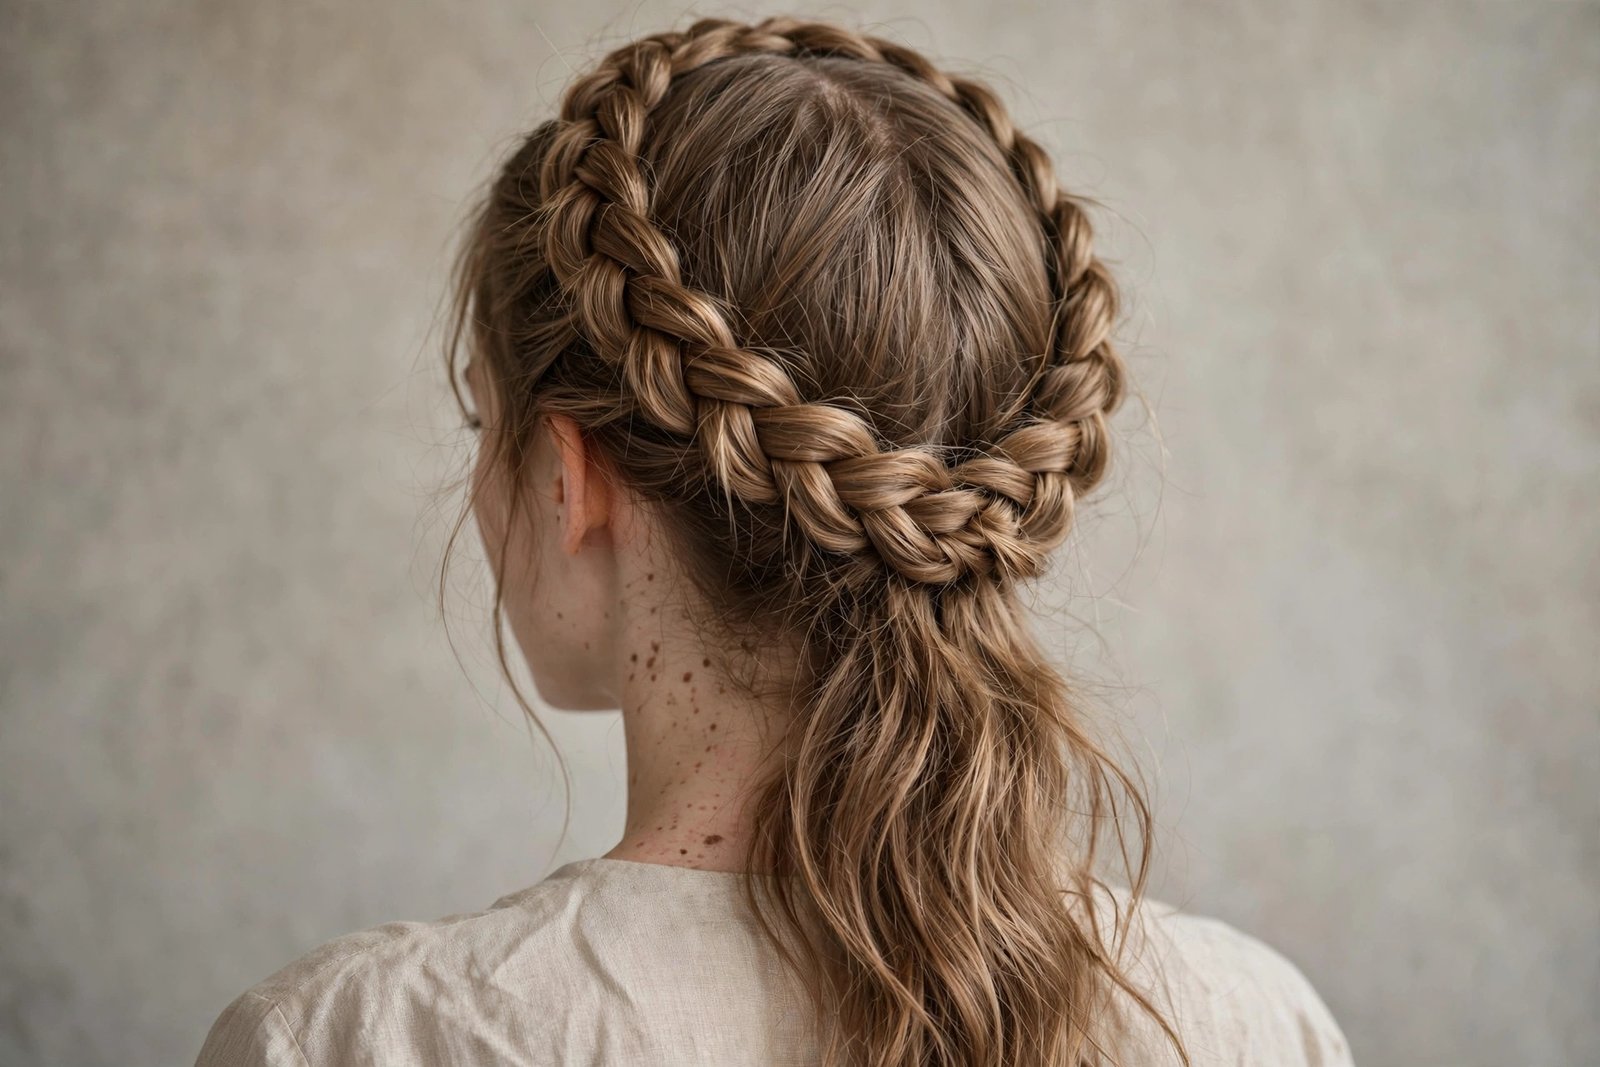
- Step 1: Middle part, then Dutch-braid each side from the hairline to the nape.
- Step 2: Cross the braids over the top of your head like a headband.
- Step 3: Tuck the ends under the opposite braid and pin.
Don’t stress about neatness — pancake the braids for fullness and let a few pieces fall out. It looks intentionally boho, which is much more forgiving than sleek. Practice once the day before and you’ll nail it on party day.
💡 Quick Tip: Braid with slightly damp, product-filled hair — a little mousse gives grip that makes Dutch braiding much easier for beginners.
Pancake each braid immediately after finishing it, before pinning across — trying to widen a braid that is already pinned pulls the whole style loose.
20. 5-Minute Party Waves With a Flat Iron
No curling iron? Your flat iron makes better waves anyway — faster, more modern, more lived-in. Clamp a section near the roots, twist the iron 180 degrees, and glide down. Alternate the twist direction for natural-looking waves. Whole head in five minutes.
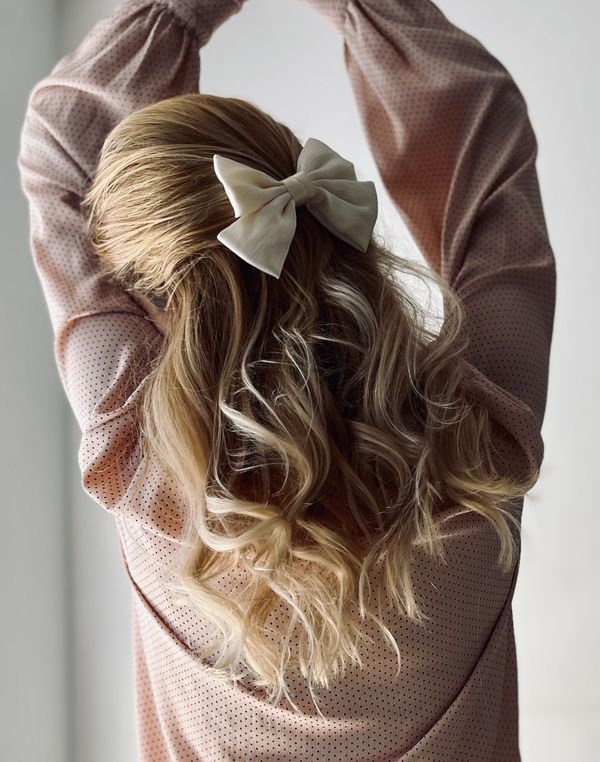
Work in one-inch sections and keep the iron moving — pausing creates kinks instead of waves. The ends should stay relatively straight; that undone finish is what makes flat-iron waves look current rather than pageant-y. Brush through with your fingers, add texture spray, and you’re party-ready. This technique also refreshes second-day curls beautifully.
📌 Good To Know: A flat iron with rounded edges works best — sharp-edged irons leave crease marks in the wave.
Work from the bottom layers upward, clipping the top hair away — it is faster than working randomly, and you will not miss hidden straight sections underneath.
CONCLUSION
Twenty party hairstyles, zero stress — proof that gorgeous Christmas hair doesn’t require a salon appointment or an hour in front of the mirror. Pick one, practice once, and walk in like you own the room. 📌 Save this post to your christmas hairstyles board on Pinterest!