
25+ Christmas Party Hairstyles 2026 — Gorgeous Seasonal Looks
Christmas party season is the one time of year your hair gets to be the main event. Twinkling lights, velvet dresses, champagne — your hairstyle should rise to the occasion. Whether you’re heading to the office party or a black-tie dinner, the right style makes everything else fall into place.
As a beauty editor, I’ve tested more party hairstyles than I can count, and the ones below are the keepers: styles that photograph beautifully, survive a night of dancing, and work on real hair — not just runway models. Grab your curling iron, your bobby pins, and maybe a glass of something festive. Let’s do this.
1. Sculpted Hollywood Waves With a Deep Side Part
Nothing says Christmas glamour like old-Hollywood waves — and the 2026 version is softer and more wearable than the vintage original. Start with a deep side part, then curl one-inch sections with a 1.25-inch iron, all in the same direction. The secret is in the cool-down: pin each curl and let it set for ten minutes before brushing through with a boar-bristle brush.
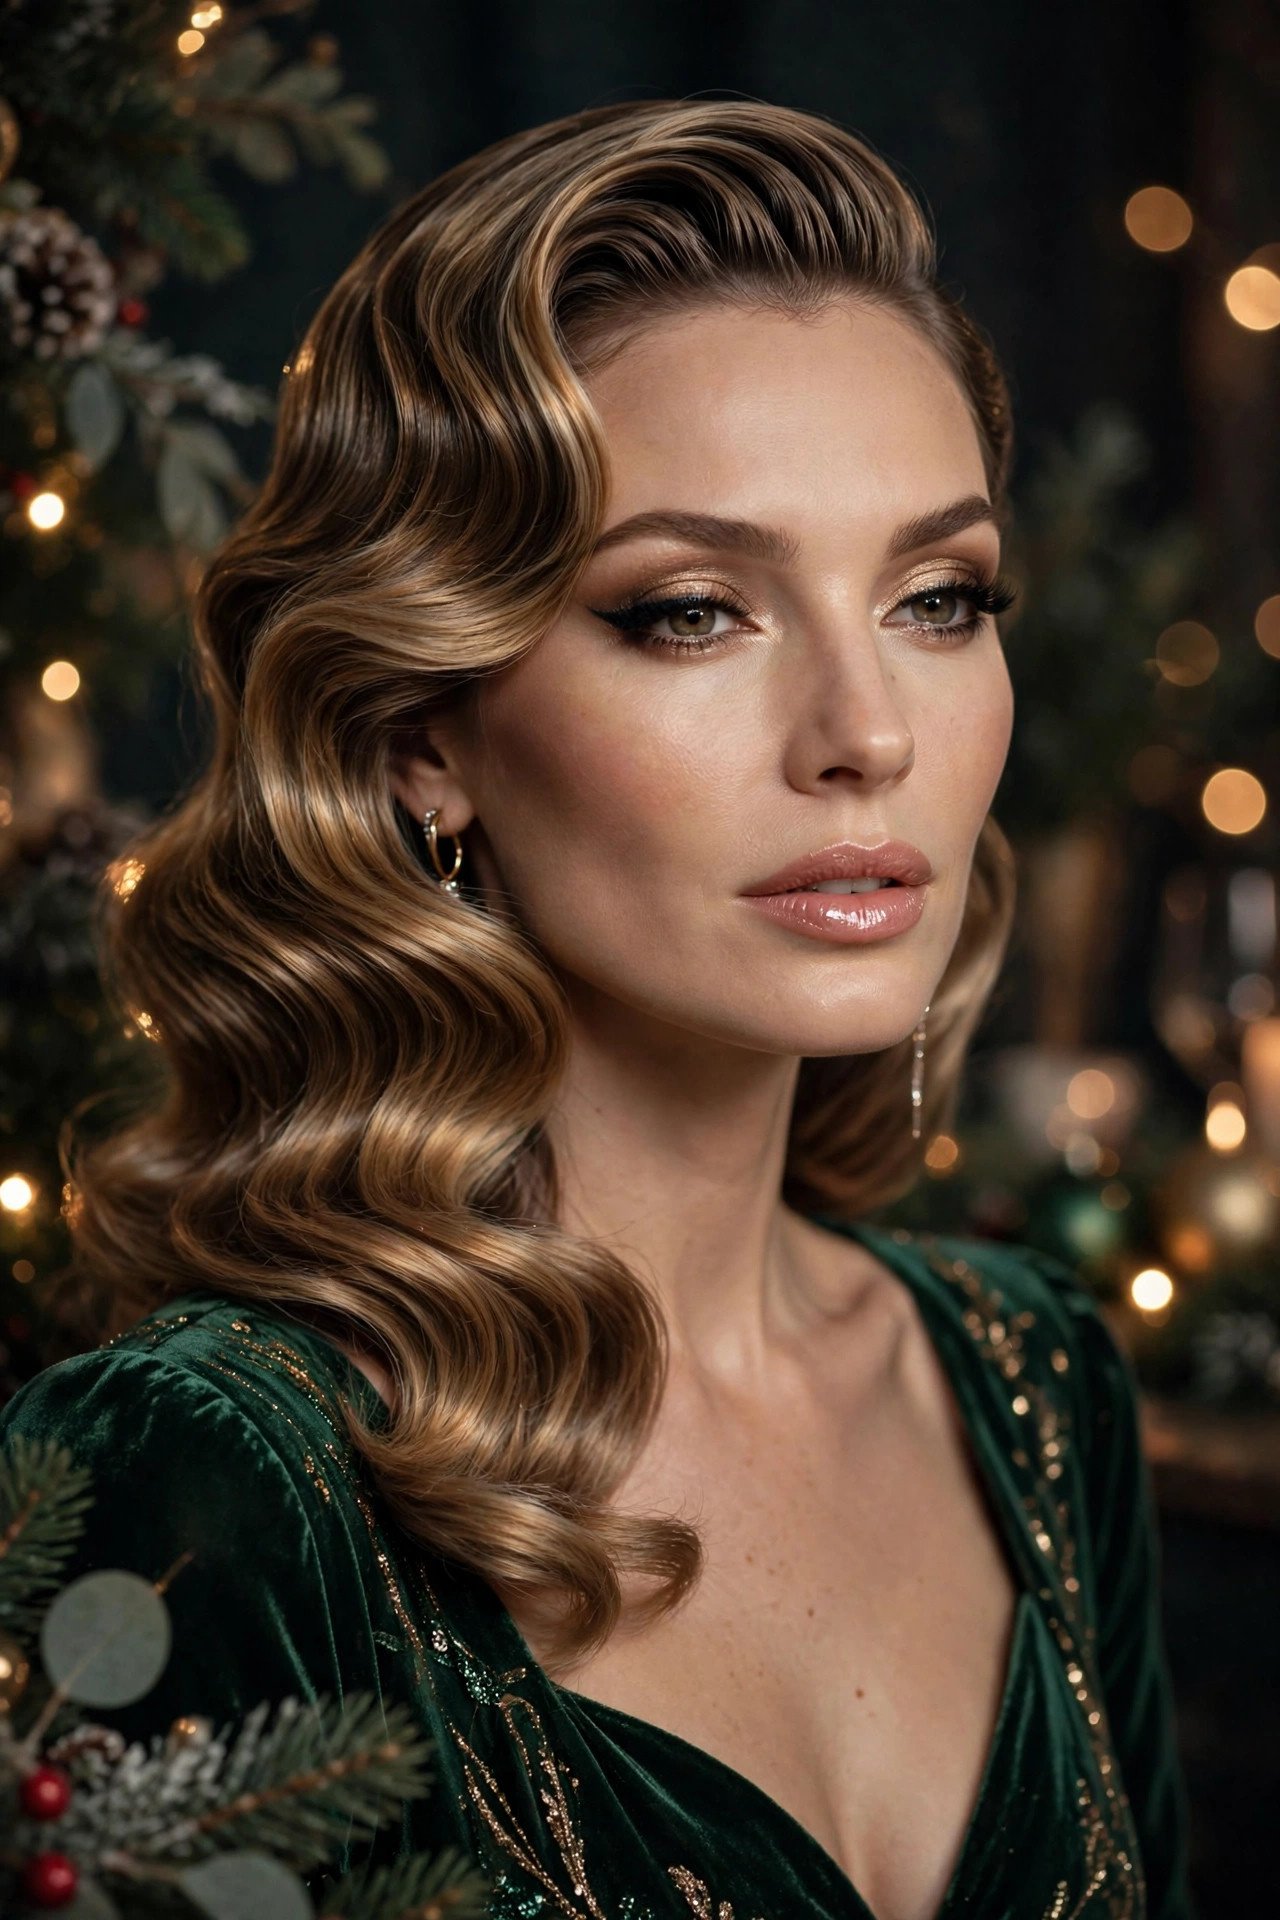
That brush-through is what transforms obvious curls into those smooth, sculpted S-waves. Mist with a flexible-hold hairspray — Kenra Volume Spray 25 is my ride-or-die — and tuck the fuller side behind one ear with a crystal clip. This style loves medium to long hair and looks stunning on every hair color, especially brunettes where the shine really shows.
💡 Quick Tip: Curl the front sections away from your face last, when the iron is fully hot — those pieces frame every photo.
2. Low Chignon With Face-Framing Tendrils
The low chignon is the little black dress of hairstyles — timeless, elegant, and appropriate everywhere. Pull hair into a low ponytail at the nape, twist it into a loose knot, and pin. Then pull out two face-framing tendrils and curl them softly. The whole thing takes fifteen minutes but looks like a salon appointment.
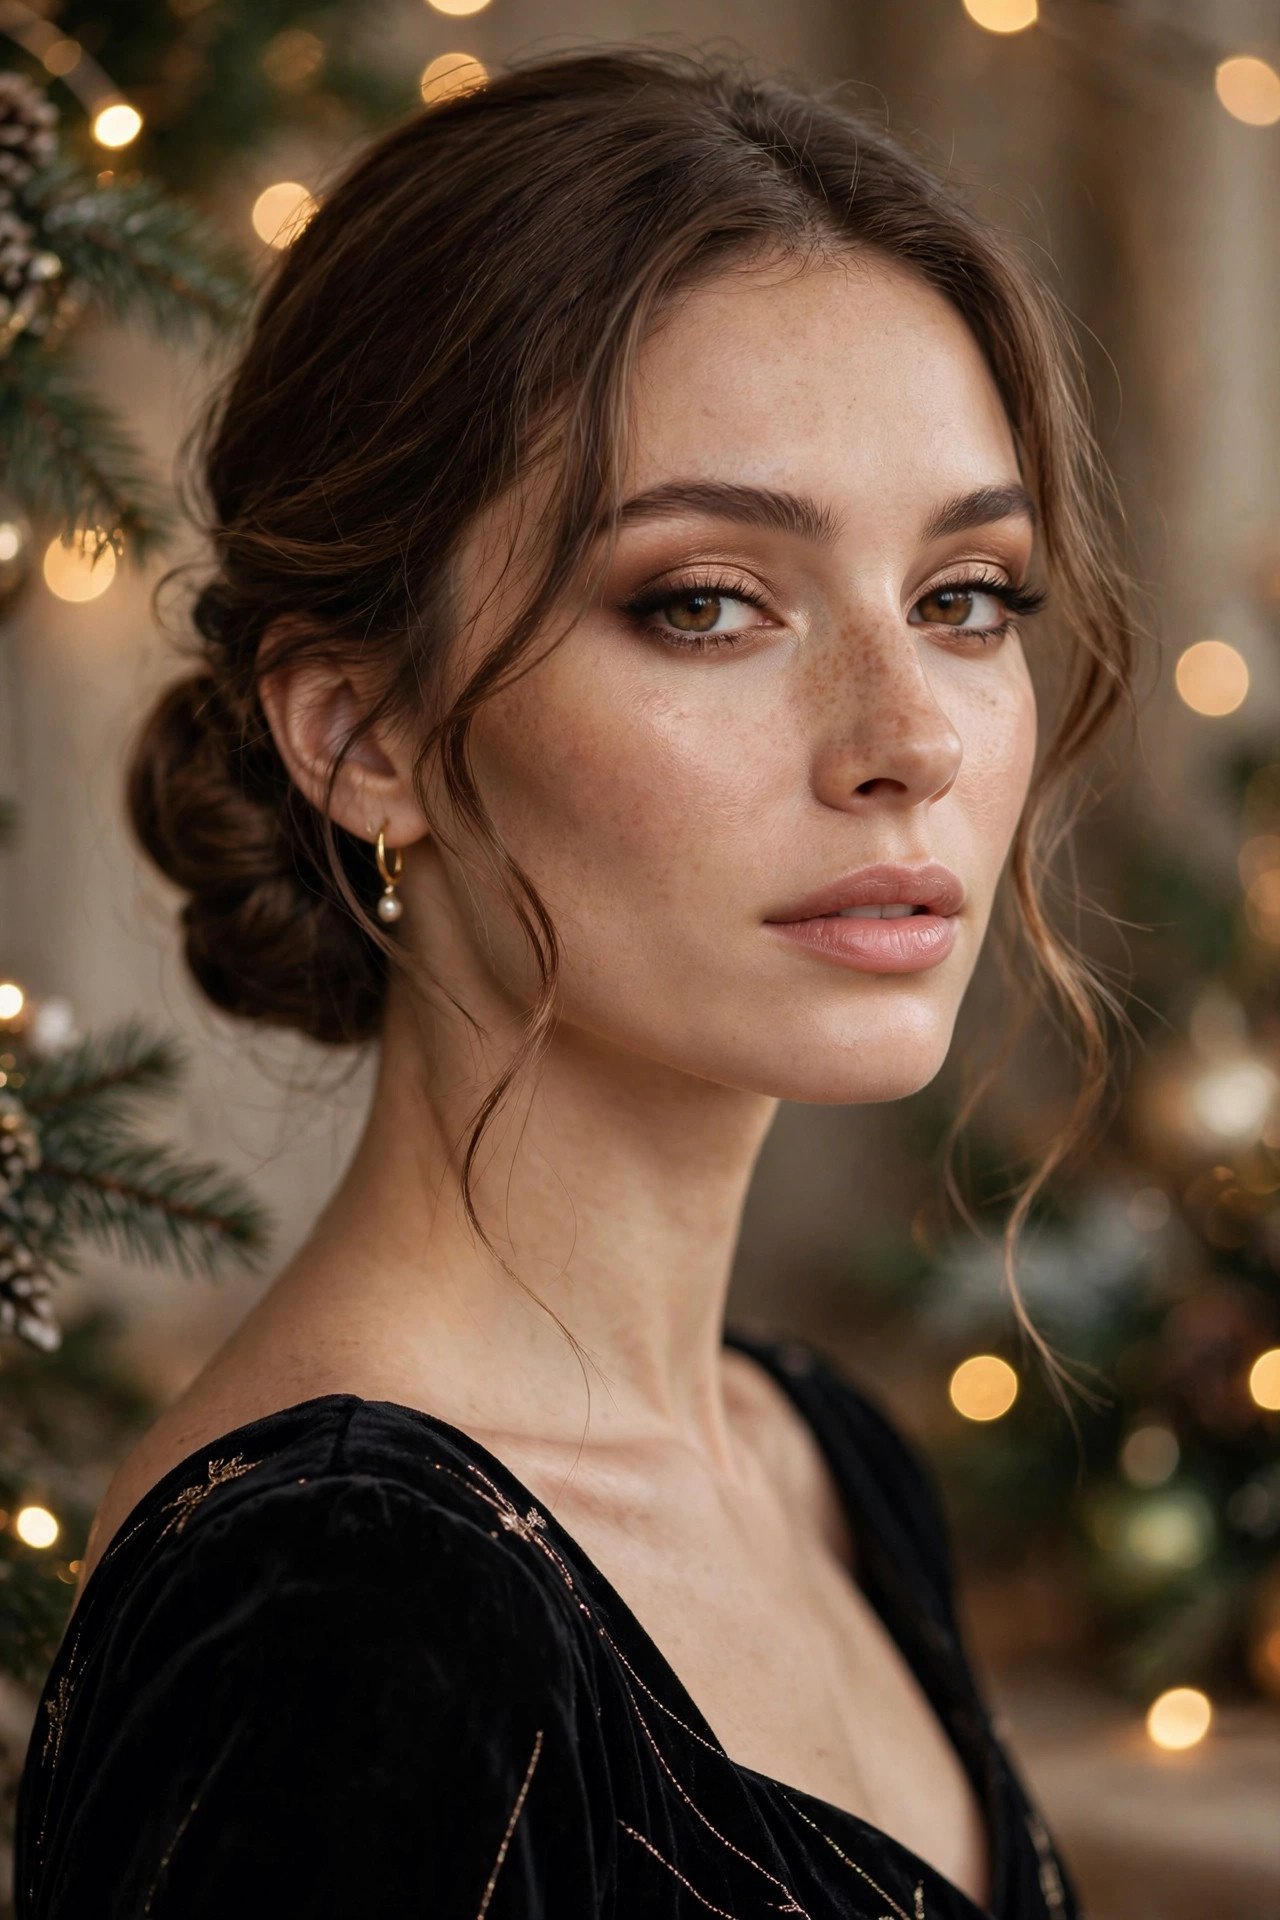
- Prep: Day-old hair holds better — add dry shampoo at the roots for grip.
- The twist: Don’t twist tightly; a loose twist gives that soft, romantic fullness.
- Secure it: Crisscross bobby pins in an X shape — they lock twice as well as parallel pins.
Finish with a shine spray on the tendrils only, keeping the chignon itself matte for contrast. Add pearl pins for a festive touch.
If the tendrils will not hold their curl, wrap each around your finger, pin the coil flat to your head for five minutes, then release — the heat-set trick works beautifully with no hot tools at all.
3. High Sleek Ponytail With a Wrapped Base
Want instant drama? A sky-high, glass-smooth ponytail lengthens your neck, lifts your whole face, and looks incredible with statement earrings. The difference between a gym ponytail and a party ponytail is all in the finish: sleek roots, hidden elastic, and ends that move.

Blow-dry hair smooth with a paddle brush, then flat-iron the crown section before gathering everything at the crown — tilt your head back as you brush up to get maximum lift. Wrap a half-inch section of hair around the elastic and pin underneath. For extra length and swing, clip in one weft of extensions at the base. A drop of serum on the ends gives that expensive, liquid shine.
📌 Good To Know: Place the ponytail at the crown’s highest point — too low reads casual, too high reads cheerleader. The sweet spot is right where your head starts to curve back.
4. Braided Crown With Loose Romantic Curls
Half ethereal, half festive — a braided crown over loose curls is the hairstyle equivalent of candlelight. Dutch-braid from each temple, meet the braids at the back, and pin them into a continuous crown. The remaining hair gets loose, brushed-out curls.

This style is forgiving in the best way: pancake the braids (gently tug the edges wider) for fullness, and don’t worry about perfection — a little looseness is the point. It works beautifully on medium to long hair, and if your hair is fine, braid over two clip-in wefts at the crown for extra volume. Weave in tiny gold star pins or baby’s breath for a Christmas-party finish that looks straight out of a holiday film.
For extra staying power, braid over slightly damp hair with a little mousse worked through — the style sets as it dries and the crown keeps its shape well past midnight.
5. Voluminous Blowout With Flipped Ends
The bouncy blowout is back in a big way, and the 2026 update adds flipped-out ends for a retro-supermodel feel. This is a salon skill you can absolutely learn at home: round brush, blow dryer with a nozzle, and sections no wider than the brush.
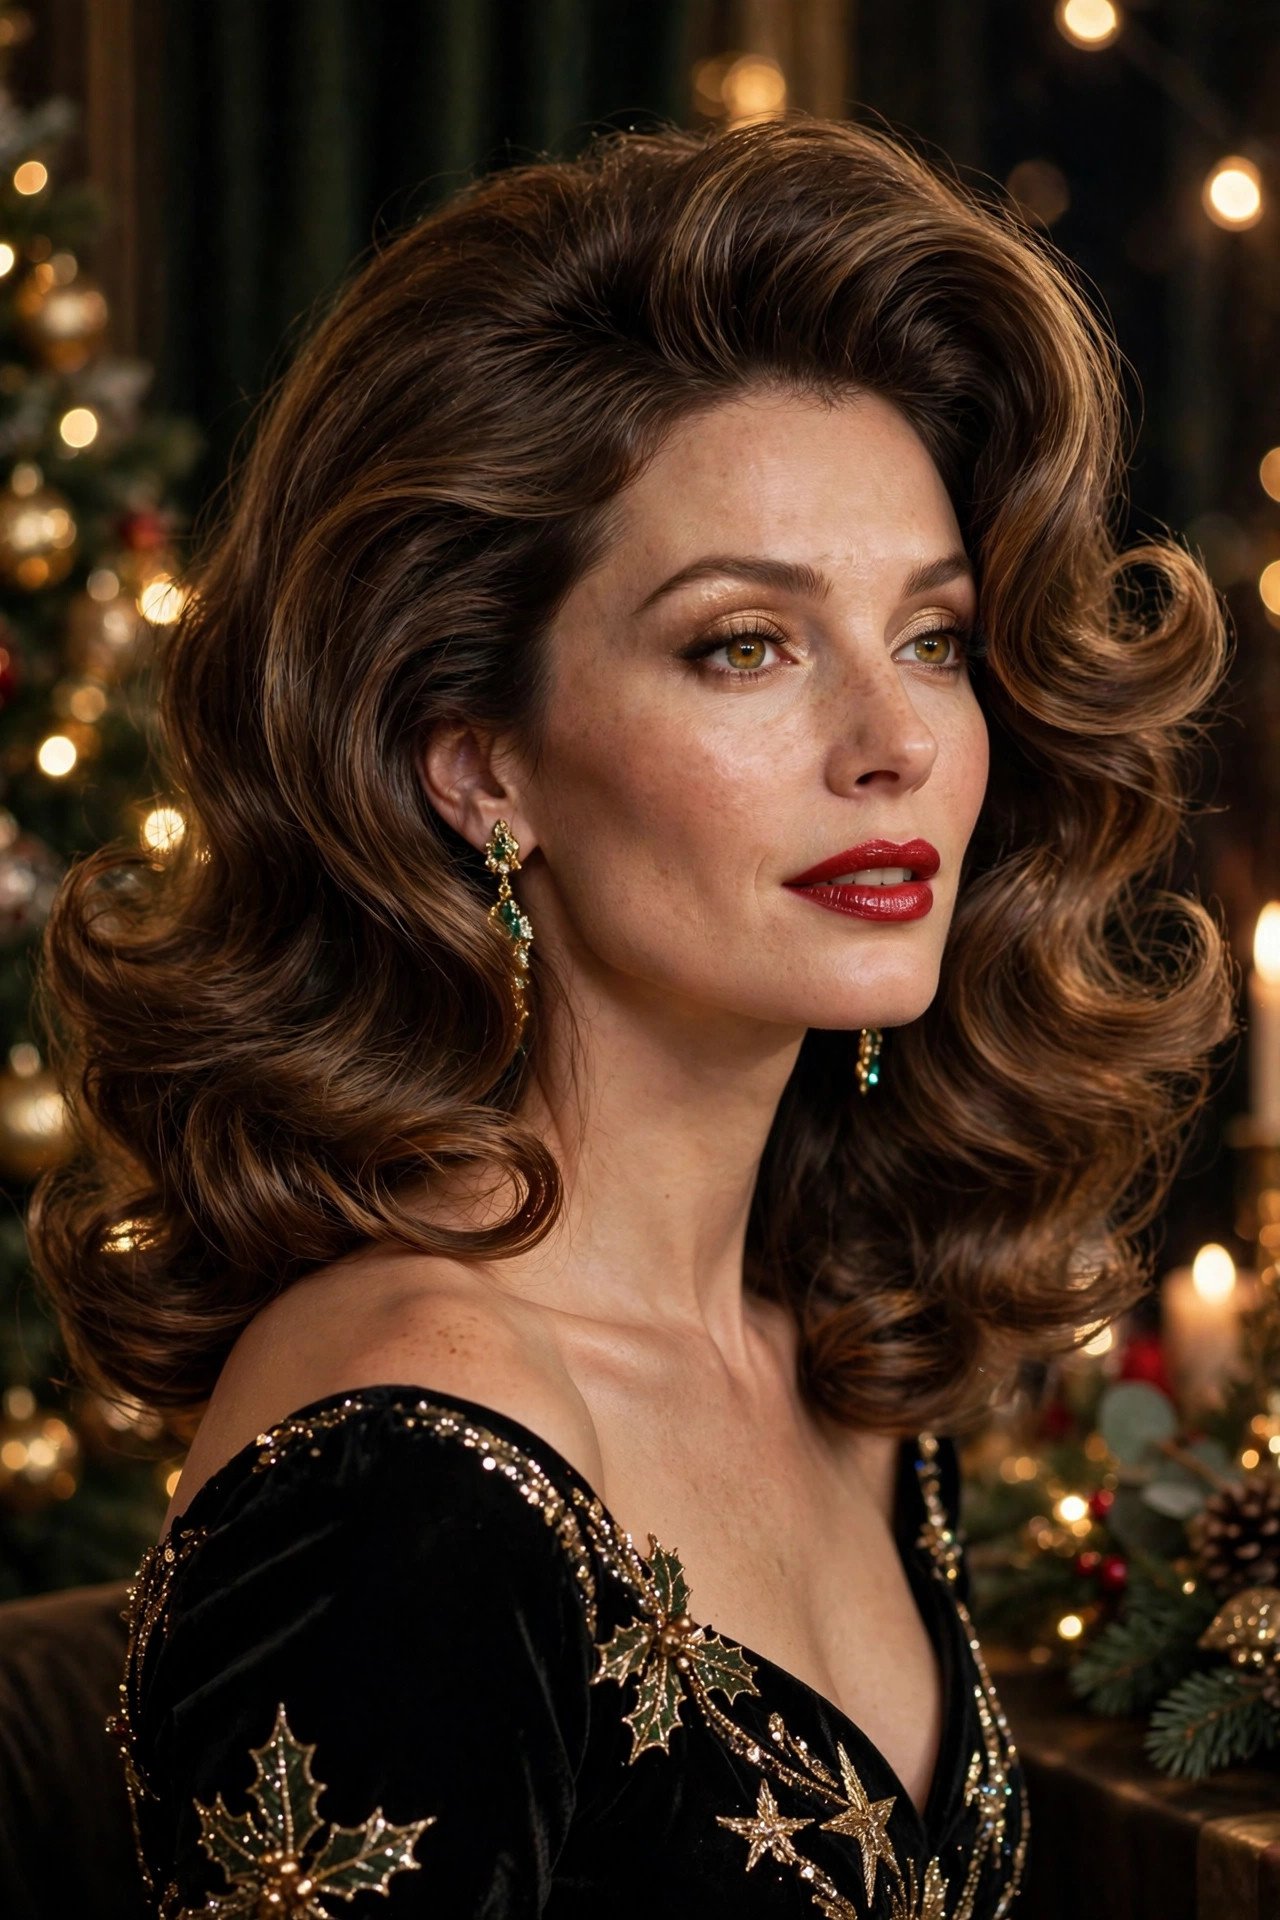
- Root lift: Apply volumizing mousse to damp roots — Moroccanoil Volumizing Mousse is excellent — and over-direct each section upward.
- The flip: On the last pass, roll the round brush outward at the ends instead of under.
- Set it: Velcro rollers on the crown for ten minutes while you do makeup. Instant volume.
⚠️ Watch Out: Skip heavy serums before blow-drying — they weigh roots down. Shine goes on the ends only, after styling.
To refresh the blowout on day two, flip your head upside down, blast the roots with the dryer for thirty seconds, and scrunch — you will get back most of the volume in under a minute.
6. Twisted Half-Up With a Velvet Bow
If you own one hair accessory this season, make it a velvet bow. Twist back two front sections, cross them at the back of the head, pin, and clip the bow over the join. The velvet texture against party lights is pure Christmas magic — rich, soft, and unmistakably festive.
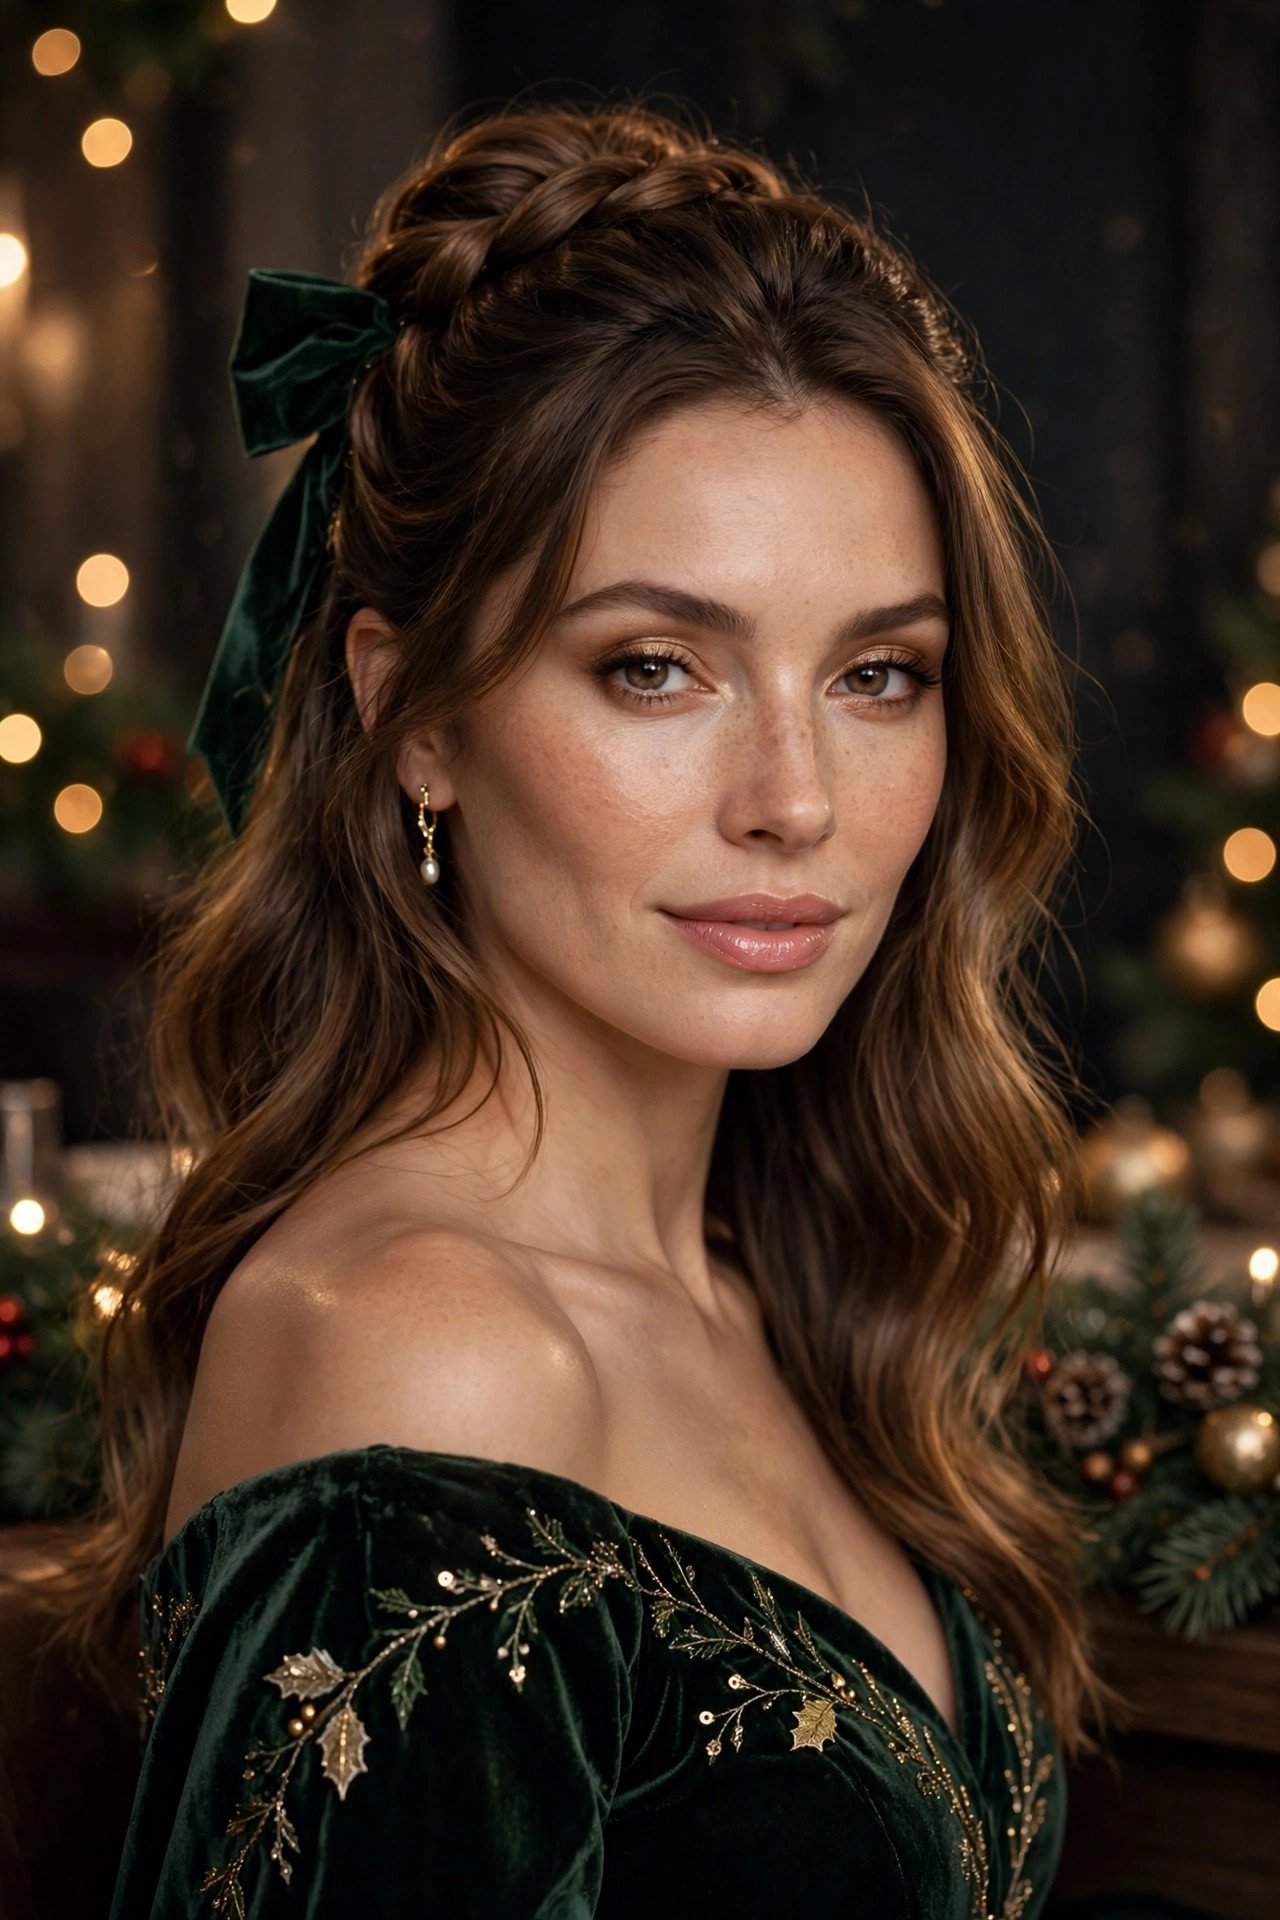
This takes five minutes and works on nearly every hair length past the chin. Curl the remaining hair loosely or leave it straight — both look intentional with the bow doing the decorative work. Choose the bow color to echo your outfit: black velvet with everything, deep red with neutrals, forest green with gold jewelry. Keep the twists slightly loose so they don’t pull — comfort matters when you’re wearing it all night.
💡 Quick Tip: Attach the bow to a small alligator clip rather than a barrette — it grips the twist join without sliding.
7. Messy Textured Bun With Gold Hairpins
The messy bun gets a party upgrade with texture and gold. Tease the crown lightly, gather hair into a high-ish ponytail, twist loosely, and pin the ends wherever they land — the messier the better. Then slide in three to five gold hairpins or minimalist gold cuffs at angles.
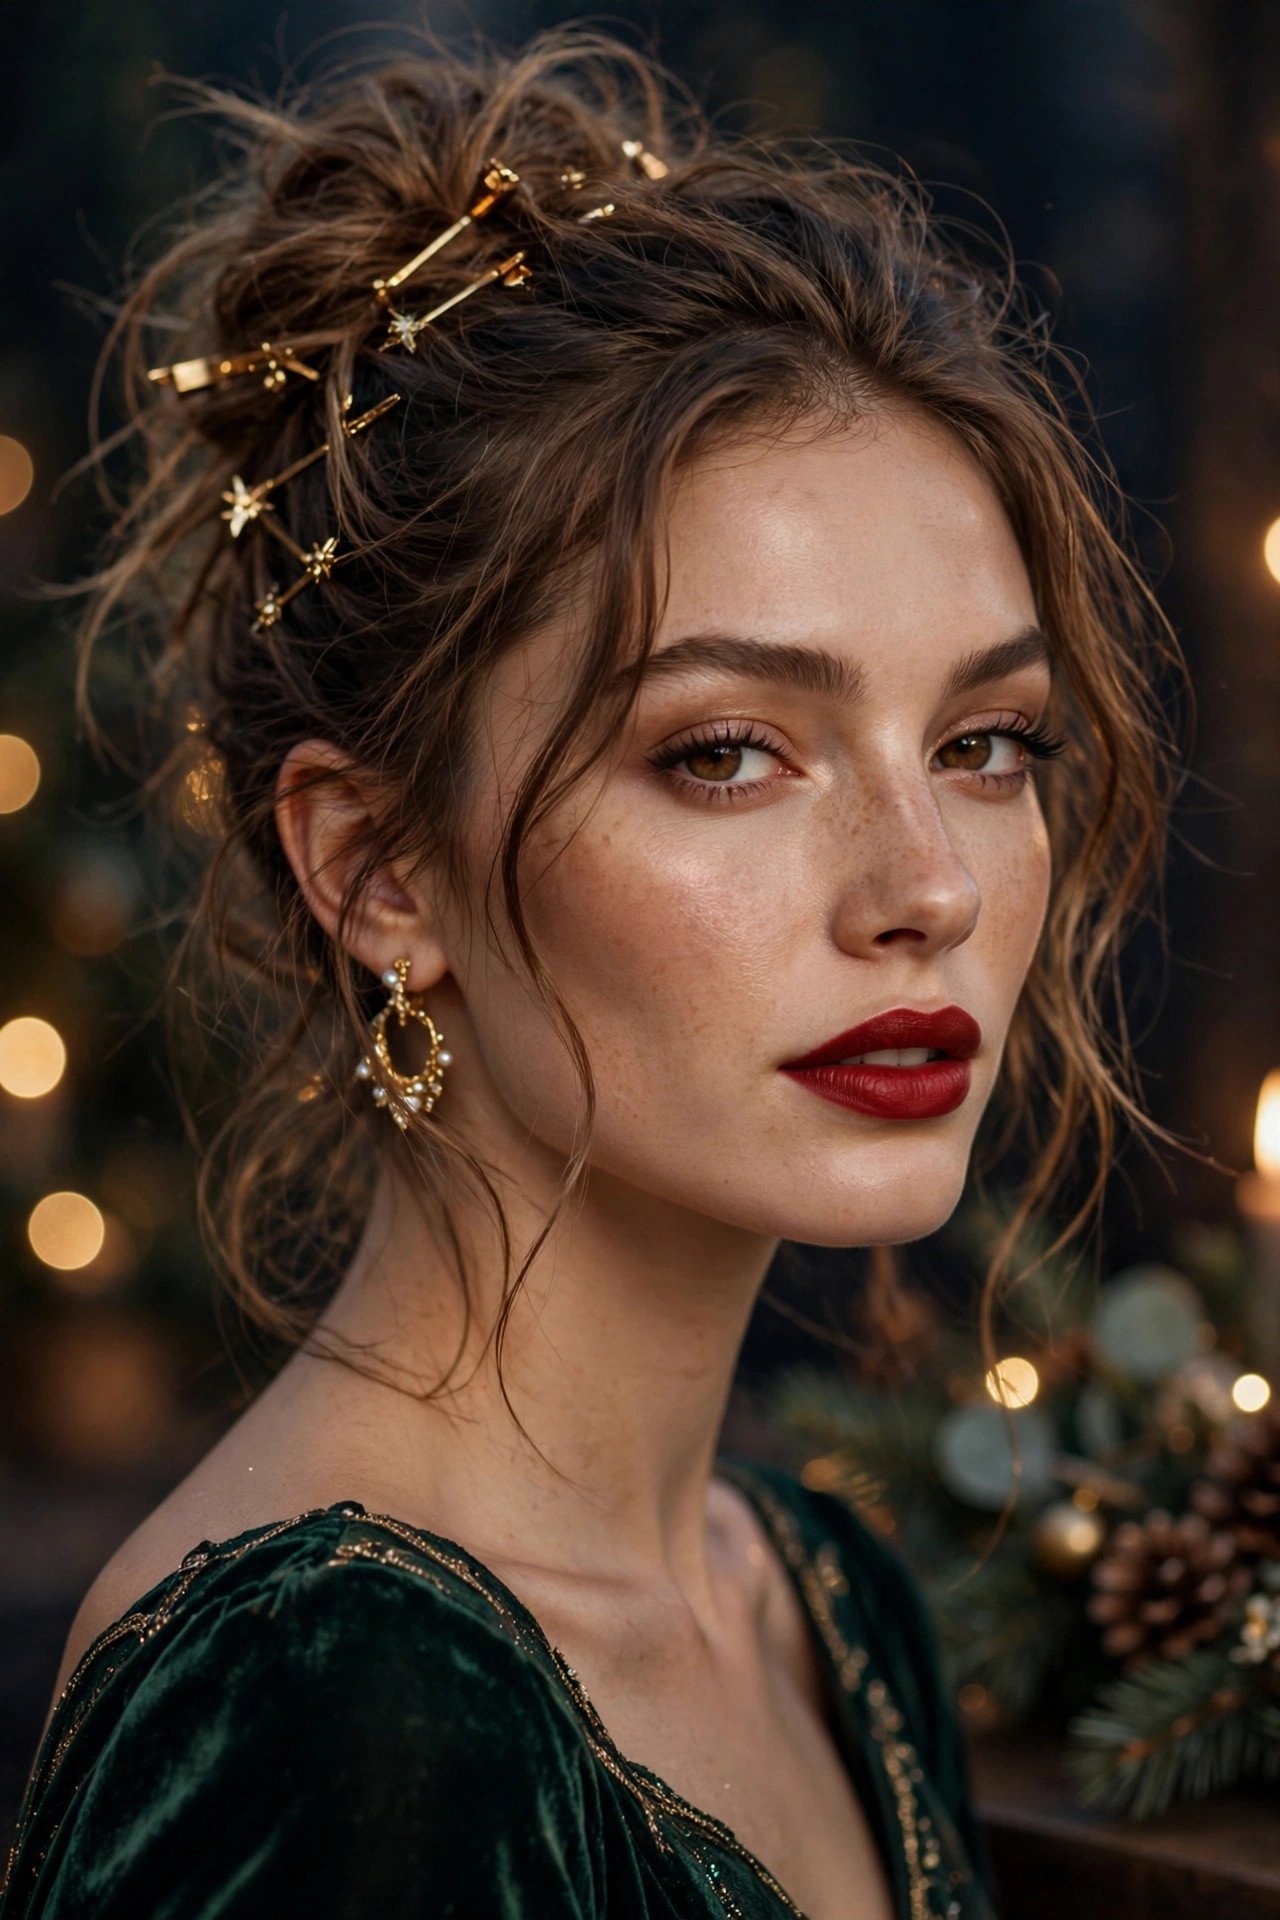
Texture is everything here: prep with a sea-salt spray or texture powder (Big Sexy Hair Powder Play is a cult favorite) so the bun has grip and piece-y-ness instead of sliding into a sad nub. Pull out wispy bits around the hairline and at the nape — those soft pieces are what separate “I tried” from “I woke up like this.” The gold pins catch the light every time you turn your head.
The undone texture means this style actually improves as the night goes on — if pieces fall, they just look more intentionally messy. Keep three spare pins in your clutch for quick fixes.
8. Modern French Twist
The French twist has a reputation for being fussy and dated, but the modern version — softer, slightly undone, with visible texture — is one of the chicest party styles you can wear. Gather hair to one side, twist upward, fold the ends in, and pin along the seam.
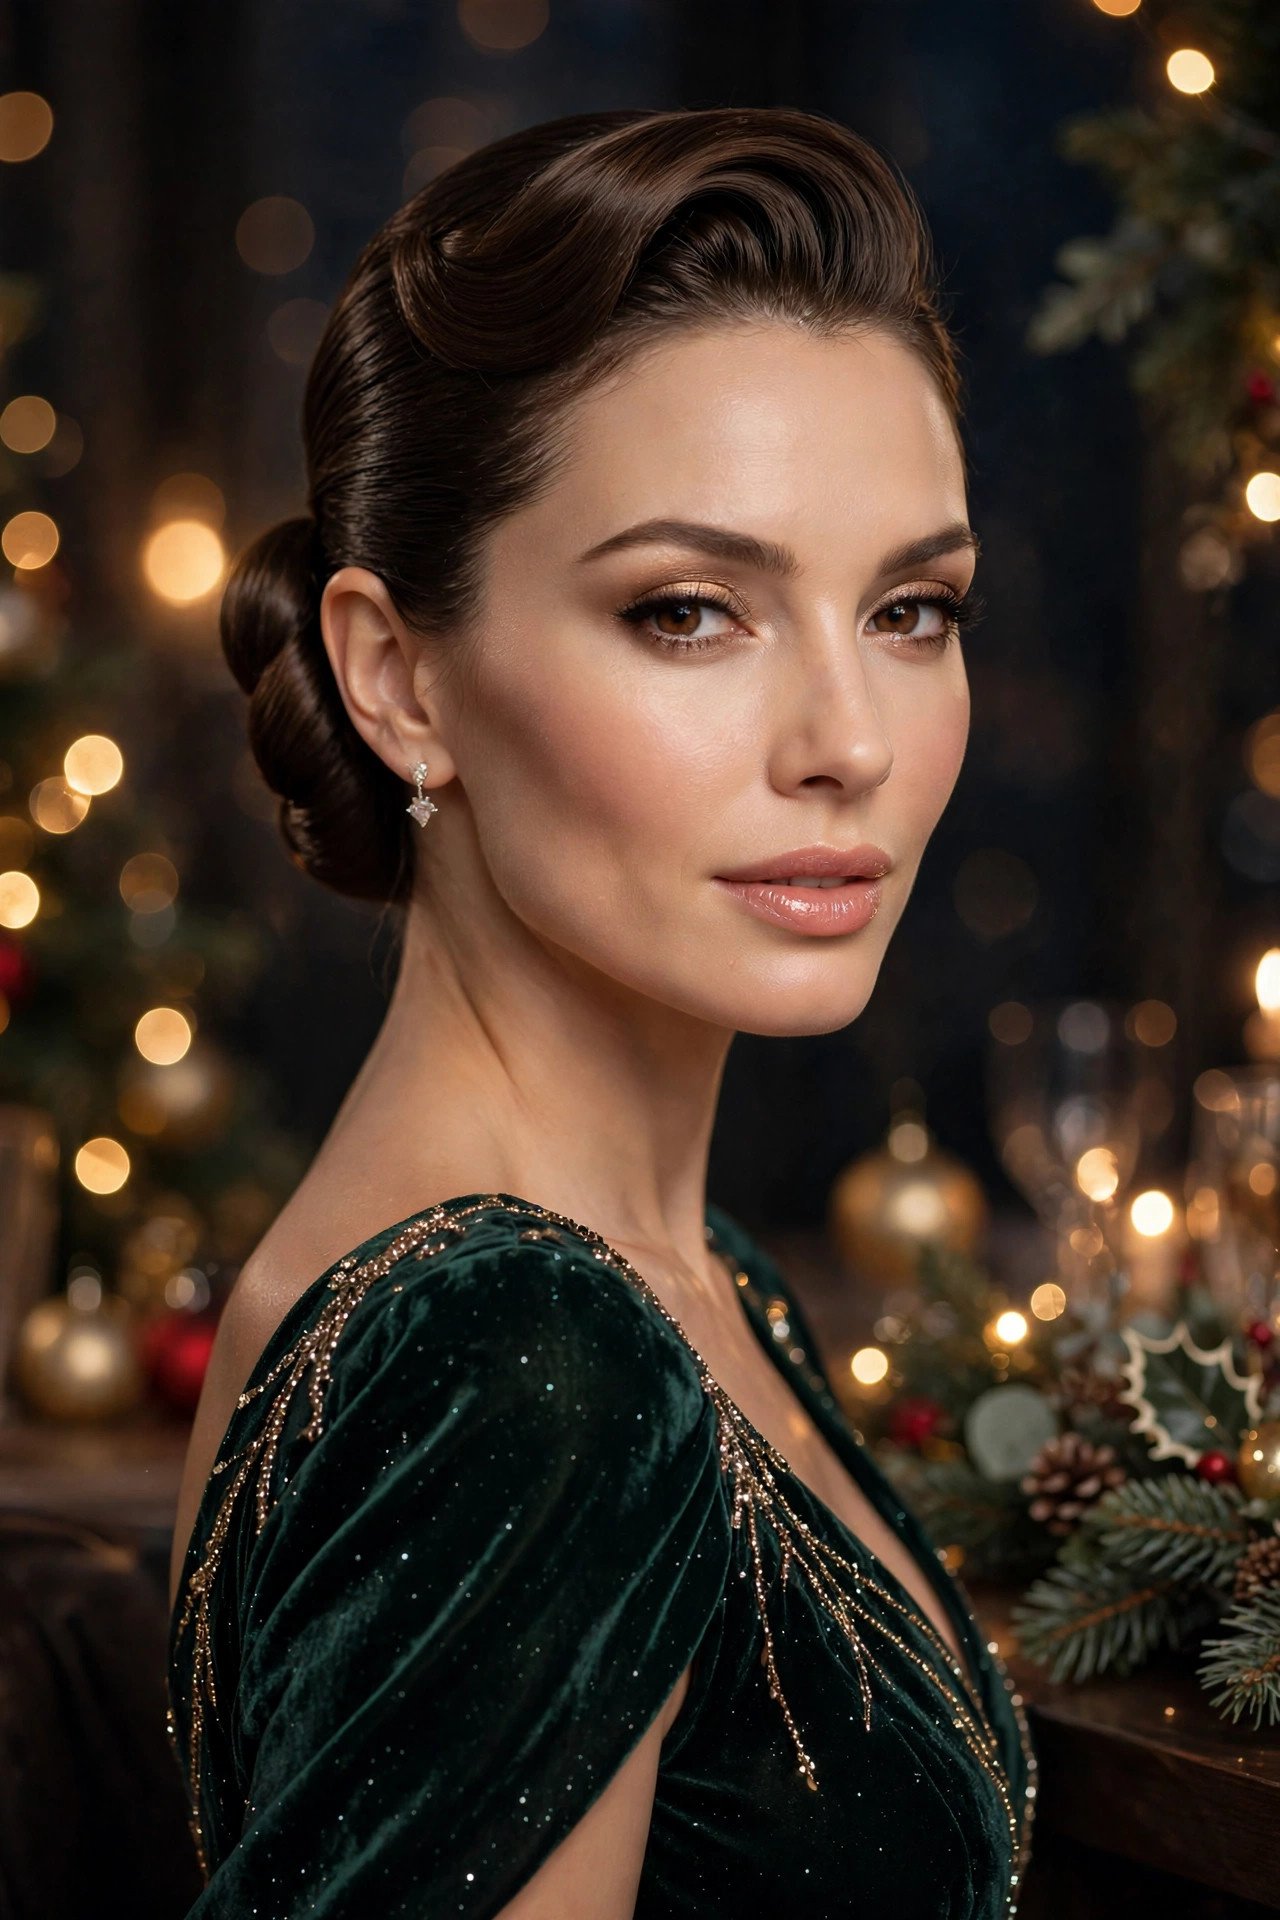
- The modern edge: Leave the twist slightly loose and pull out a few pieces — perfection is the enemy here.
- Tool: A French twist comb (the two-pronged kind) holds better than a dozen bobby pins.
- Best hair: Medium to long, medium texture — very fine hair needs texture spray first.
This elongates the neck beautifully, which makes it ideal with high necklines and statement necklaces. One jeweled comb at the twist’s base is all the decoration you need.
A light mist of strong-hold spray on each pinned section — applied as you go, not just at the end — is what keeps the twist locked for hours.
9. Waterfall Braid Into Soft Waves
The waterfall braid looks impossibly intricate but is genuinely just a French braid where you drop one strand each stitch. It creates a cascading effect across the back of the head that looks stunning with soft waves below — like your hair is decorated with its own braid.
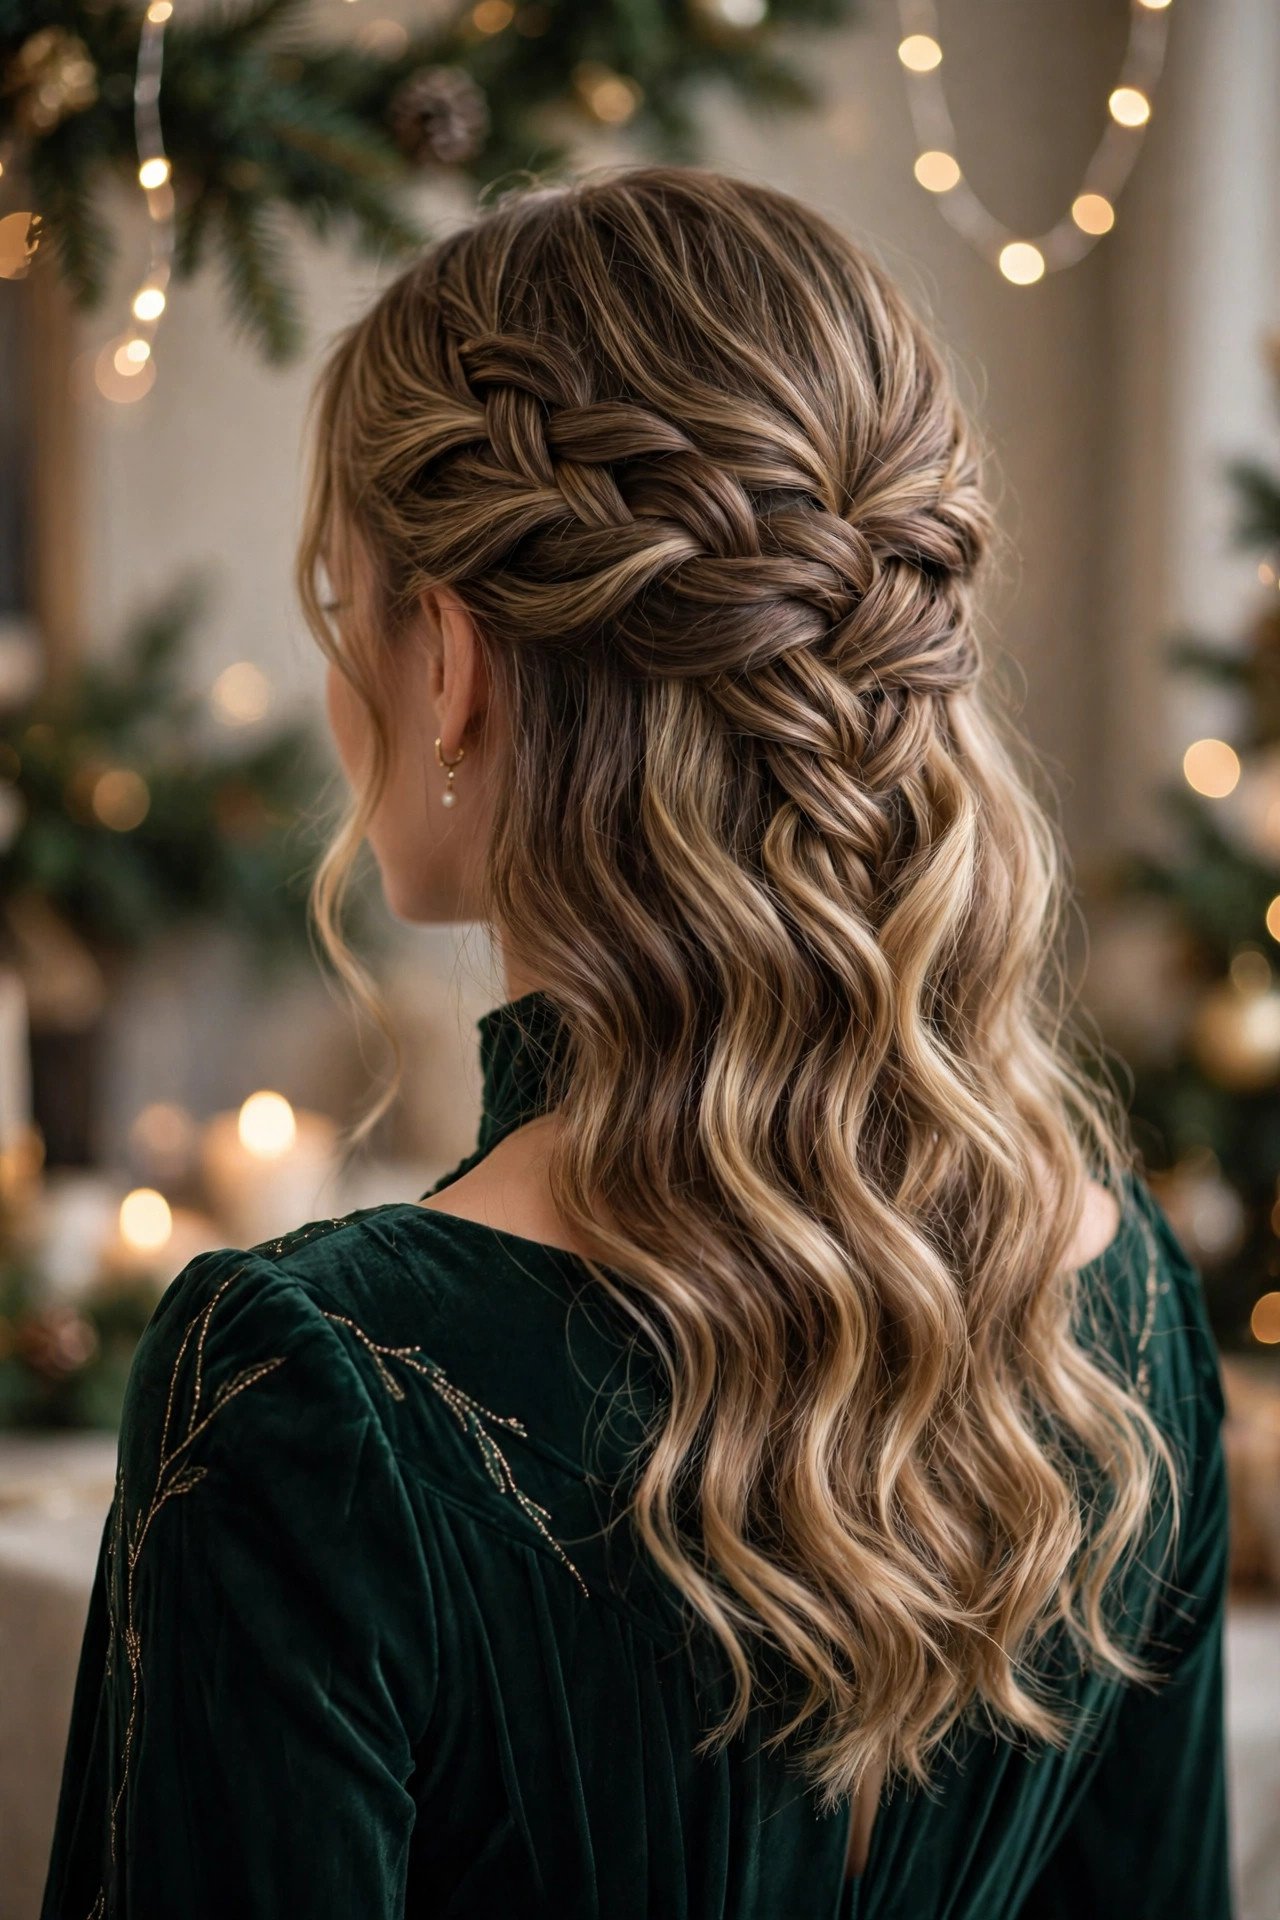
Braid from one temple across to the other, dropping the bottom strand each time and picking up a new one. Once across, continue as a regular three-strand braid and pin it under the waves. Curl the lengths with a 1.5-inch iron for loose, romantic waves. This style photographs incredibly from behind — perfect for those candid party shots — and holds up well through the night since the braid anchors everything.
📌 Good To Know: Slightly dirty hair braids better than freshly washed — the grip keeps the dropped strands from slipping out.
10. Side-Swept Curls With Crystal Clips
Old glamour, zero stiffness: sweep all your curls to one side and pin with crystal clips. The asymmetry is incredibly flattering — it shows off your neckline and earrings on one side while the curls cascade on the other. It’s the kind of style that looks like it took an hour but takes twenty minutes.
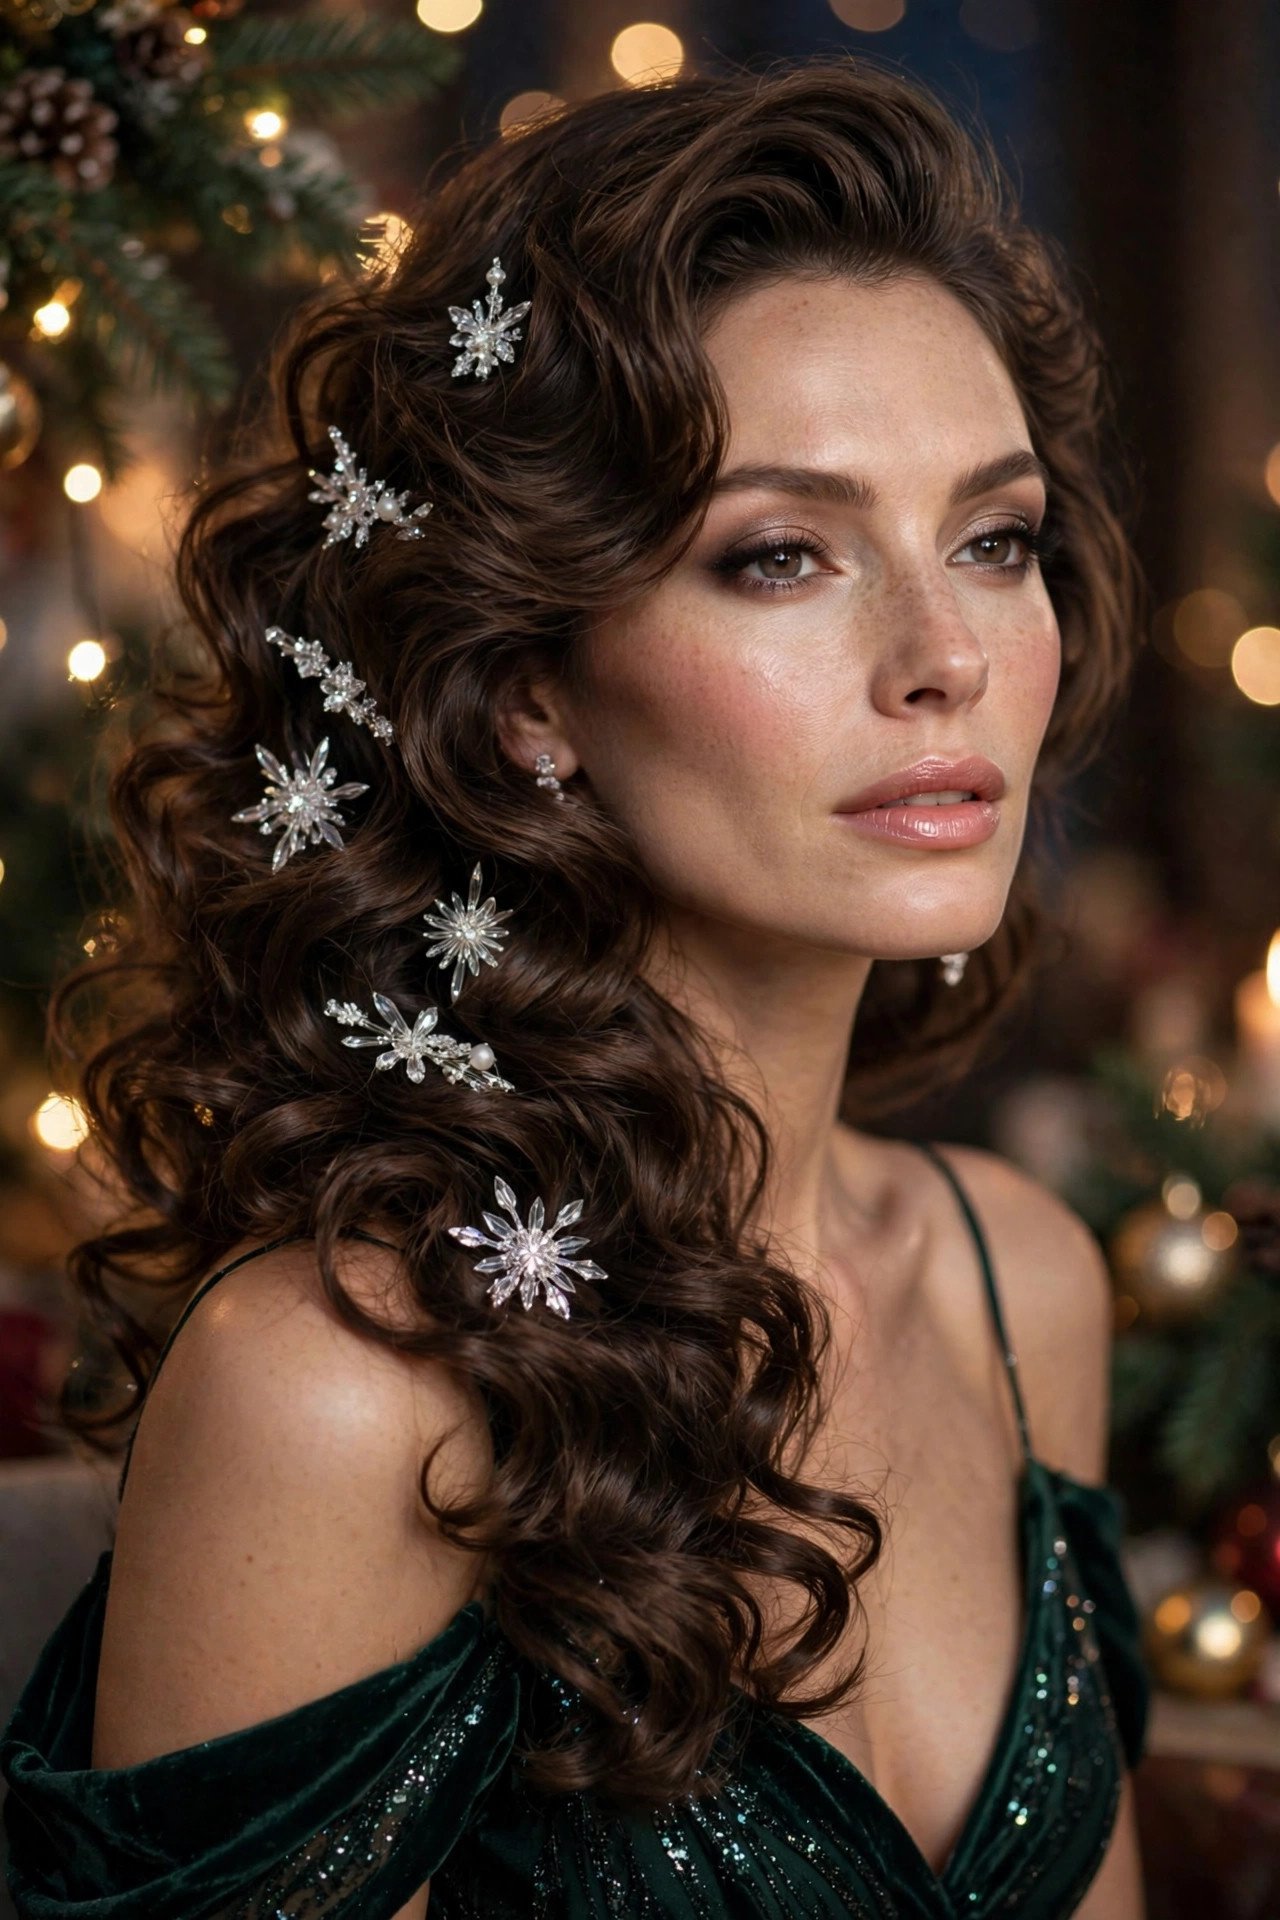
- The sweep: Curl everything, then gently sweep to one side and pin the underneath layers flat with bobby pins.
- Clip placement: Cluster two or three crystal clips just above the ear on the pinned side.
- Hold: A strong-hold hairspray on the pinned side only — the curls should still move.
This is a brilliant choice if you’re wearing an off-shoulder or one-shoulder dress — the hair and the neckline work together instead of competing.
Set the pinned side with one final veil of hairspray while holding the curls away — you want the base frozen and the lengths free.
11. Glam Bubble Ponytail
The bubble ponytail is playful, but done sleek with volume it becomes genuinely glamorous. Secure a high ponytail, then add clear elastics every two inches down the length, gently tugging each section wider to form “bubbles.” Wrap each elastic with a thin strand of hair for a polished finish.
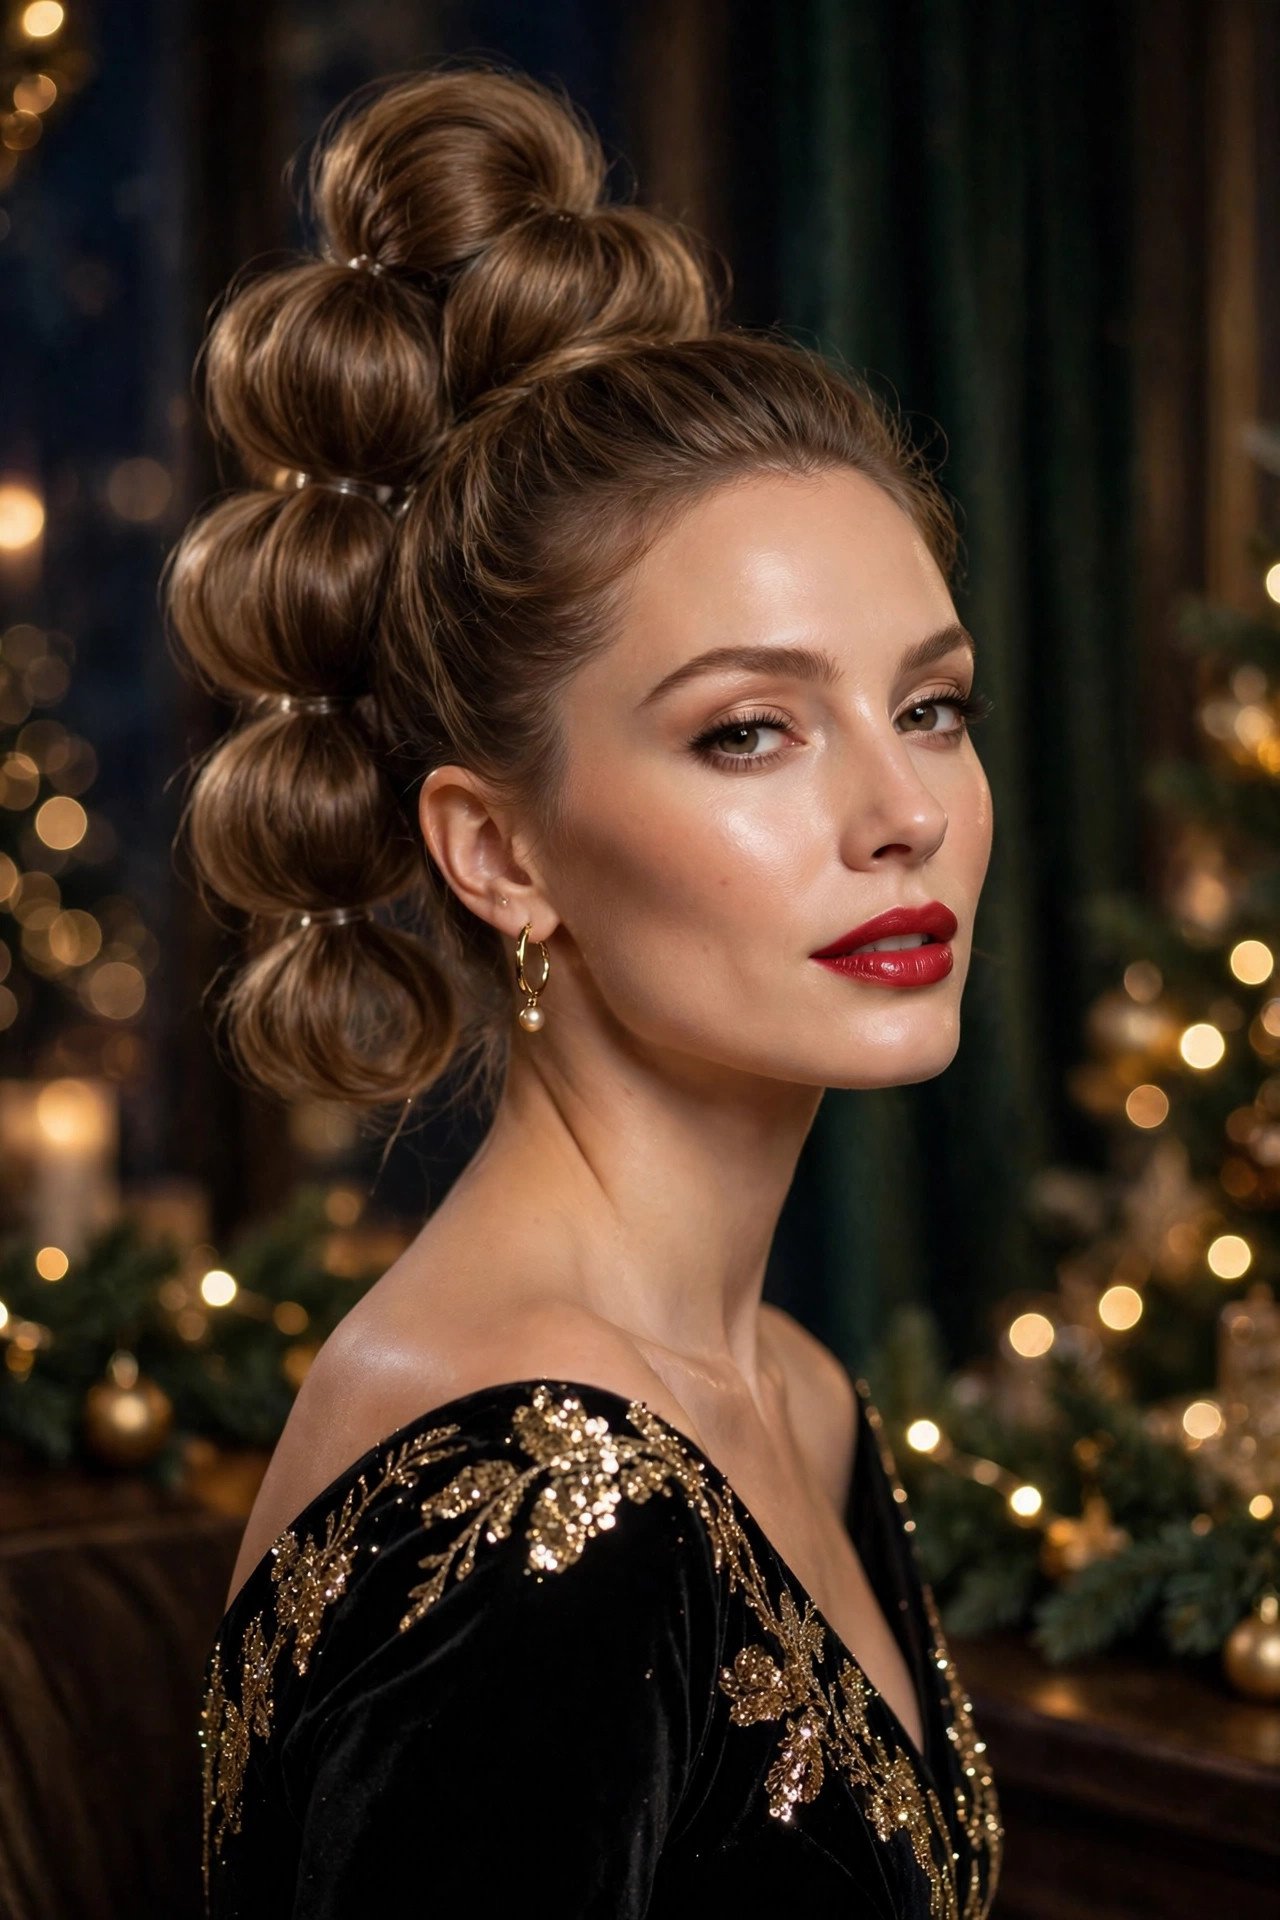
Backcomb each section lightly before tugging for maximum fullness — flat bubbles look sad, full ones look expensive. This style is a gift for long hair; if yours is medium length, add a clip-in ponytail extension at the base for extra drama. A velvet ribbon tied at the top elastic instead of a wrapped strand makes it instantly Christmas-appropriate.
💡 Quick Tip: Spray each bubble lightly with hairspray as you go — it keeps the shape from deflating by midnight.
For fine hair, tease each bubble’s interior lightly before shaping — the hidden texture is what keeps thin hair from deflating by dessert.
12. Polished Middle-Part Ballerina Bun
There’s a reason ballerinas and brides swear by this: a sleek middle-part bun is pure elegance. It’s also the best style for showing off dramatic makeup or chandelier earrings, since nothing competes with your face. Gel the roots smooth, twist into a neat bun at the crown or nape, and pin.
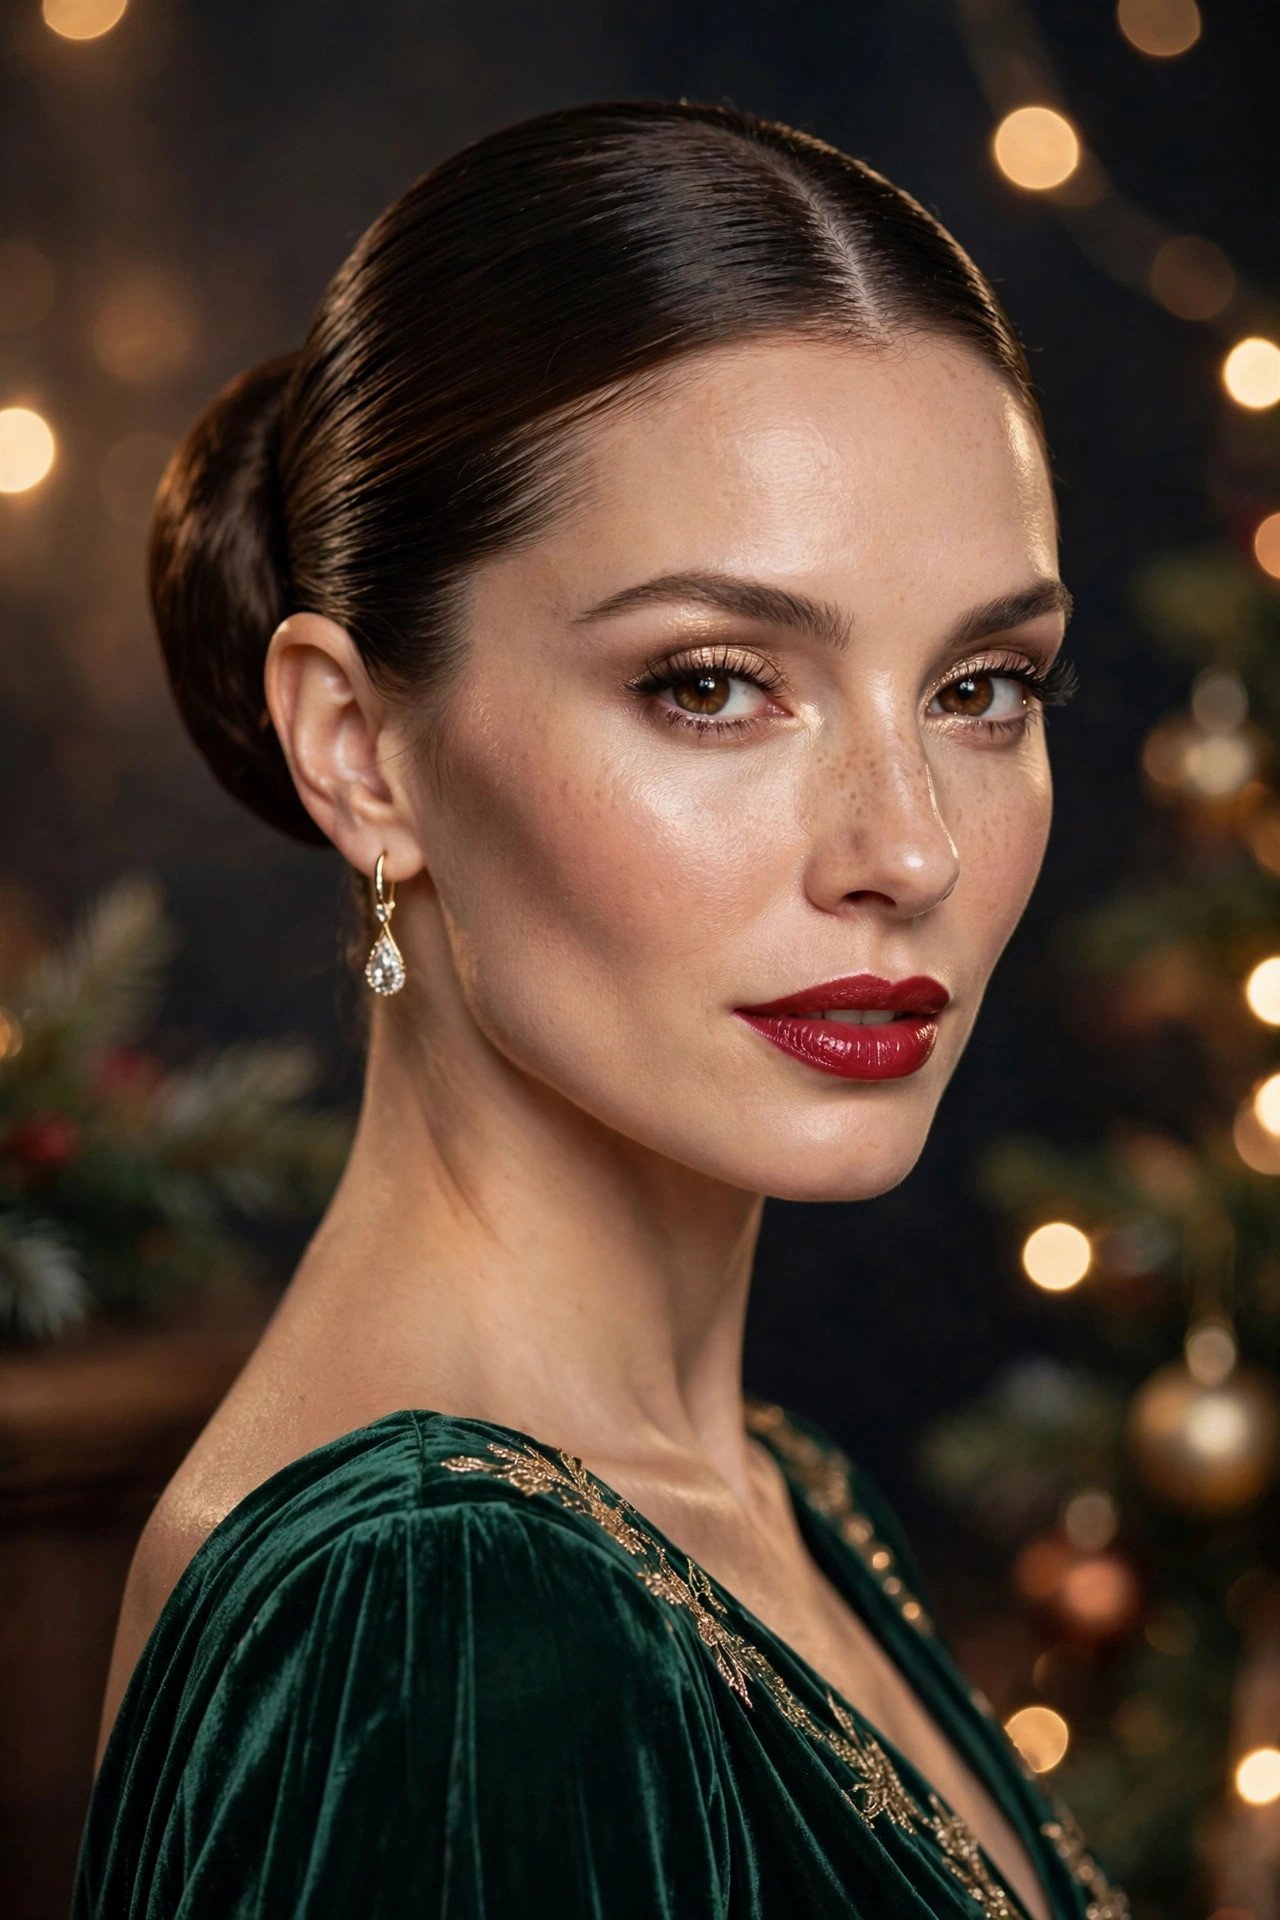
The middle part is non-negotiable for the full effect — use the edge of a rattail comb for a razor-sharp line. A small amount of edge control or pomade on a toothbrush tames every flyaway along the part. Choose bun height by neckline: high bun with strapless, low bun with high collars. This style lasts all night with zero maintenance, which is its own kind of luxury.
For fine hair, wrap a hair donut that matches your color inside the bun before pinning — it builds the full, round shape that thick hair achieves naturally.
13. Old-Hollywood Finger Waves
For the truly committed glamour lover: authentic finger waves. This is a wet-set technique — gel, a fine-tooth comb, and your fingers sculpting S-curves that dry into sculpted waves. It’s a skill, but the result is unmatched vintage drama.
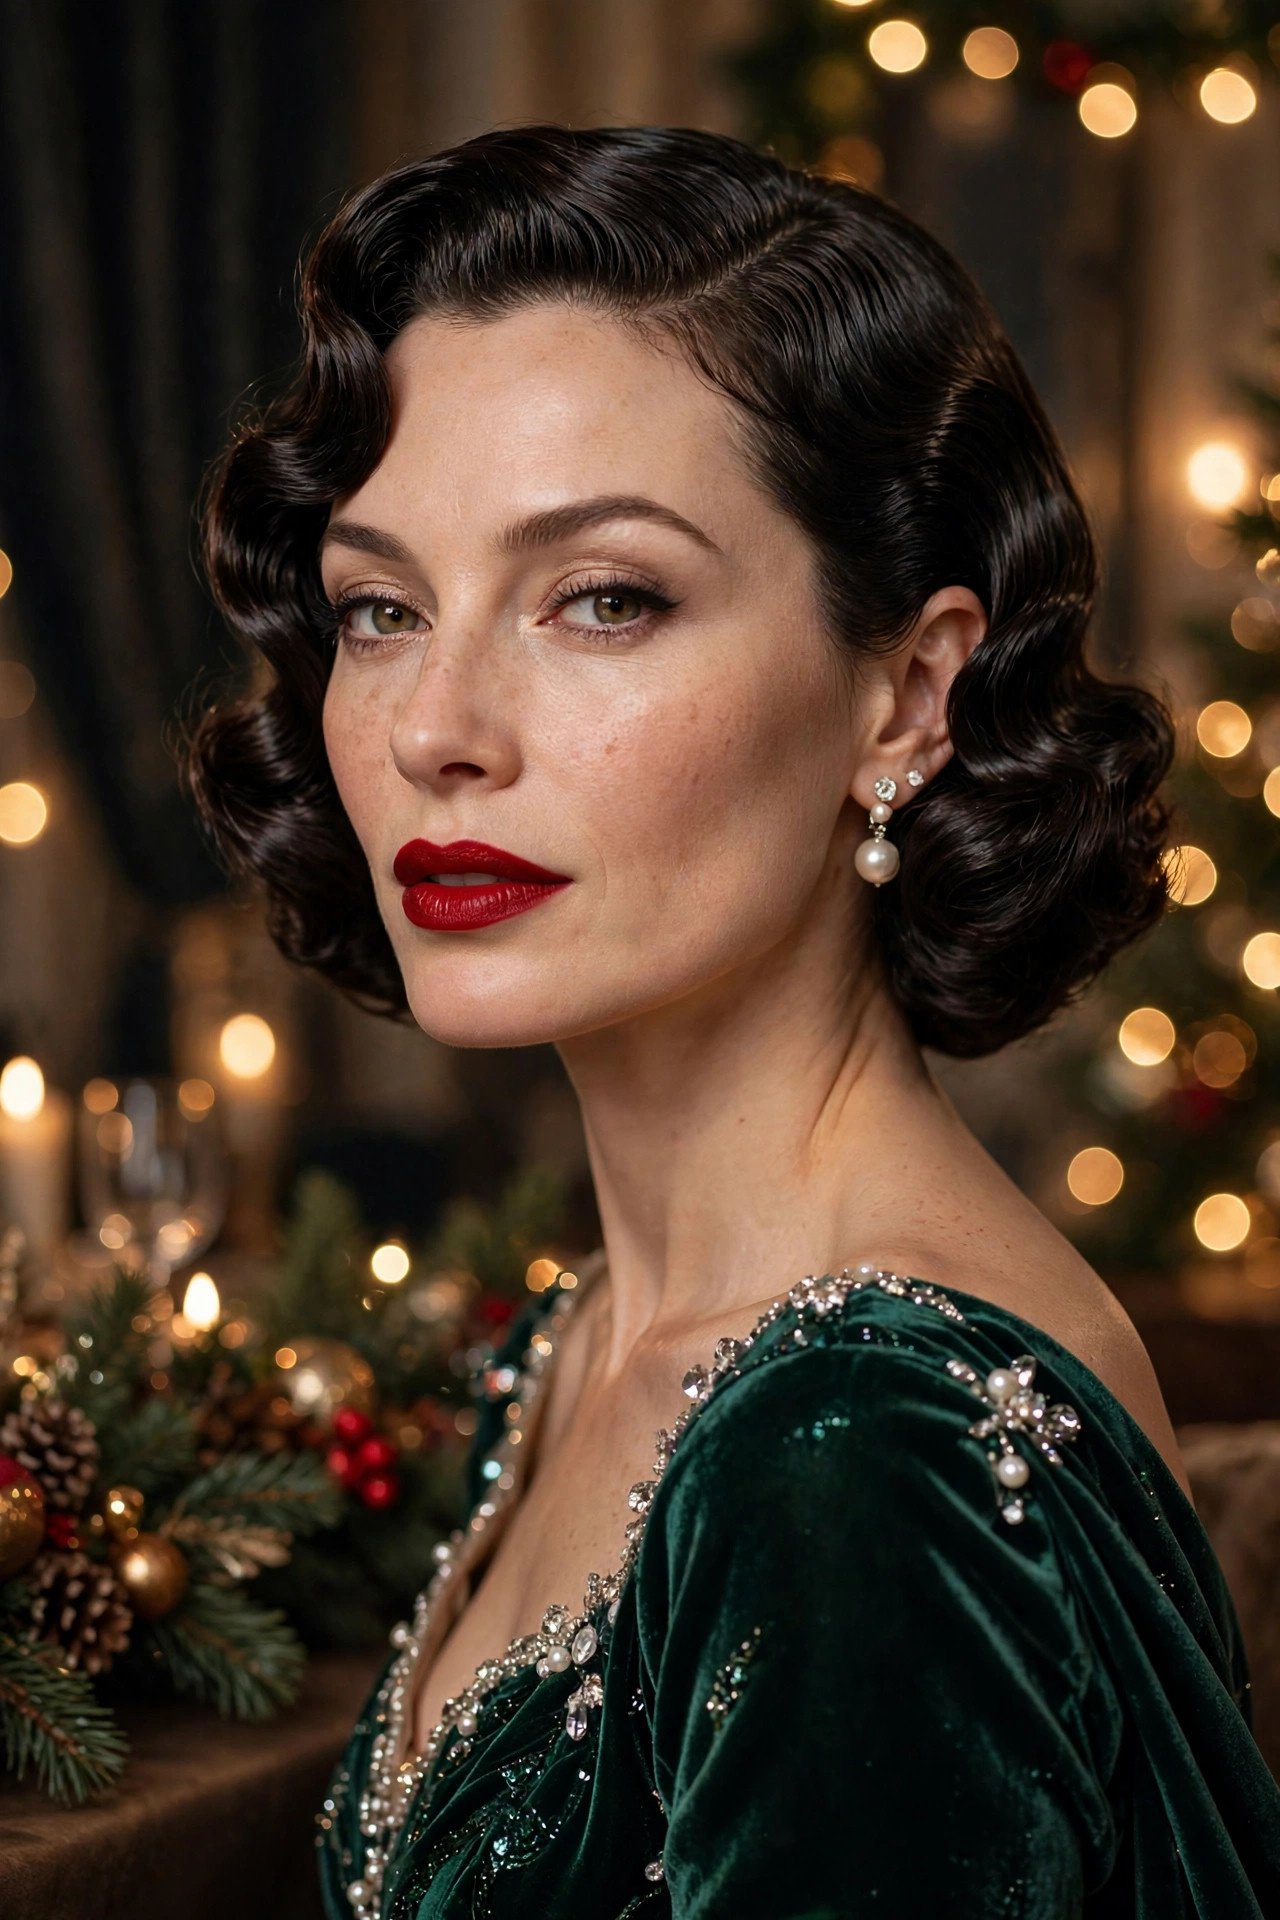
- Product: A strong-hold gel applied generously to damp hair — you need real hold here.
- Technique: Comb a section flat, push the hair forward with your finger, comb the ridge down — repeat down the section.
- Drying: Sit under a hooded dryer or diffuse on low — air-drying takes forever and risks frizz.
⚠️ Watch Out: Do a trial run before party day. Finger waves have a learning curve, and Christmas Eve is not the time to learn.
If the full wet-set technique intimidates you, fake it: sculpt deep S-waves with a flat iron, then press each wave flat with clips while it cools. The effect reads remarkably similar.
14. Fishtail Braid Over One Shoulder
A fishtail braid draped over one shoulder is romantic without being precious. It takes just two strands (split your ponytail in half, cross small pieces from outside to inside), and the result looks far more complex than the technique. Pancake it gently for that full, boho-luxe width.
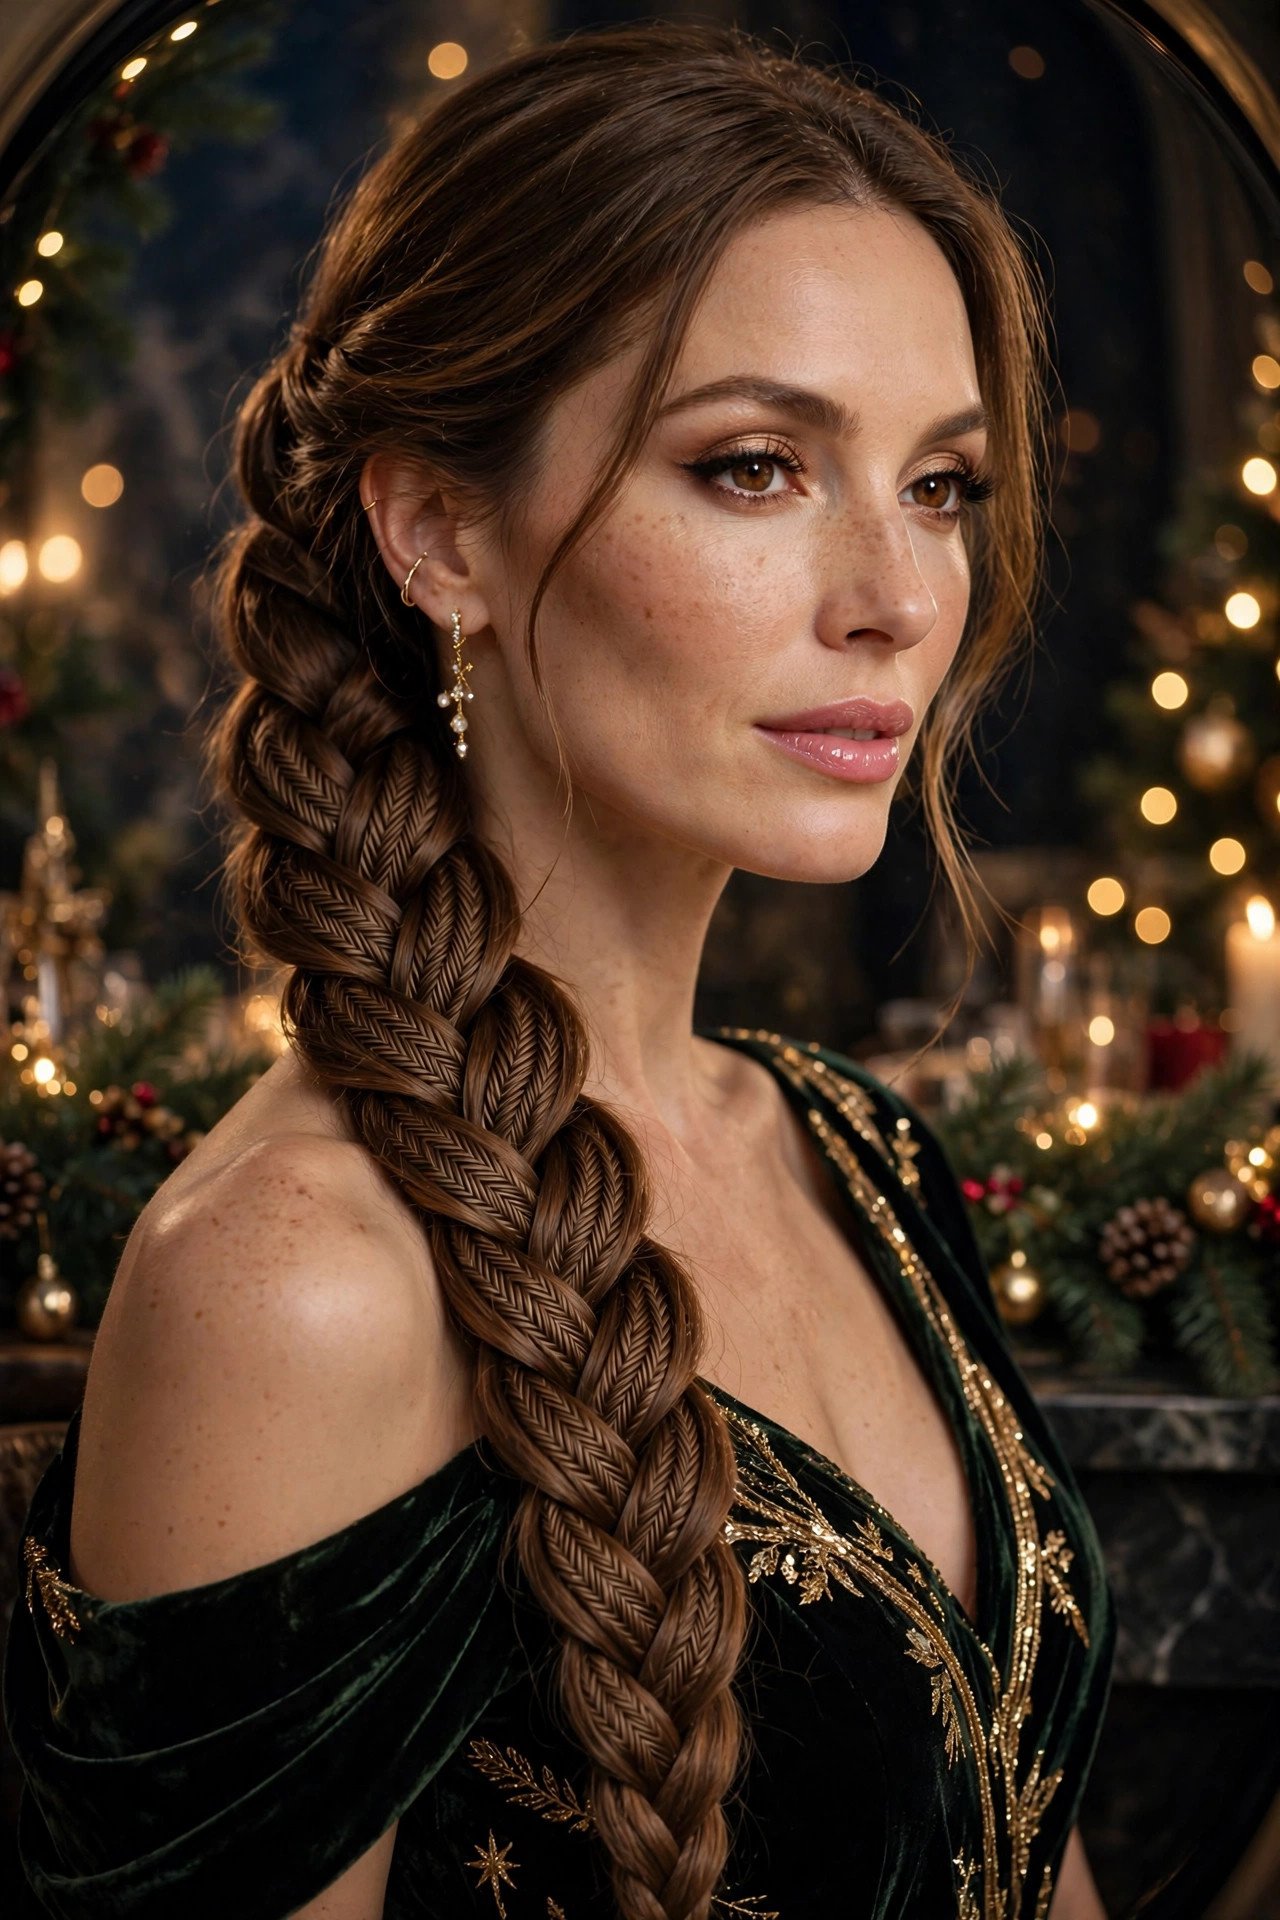
Start the braid as a low side ponytail so it falls naturally over the shoulder. Leave the ends slightly undone and curl them for a soft finish, or tie off with a velvet ribbon. This is one of the best styles for very long hair — the length becomes the whole point — and it survives hugs, dancing, and winter wind without falling apart.
📌 Good To Know: Fishtails look best a little messy. If it’s too neat, it reads sporty; pancake and pull pieces until it looks effortlessly full.
15. Romantic Low Ponytail With Ribbon
Sometimes the simplest ideas are the most beautiful. A low, loose ponytail with soft volume at the crown, tied with a wide satin or velvet ribbon, is quietly stunning — and it takes less than ten minutes. The ribbon does all the festive heavy lifting.
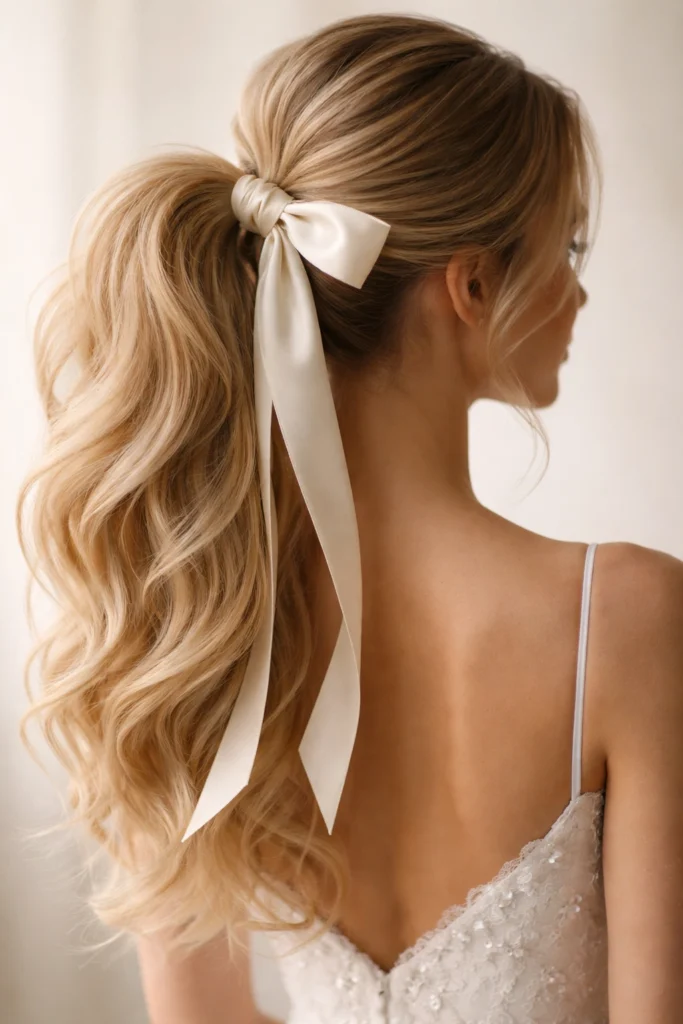
Tease the crown lightly before gathering hair low at the nape — that little lift is what keeps it from looking like a gym ponytail. Curl the ponytail’s ends under for polish, and let a few face-framing pieces fall free. Tie the ribbon in a bow with long tails; deep green, burgundy, or champagne gold all scream Christmas. This pairs beautifully with high-neck dresses where an updo would feel like too much.
Let the ribbon tails hang long — at least six inches past the knot. Short ribbon ends look perky; long ones move when you do and photograph beautifully.
16. Double Dutch Braids Into a Low Bun
Sporty meets party: two Dutch braids from the hairline that feed into a low textured bun. The braids add incredible detail and keep everything secure, while the bun keeps it elegant. It’s also one of the longest-lasting styles on this list — it’ll look perfect at midnight.

- Part: A clean middle part sets up the symmetry — use a rattail comb.
- Braid tight: Dutch braids (crossing under) sit raised on the head and show more dimension than French braids.
- The bun: Twist the remaining hair loosely and pin — texture spray first for grip.
💡 Quick Tip: Weave a thin gold cord or ribbon into one braid for a festive detail that catches the light.
Sleep in the braids the night before the party and you will wake up with gorgeous waves as a backup plan — undo, shake out, and a second style is ready in minutes.
17. Bouncy Curtain-Bang Blowout
Curtain bangs plus a bouncy blowout is the “expensive hair” look everyone’s chasing. The bangs frame the face like a curtain (hence the name), blending into face-framing layers, while the rest gets that full, bouncy blowout treatment.
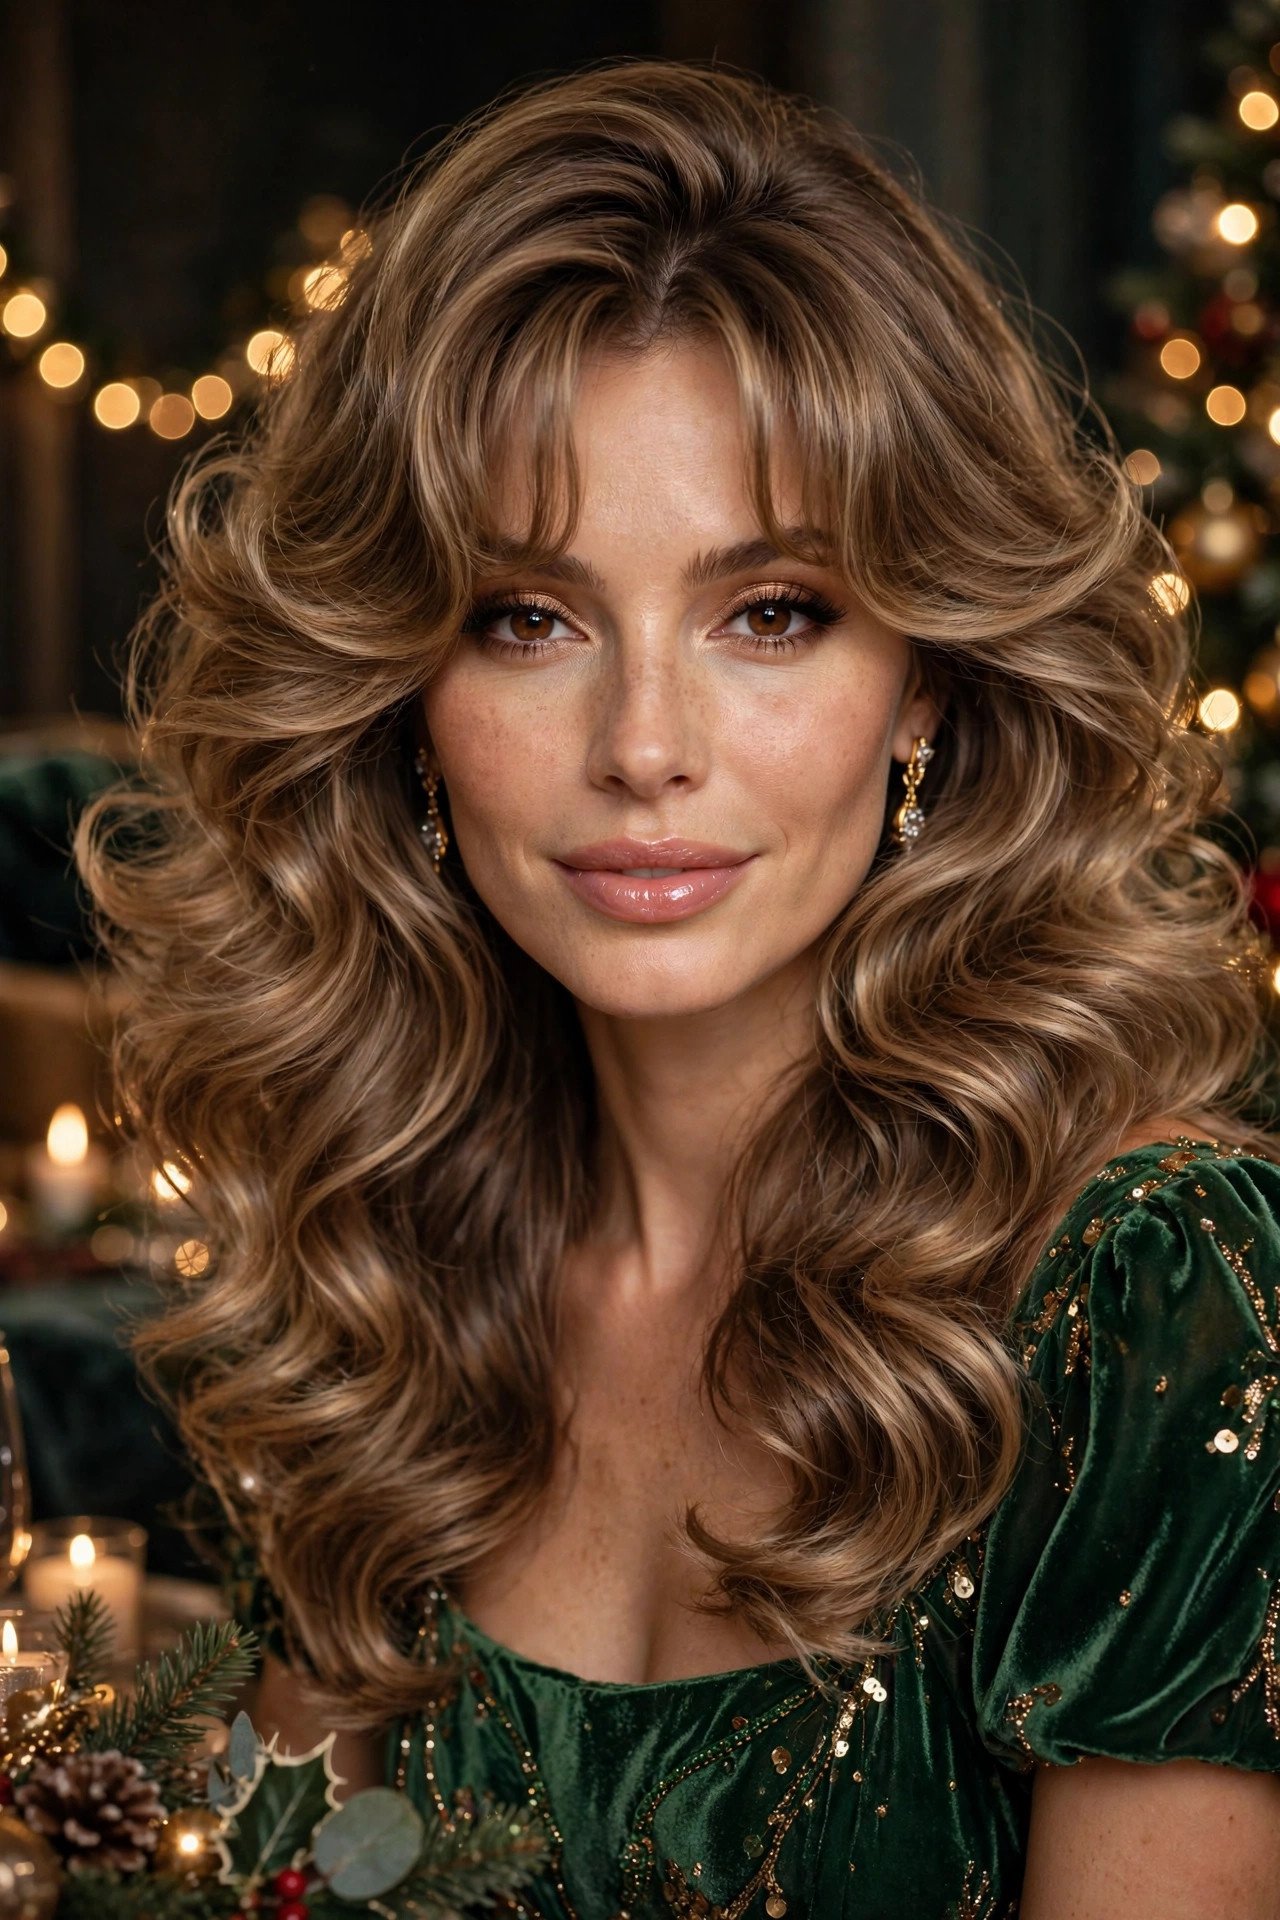
Blow-dry the bangs first, while they’re wettest — use a small round brush and roll them away from the face on each side. Then blow out the rest with a large round brush for volume. A one-inch curling iron on just the ends adds that extra bounce. This style moves beautifully, which makes it perfect for parties: every turn of your head shows it off. It also grows out gracefully, so December’s bangs still look good in February.
On party day, blow-dry the bangs first while they are soaking wet — curtain bangs set their part as they dry, and fighting a dry cowlick is a battle you will not win.
18. Sleek Glass Hair With Tucked Sides
Glass hair — impossibly smooth, reflective, blunt-cut shine — is the minimalist’s party look. Flat-iron in small sections with a heat protectant that adds shine (Color Wow Dream Coat is legendary for this), then tuck both front sections behind the ears.
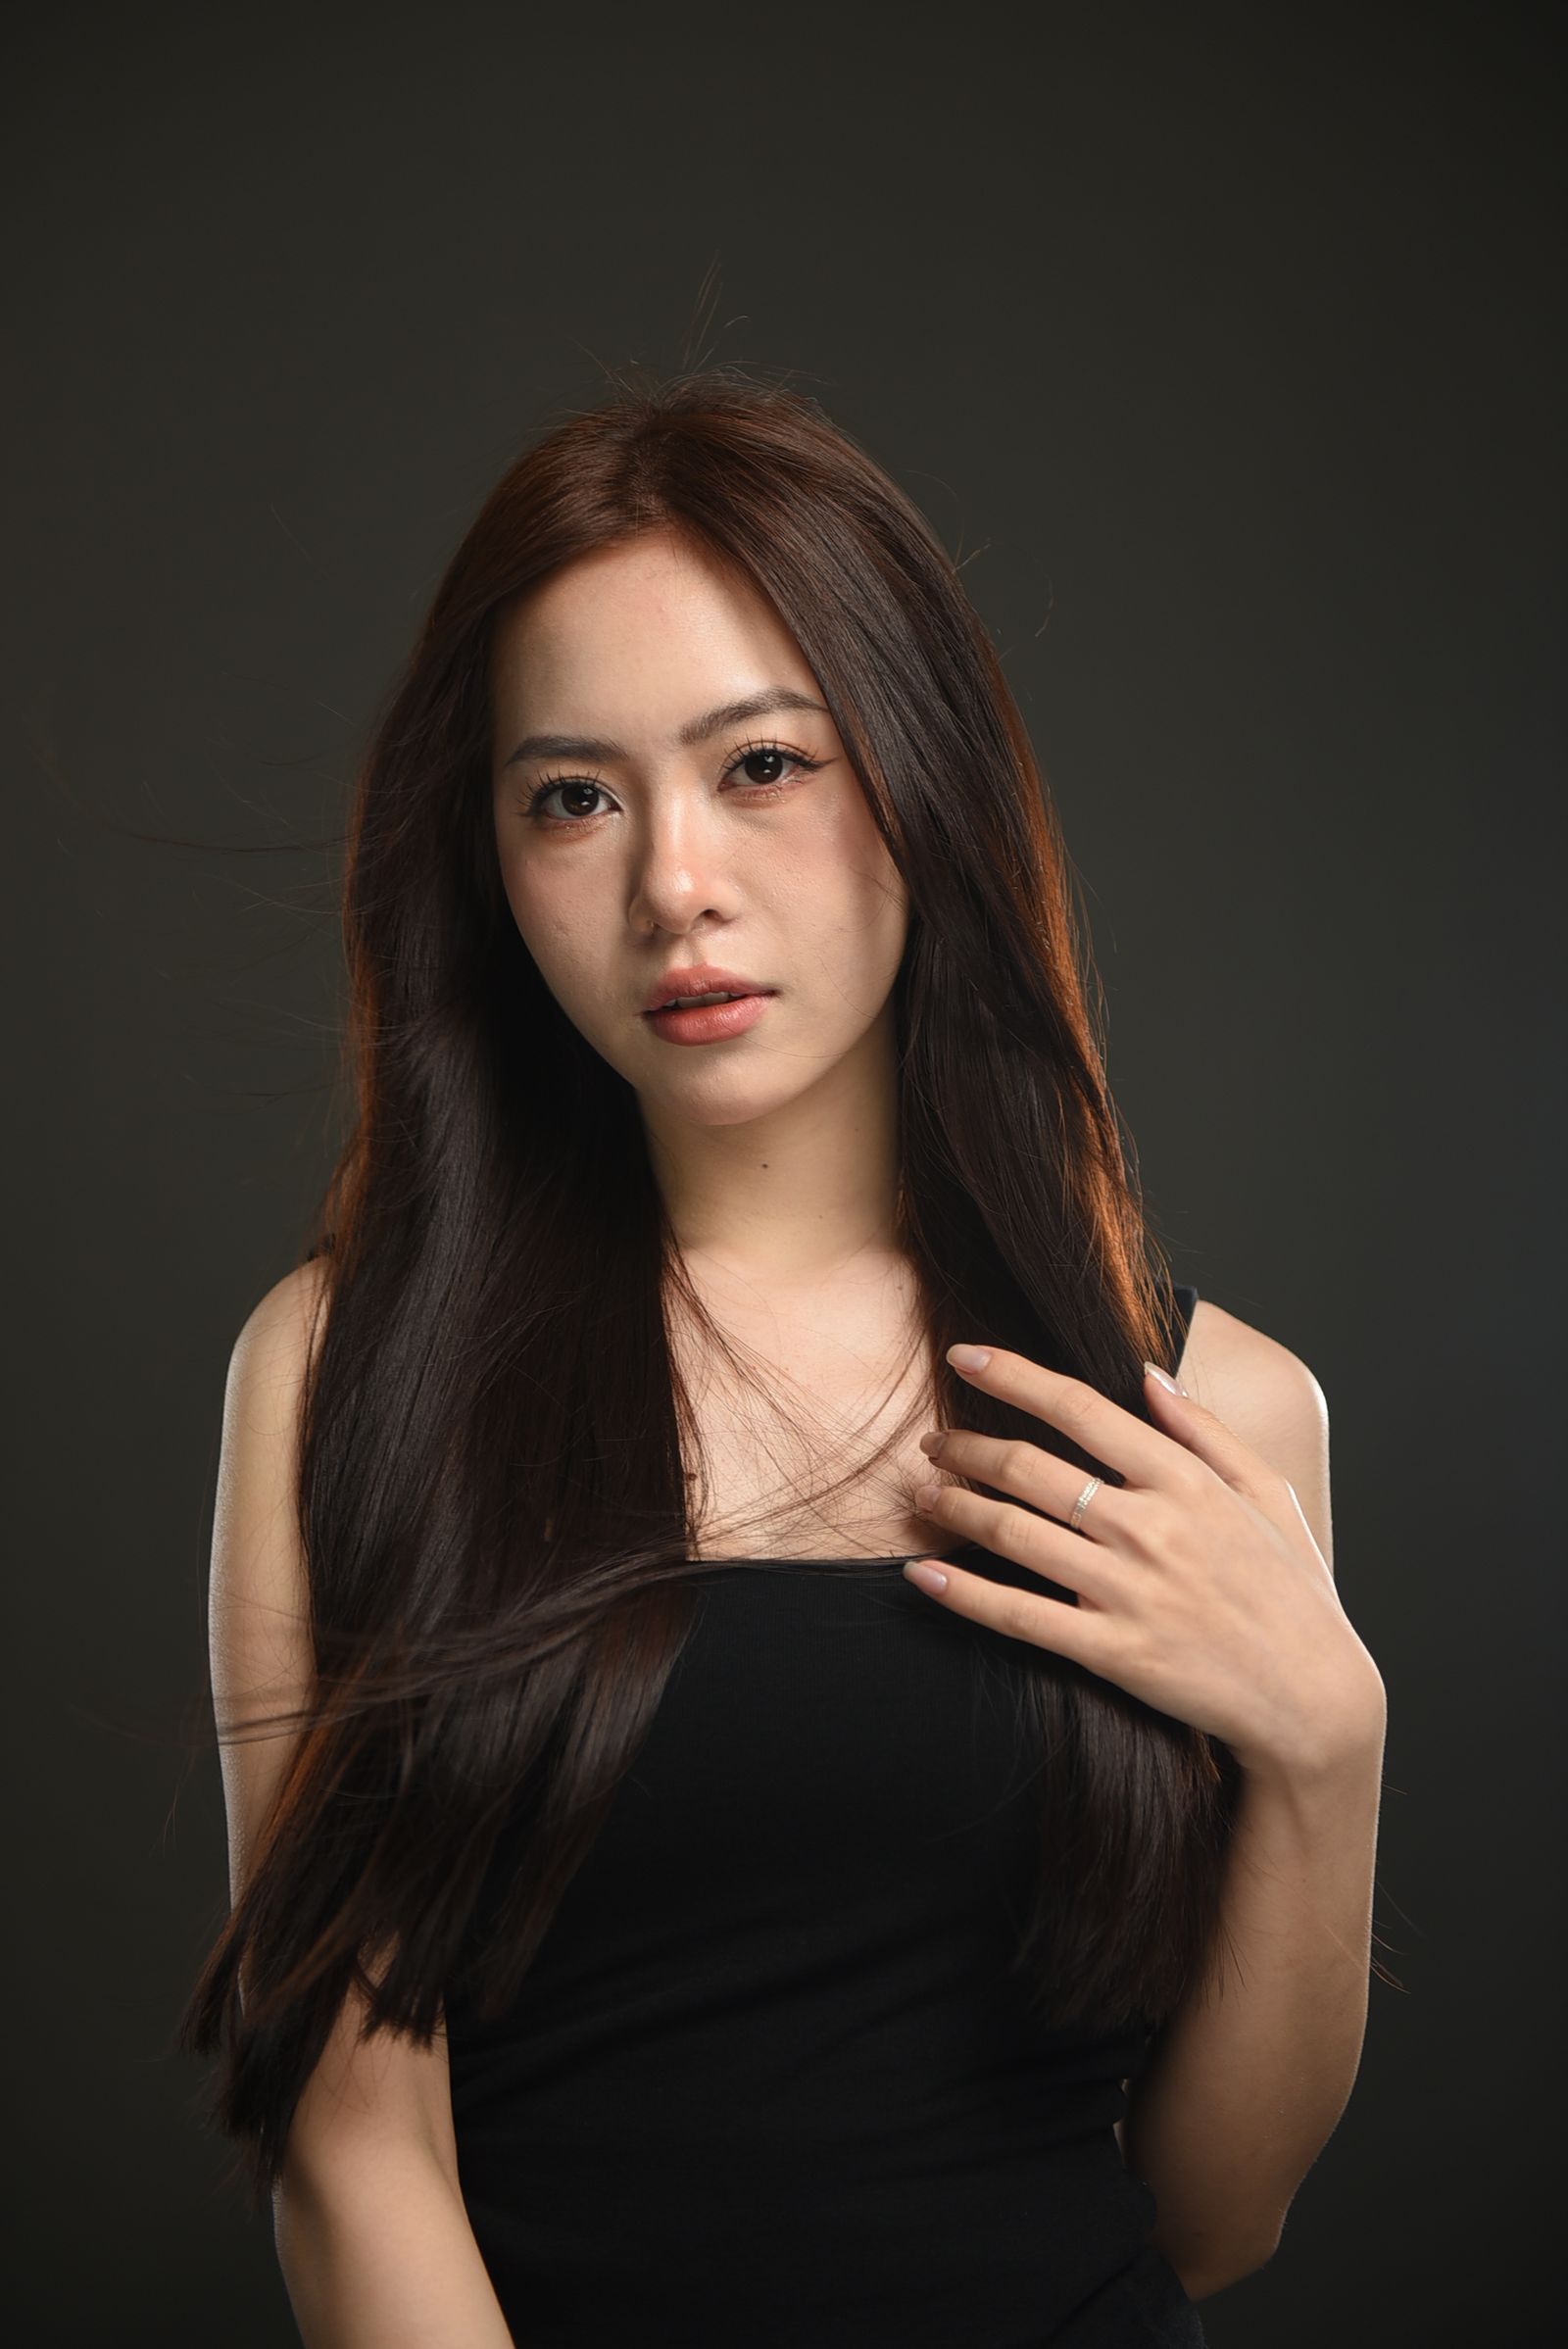
The tuck is what makes it party-ready: it shows off your earrings and bone structure while keeping the sleek line. A deep side part adds drama; a middle part adds editorial edge. This demands healthy ends — get a trim the week before if you can — because glass hair shows everything. The payoff is a look so polished it borders on intimidating, in the best way.
⚠️ Watch Out: Humidity is the enemy. If your party involves going in and out of winter air, pack a mini anti-frizz sheet or two.
19. Braided Headband With Loose Waves
Why buy a headband when you can braid one from your own hair? Take a section from behind one ear, braid it across the hairline to the other side, and pin. The rest of the hair falls in loose waves. It’s a built-in accessory that never slips, never gives you a headache, and looks incredibly romantic.

- Section size: A one-inch section makes a delicate headband; two inches makes a statement.
- Placement: Braid about an inch behind the hairline for the most natural look.
- Waves: Loose, brushed-out curls keep the whole thing soft and party-ready.
This works on medium to long hair and is especially pretty on highlighted hair, where the braid shows off the dimension. Tuck tiny faux berries or gold pins into the braid for Christmas.
Spritz the braid itself with a light-hold spray before pancaking — it keeps the widened stitches from sliding back flat within the hour.
20. Textured Top Knot With Wispy Pieces
A top knot for a Christmas party? Absolutely — when it’s textured, slightly undone, and surrounded by wispy face-framing pieces. This is the cool-girl party look: effortless on the surface, strategic underneath. Tease the ponytail before twisting for a full, piece-y knot.
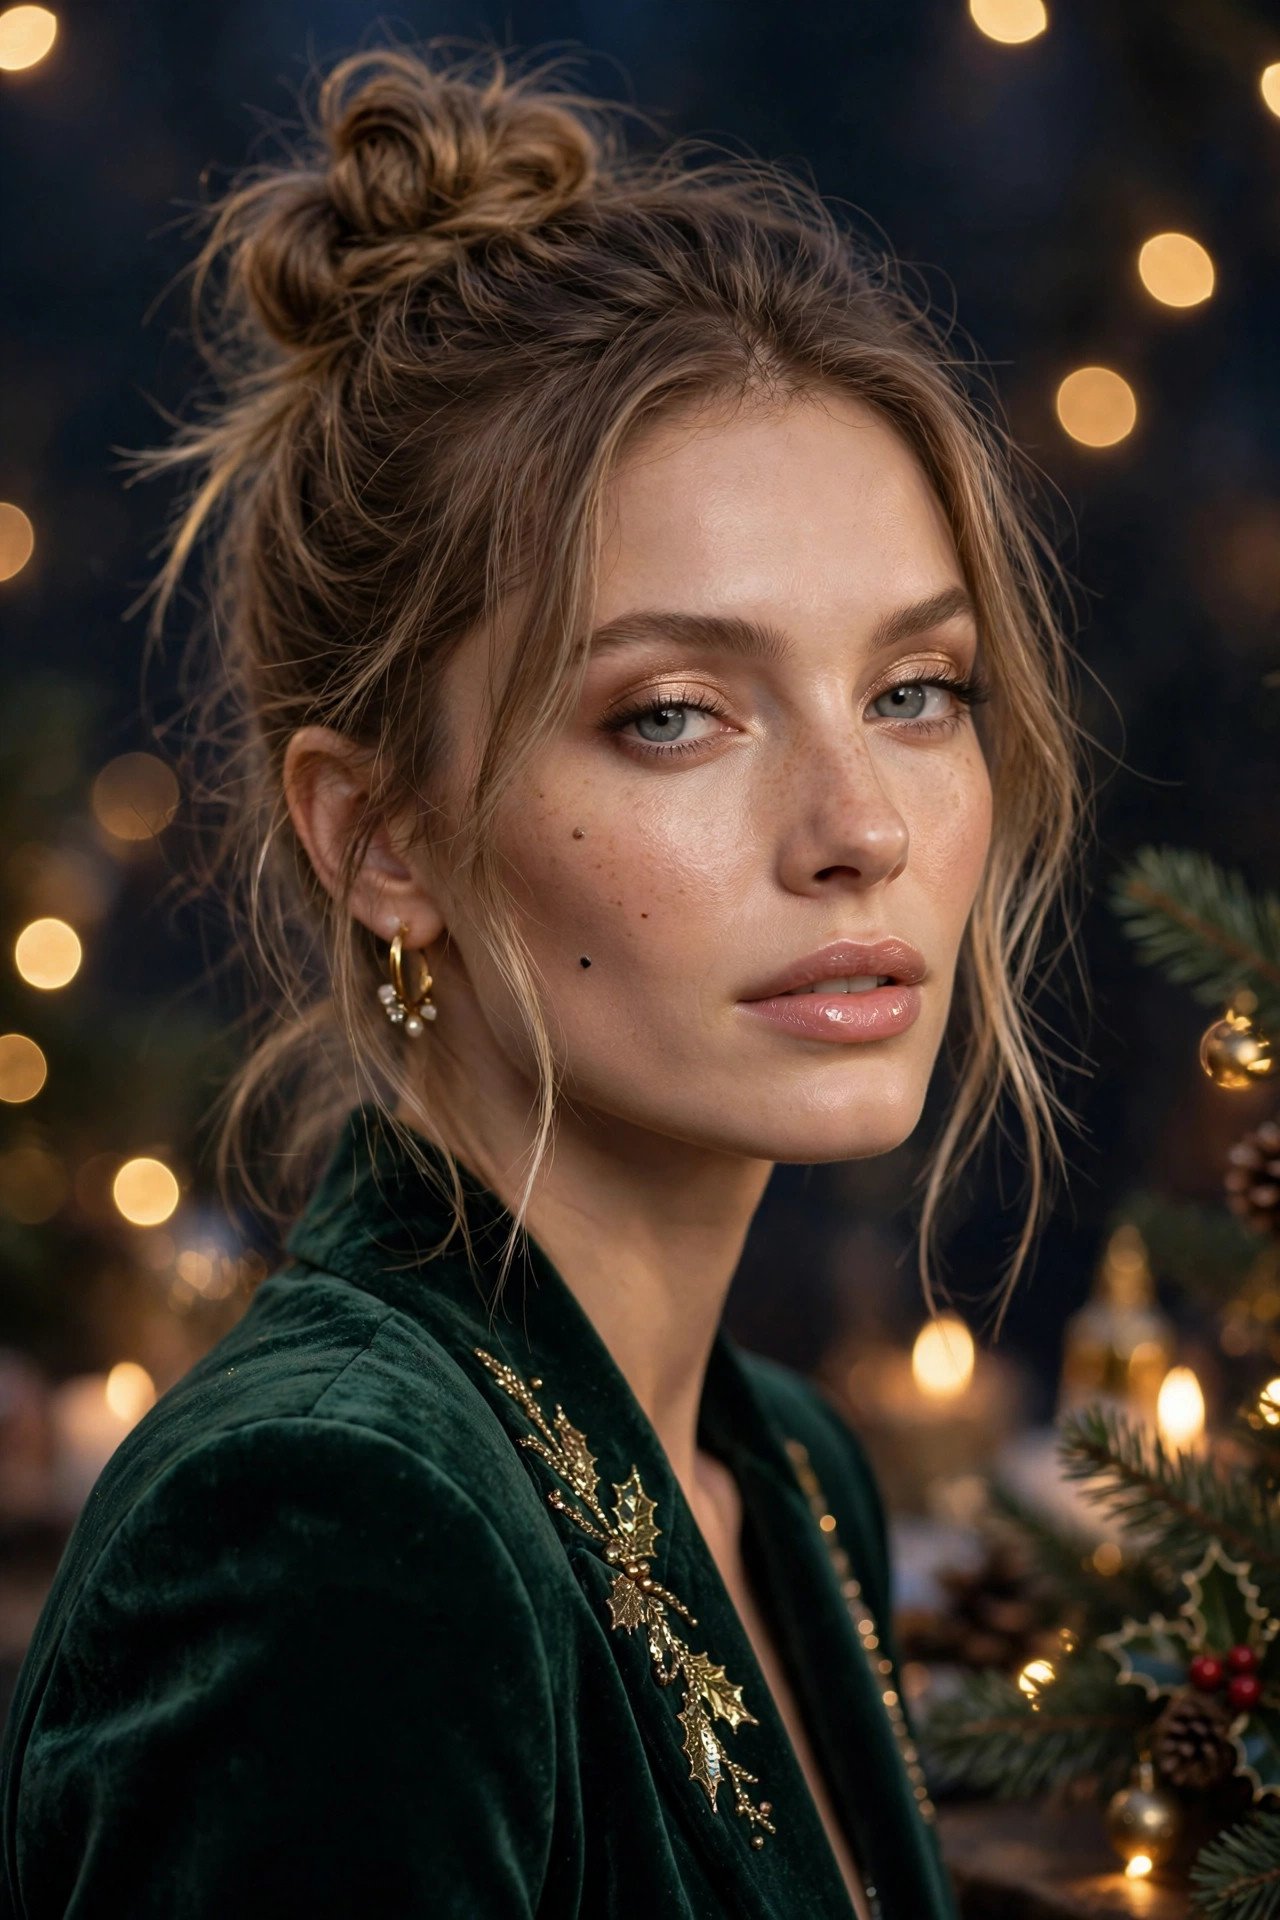
The wispy pieces are essential — pull them out before you twist the knot, then curl them softly. They soften the severity of the top knot and keep it feminine. A high knot elongates the neck and shows off your shoulders, making it ideal with strapless or off-shoulder dresses. Finish with texture spray, not hairspray — you want movement, not a helmet.
💡 Quick Tip: Place the knot slightly forward of the crown — it photographs better and feels more deliberate than dead-center.
Anchor the knot with two large U-pins pushed straight down into the base — they grip far better than bobby pins on thick, textured hair.
21. Vintage Victory Rolls, Party Edition
Channel your inner 1940s starlet with victory rolls — those sculpted rolls above each temple that are pure vintage glamour. Roll front sections around your fingers, pin the rolls in place, and leave the back in waves or a low bun. It’s bold, it’s festive, it’s unforgettable.
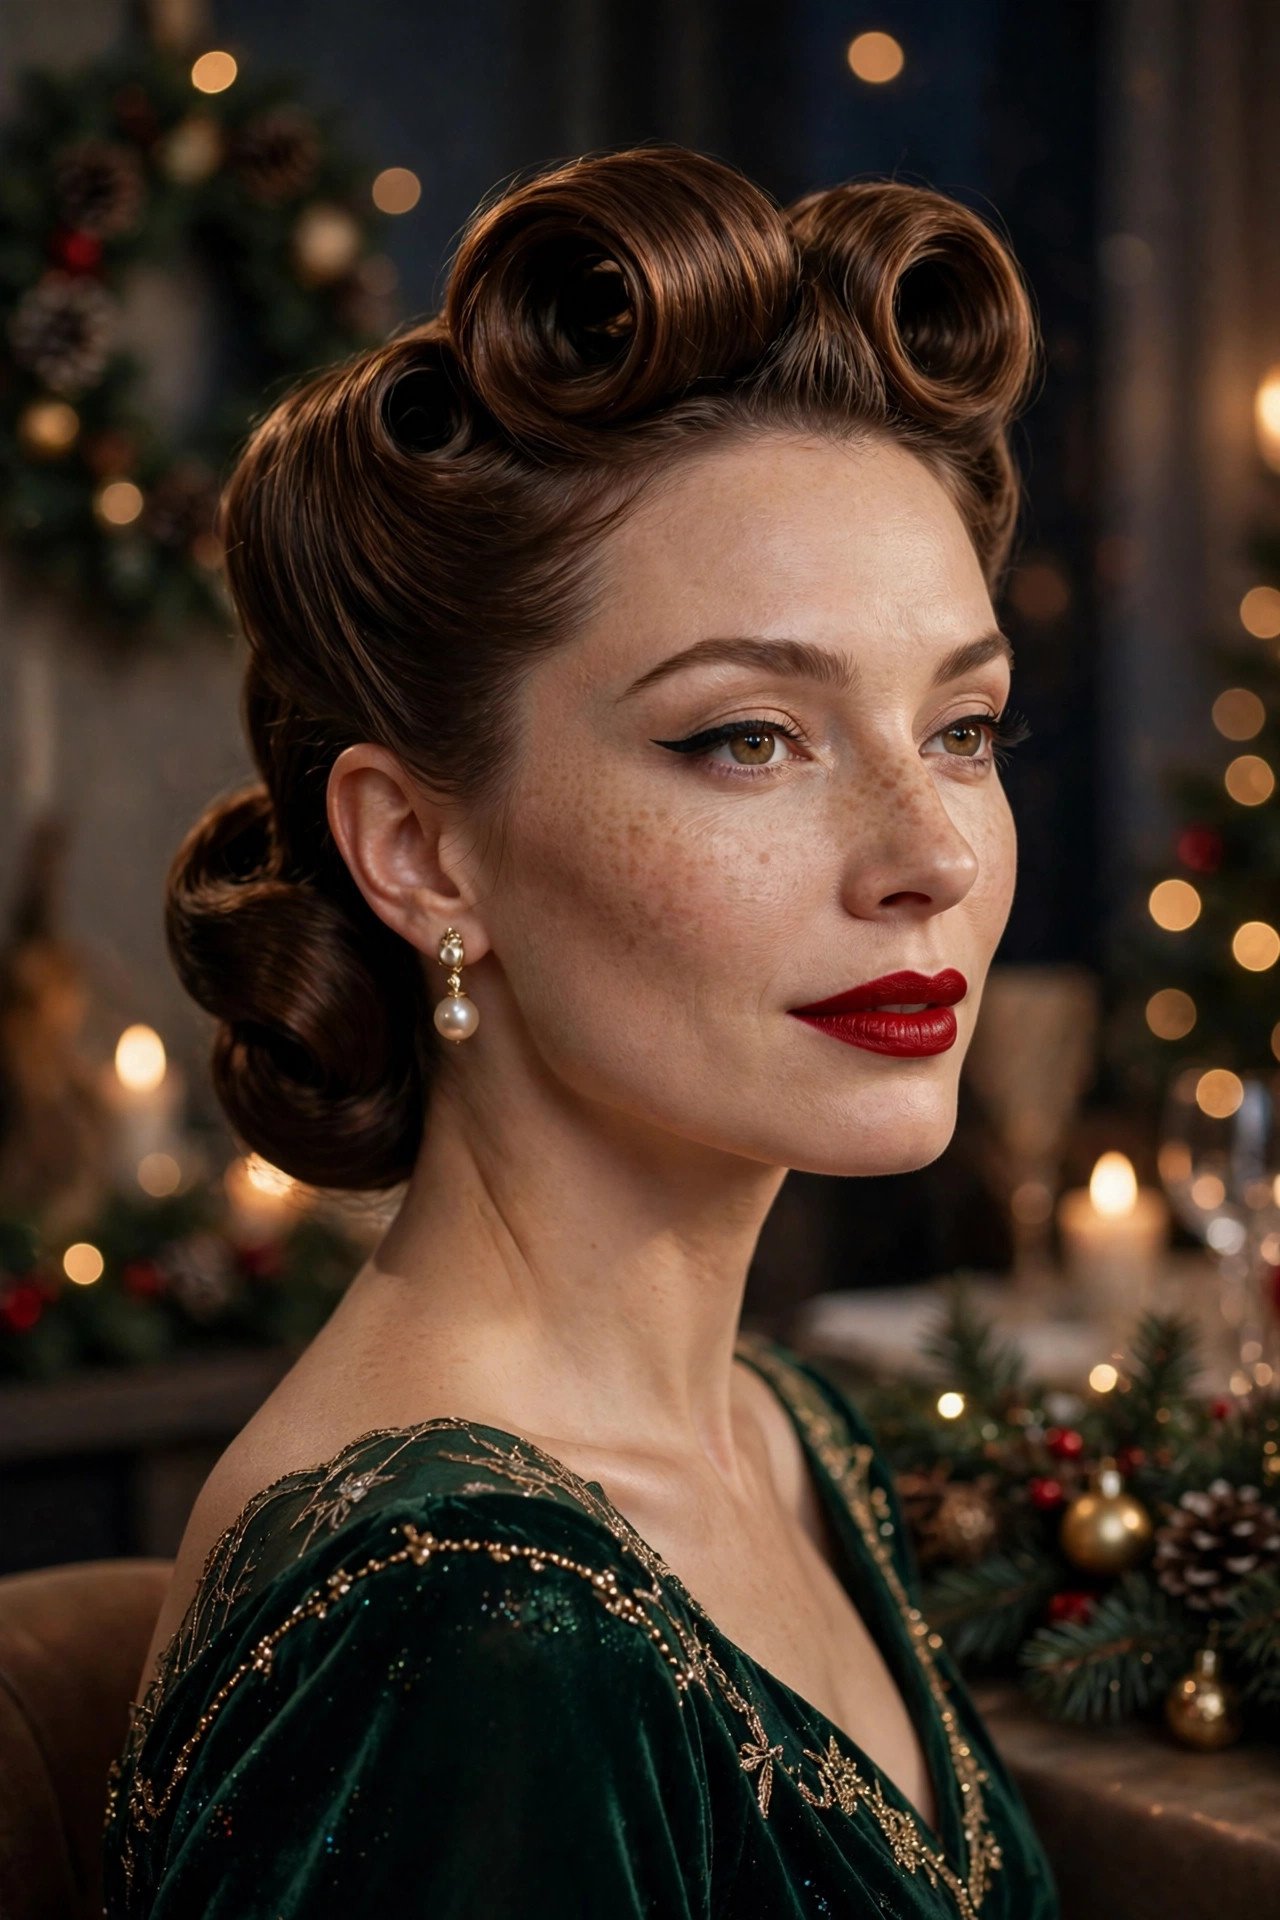
Backcomb each section at the base before rolling — the teasing is what holds the roll’s shape. Pin from underneath so the pins stay invisible, and mist generously with strong-hold hairspray. This pairs spectacularly with red lipstick and winged eyeliner; commit to the era with your makeup and you’ll look like you stepped out of a classic Christmas film. Not for the faint of heart, but the compliments will be endless.
Balance the bold hair with soft makeup everywhere except the lips — a strong red or berry lip is the only drama your face needs when the hair is this sculptural.
22. Pearl-Adorned Low Bun
Pearls and Christmas are a natural match — classic, luminous, quietly luxurious. A smooth low bun studded with pearl pins (in varying sizes, scattered asymmetrically) is understated glamour at its finest. It takes a simple bun from everyday to evening in about two minutes.
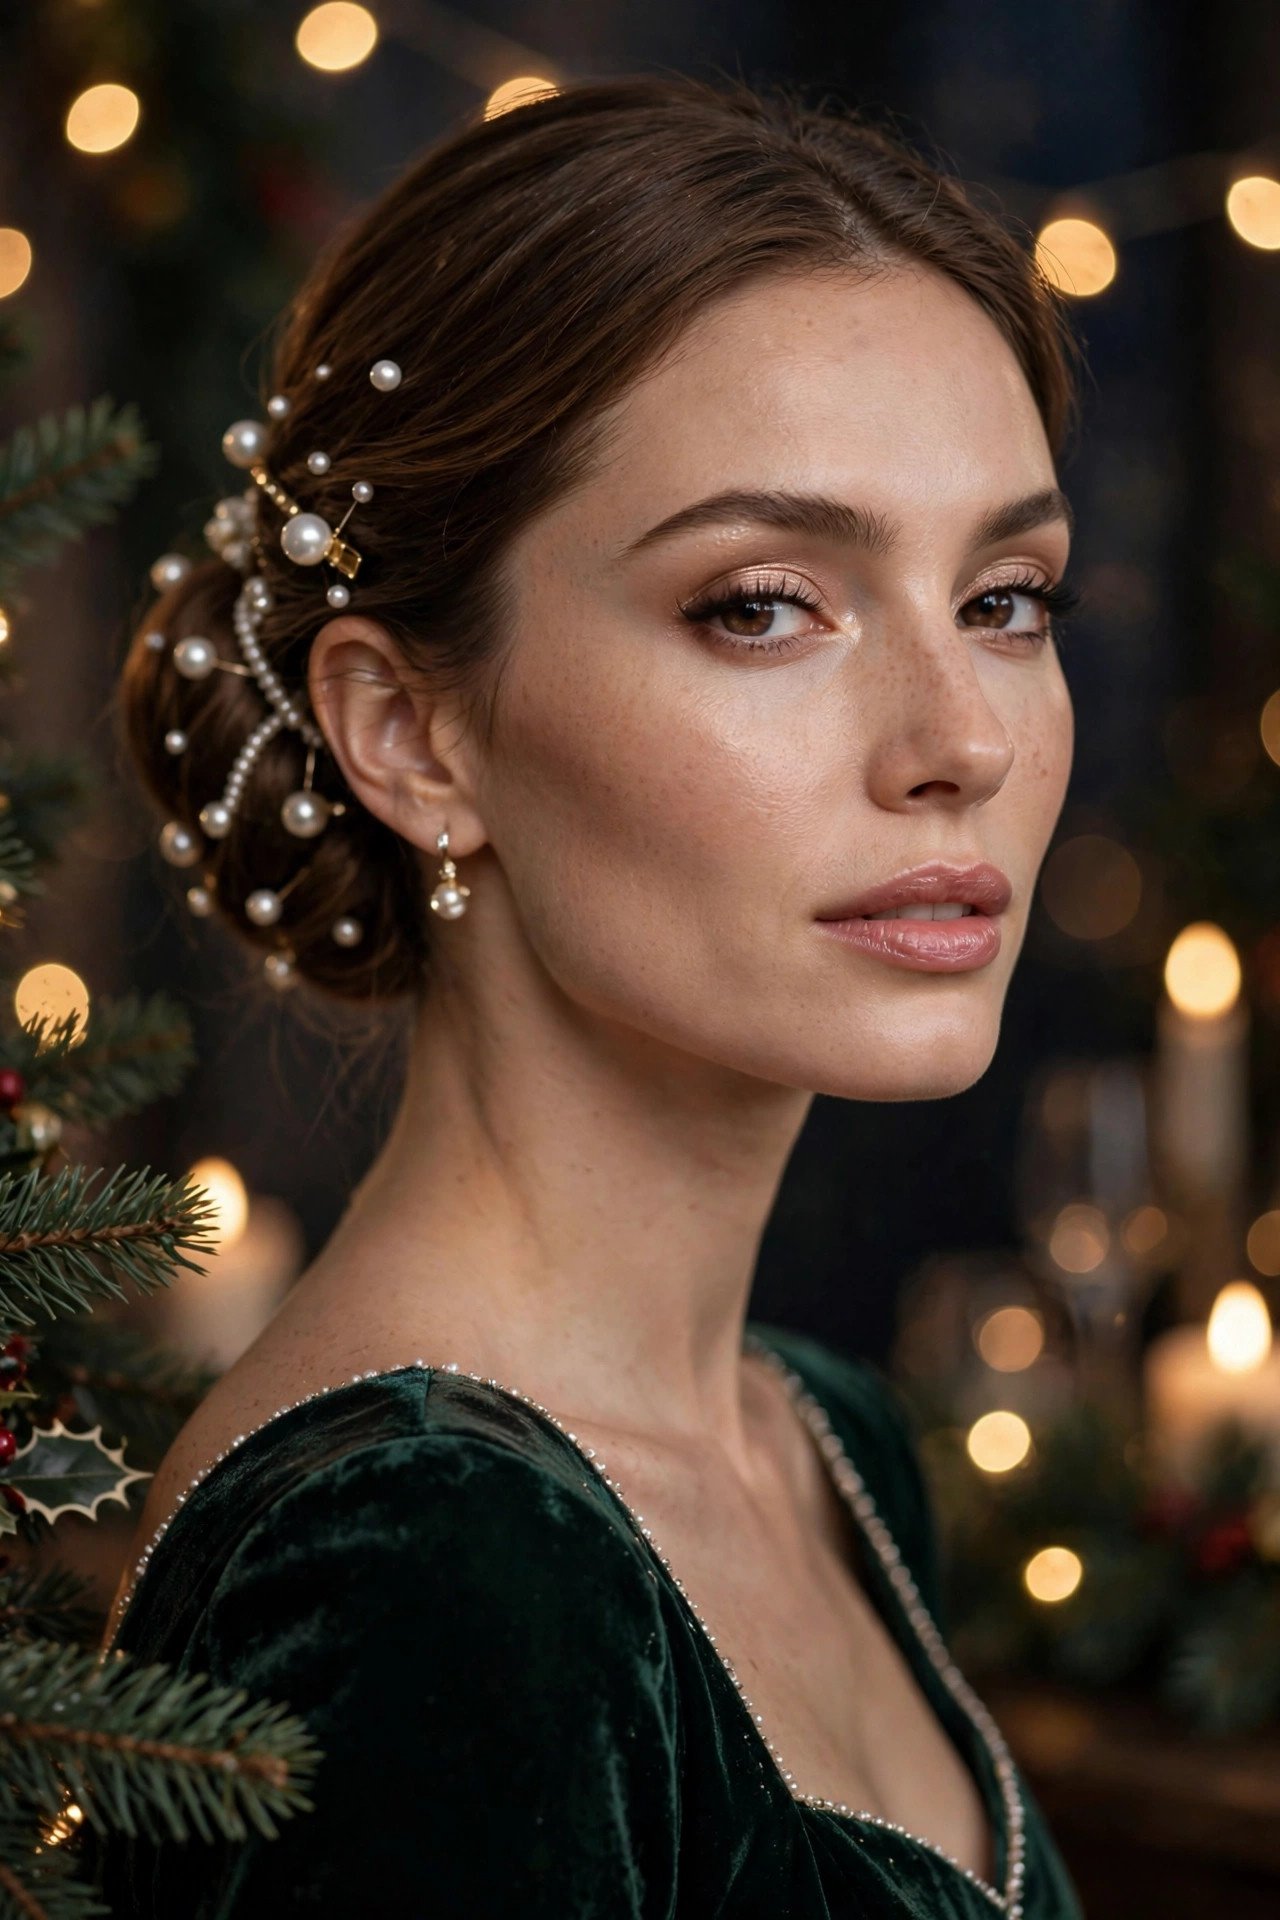
- Pearl pins: Buy a mixed set — different sizes look more organic than uniform ones.
- Placement: Cluster them on one side of the bun, trailing slightly onto the hair — asymmetry looks modern.
- The bun: Keep it smooth and neat; the pearls are the texture here.
📌 Good To Know: This is the perfect “I have ten minutes” party style — the pearls do the work of an hour of styling.
Vary the pearl sizes deliberately — one larger statement pearl among smaller ones looks curated, while all-identical pearls can read a little bridal.
23. Voluminous Side-Part Low Ponytail
A deep side part plus serious crown volume plus a low ponytail equals red-carpet polish. Tease the crown generously, smooth the top layer over it, gather low at the nape, and wrap the base. The volume up top with sleekness below is a silhouette that flatters every face shape.
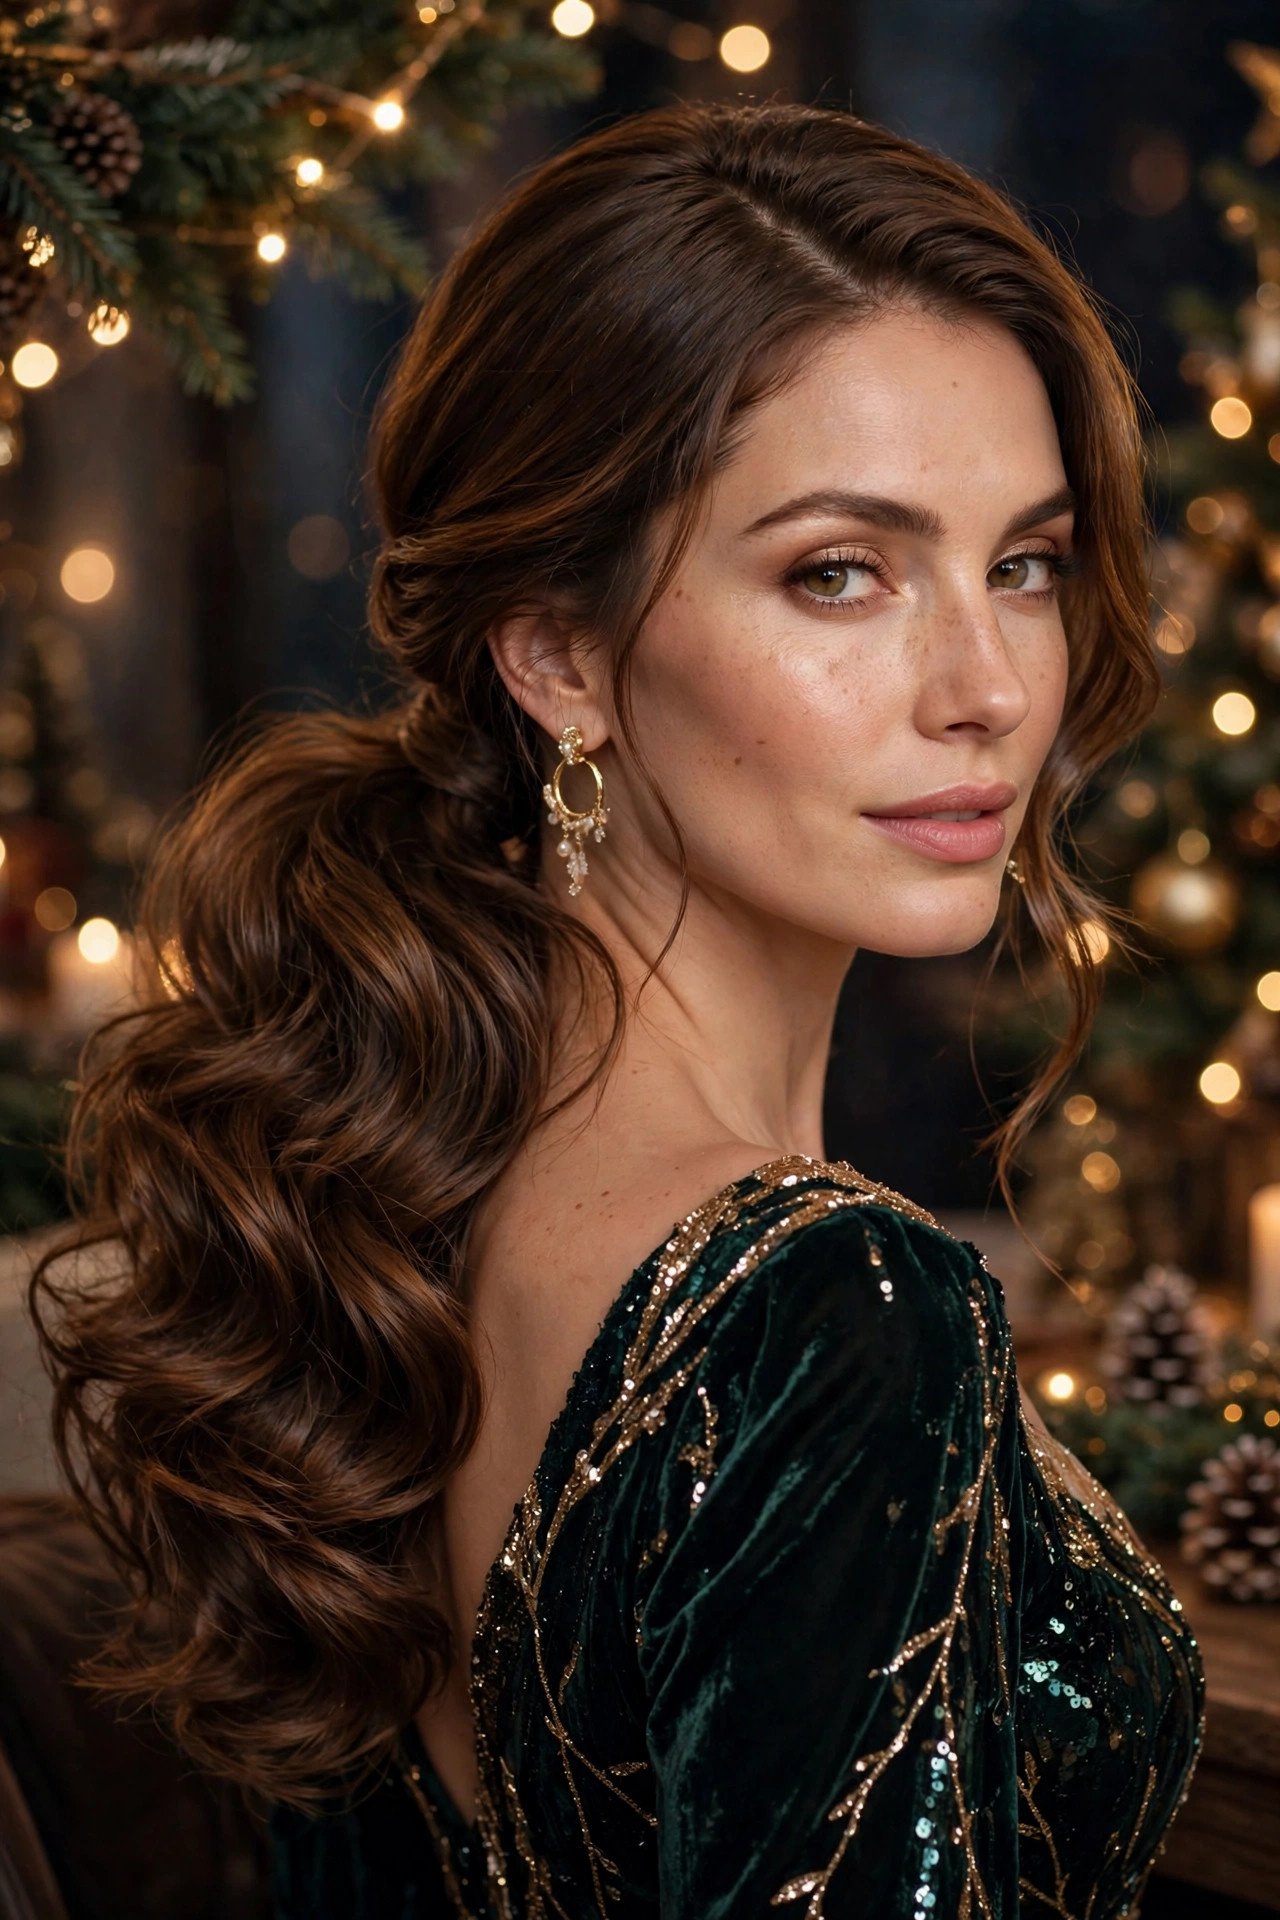
This is all about the tease-and-smooth technique: backcomb in small sections at the crown, then use a soft brush to smooth only the very top layer — never brush through the teasing itself. A little dry shampoo at the roots before teasing gives extra grip. Curl the ponytail under at the ends for a finished look, and you’re ready for the most formal party on your calendar.
Wrap the ponytail base with a strip of velvet ribbon instead of hair — the texture contrast against the sleek style is subtle but unmistakably festive.
24. Curly High Puff With Gold Cuffs
For my natural-hair queens: a high puff adorned with gold cuffs is regal, festive, and stunning. Gather your curls high with a gentle hand (no harsh brushing — preserve that curl pattern), secure with a satin scrunchie or band, and slide gold cuffs onto a few curls around the puff.
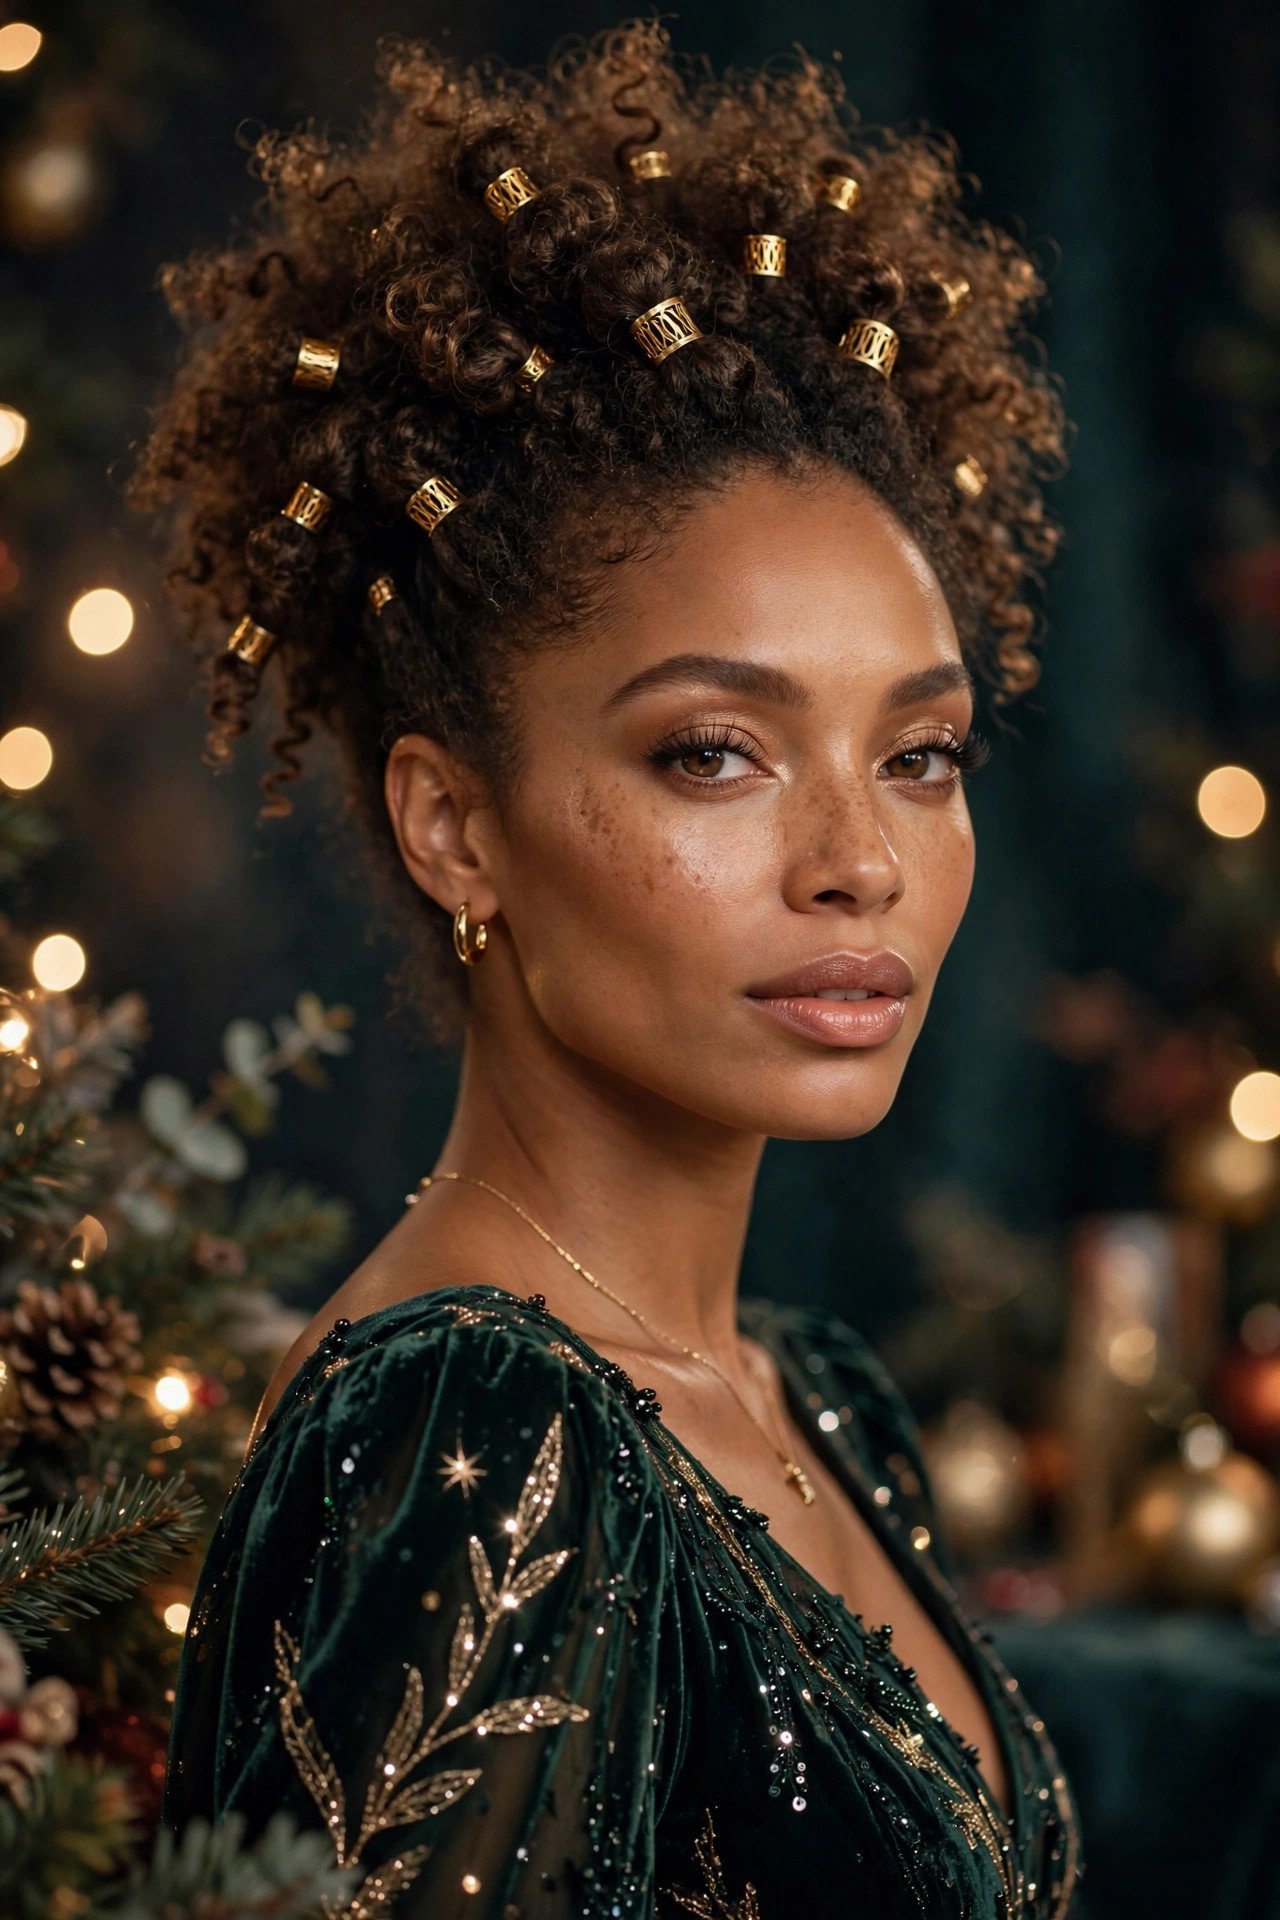
Stretch the puff gently for shape — pick it out to your desired fullness, keeping the front edges smooth with a little edge control. The gold cuffs catch the light beautifully against dark curls and read as jewelry for your hair. Fluff the back for a rounded silhouette, and finish edges with a soft brush and gel for that polished hairline. This style celebrates your texture while bringing full party energy.
💡 Quick Tip: Pineapple your puff the night before (loose high ponytail under a satin scarf) and it’ll be perfectly prepped for party day.
25. Velvet Scrunchie Sock Bun
The sock bun gets a Christmas makeover with a velvet scrunchie. Roll your ponytail over a sock donut (or a cut-up sock — no judgment), then wrap a wide velvet scrunchie around the base. The velvet adds festive texture to the most classic updo there is.
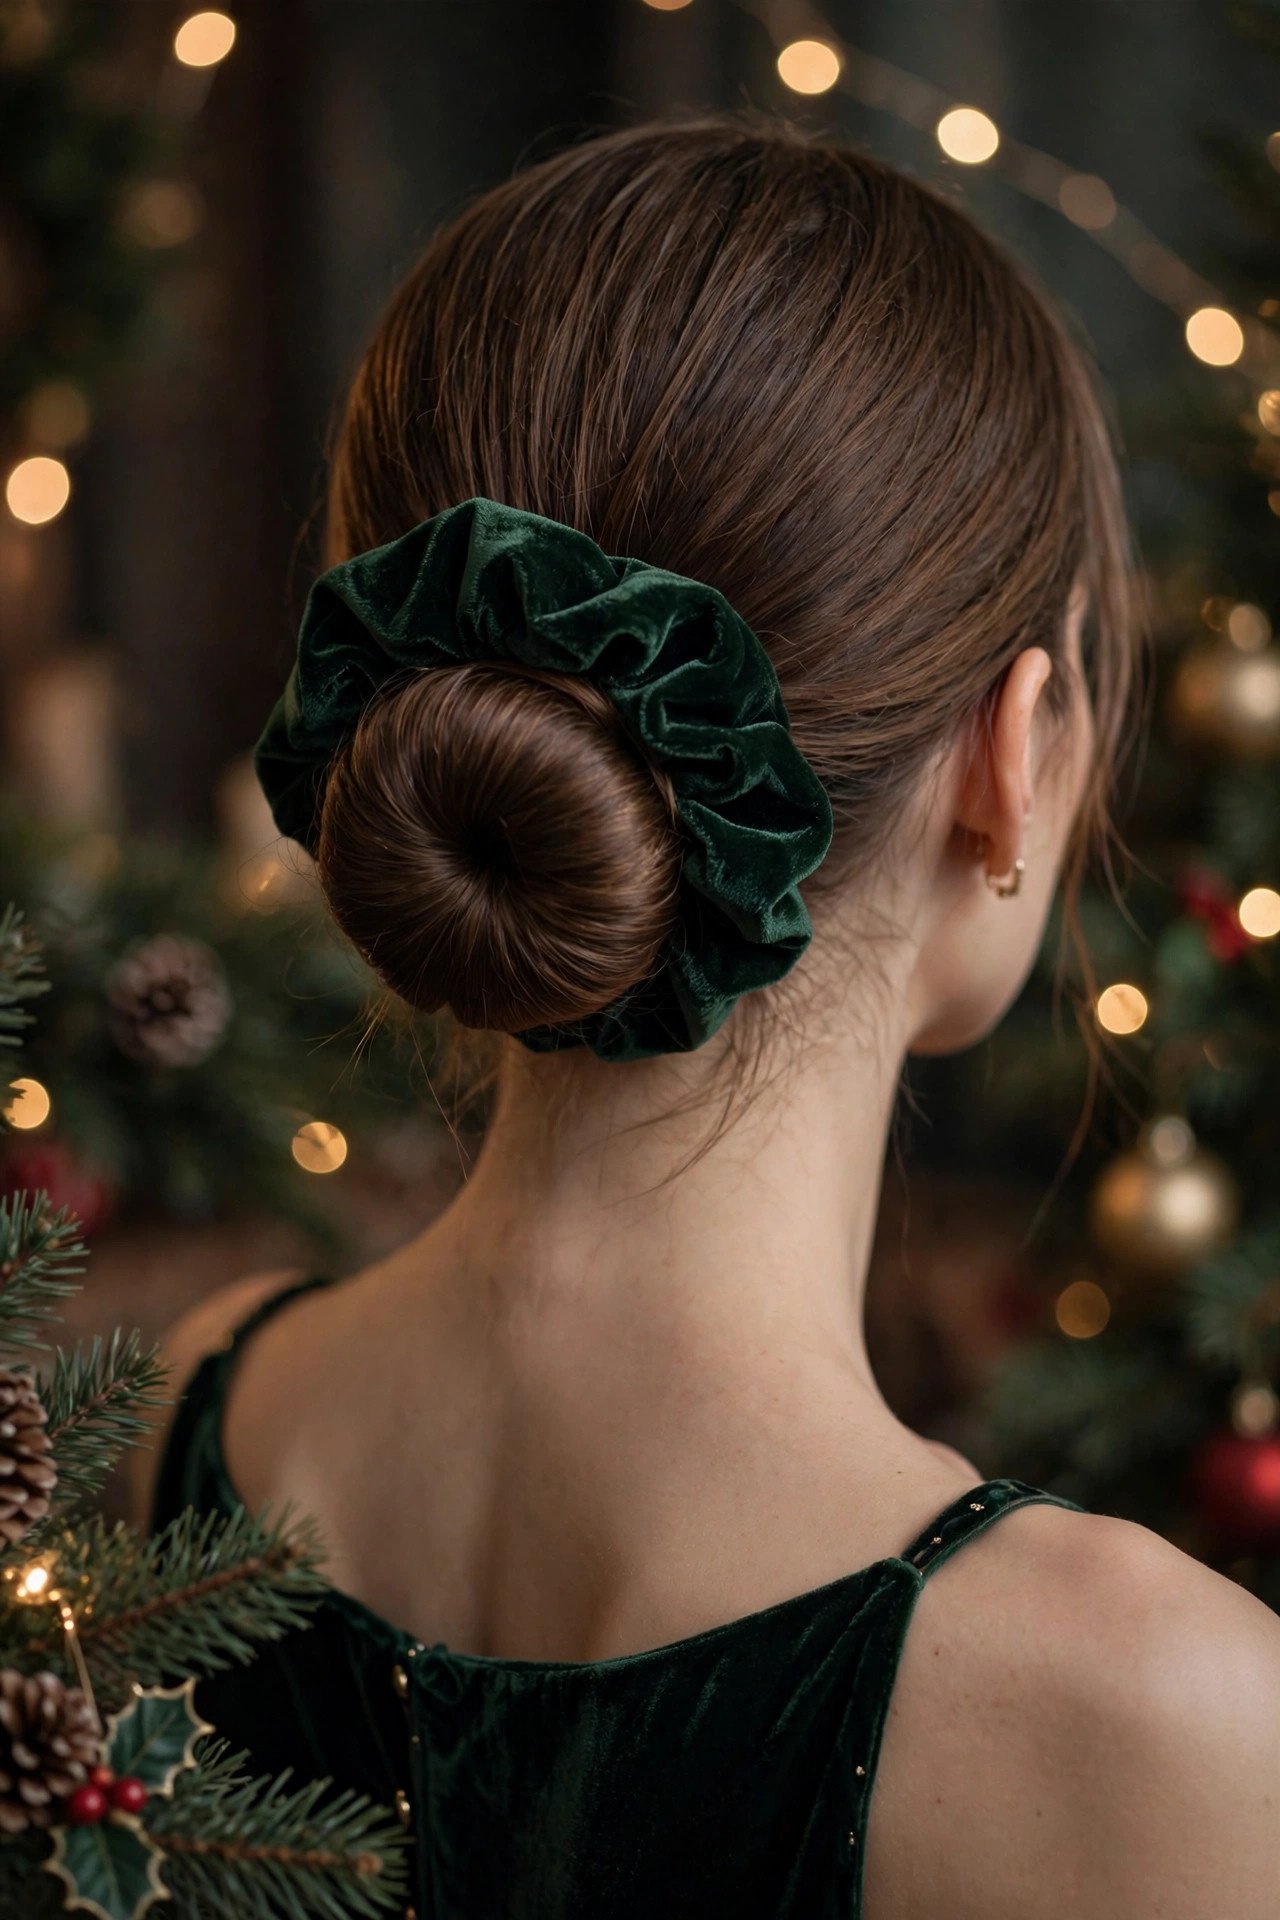
- Smooth start: Brush the ponytail completely smooth before rolling — lumps show through.
- Donut match: Choose a donut close to your hair color so it disappears if any peeks through.
- Scrunchie size: Oversized reads festive; standard reads office — go big for the party.
Deep red, emerald, or black velvet all work — match it to your outfit’s accent color. It’s the easiest style on this list and somehow still looks completely party-appropriate.
Mist the finished bun with a shine spray rather than hairspray — the velvet scrunchie already provides the festive texture, so the bun itself should gleam, not look stiff.
CONCLUSION
From sculpted waves to pearl-studded buns, there’s a Christmas party hairstyle here for every dress, every hair type, and every skill level. Pick the one that makes you feel like the best version of yourself — that’s always the right choice. 📌 Save this post to your christmas hairstyles board on Pinterest!