
20+ Easy Easy Hairstyles Black Women — Step by Step 2026
Learning to style your own hair can feel intimidating when every tutorial assumes you already know the basics. This guide doesn’t. Each hairstyle below is broken down into simple, beginner-friendly steps — no advanced braiding skills, no expensive tools, no guesswork.
Whether you’re newly natural, growing out a cut, or just tired of styles that take all day, these twenty looks are designed for real mornings. Most take under thirty minutes, many take under ten, and every single one works beautifully on Black women’s hair textures.
Grab your leave-in, your edge control, and a few elastics. By the end of this list, you’ll have a full rotation of go-to styles you can do with your eyes half open before your morning coffee kicks in.
1. Sleek Low Ponytail
If you can brush your hair back and tie an elastic, you can do this style. The sleek low ponytail is the foundation every beginner should master first — once you’ve got it down, dozens of other styles become easier.
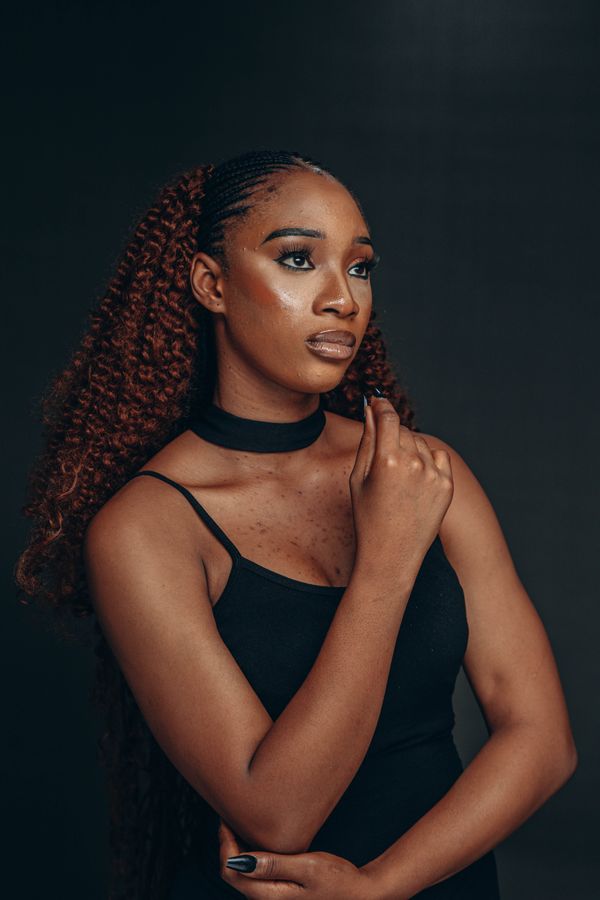
- Step 1: Start with stretched hair — blow-dried or banded overnight works perfectly.
- Step 2: Apply a smoothing serum or light gel, then brush everything straight back with a paddle brush.
- Step 3: Gather at the nape and secure with a snag-free elastic. Add a second elastic for thick hair.
- Step 4: Wrap a small section of hair around the base and pin it underneath to hide the elastic.
- Step 5: Lay your edges with edge control and tie a silk scarf over them for ten minutes.
That’s it — five steps to a style that looks polished enough for the office. The scarf step is what separates a good ponytail from a great one, so don’t skip it even when you’re rushing.
2. Two-Strand Twist Out
The twist-out is the single most useful technique in natural hair styling, and it’s genuinely easy. You’re just twisting — that’s the whole skill. If you can twist two pieces of hair around each other, you’re ready.
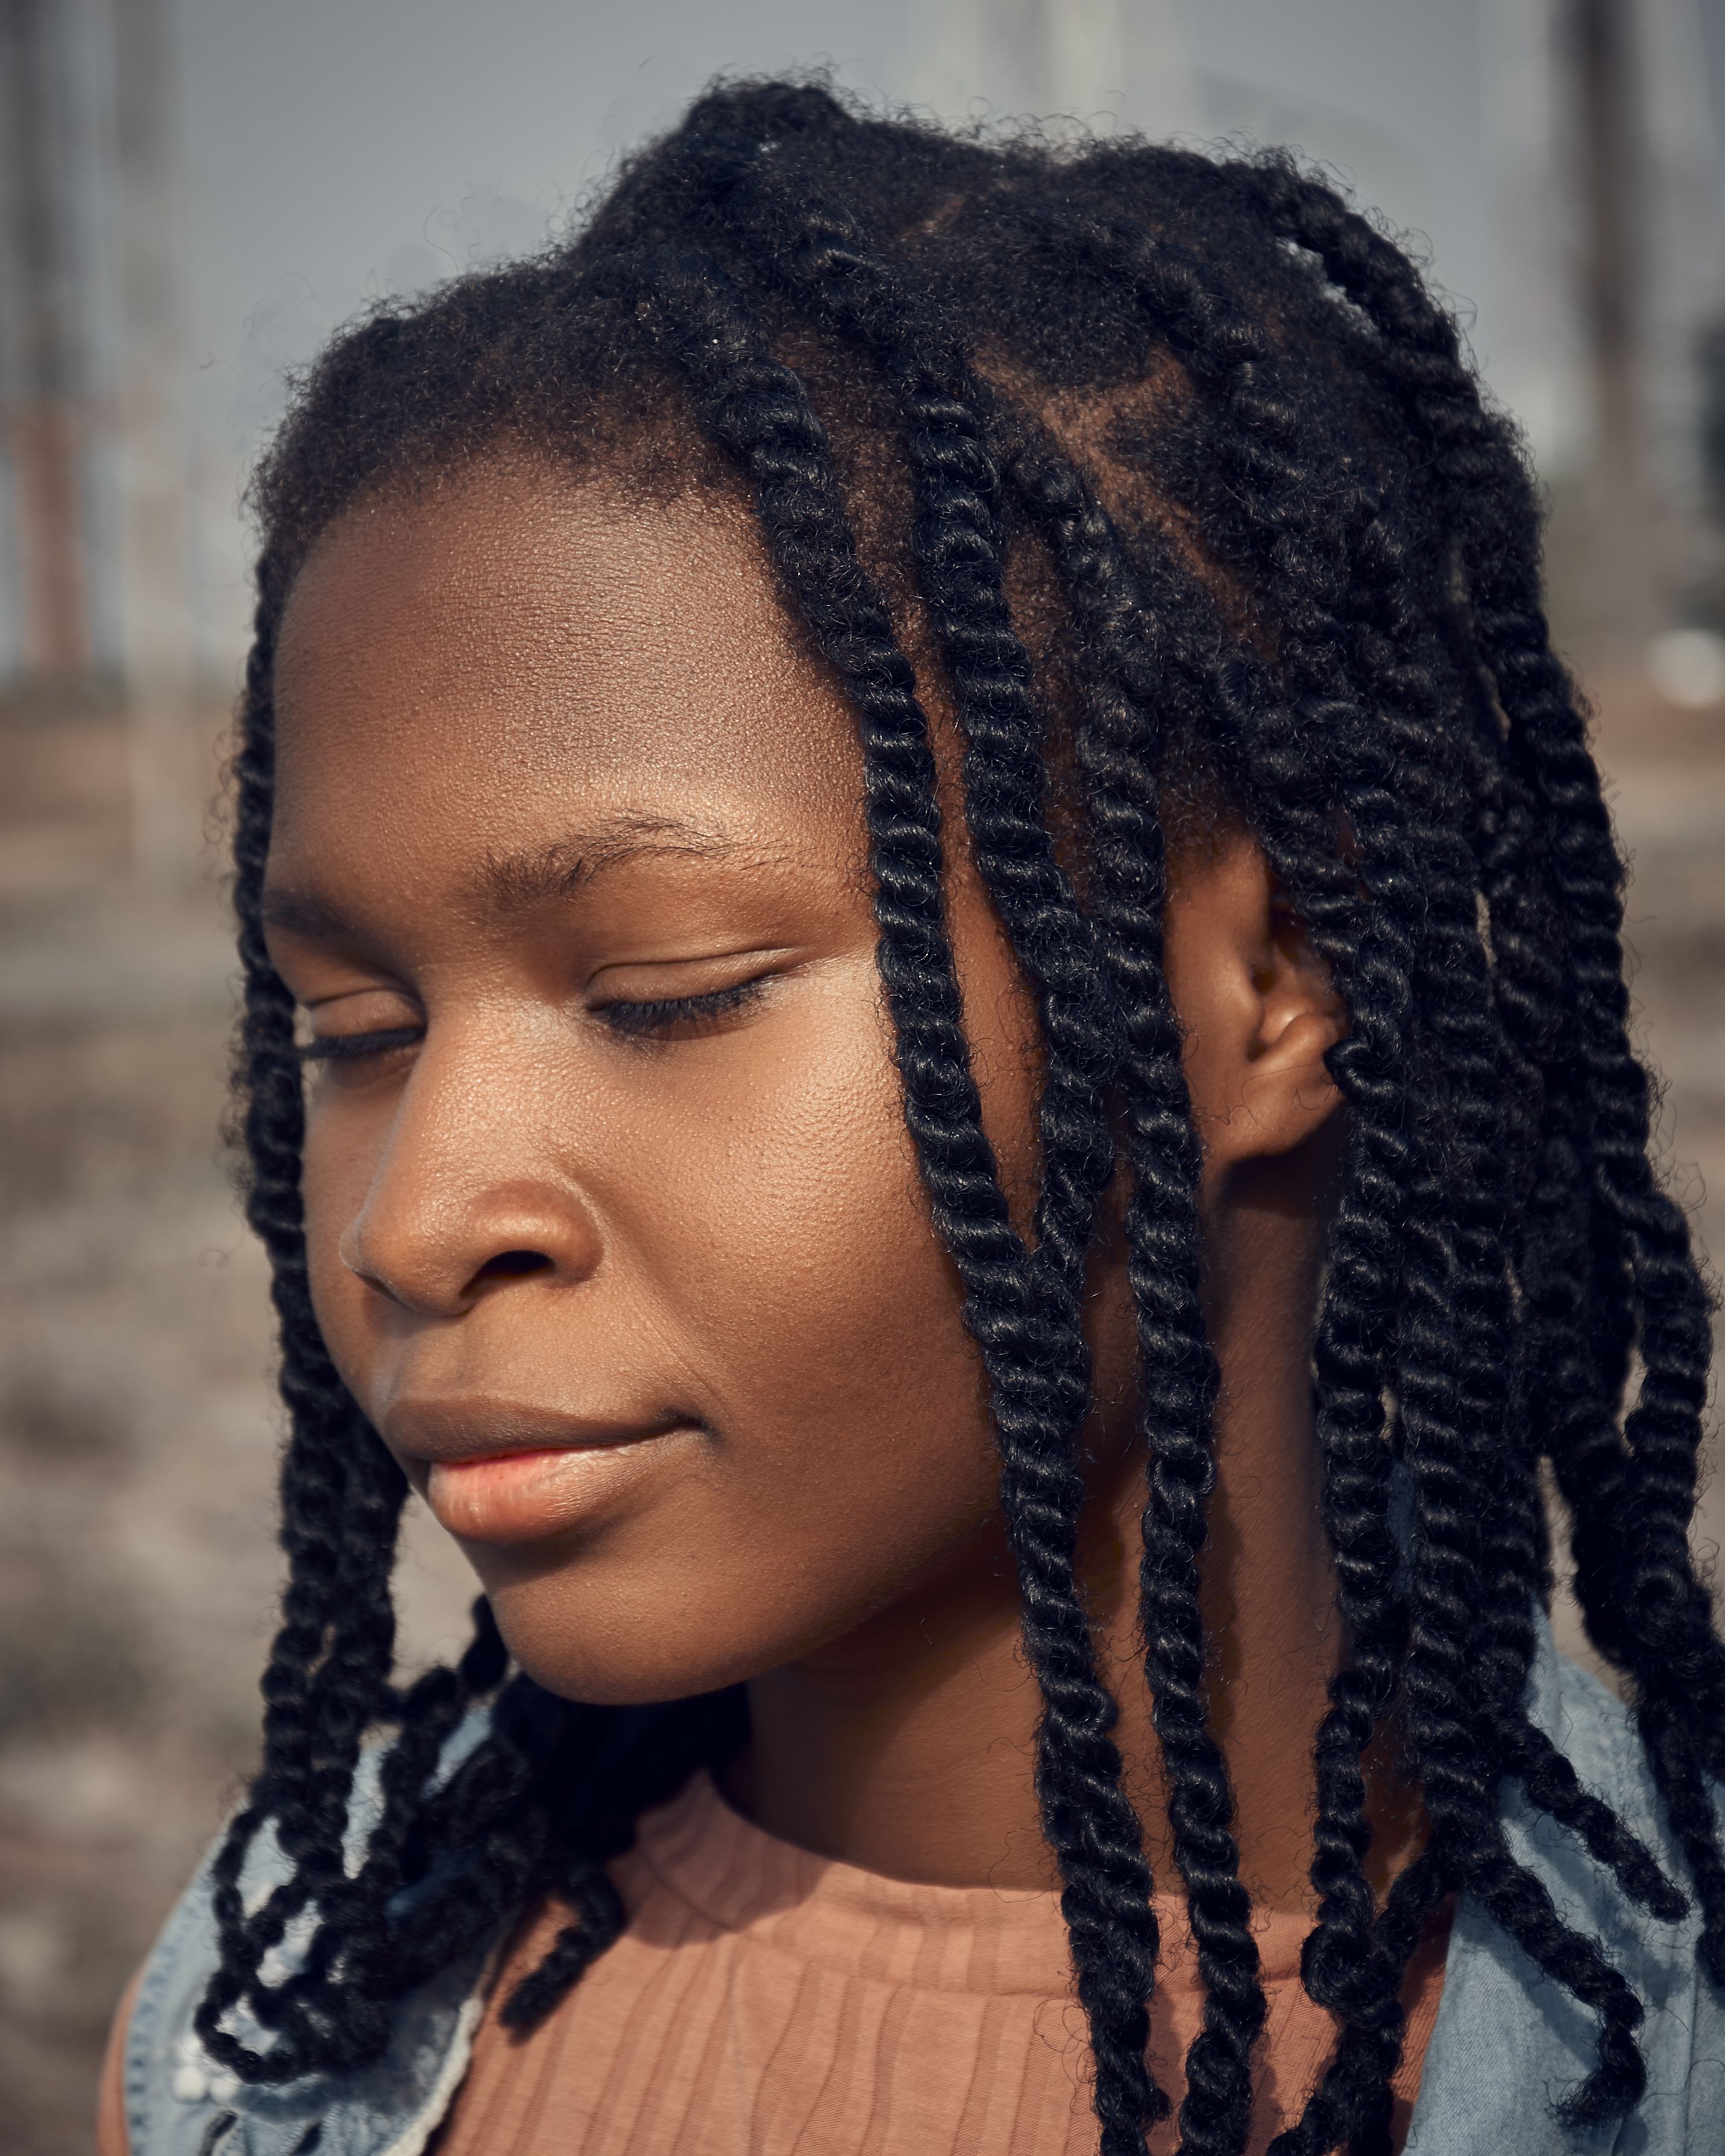
Start on clean, damp hair coated with leave-in conditioner. Divide your hair into eight to twelve sections — bigger sections for beginners, since they’re faster and more forgiving. Apply a twisting cream to one section, split it in two, and twist the strands around each other all the way to the ends. Repeat until your whole head is done, then let the twists dry completely — this is non-negotiable. Air-dry overnight or sit under a dryer.
Once fully dry, coat your fingertips with a little oil and gently unravel each twist, separating every twist into two or three pieces. Fluff the roots with a pick. Done — defined, bouncy curls that last for days.
💡 Quick Tip: Beginners should twist on stretched hair rather than soaking wet hair. It’s easier to handle, dries faster, and gives you more volume with less shrinkage.
3. Puff With a Stretch Headband
Some mornings your hair has other plans, and the puff with a headband is how you negotiate. This is a true five-minute style that looks intentional every single time.

Gather your hair into a high, loose puff using a long stretched headband or a satin scrunchie — not a tight elastic, which causes breakage at the same spot every day. Position the puff where you like it, then slide a second, wider headband on behind your hairline. Fluff the puff with your fingers, smooth your edges with a little gel, and walk out the door.
The real trick to a lasting puff is the base — never gather soaking-wet hair, because it stretches the elastic and slides as it dries. Slightly damp or dry hair grips best. If your puff feels small, stretch your hair with the banding method overnight first for noticeably more fullness.
- Best on second- or third-day hair when your curls have natural volume.
- Use a soft-bristle brush on the front only — never brush the puff itself.
- Swap headband colors and prints to make the same style feel new.
- A pick at the roots adds instant height if your puff falls flat.
4. Flat Twist Headband Style
Flat twists sound fancy, but they’re just two-strand twists done flat against your scalp — and they’re far more forgiving than cornrows for beginners. This headband-style version frames your face beautifully while the back stays free.
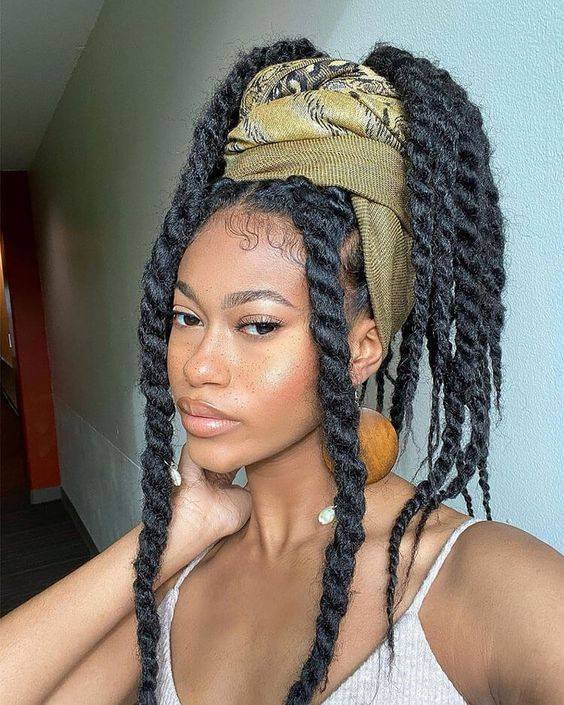
Part your hair from ear to ear, clipping the back section away. On the front section, create a side part and flat-twist each side back toward your ears, adding hair as you go. Pin the ends behind your ears or let them hang into the loose back hair. That’s the whole style — two flat twists and you’re done.
Don’t worry if your first flat twists look lumpy — everyone’s do. Smoothness comes from consistent tension and adding even amounts of hair with each pass. Practice on the same two front sections every night for a week, taking them out each morning. By day seven your fingers will know the motion, and the rest of your head follows naturally.
📌 Good To Know: Practice flat twists on the front of your hair while watching TV. After three or four practice sessions, your hands will do it automatically, and you’ll wonder why you ever thought it was hard.
5. High Bun on Stretched Hair
The high bun is the style equivalent of a deep breath — everything up, out of your face, completely handled. On stretched hair it looks full and smooth; on a twist-out it looks textured and soft. Both are correct.
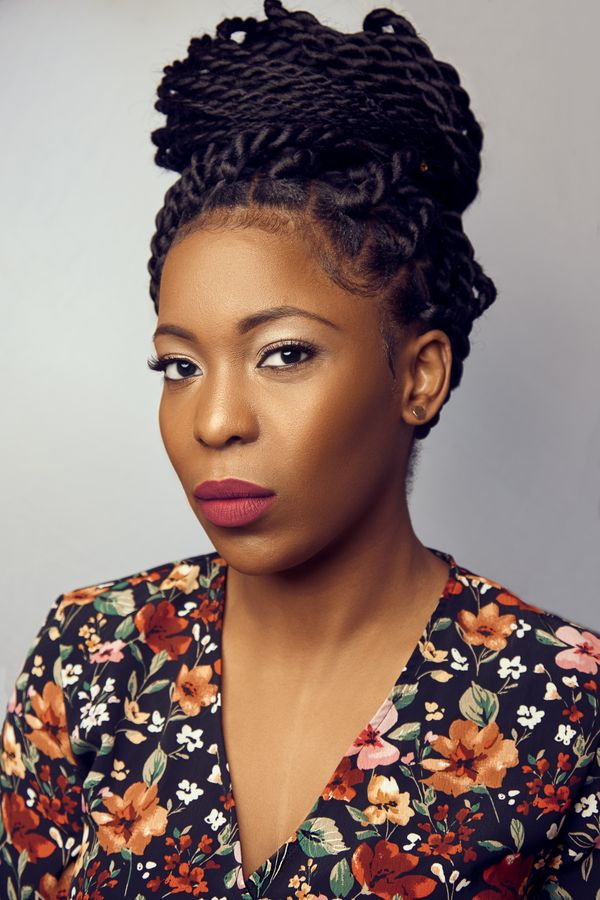
If your bun always ends up lopsided, check the ponytail in a hand mirror before coiling — most lopsided buns are actually lopsided ponytails. For a fuller bun, tease the ponytail gently with a brush before coiling; the texture creates volume that coiling alone can’t. Always pin in the direction opposite to the coil for the strongest hold.
- Step 1: Brush stretched hair up to the crown with a paddle brush.
- Step 2: Secure into a high ponytail with a strong elastic.
- Step 3: Twist the ponytail loosely and coil it around the base.
- Step 4: Pin with bobby pins, tucking the ends underneath.
- Step 5: Gently pull at the bun’s edges for fullness and smooth your hairline.
For extra fullness, add a mesh bun donut underneath before coiling — it gives fine or medium-density hair that big, round ballerina shape with almost no extra effort.
6. Chunky Beginner Box Braids
Box braids feel advanced until you realize the beginner version just uses bigger sections. Chunky box braids — sometimes called jumbo braids — go in fast, come out fast, and still give you that classic braided look for weeks.
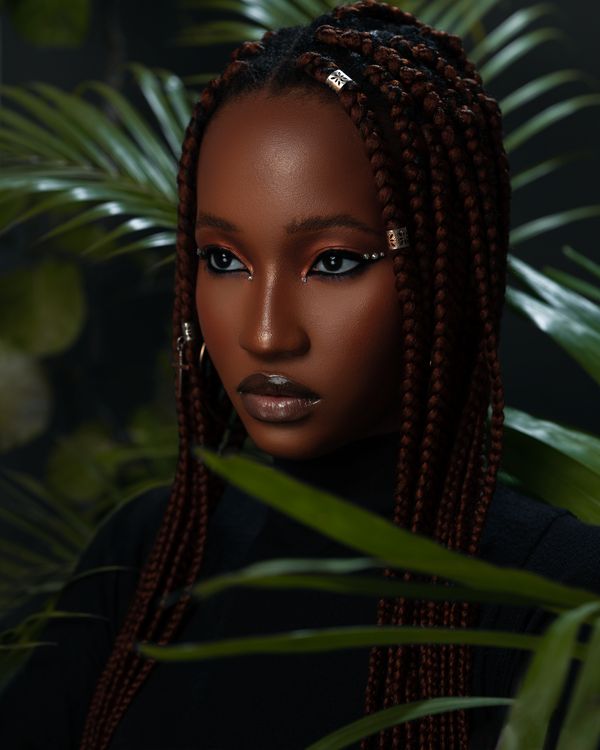
Part your hair into large square sections, about one to two inches wide. Braid each section with or without added braiding hair, keeping your tension even from root to tip. Because the sections are big, you’ll finish a full head in two to three hours instead of six to eight. Dip the ends in hot water to seal them, or add beads for a finished look.
The biggest beginner mistake is making the parts too small — chunky means chunky, so don’t be shy with section sizes. Larger sections also mean less tension on your scalp, which your edges will appreciate. If added hair feels slippery, lightly dampen it first; it grips your natural hair much better.
💡 Quick Tip: Beginners should braid with the hair slightly damp and well-moisturized — it grips better, parts cleaner, and the finished braids look smoother with less frizz.
7. Overnight Pineapple to Morning Curls
This isn’t even really a style — it’s a nighttime habit that hands you a style every morning. The pineapple method is how women with curly hair wake up with their wash-and-go still intact on day three, four, and five.

Before bed, flip your head over and gather all your curls into a very high, very loose ponytail right at the front of your crown — it should look like a pineapple top, hence the name. Secure with a satin scrunchie, never a tight elastic. Cover with a satin bonnet. In the morning, take it down, shake gently, fluff the roots with your fingers, and smooth your edges.
- Works on wash-and-gos, twist-outs, braid-outs, and curly wigs.
- The looser the pineapple, the less denting at the roots.
- On day three or four, spritz with water and scrunch before fluffing.
- Pair with a satin pillowcase as backup for nights you forget the bonnet.
8. Half-Up Top Knot
Can’t decide between wearing your hair up or down? Stop deciding. The half-up top knot takes the top section out of your face while the rest flows free — and it takes about three minutes.

Section the top half of your hair from temple to temple. Twist that section loosely, coil it into a small bun right on top of your crown, and secure with an elastic and one or two bobby pins. Pull gently at the bun for a soft, lived-in shape. Leave the bottom half exactly as it is — wash-and-go curls, a twist-out, straightened hair, all of it works.
Knot placement changes the whole look — higher on the crown reads playful, slightly back reads polished. If the top section is too short to coil, twist it and secure with a small claw clip instead of an elastic; it holds short pieces better and looks intentional. A little dry shampoo at the roots before gathering adds grip and absorbs oil.
📌 Good To Know: This style is a secret weapon for stretching wash day. When your roots are oily but your ends still look good, the top knot hides the roots completely.
9. Perm Rod Twist and Curl
Want defined, bouncy curls without heat? Perm rods are the beginner’s best friend — they do all the shaping work for you, and the results look like you spent an hour with a curling wand.

Rolling direction matters — roll all rods the same way for uniform curls, or alternate for a natural, tousled pattern. Keep sections even; fat sections next to skinny ones give inconsistent curl sizes. And be patient with drying — removing even slightly damp rods is the number one cause of frizz and fallen curls in rod sets.
- Step 1: On damp, moisturized hair, create small to medium sections.
- Step 2: Two-strand twist each section, applying a setting foam as you go.
- Step 3: Roll each twist onto a perm rod from ends to roots and snap it closed.
- Step 4: Let rods dry completely — overnight or under a hooded dryer.
- Step 5: Remove rods, unravel twists with oiled fingers, and separate for volume.
The smaller the rod, the tighter the curl. Start with medium rods (the blue or grey ones) for a versatile curl size that works for everyday wear.
10. Two Feed-In Side Braids
Two braids down the sides of your head — simple, sporty, and cute. The feed-in technique just means adding small pieces of braiding hair as you go so the braid starts thin at your hairline and gets thicker, which looks more natural than one bulky added chunk.

Part your hair down the middle. Starting at the front hairline on one side, begin a cornrow braid, feeding in small pieces of braiding hair every few stitches. Continue straight back to the nape, then finish as a regular three-strand braid down the length. Repeat on the other side. Seal the ends by dipping in hot water.
The feed-in part is simpler than it looks: add a small piece of braiding hair every two or three stitches, starting small and gradually larger. Your hands learn the rhythm after the first braid. Keep a bowl of pre-cut, pre-feathered braiding hair beside you so you’re not fumbling mid-braid.
⚠️ Watch Out: Keep your grip firm but gentle at the hairline. If your edges hurt or you see tiny bumps forming, your tension is too tight — redo that section looser before it causes breakage.
11. Messy Low Bun
The messy low bun is gloriously forgiving — the messier it looks, the better it works. This is the style for days when your hair is doing its own thing and you’ve decided to let it, elegantly.
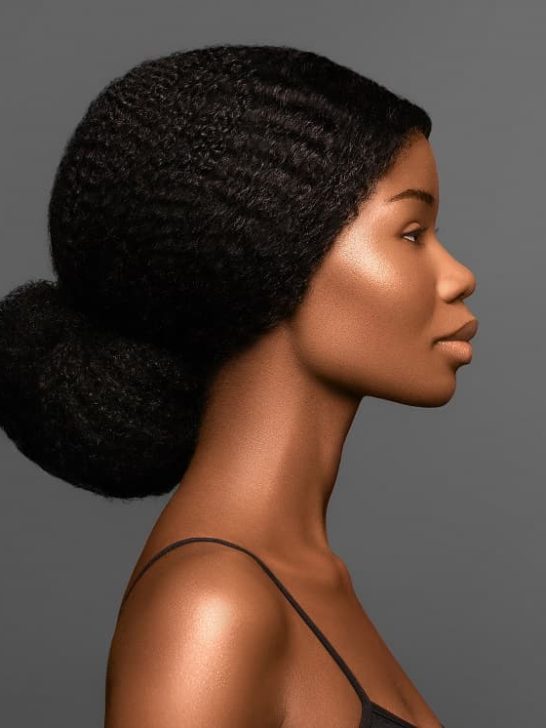
Gather your hair loosely at the nape — don’t brush it smooth, just finger-comb it back. Twist it once or twice and wrap it into a loose bun, pinning casually so pieces stick out naturally. Pull out a few face-framing strands and let them do whatever they want. Tug gently at the crown for softness. There is no wrong way to do this; that’s the entire point.
The secret ingredient in a great messy bun is texture — too-clean, slippery hair won’t hold the shape. Day-old hair, or a spritz of texturizing spray on clean hair, gives the grip you need. Insert bobby pins with the wavy side down against your scalp; they grip far better that way. Then resist the urge to keep fussing.
💡 Quick Tip: This style looks best on hair with some texture — a day-old twist-out, stretched natural hair, or even second-day straightened hair. Freshly washed, slippery hair won’t hold the lived-in shape as well.
12. Bantu Knots
Bantu knots look intricate, but the technique is just twist and wrap. They’re a style on their own and the setup for a gorgeous knot-out later — two styles for the effort of one.
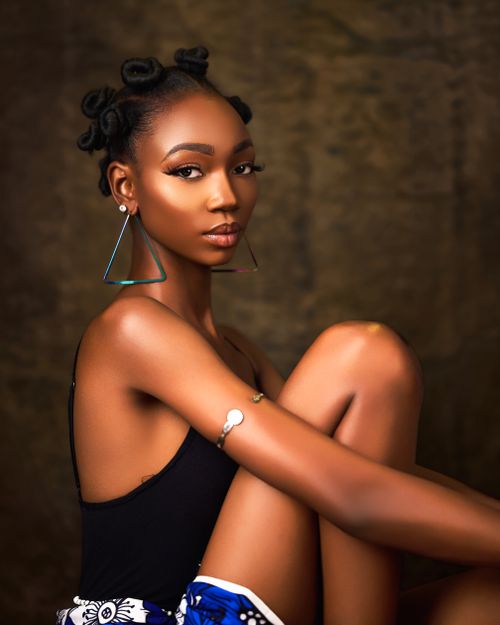
Even spacing makes bantu knots look polished — use two fingers’ width as a guide between parts. If a knot pops open, the section was too dry; mist it, add cream, and re-coil. Plan knot sizes for the day-two knot-out you want: bigger knots for looser waves, smaller for tighter curls.
- Step 1: Section damp, moisturized hair into 8 to 12 parts.
- Step 2: Apply twisting cream to one section and twist it from root to tip.
- Step 3: Wrap the twisted section around its own base, coiling it flat against the scalp.
- Step 4: Tuck the end under the coil — no pins needed if the twist is snug.
- Step 5: Repeat across the head. Wear as-is, or unravel the next day for a knot-out.
Keep the knots small and neat for a sculptural look, or make them chunkier for bigger, looser waves when you take them down. Either way, moisturize well first — dry hair makes knots that frizz instead of define.
13. Simple Wash and Go Routine
A wash and go is exactly what it sounds like — wash it, style it, and go — but beginners often overcomplicate it. Here’s the stripped-down version that actually works.
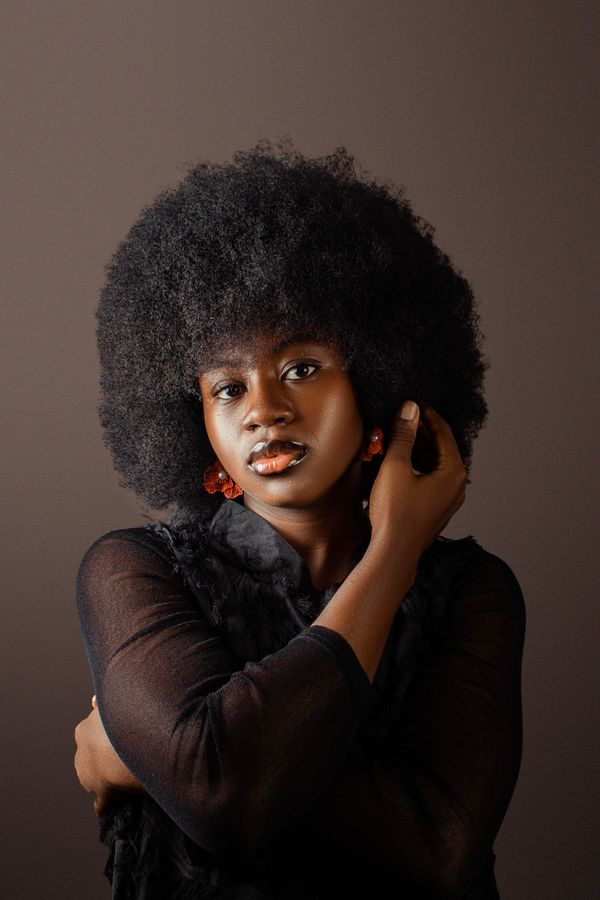
Start with freshly washed, deeply conditioned hair, still dripping wet. Divide into four to six sections. On each section, rake through a leave-in conditioner, then smooth a curl cream over it, then glaze a gel on top — the classic liquid, cream, gel layering method. Use the pads of your fingers to smooth each clump downward in the direction it naturally curls. Shake your roots, then don’t touch your hair again until it’s 100% dry.
Finding your product cocktail takes experimentation — start with leave-in, cream, and gel, then adjust one variable at a time. Defined but frizzy means more gel; defined but crunchy means less gel; soft but undefined means stronger hold. Keep notes on your phone for the first month — future you will be grateful.
📌 Good To Know: The most common beginner mistake is using too little water and too much product. Your hair should be sopping wet when you start — if it’s just damp, hop back under the spray or use a continuous-mist bottle.
14. Scarf-Wrapped Low Bun
When your bun needs a little personality — or when your edges need a little cover on day four — a silk scarf turns a basic low bun into a whole look. It also protects your hairline, which is doing double duty.

Pull your hair into a low bun, sleek or messy — your choice. Take a long rectangular silk or satin scarf, place the center at your nape under the bun, bring the ends up and cross them over your crown, then tie them into a bow or knot at the top or side. Tuck the ends in neatly. The scarf covers the hairline, adds color and pattern, and keeps edges laid all day.
- Silk or satin scarves protect hair; cotton scarves absorb moisture — choose wisely.
- Match the scarf to your outfit for a coordinated look, or contrast it for a pop.
- This is an excellent style for covering new growth between relaxers or installs.
- At night, remove the scarf and re-tie it loosely to preserve the style.
15. Clip-In Bangs Refresh
Want bangs without the commitment of cutting them? Clip-in bang pieces exist, they’re affordable, and they take about sixty seconds to install. Instant face-framing, zero scissors.

Choose a clip-in bang in a texture that matches your hair — kinky-curly or coily textures blend best with natural hair. Part your own hair where you want the bangs to start, clip the piece in about an inch behind your hairline, and blend by fluffing your natural hair over the clips. Style the bangs with your fingers: scrunch curly ones, smooth straight ones.
Blending is everything — after clipping in the bangs, pull small sections of your own hair forward over the clips and style everything together. If textures don’t quite match, a quick pass with a heat tool on low bridges the gap. Nobody should be able to tell where your hair ends and the piece begins.
💡 Quick Tip: Trim the clip-in bangs while they’re on your head, a tiny bit at a time. You can always cut more, but you can’t put it back — the golden rule of at-home bang trims.
16. Jumbo Twists
Jumbo twists are the fast lane of twist styling — six to eight big twists, and you’re done in under an hour. They give you that chunky, textured look that’s everywhere right now, with a fraction of the effort of small twists.

On stretched, moisturized hair, part into six to eight large sections. Apply a rich twisting butter to each section and create one big two-strand twist, twisting firmly so it holds its shape. Coil the ends or add a small elastic to keep them from unraveling. Wear them for one to three weeks as a protective style, then take them down for the fluffiest, most voluminous twist-out of your life.
Because the sections are large, work the twisting butter all the way through each section, not just on the surface, or the insides frizz while the outside looks smooth. Twist firmly at the roots but keep lengths soft. Don’t skip sealing the ends — jumbo twists unravel faster than small ones if ends aren’t secured.
📌 Good To Know: Jumbo twists are perfect for beginners because mistakes don’t show — a slightly uneven twist just looks like texture. Start here before attempting smaller, neater twists.
17. Straight-Back Stitch Braids Into a Ponytail
Straight-back braids flowing into a ponytail give you the neatness of cornrows with the fun of a high pony. The stitch method — where the braider’s nails create those clean, defined parts — makes them look razor-sharp.

Clean parts are the foundation of stitch braids — take your time with the rattail comb, because wobbly parts show. If you’re doing this yourself, use two mirrors so you can see the back of your head. Apply edge control along each part as you braid for that crisp, fresh-from-the-salon look.
- Step 1: Section the front of your hair into 4 to 6 straight-back parts.
- Step 2: Feed-in braid each section toward the crown, adding hair gradually.
- Step 3: Gather all braids plus the loose back hair into a high ponytail.
- Step 4: Add curly or straight extension hair for a full, long ponytail.
- Step 5: Wrap the base with a section of hair and mousse everything smooth.
This style lasts two to three weeks and works for the gym, the office, and nights out. Wrap the ponytail loosely at night to keep it from tangling.
18. Double Space Buns
Two buns are better than one — at least when you’re going for playful. Space buns are beginner-friendly because symmetry is the only skill involved, and even slightly uneven buns look charming.

Part your hair down the middle into two equal sections. Brush each side up toward the crown and secure into high pigtails. Twist each pigtail and coil it into a bun, pinning securely. Pull gently at each bun for fullness, and leave the front edges smooth or add two small face-framing braids. The whole thing takes ten minutes once you’ve done it twice.
Getting the buns even is the only tricky part — part carefully down the middle, then brush each side up while looking straight ahead so placement stays symmetrical. If one bun ends up bigger, pull the smaller one out a bit more; texture hides a multitude of sins. Secure each bun with both an elastic and pins.
💡 Quick Tip: For a sleeker look, do space buns on stretched hair. For a softer, cuter look, do them on a twist-out or braid-out — the texture makes the buns look bigger and more fun.
19. Finger Coils
Finger coils are the most meditative style on this list — you, your product, and your fingers, one small section at a time. The result is springy, uniform coils with incredible definition, and the technique couldn’t be simpler.
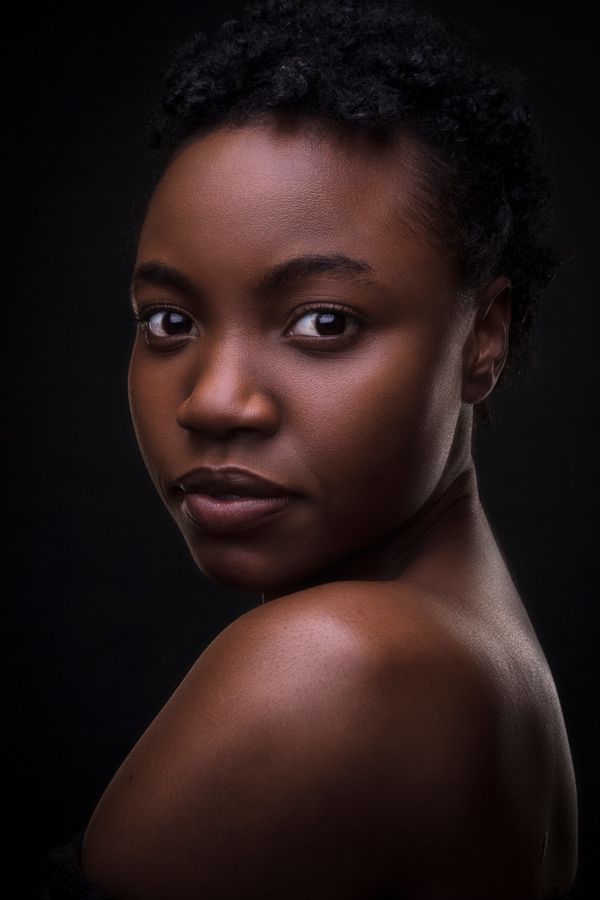
On freshly washed, soaking-wet hair with leave-in applied, take a small section — about the width of your finger. Apply a curl-defining cream or gel, then twirl the section around your finger from root to tip, sliding your finger out at the end. The hair springs into a perfect coil. Repeat across your whole head. Let it dry completely without touching.
This style rewards patience — put on a show, settle in, and coil section by section without rushing. Keep a spray bottle handy because hair must stay wet for coils to form; dry sections won’t coil, they’ll frizz. Work from the back forward so you’re not leaning over finished coils.
- Smaller sections give tighter, longer-lasting coils.
- A strong-hold gel is essential — cream alone won’t hold the coil.
- Diffuse on low heat to speed up drying without disturbing the pattern.
- Coils last up to two weeks with nightly pineappling and a bonnet.
20. Satin-Lined Beanie Day
Let’s end with the easiest style on this entire list: the satin-lined beanie. Cold mornings, bad hair days, protective-style grow-out — the beanie handles all of it while the satin lining protects your hair instead of snagging it like regular knit does.
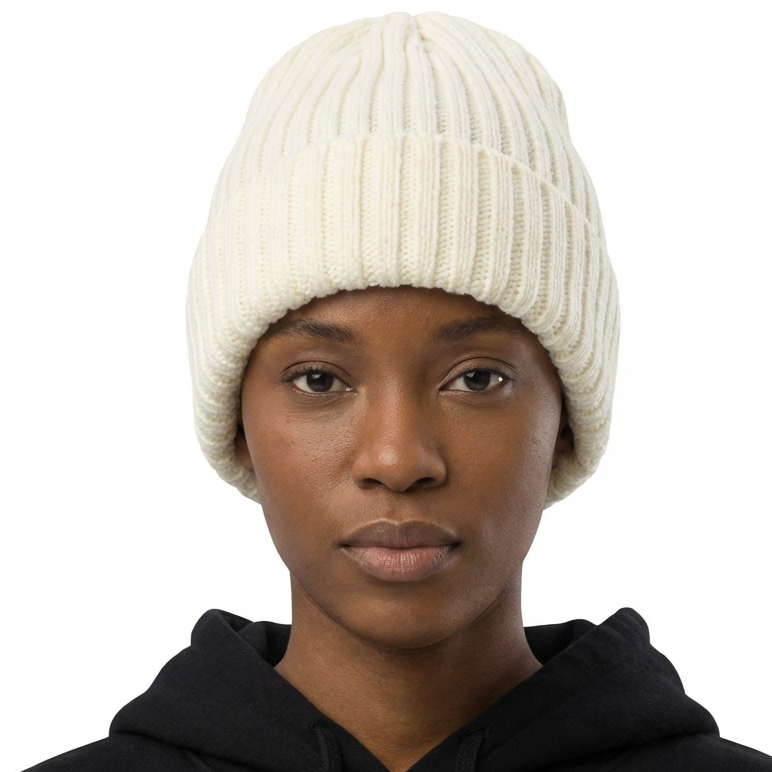
Braid or twist your hair flat underneath — even two loose braids work — moisturize your ends, and pull on a satin-lined beanie. Smooth your edges before the beanie goes on so they stay laid. That’s the whole tutorial. When you take it off hours later, your hair is exactly as moisturized as when you put it on, because the satin didn’t steal a drop.
Not all satin-lined beanies are equal — look for satin going all the way to the edge, not just a middle patch, with a smooth (not plasticky) lining. Already own beanies you love? Satin beanie liners are sold separately to wear underneath. Either way, your hair stays moisturized no matter how cold it gets.
⚠️ Watch Out: A regular cotton or acrylic beanie will dry your hair out and cause breakage at the hairline with daily wear. If you love beanies, the satin lining isn’t optional — it’s the entire point.
CONCLUSION
You don’t need to be a stylist to have great hair days — you just need a few reliable techniques and the confidence to try them. Start with one style from this list, practice it twice, and watch it become second nature. Your hands already know more than you think. 📌 Save this post to your hairstyles board on Pinterest so you always have gorgeous hair inspiration!