
25+ Easy Hairstyles Black Women 2026 — Beautiful Ideas
Some mornings you want your hair to look incredible without spending an hour in the mirror, and honestly, that should be the standard — not the exception. Your texture is already doing the heavy lifting. The right easy style just frames it, protects it, and lets you walk out the door feeling like yourself on your best day.
This list is packed with beautiful, genuinely easy hairstyles for Black women in 2026 — from wash-and-go curls and chunky twist-outs to sleek ponytails, protective braids, and five-minute updos. Every look works with real life: workdays, workouts, weekends, and everything in between.
Pick the styles that match your length, your texture, and your mood this week. Most of these take under thirty minutes once you know the steps, and several double as protective styles that keep your ends tucked away while they look effortlessly polished.
1. High Sleek Ponytail With Laid Edges
Is there anything more instantly put-together than a snatched high ponytail? This is the style that takes you from gym to dinner without a second thought. Start on stretched or blown-out hair, brush everything upward with a boar-bristle brush, and secure it high on the crown with two snag-free elastics for extra hold.
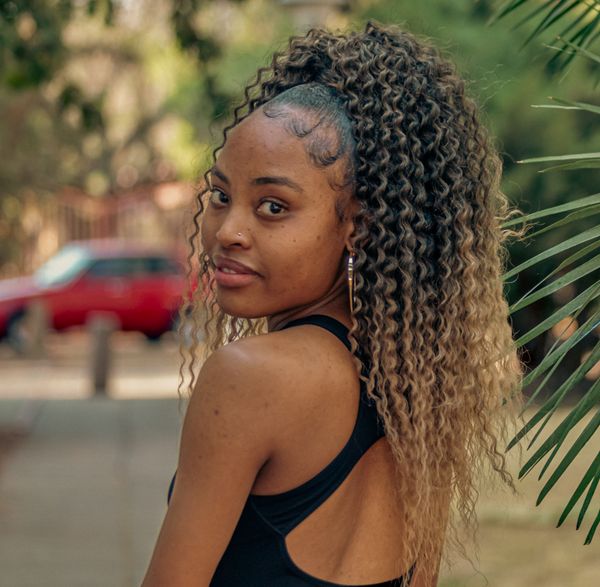
Wrap a small section of hair around the base to hide the elastic, then smooth your edges with edge control and a soft brush. For extra length and swing, add a drawstring ponytail that matches your texture — kinky-straight blends beautifully with blown-out natural hair. Finish with a light mist of shine spray, and tie it all down with a silk scarf for ten minutes while you do your makeup.
💡 Quick Tip: Sleep with the ponytail loosely wrapped in a pineapple and your edges under a scarf, and this style easily lasts three to four days with a quick morning smoothing.
2. Two-Strand Twists With Gold Cuffs
Two-strand twists are the quiet overachievers of natural hair: a protective style, a length-retention strategy, and a future twist-out all in one. On freshly washed, conditioned hair, work in small sections with a creamy leave-in and a butter or twisting cream, twisting each section from root to tip.
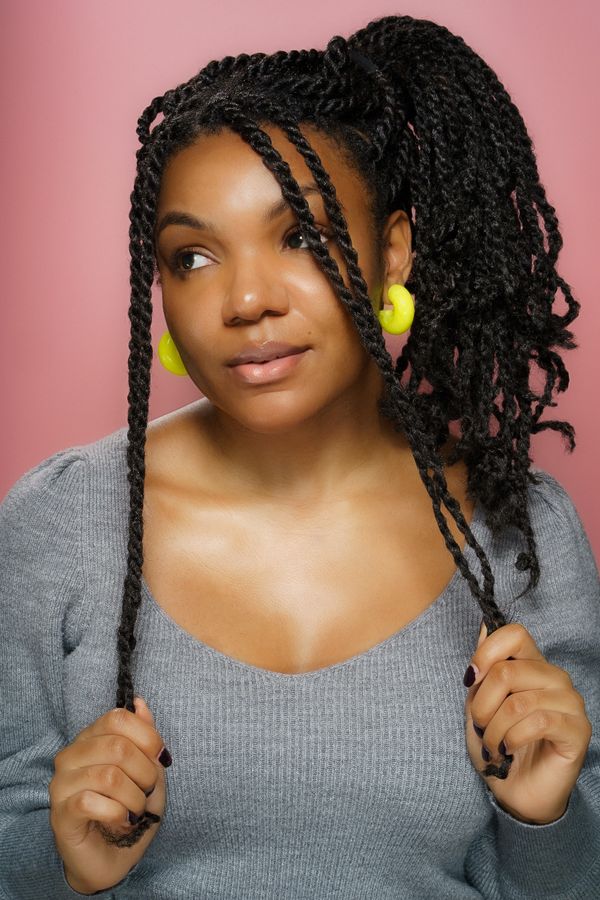
The magic is in the details. Keep your parts neat but not painfully precise — slightly organic parts look modern and take half the time. Once your twists are in, slide a few gold cuffs or rings onto random twists around your face and crown. It turns a simple protective style into something that looks intentionally styled, and the cuffs catch the light beautifully in photos.
- Twist on damp, well-moisturized hair for the smoothest roots.
- Seal each twist with a pea-sized amount of oil to lock in moisture.
- Refresh the scalp every few days with a light oil or braid spray.
- Wear them for two to three weeks, then unravel for a defined twist-out.
3. Wash and Go Defined Curls
A great wash and go is equal parts technique and product cocktail, and once you crack your own formula, it becomes the fastest routine in your rotation. The foundation is clean, deeply conditioned hair — definition starts in the shower, not after it.
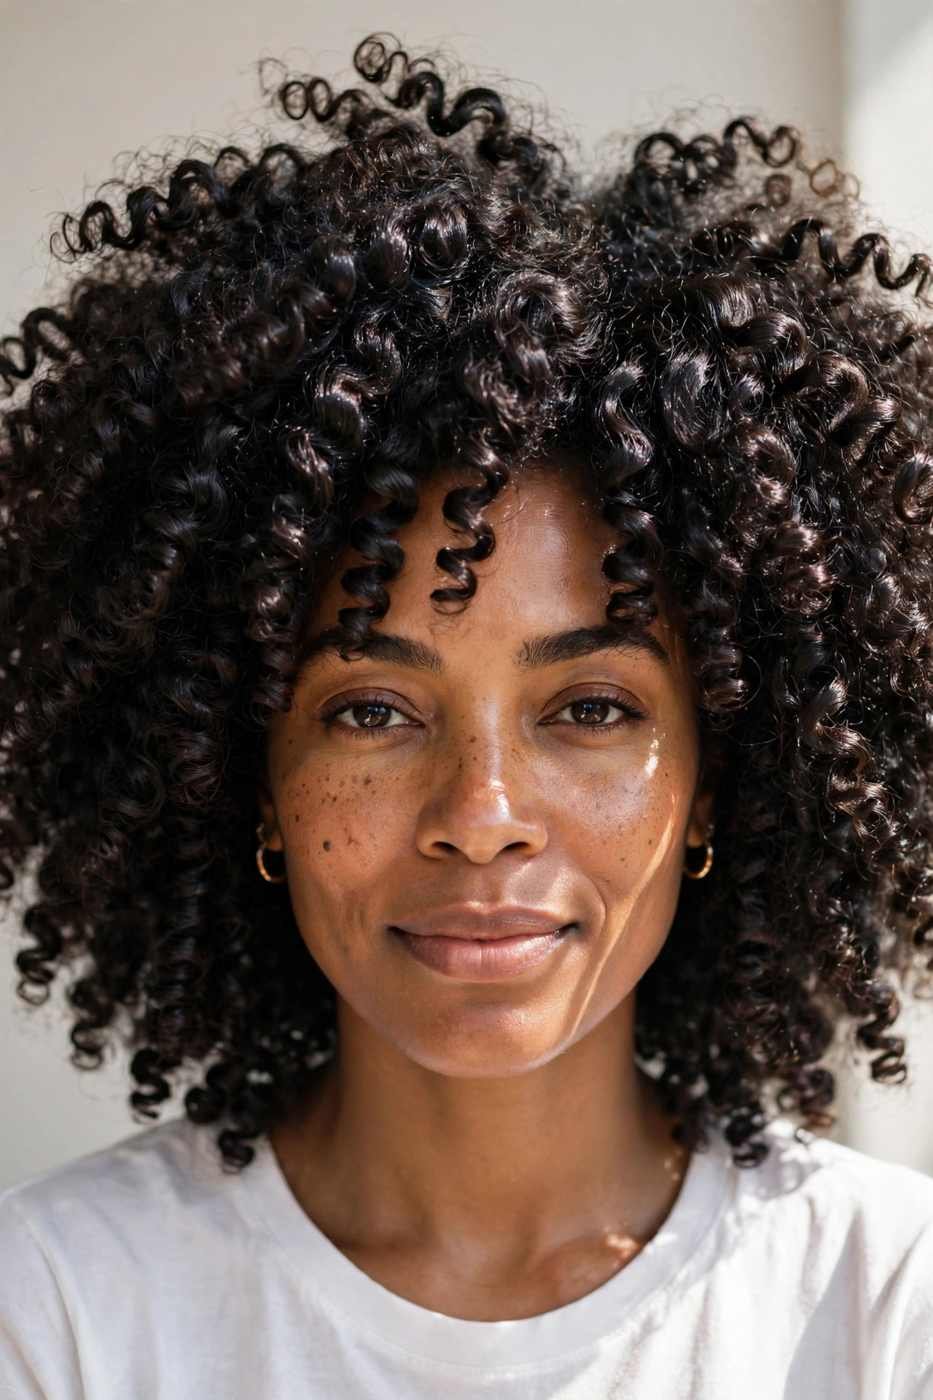
Work in four to six sections on soaking-wet hair. Rake a leave-in through each section, then layer a curl-defining cream and a strong-hold gel, smoothing each clump downward so the curls form in their natural pattern. Shake at the roots for volume, then either diffuse on medium heat or air-dry completely before touching anything. Hands off until it’s dry — that’s the whole secret.
📌 Good To Know: If your curls fall flat by day two, revive them with a spray bottle of water mixed with a little leave-in, scrunch, and go. Pineapple at night under a satin bonnet to keep definition for up to five days.
4. Top Knot Pineapple Updo
Some days your curls are doing their own thing and the smartest move is to gather them up and let them be the star. The top knot pineapple works on wash-and-go hair, twist-outs, braid-outs — anything with texture and personality.
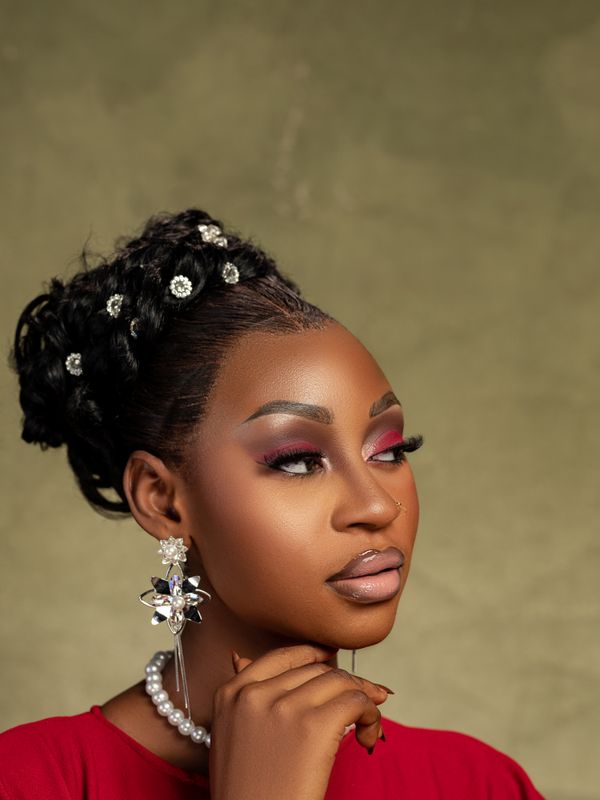
Flip your head over, gather your hair loosely at the very front of your crown, and secure it with a satin scrunchie or a loose elastic. The key word is loosely — you want height and softness, not tension. Fan the curls out with your fingers, fluff the roots gently with a pick, and smooth the sides with a little edge control if you like a polished hairline. Ten minutes, tops, and it looks like you tried much harder than you did.
This is also a brilliant second- or third-day style when your definition is fading but your volume is thriving. Add statement earrings and a bold lip, and nobody will ever guess this was a rescue mission.
5. Goddess Box Braids With Curly Ends
Goddess braids earned their name — there’s something undeniably regal about neat box braids melting into soft, free curls at the ends. It’s the perfect middle ground if classic box braids feel too severe for you but you still want weeks of low-maintenance wear.
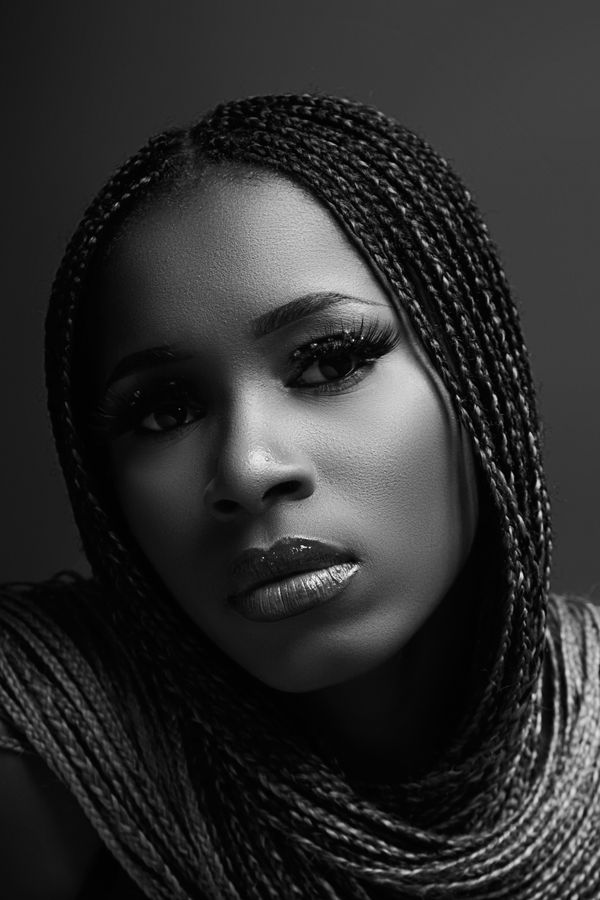
Ask your braider for medium-sized knotless braids and curly crochet or bulk hair left out at the ends, or DIY it by braiding three-quarters down and leaving the rest loose and curled. The curly ends need a little love: a light mousse keeps them defined without crunch, and sleeping with them loosely twisted inside a bonnet prevents tangling.
For the curliest finish, ask your braider to use deep-wave bulk hair for the ends rather than straight braiding hair. Pre-stretch the braiding hair before installing to save time and arm fatigue. A golf-ball-sized amount of mousse scrunched through the braids tames flyaways and keeps everything salon-fresh for the first week.
- Keep parts medium — too small means marathon install sessions.
- Oil your scalp twice a week; braids don’t mean neglecting it.
- Refresh the curls with water and mousse whenever they look tired.
- Expect four to six weeks of wear with good nighttime care.
6. Silk Press With Flipped Ends
I still remember the first time a stylist flipped the ends of my silk press outward instead of under — it changed the whole energy of the style. That little outward flick gives straight hair movement and bounce that a flat, pin-straight press just doesn’t have.
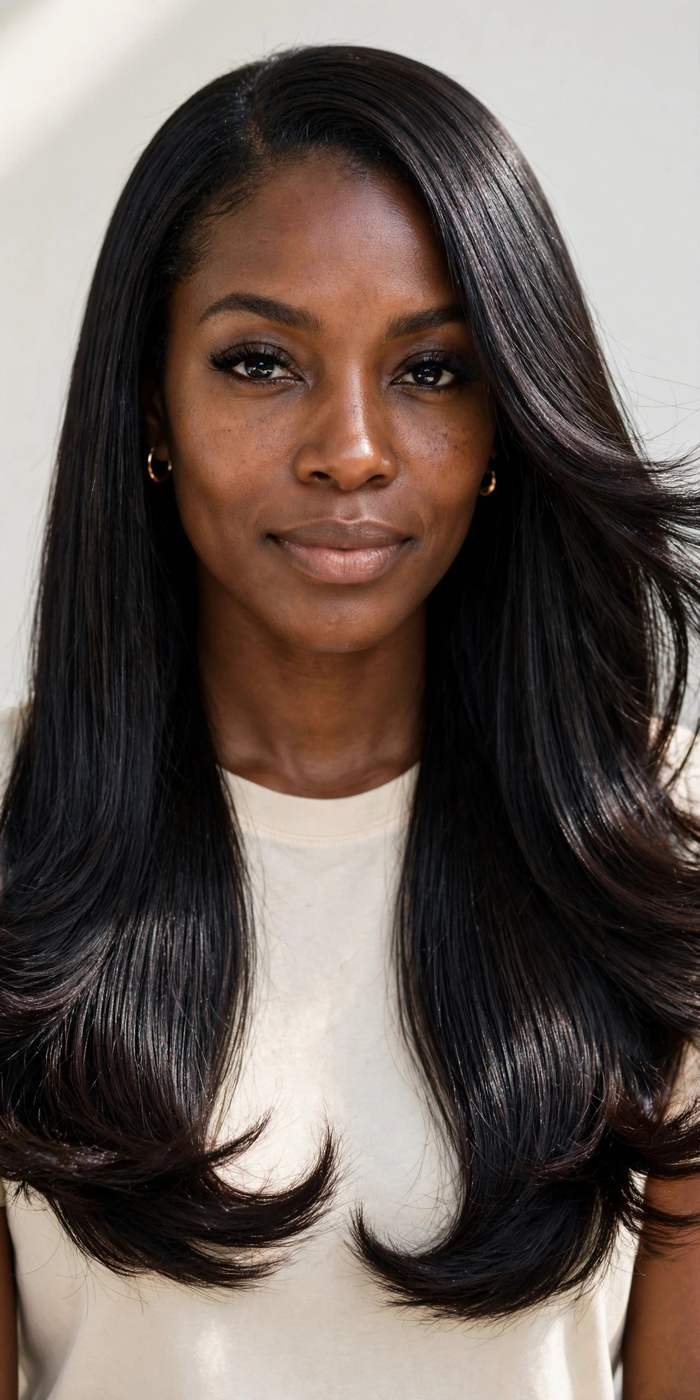
A lasting silk press starts with a proper foundation: a clarifying cleanse, a deep conditioning treatment, and a heat protectant applied generously. Blow-dry in small sections with a paddle brush, then flat-iron in thin passes at the right temperature for your texture — usually 350 to 400 degrees for most natural hair. Chase each pass with a comb for that glassy finish, then flip the last inch of each section outward with the iron.
Wrap your hair at night or use the pineapple method with a silk scarf, and avoid steam and heavy sweating if you want it to last. On fine or heat-trained hair, a good press holds for up to two weeks.
💡 Quick Tip: A pea-sized drop of silicone serum on the ends — not the roots — keeps the flip bouncy and fights humidity frizz without weighing hair down.
7. Low Messy Bun With Face-Framing Tendrils
The low messy bun is proof that undone can look completely intentional. It’s the hairstyle equivalent of your favorite oversized sweater — relaxed, flattering, and appropriate almost everywhere.
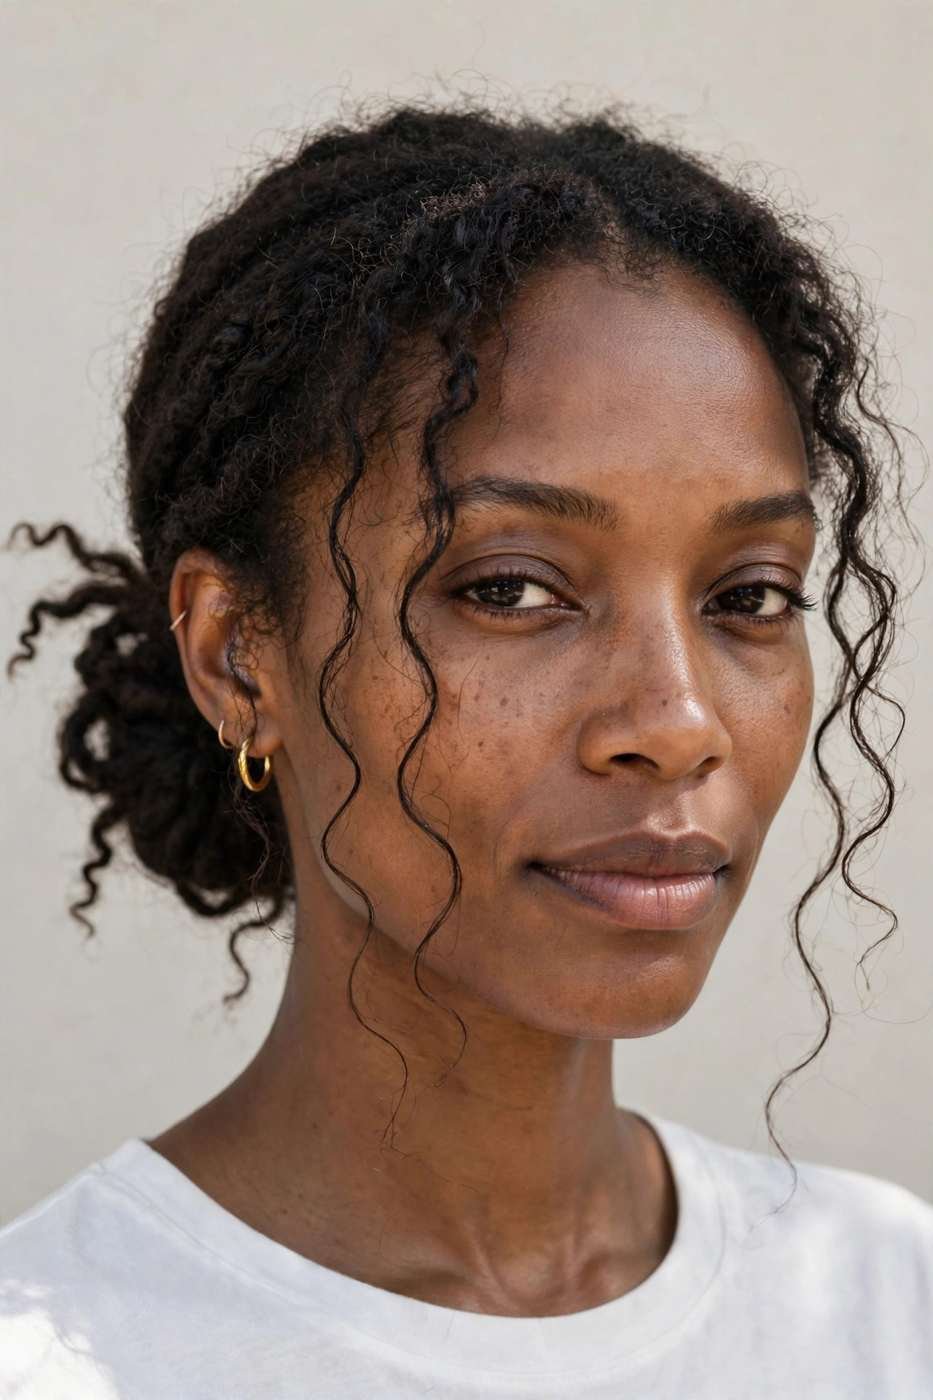
Gather your hair at the nape on day-old stretched hair or a braid-out, twist it loosely, and pin it into a soft bun, leaving the texture visible instead of smoothing everything flat. Pull out two thin tendrils at the front and either leave them curly or loosely twist them. Gently tug at the crown for a little lift, and let a few pieces escape — perfection is the enemy here.
This bun also works as a next-day style — sleep in a loose pineapple, then gather, twist, and pin without brushing in the morning. The overnight texture gives natural grip and volume. If shorter layers won’t stay tucked, cross two bobby pins in an X over each section; crossed pins hold far better on textured hair.
- Works beautifully on second-day twist-outs and old braid-outs.
- Use bobby pins that match your hair color for an invisible hold.
- A light-hold hairspray keeps flyaways soft, not crunchy.
- Dress it up with a silk scarf tied around the base for evening.
8. Flat Twists Into a Twisted Bun
When you want something more polished than a puff but just as quick, flat twists are your answer. They lie flatter than cornrows, take a fraction of the time, and look incredibly elegant swept into a bun.
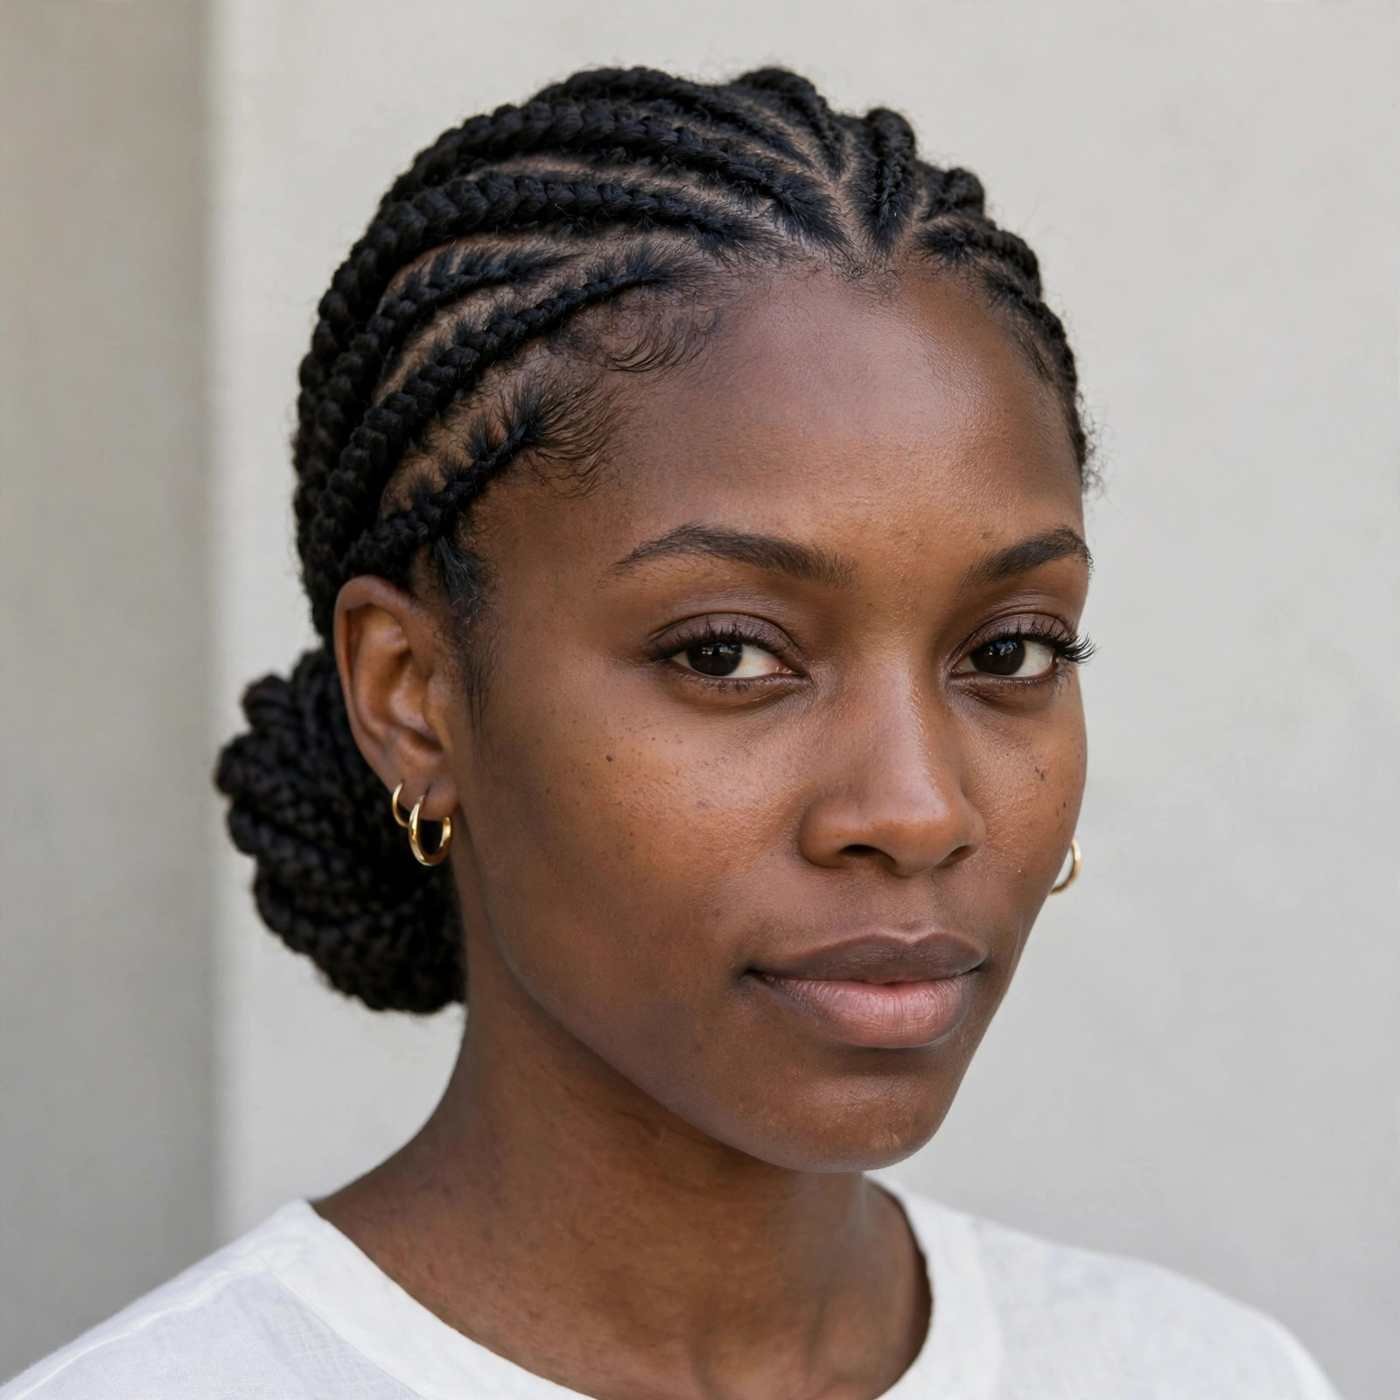
Part your hair down the middle or on a deep side, then flat-twist each side back toward the nape, adding hair as you go like a French braid with two strands. Gather the ends together, twist them into a low bun, and pin securely. The whole style takes twenty to thirty minutes once you’ve done it a couple of times, and it keeps your ends completely protected.
Once you’re comfortable with the basic version, try angling your flat twists diagonally instead of straight back for a gorgeous asymmetrical effect. You can also leave the ends as small two-strand twists instead of gathering them into a bun, giving you a twist-out base for tomorrow. Two styles from one install session.
📌 Good To Know: Flat twists are gentler on edges than tight cornrows, making them ideal if your hairline is recovering. Keep the tension moderate at the front and moisturize your edges before you start.
9. Half-Up Half-Down With Defined Coils
There’s a reason the half-up style never leaves the trend cycle — it gives you the polish of an updo and the drama of wearing your hair down, all at once. On defined coils or a fresh wash and go, it looks especially stunning.
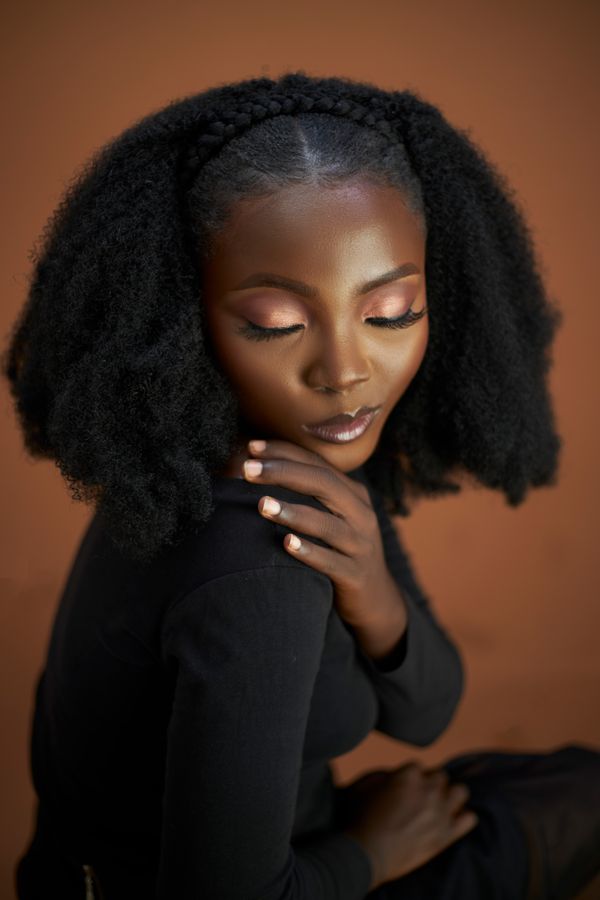
Section off the top half of your hair from temple to temple and gather it into a high puff, mini bun, or small ponytail, leaving the bottom half free and full. Smooth the top section with edge control for contrast against the texture below, and fluff the loose hair for maximum volume. It’s a fifteen-minute style that photographs beautifully from every angle.
- Add a scrunchie, claw clip, or gold cuff to the top section for extra style.
- Stretch the bottom half with a diffuser for even more fullness.
- Perfect for showing off length while keeping hair out of your face.
- Revive day-two hair by re-wetting just the top section and re-gathering.
10. Faux Locs Bob
Short, chic, and endlessly cool — the faux locs bob gives you the texture and attitude of locs without the long-term commitment. It sits right at the jawline or chin, framing the face in a way that’s both edgy and feminine.
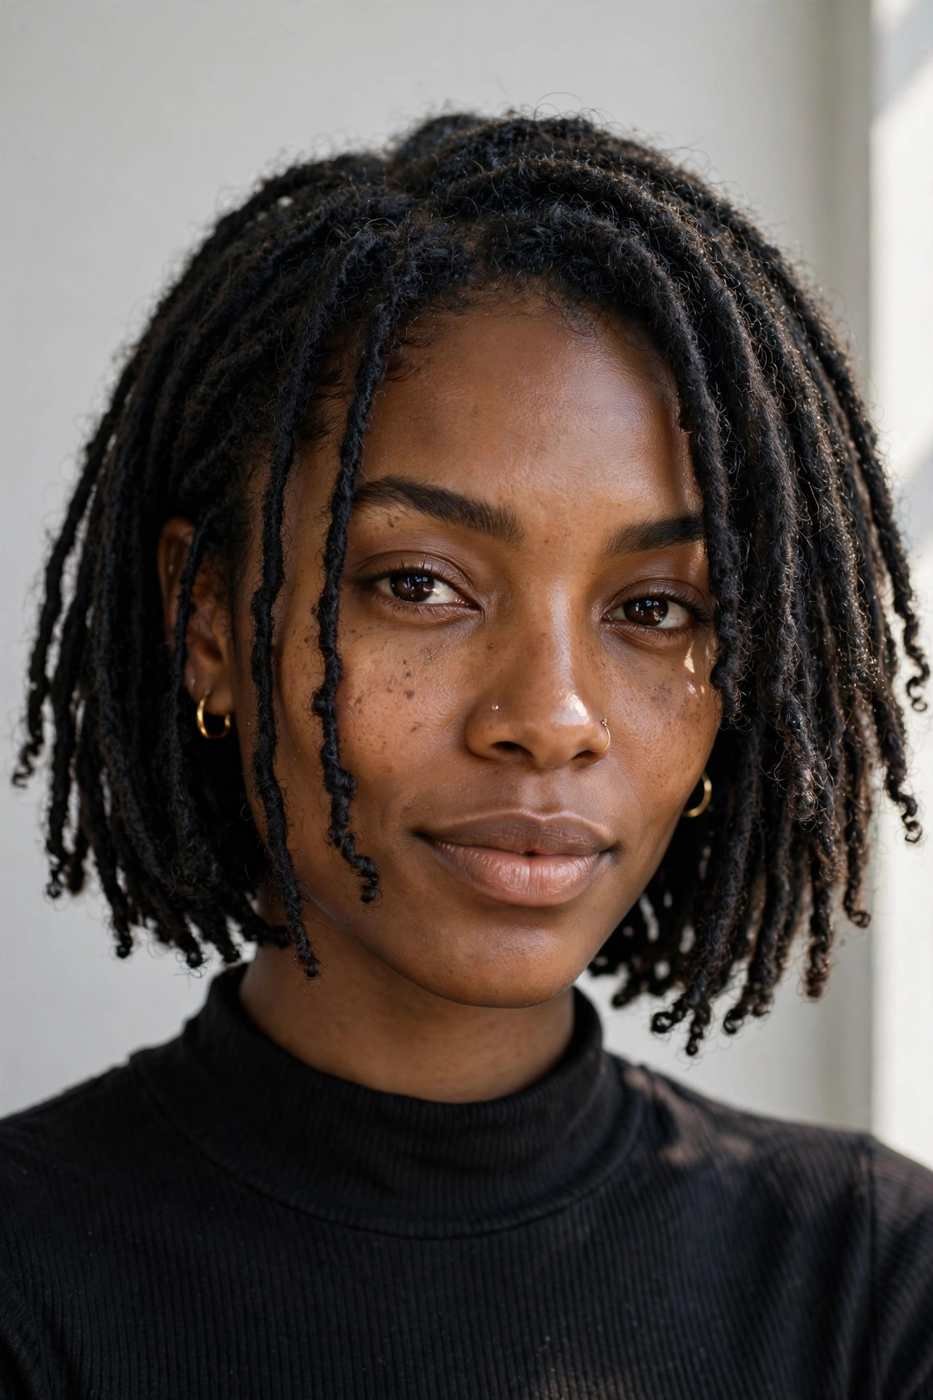
The bob length is what makes this style so wearable: it’s lighter than long locs, dries faster, and swings when you move. Installation usually takes three to four hours with crochet faux locs, and you can add curly pieces at the ends or a few wrapped accent locs for dimension. Because the length is short, upkeep is minimal — just oil your scalp and wrap at night.
⚠️ Watch Out: Faux locs can get heavy if installed too thick, so ask for a lightweight brand and medium density. Heavy locs pull on your edges over time, and a bob should feel effortless, not like a workout for your neck.
11. Bantu Knot-Out With Volume
Want curls with built-in lift at the roots? A bantu knot-out delivers exactly that — springy, separated curls that stand away from the scalp instead of lying flat. It’s one of the best heat-free ways to get big hair with definition.
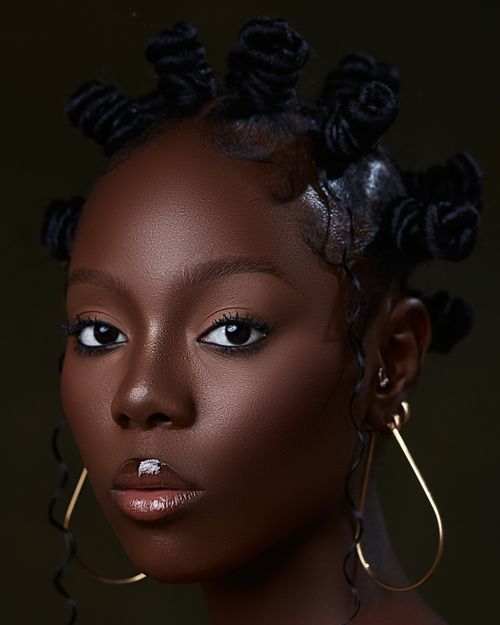
On stretched, moisturized hair, section into eight to twelve parts depending on your density. Twist each section and coil it into a small knot against the scalp, tucking the ends underneath. Let them set fully — overnight is ideal, or sit under a hooded dryer for an hour. Unravel each knot carefully, separate the curls with oiled fingers, and pick the roots for volume.
The unravel is where the magic happens, so don’t rush it. Coat your fingertips with a lightweight oil and gently untwist each knot in the opposite direction you coiled it, then separate each curl into two or three pieces. Day-two hair often looks even better as the curls settle and expand.
💡 Quick Tip: Smaller knots give tighter, more defined curls; larger knots give looser waves with more volume. Mix sizes — smaller at the front, larger at the back — for a natural, layered effect.
12. Cornrowed High Ponytail
This style means business. Cornrows braided up into a high ponytail give you weeks of wear, a sculpted hairline, and a ponytail that swings — it’s the best of protective styling and statement hair.
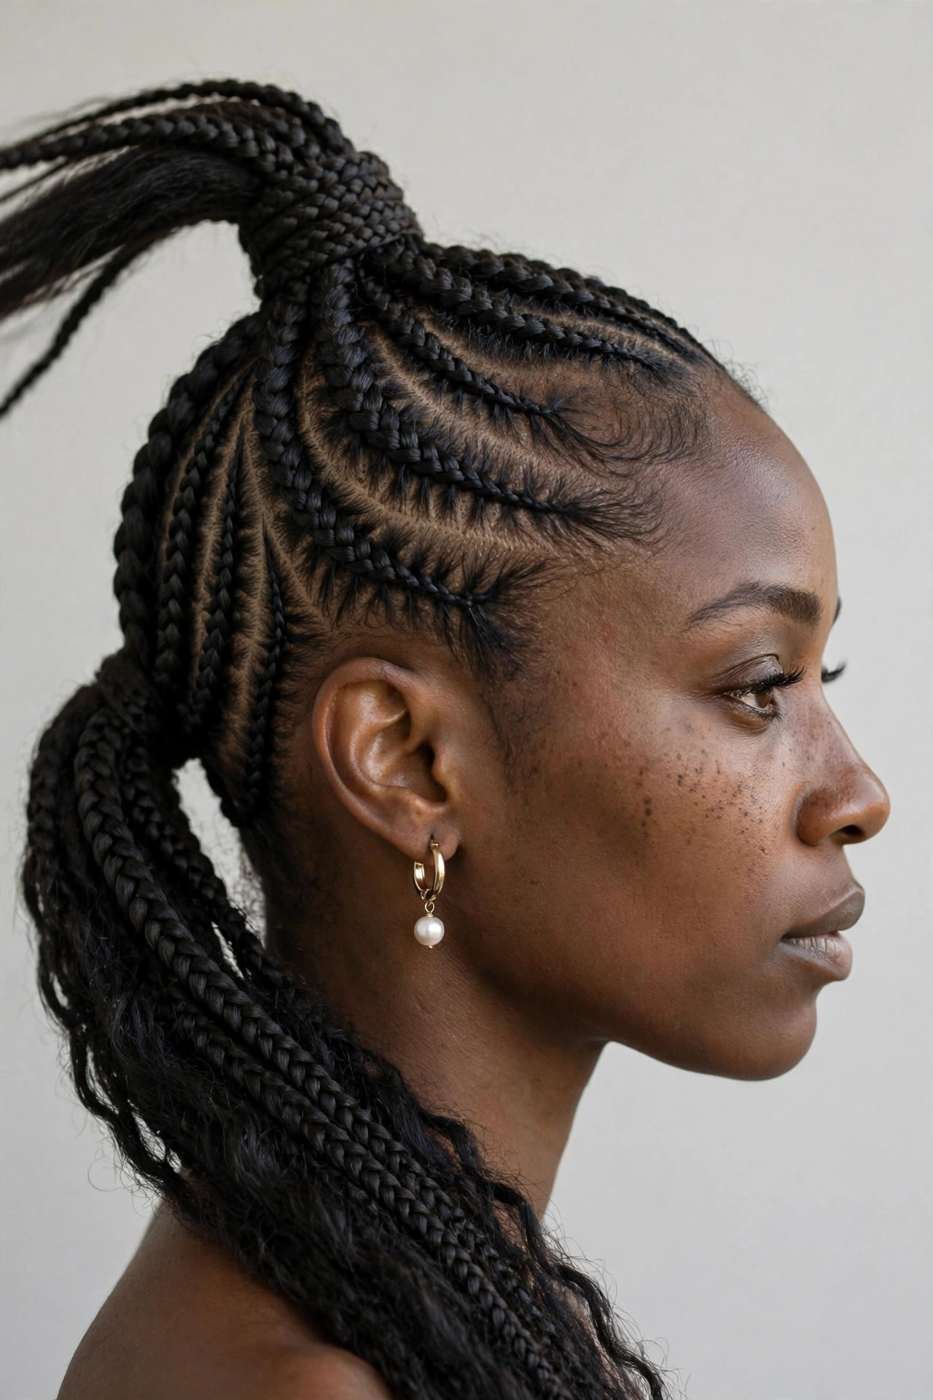
Braid cornrows from the hairline upward toward the crown, feeding in a little braiding hair for grip if your hair is short. Gather everything into a high ponytail and add curly or straight extensions for length, or wrap your own stretched ends around the base. The cornrowed sides keep everything neat for weeks while the ponytail stays fun and movable.
To keep the ponytail fresh for weeks, wrap it in a satin scrunchie at night rather than a tight elastic — it preserves the curl pattern without denting. If edges frizz, smooth them with a toothbrush and edge control rather than re-braiding. The cornrow base makes a perfect foundation for a high bun.
- Ask for the stitch or feed-in method for cleaner, longer-lasting parts.
- Keep the front braids snug but not painful — tension headaches are a red flag.
- Wrap the ponytail in a loose bun at night to preserve the curl pattern.
- Mousse the braids weekly to tame frizz and keep them looking fresh.
13. Finger Waves on Short Natural Hair
The first time I saw finger waves done on a tapered natural cut, I understood why this vintage style keeps coming back. Those sculpted S-waves turn short hair into pure art — glossy, deliberate, and incredibly striking.
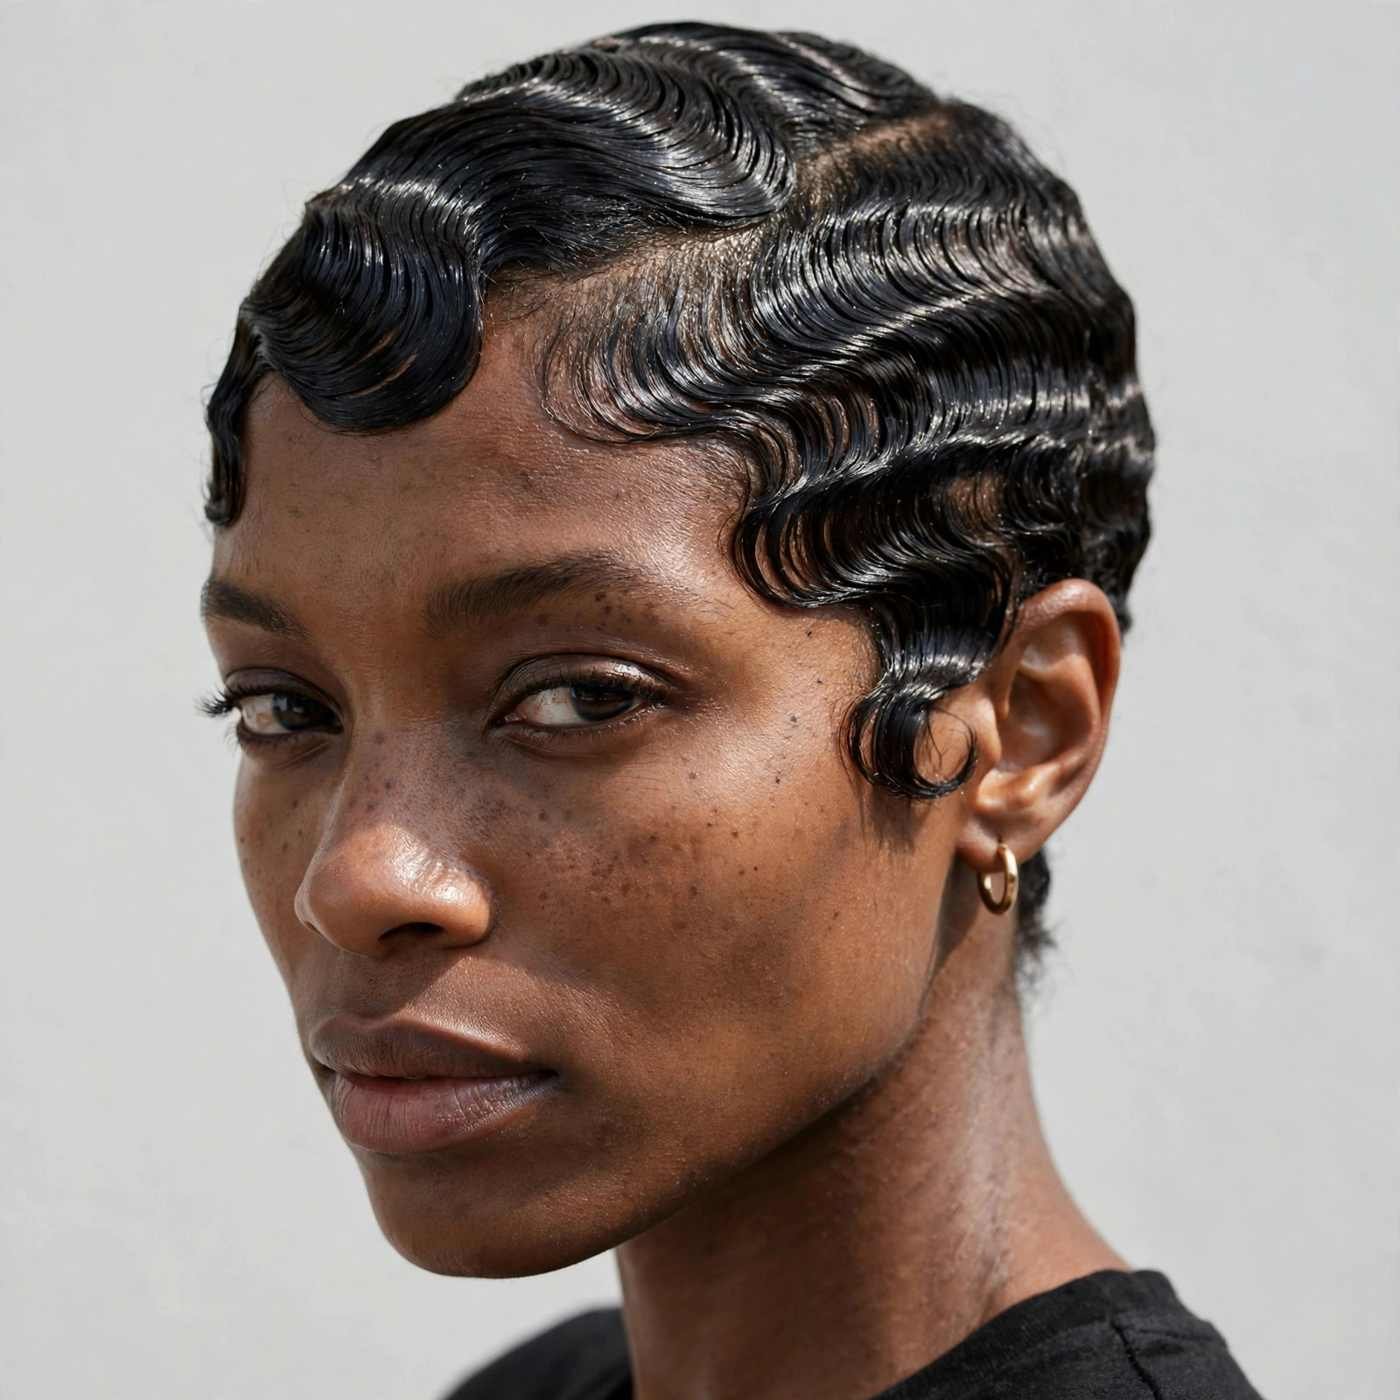
Finger waves work best on short, moldable hair — a TWA, a tapered cut, or relaxed short hair. Apply a generous amount of styling foam or wave gel, then use a fine-tooth comb and your fingers to sculpt the waves, pressing each ridge into place. Sit under a hooded dryer until completely dry, then mist lightly with oil sheen for that classic glossy finish.
The secret to crisp finger waves is keeping hair saturated as you sculpt — if it starts drying, mist it again. Use the fine-tooth side of a rattail comb to carve each ridge, pressing firmly with your fingers to set the shape. It feels fiddly the first time, but by your third attempt your hands move on autopilot.
📌 Good To Know: This style can last a full week if you wrap it nightly with a silk scarf and avoid water. Touch up the front waves midweek with a little more foam and a comb.
14. Chunky Twist-Out
If wash-and-go definition feels fussy and small twists take forever, the chunky twist-out is your sweet spot. Fewer, bigger twists mean less install time and bigger, fluffier curls when you take them down.
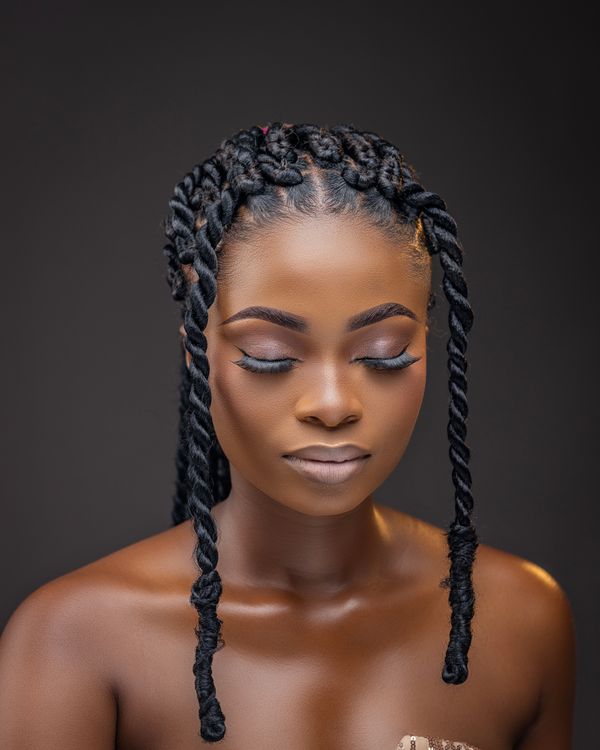
Work on stretched hair in six to ten large sections. Apply leave-in and cream generously — chunky twists need thorough product distribution to stay smooth — and twist each section loosely from root to tip. Let them dry completely, then unravel and separate each twist into three or four pieces. Fluff the roots with a pick and shake.
For maximum volume, separate each twist while your hair is still slightly warm — the curls are more pliable and you’ll get bigger separation with less frizz. If the roots look flat after unraveling, flip your head over and pick just the roots while the lengths stay defined. That contrast is what gives chunky twist-outs their signature shape.
- Chunky twists dry faster than small ones — great for thick, dense hair.
- Twist the ends tightly so they don’t unravel while setting.
- Separate with oiled fingers to minimize frizz.
- Pineapple at night and fluff in the morning for three to five days of wear.
15. Space Buns With Curly Bangs
Space buns aren’t just for festivals — done right, they’re playful, youthful, and surprisingly versatile. Adding curly bangs keeps them from reading too costume-y and frames the face beautifully.
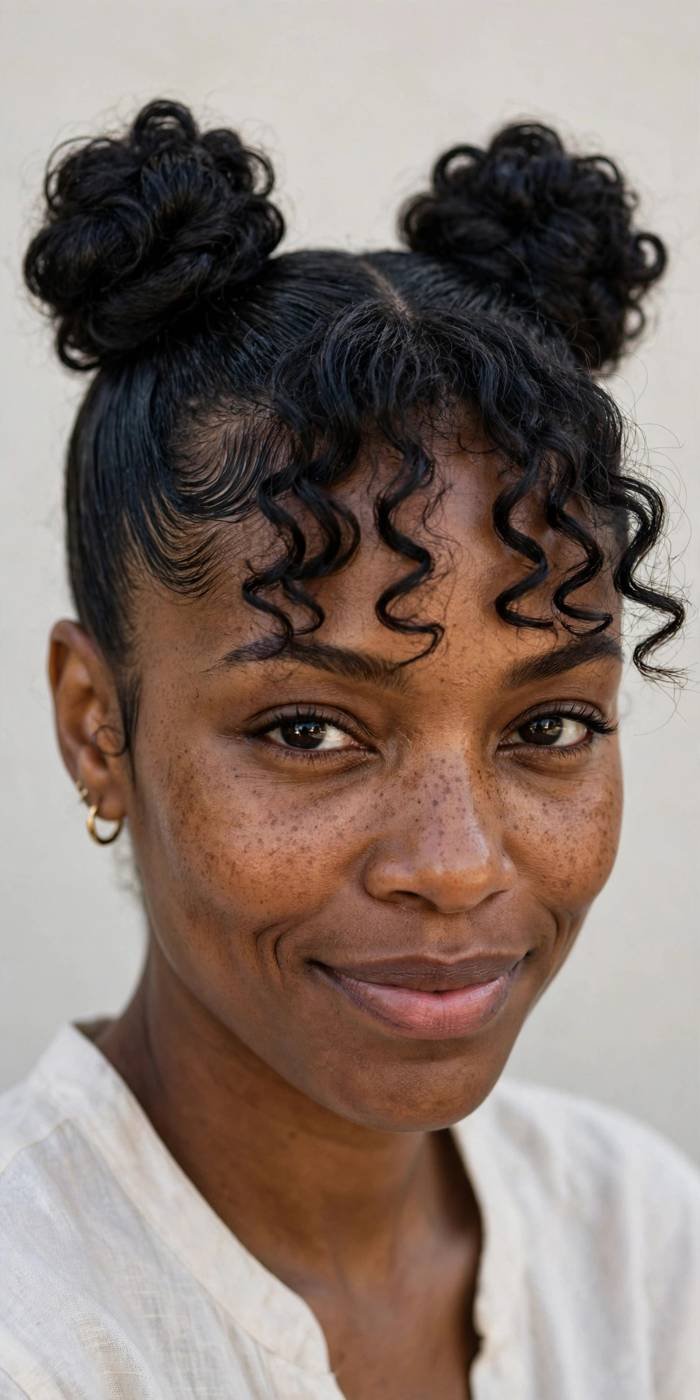
Part your hair down the middle and gather each side into a high puff or twisted bun, securing with elastics and pins. Leave the front section out and let your curls, coils, or a curly bang piece fall naturally across the forehead. The contrast between the structured buns and the soft bangs is what makes this look work for brunch, concerts, and everything casual in between.
To keep space buns from reading juvenile, pair them with elevated details: sleek gelled edges, gold cuffs at the base of each bun, or a bold red lip. The styling around the buns determines the vibe. They also make a great weekend protective style — ends tucked away for two days of cute, then take them down into loose waves Monday.
💡 Quick Tip: Position the buns slightly toward the back of the crown rather than directly on top — it’s more flattering on most face shapes and keeps the look grown-up rather than cartoonish.
16. Sleek Middle-Part Bob
I’ll never stop recommending the middle-part bob to anyone who wants instant polish. It’s clean, modern, and quietly powerful — the kind of style that makes people assume you have your whole life together.
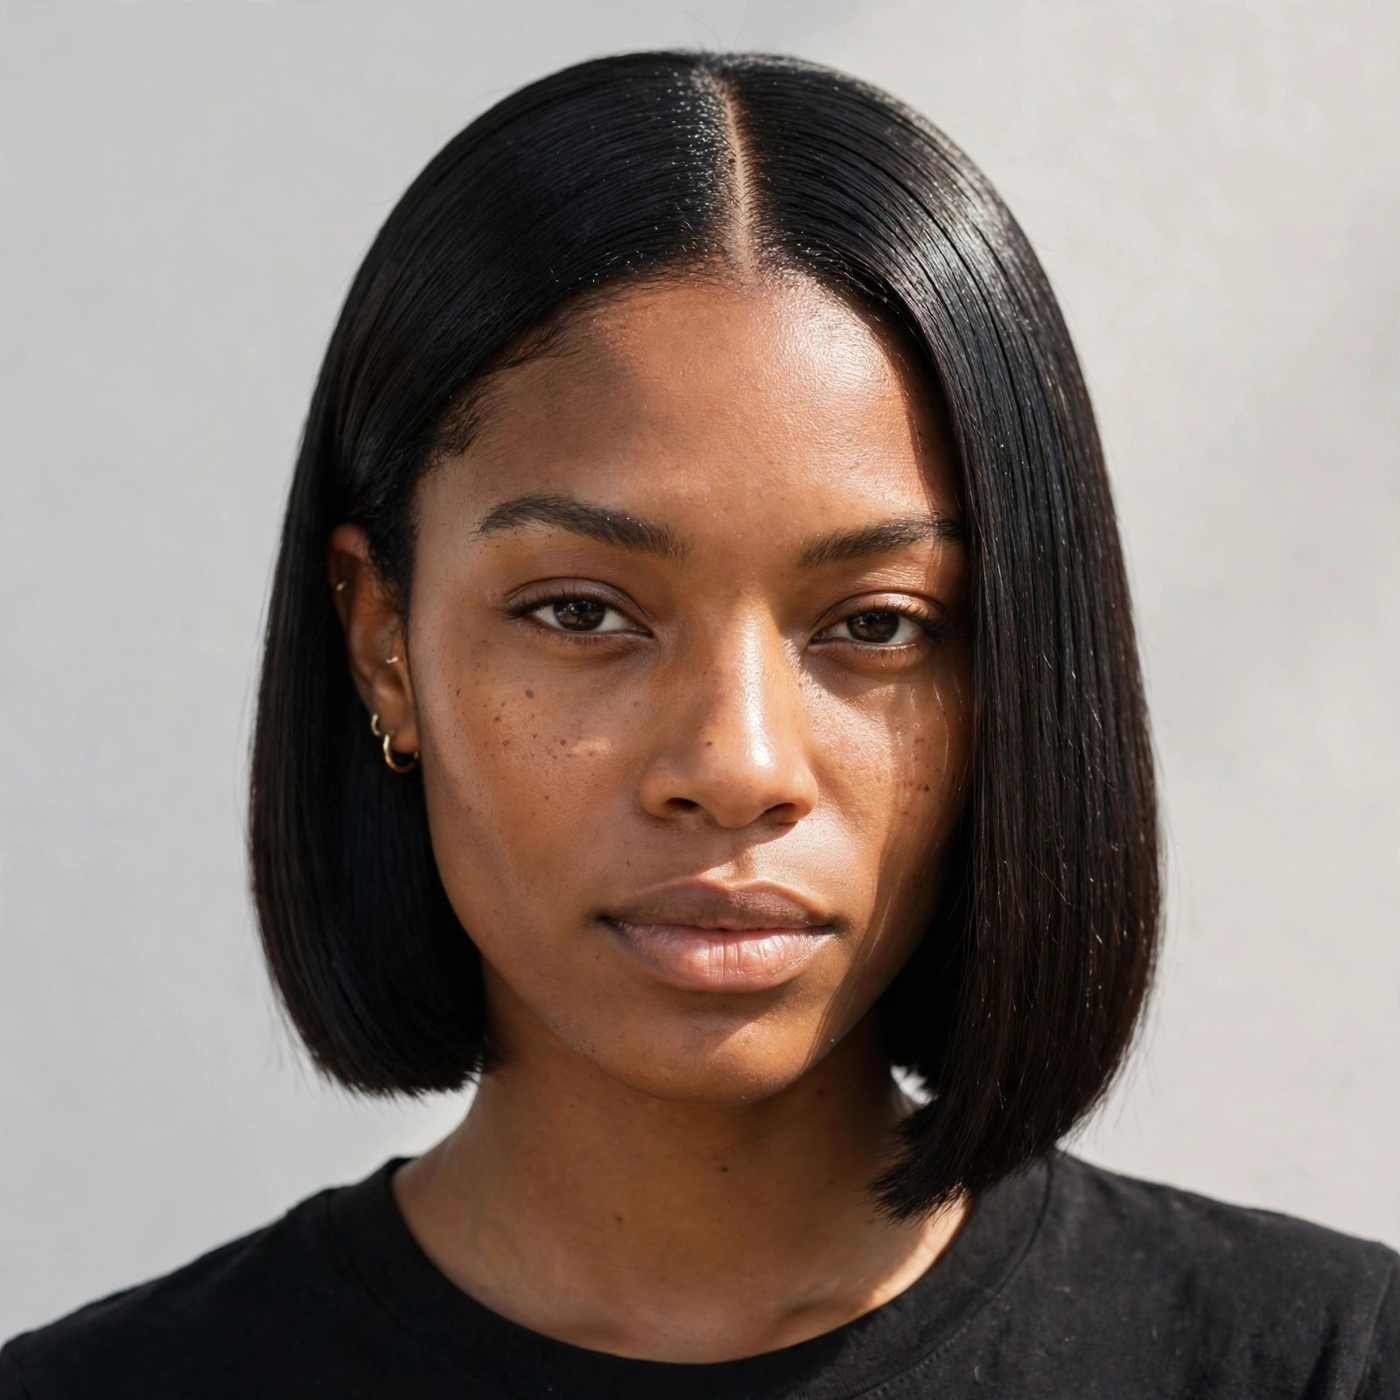
Whether it’s your own silk-pressed hair, a sew-in, or a glueless wig, the keys are the same: a razor-sharp middle part, glassy-smooth strands, and ends that sit right at or just below the chin. Tuck one side behind the ear to show off earrings, or wear it blunt and symmetrical for maximum impact. A flat iron touch-up on the front pieces keeps it looking fresh all day.
The difference between an expensive-looking bob and a flat one is all in the ends — make sure they’re freshly trimmed so they sit sharp. For wig wearers, a thin elastic band melted over the hairline for ten minutes after applying lace gives that seamless, scalp-like finish that makes people ask if it’s all yours.
📌 Good To Know: If you’re wearing a wig, melt the lace with a hot comb and a thin layer of lace tint or foundation that matches your scalp — an undetectable hairline is what separates a good bob from a great one.
17. Pineapple Puff With Headband
The puff is a natural-hair rite of passage, and adding a headband takes it from everyday to styled in about thirty seconds. It’s the easiest way to make second-day hair look deliberate.
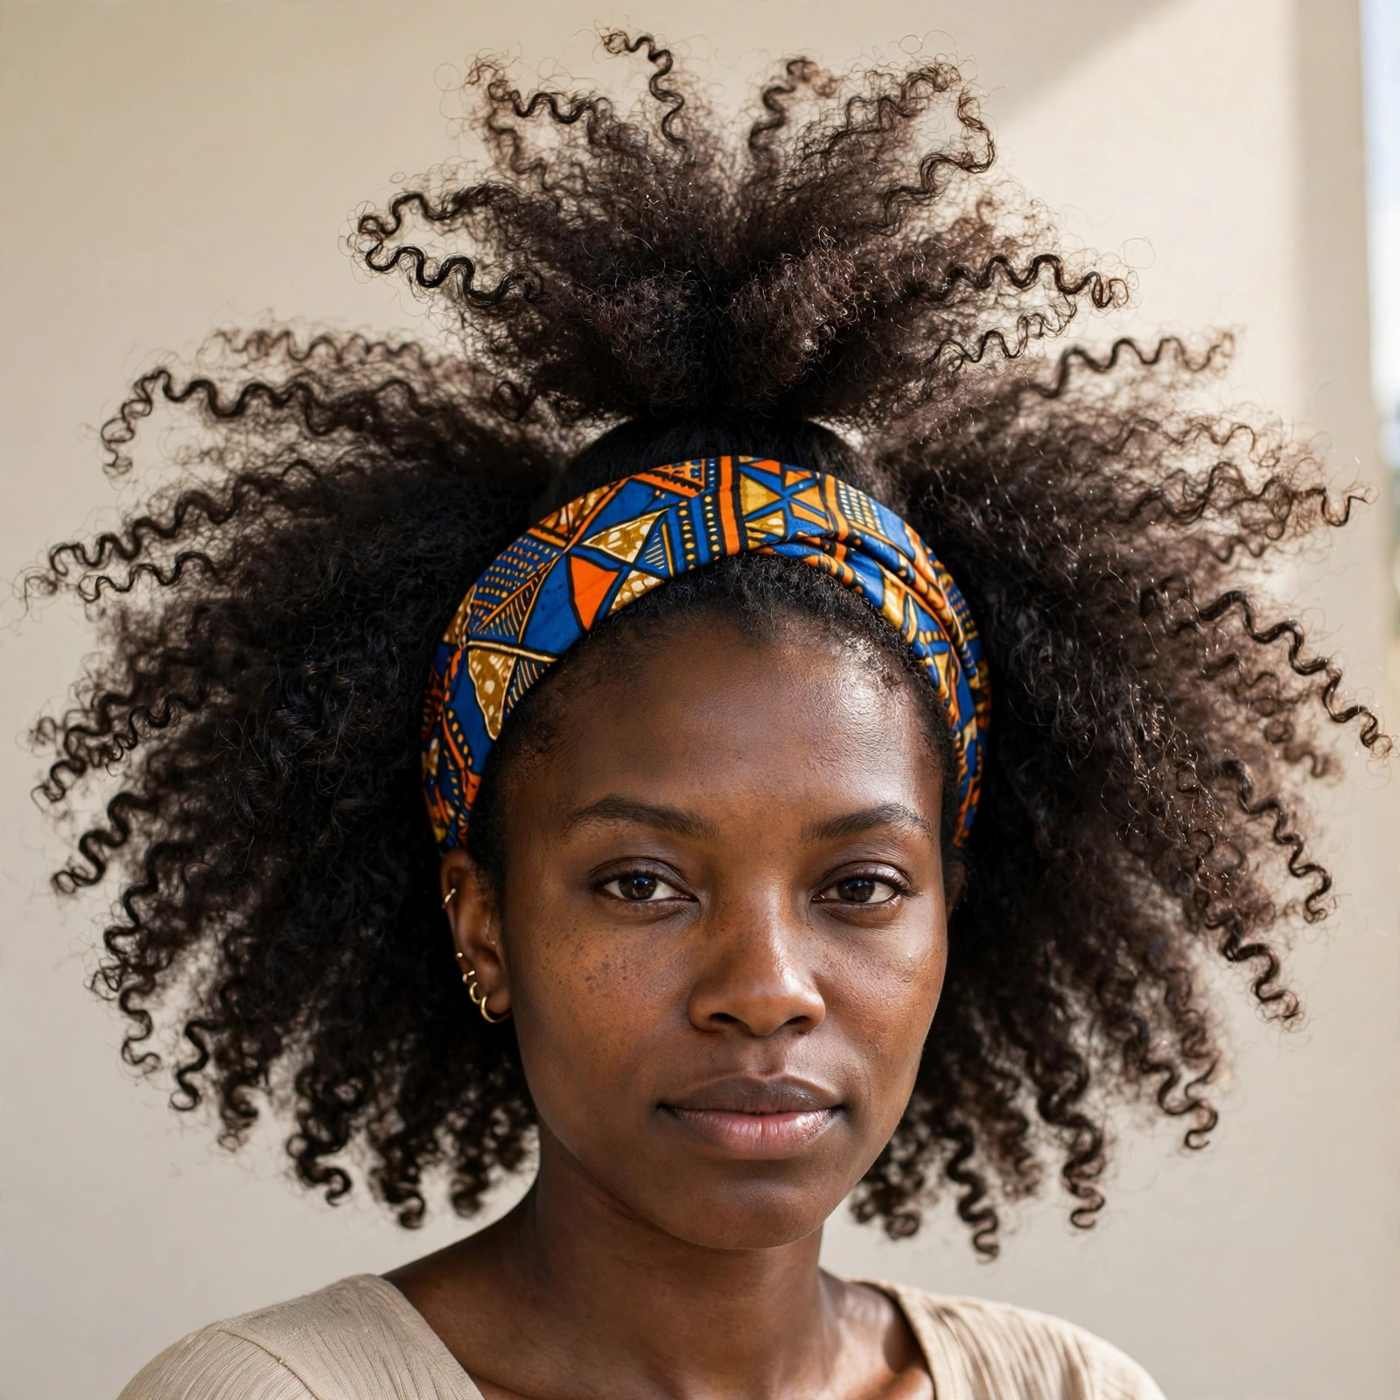
Gather your hair into a high, loose puff with a satin scrunchie or a stretched headband, letting your curls fan out freely. Slide a wide fabric headband, a knotted turban band, or a printed scarf-headband on behind your hairline. Smooth your edges underneath, fluff the puff to your desired size, and you’re done. The headband also hides any puffiness or frizz at the roots.
If your puff shrinks by midday, lightly mist it with water and scrunch upward to reactivate the curl pattern. For extra hold without crunch, scrunch a pea-sized amount of curl cream through after misting. For maximum height, gather the puff, then use an afro pick to lift only the underlayer, leaving the top curls smooth and defined.
- Satin-lined headbands protect your edges better than plain elastic ones.
- Stretch the puff with a pick for extra height and drama.
- Works on wash-and-gos, twist-outs, and stretched natural hair alike.
- Keep a headband in your bag — it’s a five-second fix for humid days.
18. Fulani Braids With Beads
Have you noticed how Fulani braids instantly make every outfit look more intentional? The signature center braid, the face-framing cornrows, the beads — it’s a whole aesthetic, and it’s deeply rooted in West African tradition.
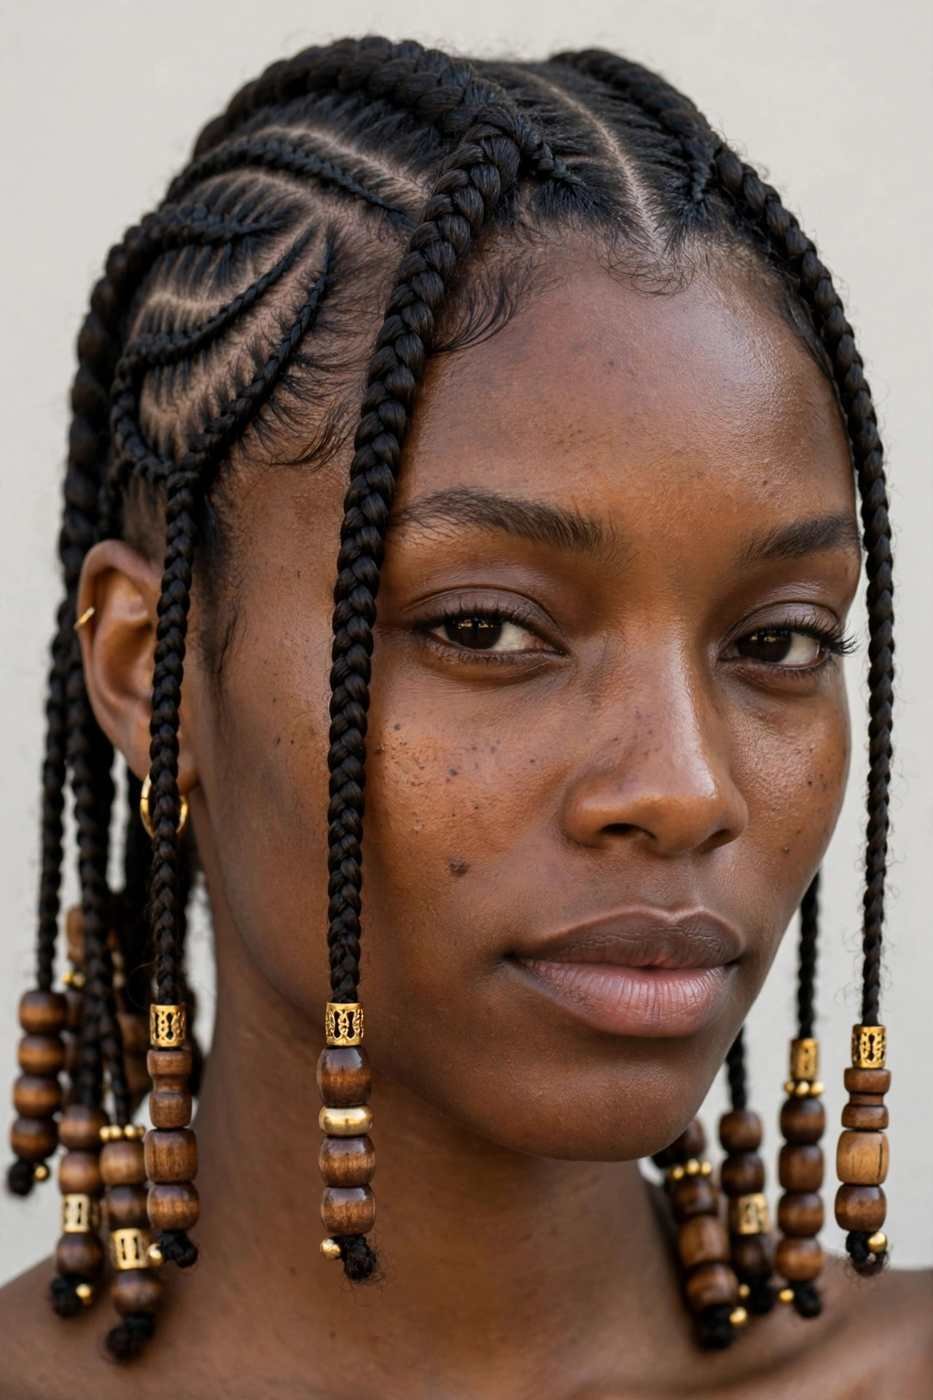
The classic layout features a single braid down the center part, cornrows braided back on either side, and individual braids or twists hanging at the sides and back. Thread wooden, gold, or glass beads onto the ends of the face-framing braids for that authentic finish. Installation takes three to five hours, but you’ll get four to six weeks of wear.
The beads are where you make this style yours — mix wood, gold metal, and glass for an eclectic look, or keep them uniform for something cleaner. Thread them on before dipping the ends in hot water so they stay put. If beads feel heavy, use them only on the two face-framing braids; the accent is just as striking with half the weight.
💡 Quick Tip: Dip just the beaded ends in hot water to seal them, and wrap the beads in a little tissue first so the heat doesn’t crack or melt them.
19. Loose Curls With Deep Side Part
A deep side part is the simplest way to add drama to loose curls — it creates instant volume at the crown and a sweeping, face-framing effect that a middle part can’t touch. This is red-carpet hair you can absolutely wear to brunch.
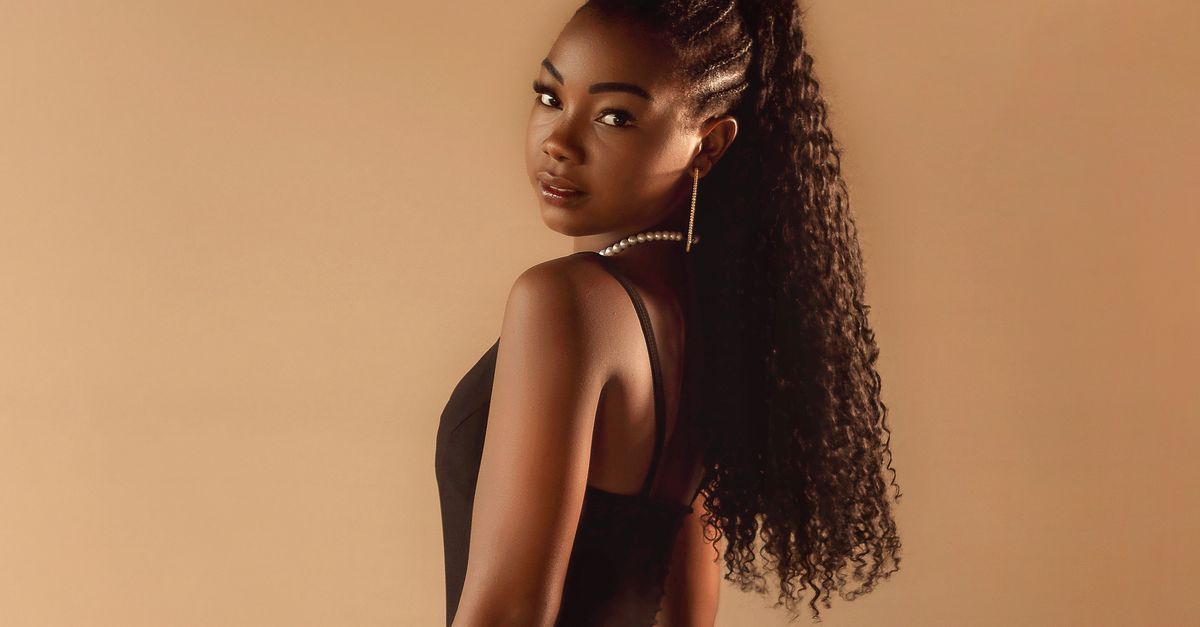
Start with a flexi-rod set, a wand curl on stretched hair, or a curly wig. Create the deep part about two inches off-center and sweep the heavier side across. Pin the smaller side flat behind the ear for contrast, and let the larger side cascade. A light oil on the curls adds shine without disturbing the pattern.
To make the deep side part last, set it with flexible-hold hairspray right after styling — side parts migrate without help. On a wig, pluck a natural part line and add foundation along it for realism. When curls start to drop, pin the heavier side up for an hour; the cool set revives the bounce.
- Flexi rods on stretched hair give the most natural-looking loose curls.
- Let curls cool completely before separating for longer-lasting definition.
- A side part also works beautifully to camouflage thinning at the crown.
- Refresh with a water-and-leave-in spritz, scrunching upward.
20. Crochet Passion Twists
Passion twists have that perfectly undone, bohemian texture that looks like you spent a week at the beach — in the best way. The crochet method gets you there in under three hours, which is remarkable for the amount of hair you end up with.
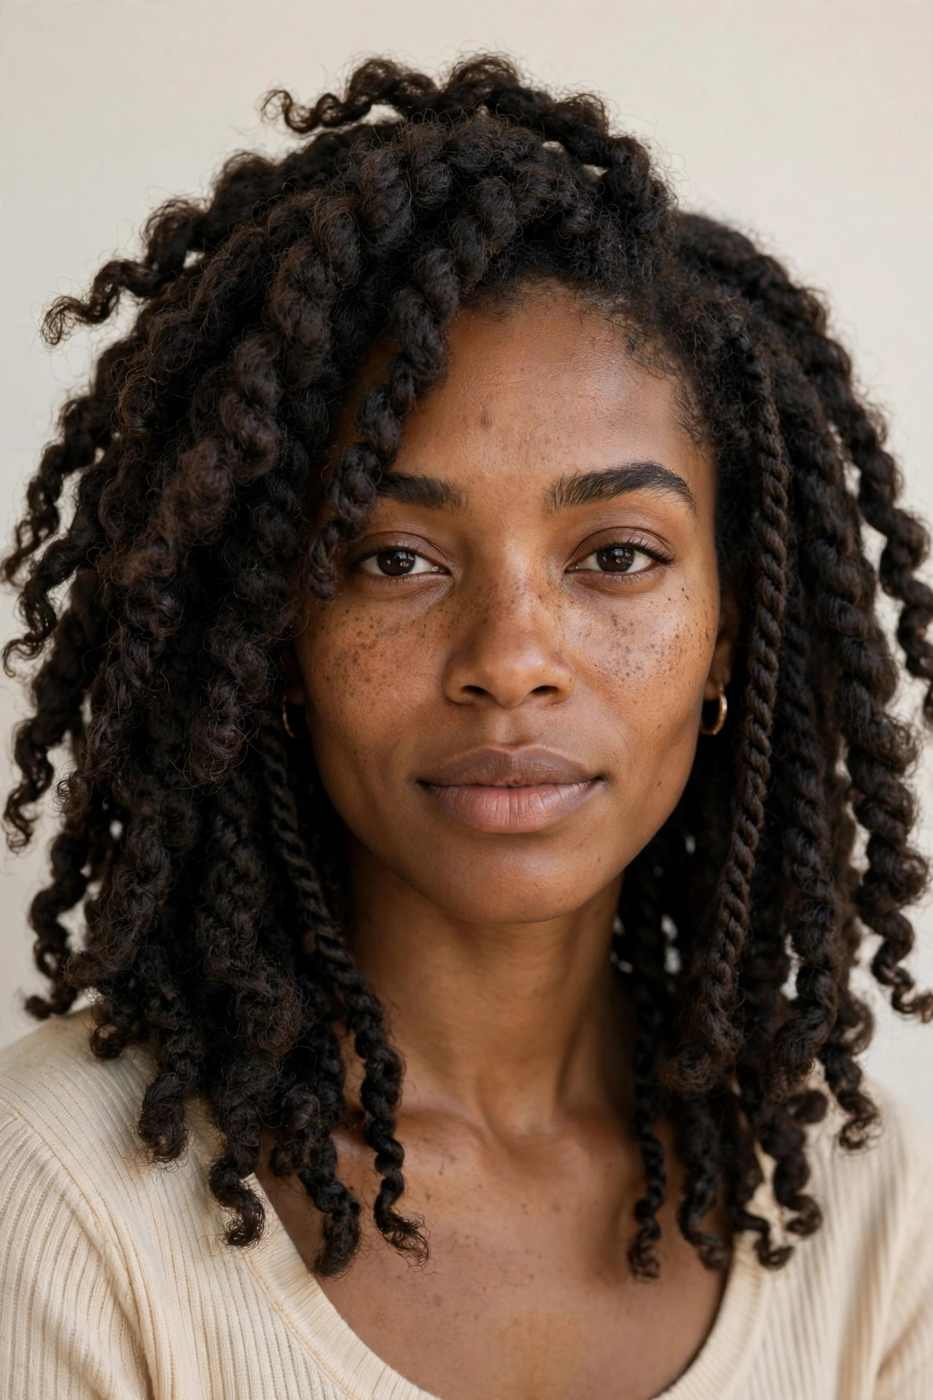
With your natural hair cornrowed flat underneath, loop pre-twisted passion twist crochet hair through the braids with a latch hook. Shoulder or bob length keeps it light and easy to style; longer lengths give mermaid energy. Fluff the twists apart gently with your fingers for that signature airy fullness, and trim any stragglers for a clean shape.
The fluff factor is everything — after install, gently pull each twist apart lengthwise with your fingers to create that airy, lived-in texture. Don’t be afraid to really separate them; the hair is designed for it. If any twists look too uniform, muss them deliberately. Perfectly imperfect fullness is the whole point of passion twists.
⚠️ Watch Out: Passion twist hair tangles if you skip nighttime care — gather the twists into a loose pineapple inside a satin bonnet every single night, no exceptions.
21. Low Sleek Bun With Swirled Edges
When the occasion calls for elegance — a wedding, an interview, a dinner you actually dressed up for — the low sleek bun never misses. It’s timeless, it’s tidy, and those swirled edges add artistry that a plain bun can’t.
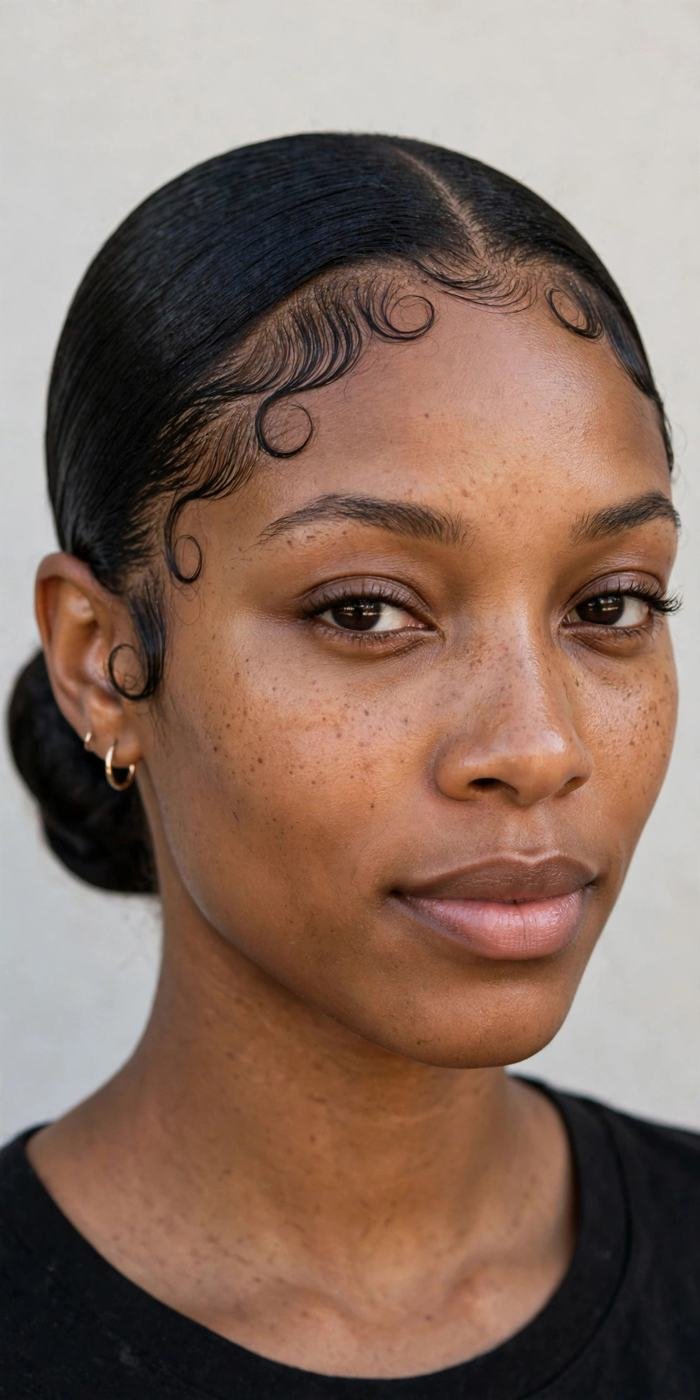
Brush stretched hair smooth into a low ponytail at the nape, then twist or coil it into a neat bun and pin firmly. The edges are the star here: use a strong-hold edge control and a fine brush to sculpt swoops and swirls along your hairline. Take your time with them — this is the detail people will compliment. Set everything with a light mist of holding spray.
For a bun that photographs like glass, do a final pass with a boar-bristle brush and a touch of edge control over the entire head before leaving — it catches every flyaway. If your hair is short, build on a textured bun maker underneath; nobody will know. Finish with shine spray held twelve inches away for an even, non-greasy glow.
💡 Quick Tip: For extra staying power, tie a silk scarf over the finished style for fifteen minutes before you leave. It sets the edges and smooths any remaining flyaways.
22. Tapered TWA
Short hair, maximum confidence — the tapered teeny-weeny afro is proof that you don’t need length to make a statement. The tapered sides keep it sharp and modern while the fuller top shows off your texture.
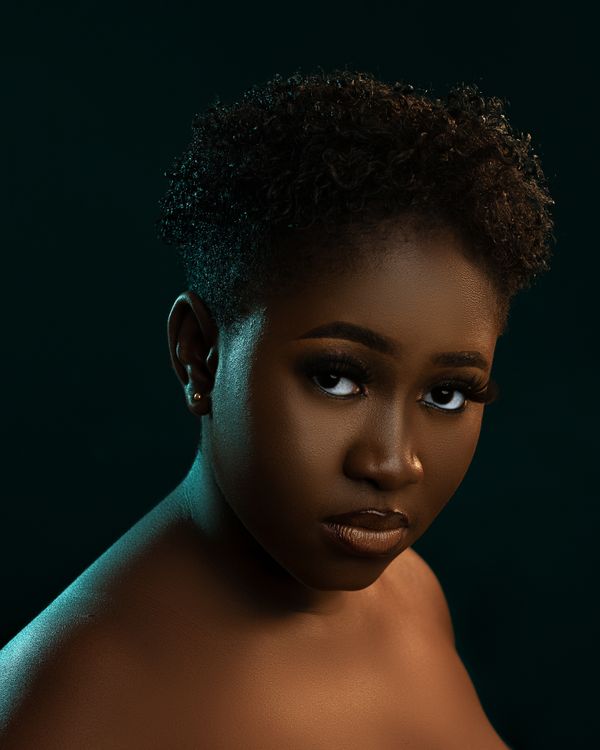
This cut does most of the work for you, which is exactly why it’s on an easy-styles list. Wash, condition, apply a curl-defining cream or twisting butter, and either finger-coil the top or just let your coils spring up naturally. A sponge can add quick definition to the crown in under two minutes. Keep the tapered sides crisp with a shape-up every two to three weeks.
- Define the top with a curl sponge for a uniform coil pattern in minutes.
- A light oil keeps short hair moisturized without buildup.
- Color the top — a copper or honey tint — for an instant style upgrade.
- Sleep in a satin bonnet or on a satin pillowcase to preserve the shape.
23. Braided Crown Updo
The first time I wore a braided crown to a family event, three different aunties asked for my braider’s number before dinner was served. There’s something about braids wrapped around the head like a halo that reads as both regal and romantic.
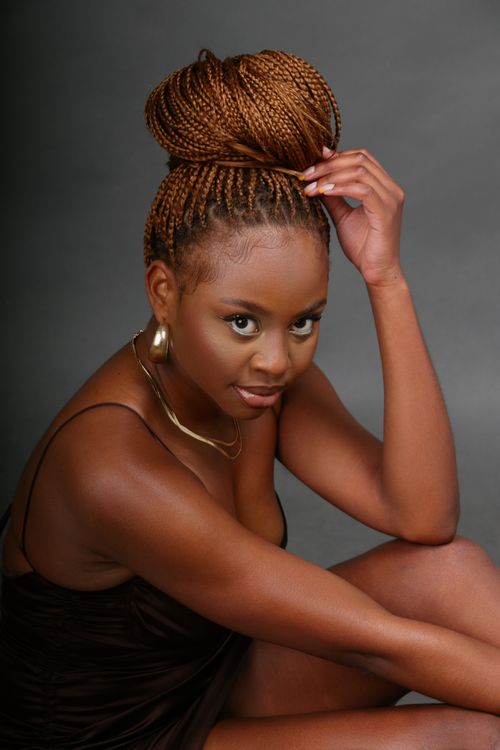
You can build this on your own braids: create two Dutch braids from the front hairline, wrap them around your crown, and pin the ends underneath. Or cheat beautifully — braid two extensions separately and pin them around your head over sleek, gelled-down hair. Add small gold cuffs or fresh baby’s breath for weddings and special occasions.
To make the crown look fuller, gently pancake each braid by tugging at its edges before pinning — it doubles their visual thickness. Hide the pins underneath, crossing them for security, and finish with light hairspray. This works beautifully over a sleek wig cap if your own hair is short; the braided extensions do all the visual work.
📌 Good To Know: This style keeps every end tucked and protected, making it a genuine protective style despite how dressy it looks. It also survives dancing, humidity, and long days remarkably well.
24. Loose Wave Wig With Middle Part
Some weeks you just want great hair with zero effort, and that’s exactly what a good loose-wave wig is for. Throw it on, melt the lace, and you have flowing waves that took someone else’s time — not yours.
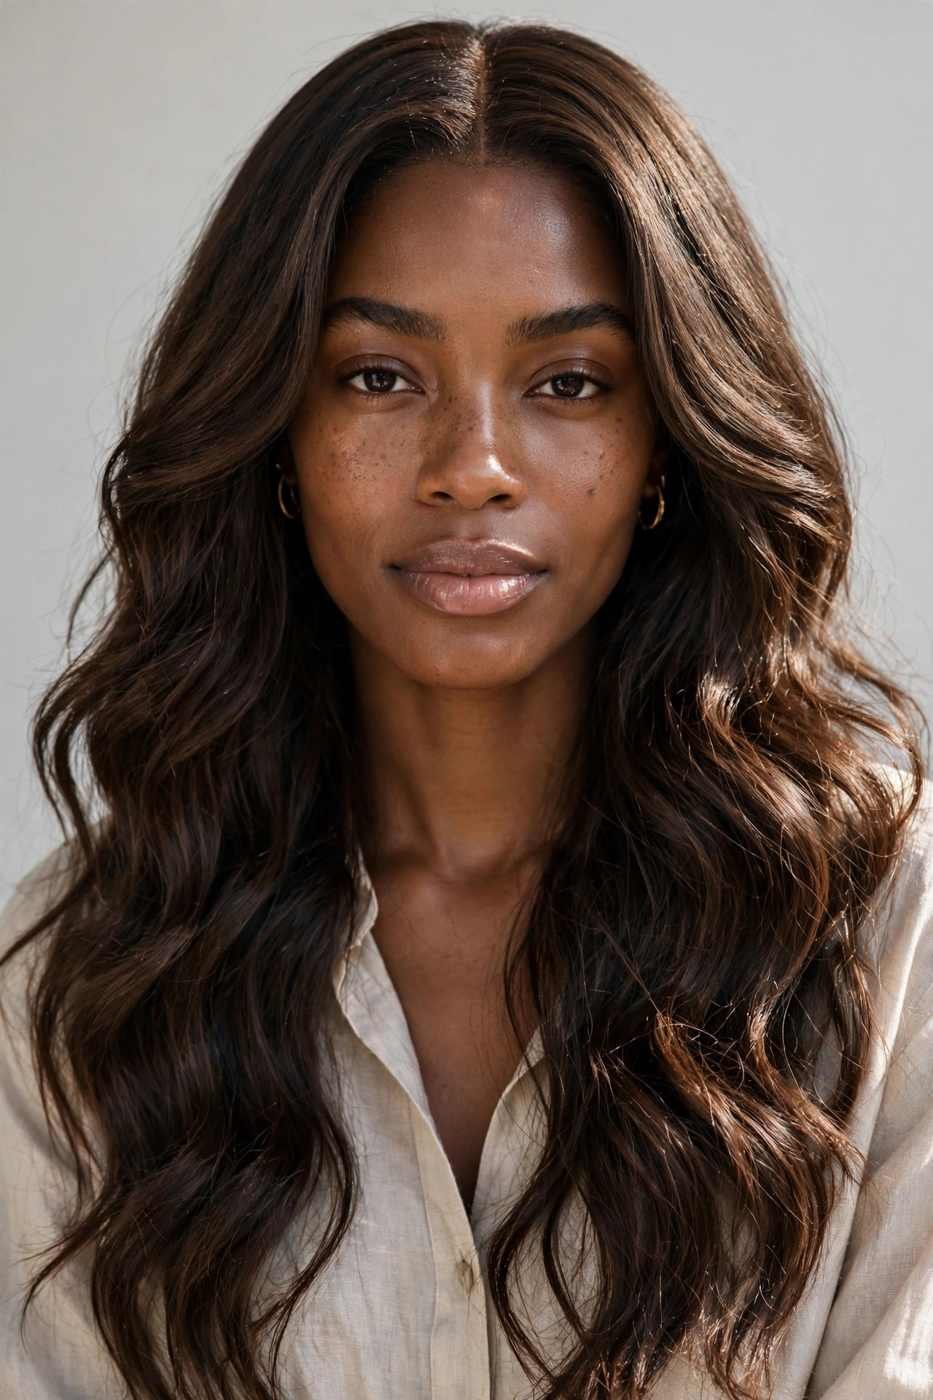
Look for a glueless or wear-and-go unit in a loose wave or body wave texture, ideally with pre-plucked hairline and bleached knots to save you prep time. A middle part keeps it classic; add a headband or claw clip to switch it up midweek. Brush the waves gently with a paddle brush and revive them with a water-and-leave-in mist when they start to look tired.
The fastest way to make a wig look natural is plucking the part line and hairline slightly — factory density is always too perfect. Flatten the top two inches with a low-heat flat iron to remove unboxed bulk. Store the wig inside-out on a stand between wears to keep waves from stretching.
- Glueless wigs with adjustable straps and combs stay secure without adhesive.
- Store on a wig stand to preserve the wave pattern between wears.
- Co-wash every one to two weeks to keep the hair soft and fresh.
- A 180%-density unit gives fullness without looking unnatural.
25. Twist-Out With Honey-Blonde Highlights
We saved the showstopper for last. A twist-out is already gorgeous — add honey-blonde highlights and it becomes dimensional, sun-kissed, and impossible to ignore. Color is the fastest way to make a familiar style feel brand new.
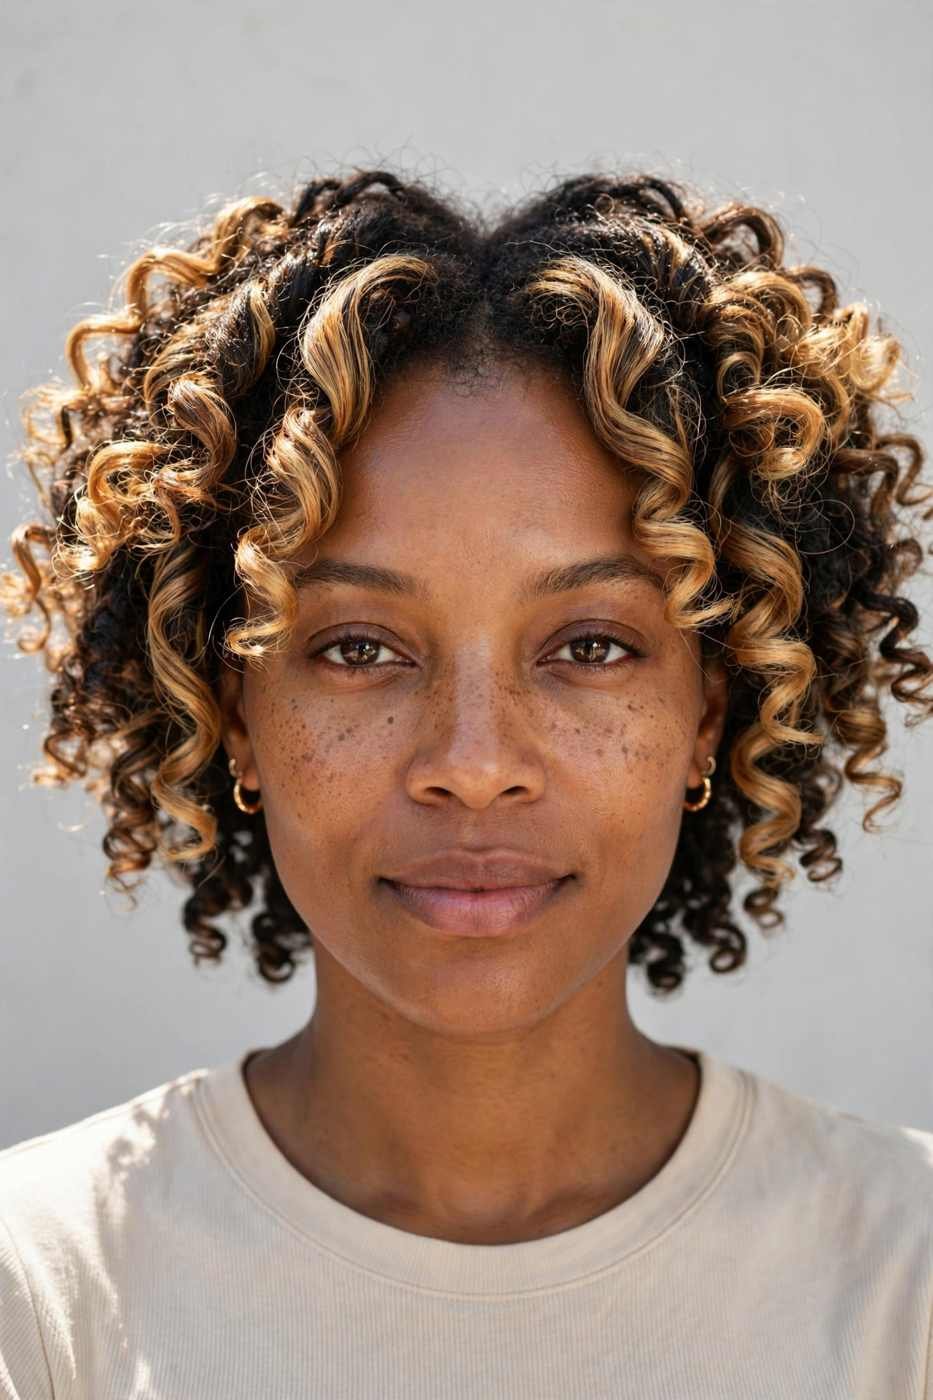
The highlights can come from dyed sections of your own hair, blonde clip-in pieces twisted in with your natural hair, or a highlighted wig worn in a twist-out texture. The contrast between the dark base and the warm honey pieces creates depth that makes every curl pop. Keep color-treated hair deeply moisturized — highlights and dryness are not friends — with weekly deep conditioning.
Placement is everything — concentrate lighter pieces around your face and at the crown where light naturally hits, keeping the underneath darker for depth. This framing technique brightens your whole face. If you’re using clip-ins, twist them in with slightly smaller sections of your own hair so they grip securely all day.
💡 Quick Tip: If you’re nervous about permanent color, try blonde clip-ins or a highlighted half-wig first. You get the full effect with zero commitment and zero damage.
CONCLUSION
Beautiful hair doesn’t have to be complicated — it just has to be yours. Whether you reached for a five-minute puff, a protective set of twists, or a silk press with flipped ends, these easy styles prove that gorgeous hair and a busy life can absolutely coexist. Try one new look this week and see how it feels. 📌 Save this post to your hairstyles board on Pinterest so you always have gorgeous hair inspiration!