20+ Easy Holiday Party Hairstyles — Quick Tutorials 2026
Holiday party season has a way of sneaking up on you — one minute you’re totally fine, the next you’re staring at your closet with damp hair and forty minutes on the clock. Sound familiar? These easy holiday party hairstyles were made for exactly that moment.
Every look below takes ten minutes or less, needs nothing fancier than bobby pins, dry shampoo, and a brush, and still reads as completely party-ready. No salon appointment, no panic — just simple tutorials that actually work on real hair, in real bathrooms, with real time pressure.
So grab your brush, put on your favorite playlist, and let’s get you out the door looking like you planned this look all week.
1. The 5-Minute Sleek Low Bun
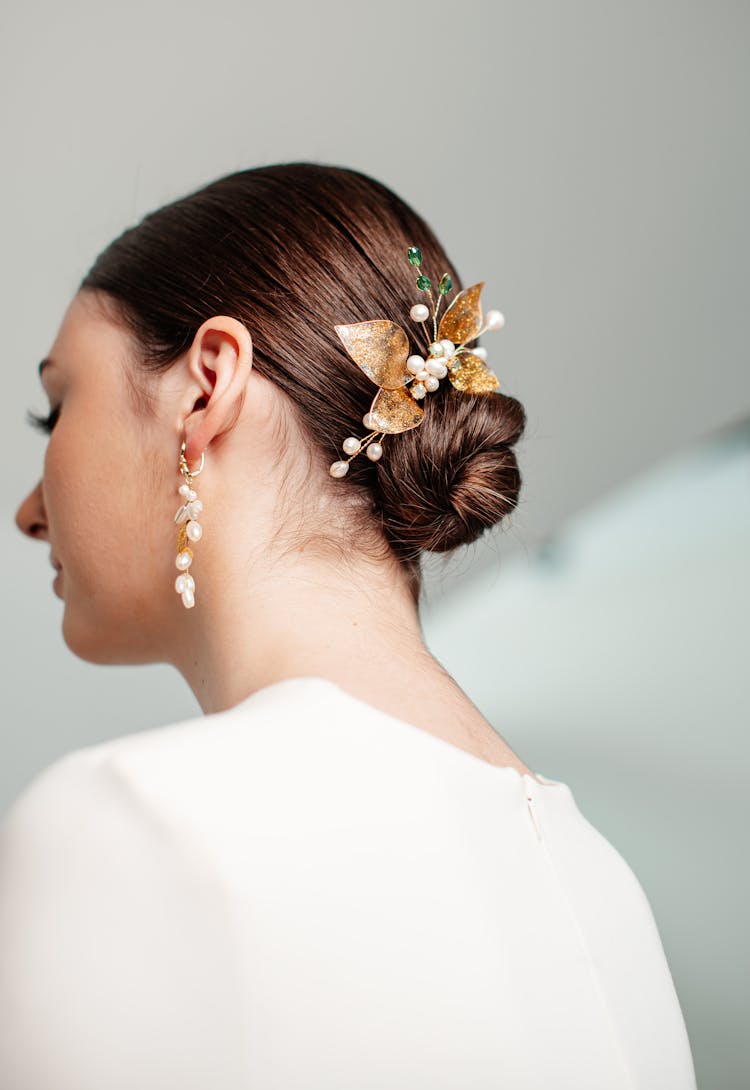
This is the style you reach for when the invitation said 7 PM and it’s already 6:40. A sleek low bun looks polished and intentional, yet it genuinely takes five minutes once you’ve done it twice. Start by brushing your hair back into a low ponytail at the nape, smoothing the top with a little serum so there are no flyaways catching the light.
Twist the ponytail around its base, tuck the ends underneath, and pin as you go — crisscrossed bobby pins hold far better than parallel ones. Pull out two soft face-framing pieces and give them the tiniest bend with a straightener so they don’t look accidental. A spritz of strong-hold hairspray locks everything in for the night.
What makes this bun party-worthy instead of office-blah is the finish: add a jeweled hairpin or a slim velvet bow right above the bun, and suddenly it reads festive. It works on second-day hair beautifully, keeps every strand off your face while you mingle, and photographs like a dream from every angle.
2. High Polished Ponytail
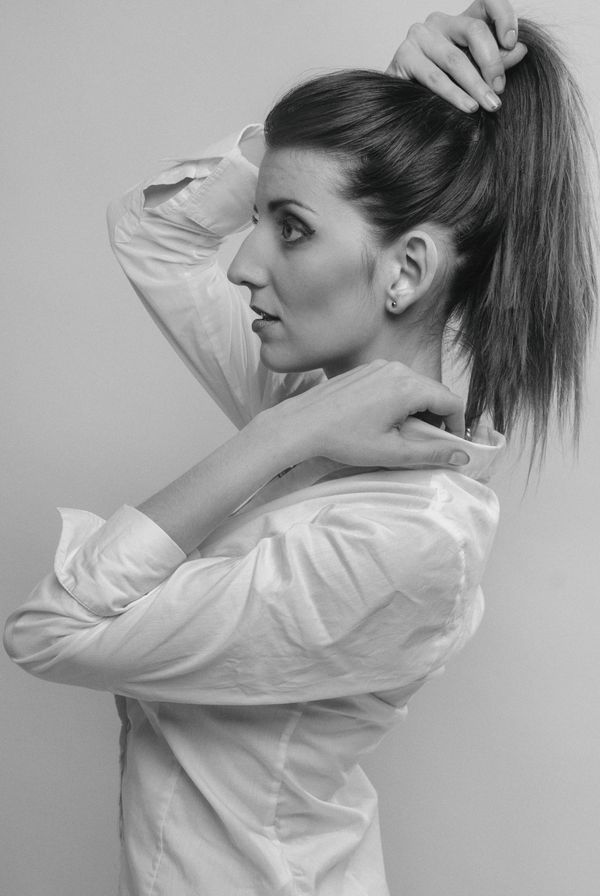
Nothing says “I have my life together” like a sky-high ponytail with a glassy finish. Flip your head upside down and gather your hair at the crown — this trick gives you lift you can’t get standing upright. Secure it with a snag-free elastic, then take a half-inch section from underneath and wrap it around the base to hide the band completely.
- Smooth the top with a boar-bristle brush and a pea-sized amount of smoothing cream for that liquid shine.
- Run a flat iron over the tail in two quick passes so it swings like one polished ribbon.
- Tilt your chin up and mist hairspray from underneath to tame baby hairs without flattening volume.
- For extra drama, clip in one weft of extensions before gathering — nobody will know.
Wear it with a bold lip and gold hoops and you’ve got instant holiday glam in under eight minutes. The height elongates your neck, shows off your earrings, and stays put through dancing, hugging, and that second glass of champagne.
3. Soft Holiday Waves
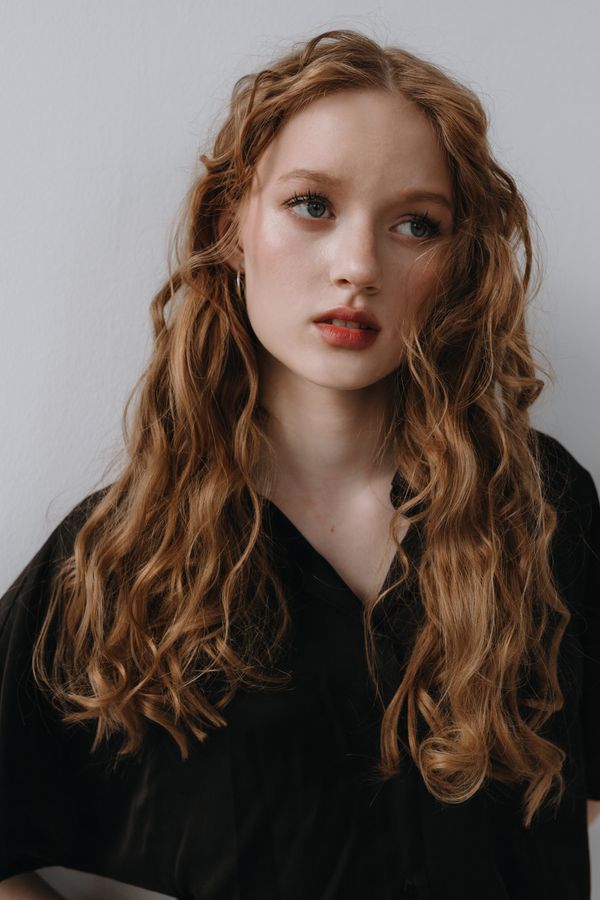
If you only learn one party hairstyle this season, make it this one. Soft waves flatter literally everyone, work on every hair length past the chin, and take about ten minutes with a curling wand once you stop overthinking the technique. The secret is curling away from your face in big one-inch sections and — this is the important part — letting each curl cool in your palm for three seconds before you let it drop.
That little pause is what turns tight ringlets into soft, expensive-looking waves. After you’ve curled everything, flip your head over, shake it out, and rake through with your fingers instead of a brush. Fingers keep the wave pattern intact while a brush can pull it into frizz, especially in winter air.
💡 Quick Tip: Mist texturizing spray — not hairspray — through the mid-lengths before you curl. It gives fine hair the grip it needs so waves actually survive past the appetizers.
Finish with a light-hold spray and a deep side part for instant glamour. This style pairs with everything from sequin minis to velvet jumpsuits, which is exactly why it deserves a permanent spot in your holiday rotation.
4. Twisted Half-Up Crown
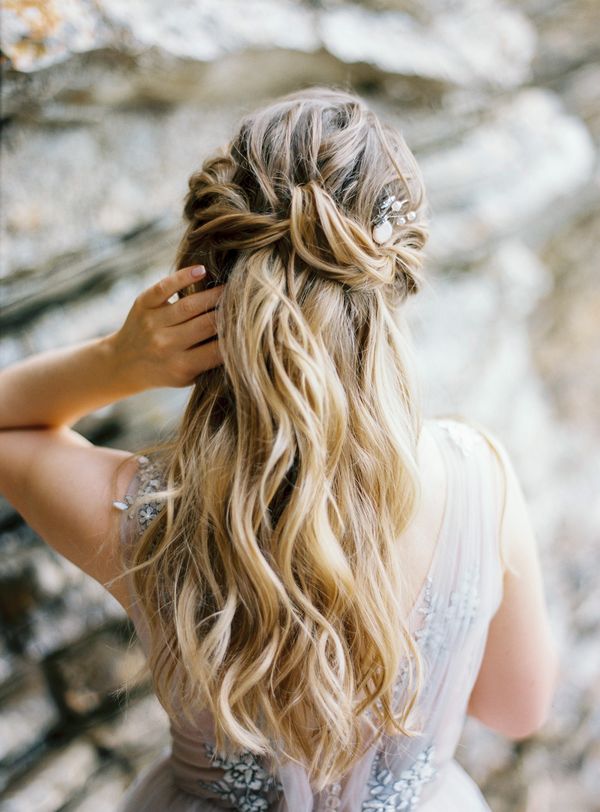
Half-up styles are the sweet spot of party hair: polished on top, romantic and loose at the bottom. This twisted crown version looks intricate but is honestly just two twists and three pins. Take a two-inch section from each temple, twist each one back toward the crown, and cross them over each other like you’re tying the world’s prettiest knot.
Pin the twist flat against your head with bobby pins pushed upward into the twist — pushing up instead of down hides the pins completely and holds twice as well. Gently tug at the twists with your fingertips to fatten them up; pancaking is what makes the style look lush rather than stringy. Leave the rest of your hair down, and add a few bends with a wand if you have an extra two minutes.
This is a lifesaver for anyone whose hair falls flat by 9 PM, because the pinned crown keeps the top lifted all night while the loose lengths move naturally. Add tiny pearl pins along the twist for a holiday sparkle that catches candlelight beautifully.
5. Messy Textured Top Knot

The top knot gets a bad rap as a gym style, but done right it’s one of the chicest party looks going — especially with a dress that has an interesting neckline you want to show off. The trick is texture: start with dry shampoo at the roots even if your hair is clean, because grip is everything here.
- Gather hair into a high ponytail, but on the last loop of the elastic, pull only halfway through to form a looped bun.
- Wrap the loose ends around the base and pin — don’t aim for neat, aim for interesting.
- Pull a few pieces loose around your hairline and at the nape for softness.
- Gently tug the bun wider with your fingers until it looks deliberately undone.
Set it with a flexible-hold spray so it moves instead of helmeting. Pair it with statement earrings — with your hair fully up, your jewelry becomes the outfit’s co-star. Seven minutes, zero heat tools, and you look like the coolest person at the party.
6. The 5-Minute French Twist

A French twist sounds fancy, but the five-minute version is wonderfully forgiving — a little imperfection actually makes it look more modern. Sweep all your hair to one side and pin it in a vertical line down the back of your head; those pins are the secret scaffolding nobody sees. Then gather the hair, twist it upward against the pins, and tuck the ends into the pocket the twist creates.
Pin along the seam where the twist meets your head, pushing pins upward for maximum hold. Don’t chase perfection — gently pull at the twist to loosen it slightly, and let a few soft pieces fall around your face. The slightly undone finish is what separates a chic party twist from a stiff bridesmaid updo.
💡 Quick Tip: This style grips best on day-old hair. If yours is freshly washed, work a palmful of texturizing powder through it first — slippery clean hair is the number one reason twists collapse.
Slide in a gold hair comb or a sprig of baby’s breath for instant holiday charm. Elegant, timeless, and done before your ride arrives.
7. Bubble Ponytail

The bubble ponytail is proof that the easiest styles often get the most compliments. It’s playful, modern, and takes roughly four minutes — you just need a handful of small clear elastics. Start with a standard ponytail at whatever height you like, smooth or textured, then place another elastic two inches down and gently pull the hair between the bands outward to form a bubble.
Repeat down the length of your tail, keeping the spacing even, and tug each bubble a little wider than feels natural — they always look smaller in photos than in the mirror. The key to making it party-appropriate rather than playground is the finish: wrap each elastic with a tiny strand of hair, or slide a gold cuff over every other band for a luxe detail.
This style is brilliant for long hair because it shows off your length while keeping everything controlled and off your back. It survives hugs, dancing, and coat-check lines without budging, and it photographs with the most satisfying graphic shape.
8. Side-Swept Glam Curls

Old Hollywood knew what it was doing: sweeping everything to one side is instant red-carpet energy. Create a deep side part, then curl your hair in one-and-a-half-inch sections, winding each piece around the wand in the same direction so the curls fall like a unified wave. Once cool, brush through gently with a paddle brush — yes, brush — to meld them into one glossy cascade.
- Sweep all the hair over one shoulder and pin a small section behind the opposite ear to anchor it.
- Tuck the pinned side flat with a little pomade so the asymmetry looks deliberate, not lopsided.
- Mist shine spray over the visible sweep — this style is all about reflective, liquid hair.
The asymmetry does something wonderful for photos: it creates a diagonal line that draws the eye down, elongating your neck and showing off one earring spectacularly. Wear your statement earring on the exposed side and keep the other ear simple — or bare — for maximum impact.
9. Low Chignon with a Middle Part

There’s a reason the low chignon never goes out of style — it’s the fashion industry’s favorite party hair, and it takes about six minutes. Part your hair cleanly down the middle, smooth it back with a light serum, and gather it low at the nape. Twist the tail into a simple coil, pin it flat, and you’re essentially done.
The middle part is what makes this feel current rather than classic: it frames the face symmetrically and gives the whole look a sleek, editorial edge. Keep the top smooth and close to the head — volume at the crown fights the aesthetic here. If you have layers that pop out, pin them under with crossed bobby pins and finish with a firm-hold spray.
💡 Quick Tip: Run a flat iron over the part line before styling. A crisp, pin-straight part is the difference between “chic chignon” and “I just threw it up” — it takes thirty seconds and elevates everything.
Pair it with a red lip and minimal jewelry. Understated hair lets your makeup and outfit do the talking, and this chignon keeps every bit of attention exactly where you want it.
10. Braided Headband Half-Up
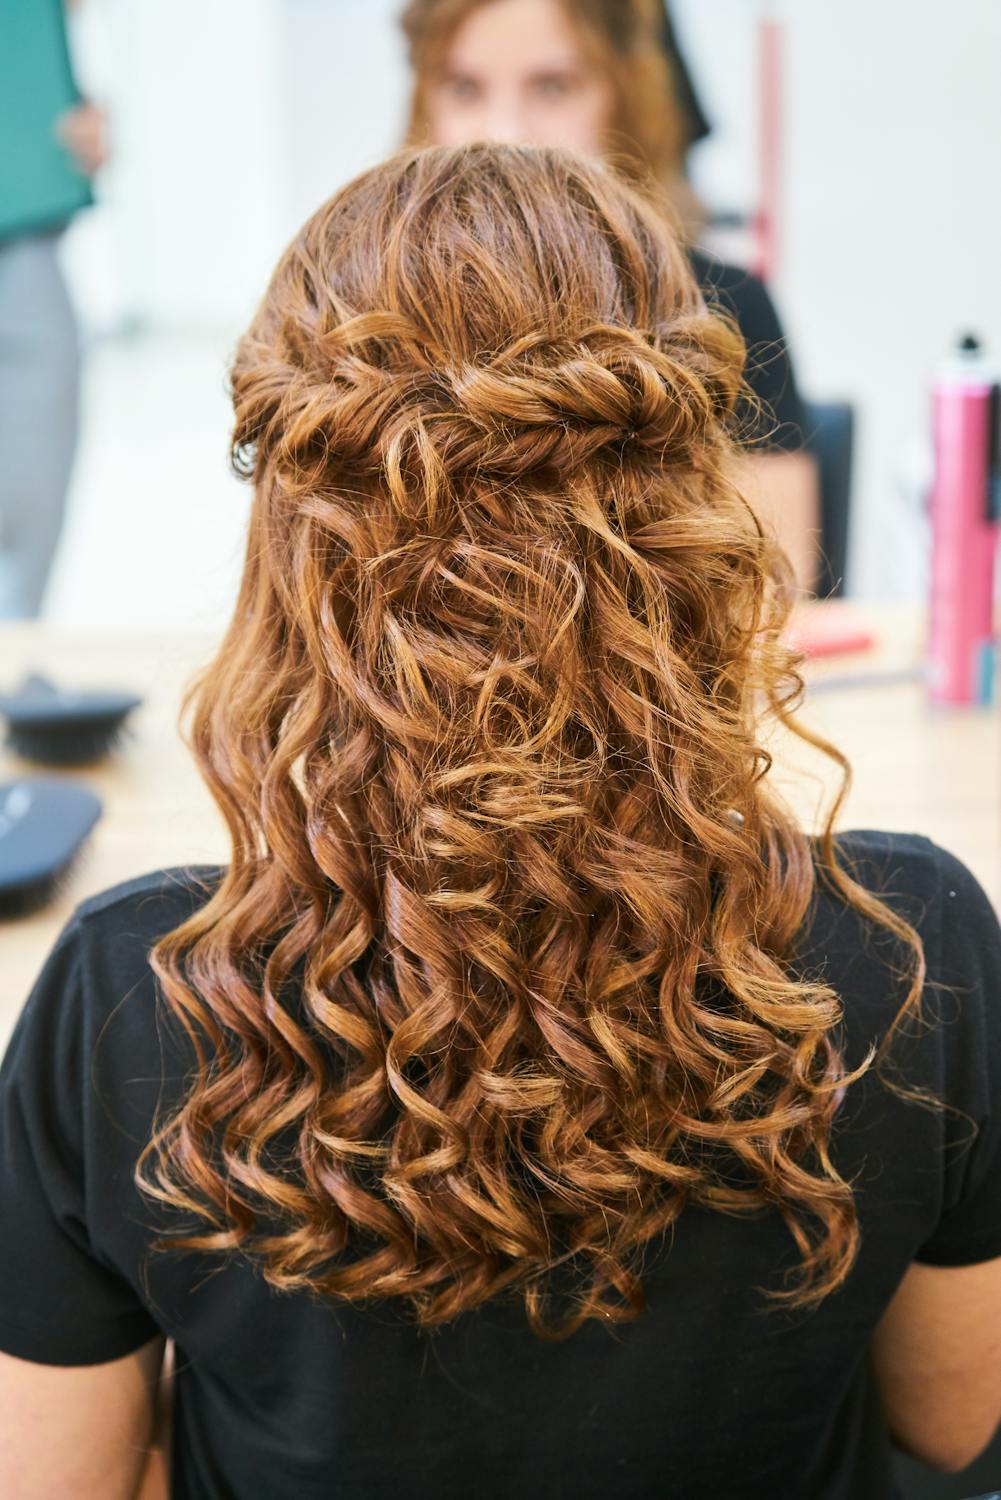
This one looks like you spent forty-five minutes, and I won’t tell anyone it took eight. Take a section of hair from behind one ear, braid it loosely, and drape it across the top of your head like a headband, pinning it behind the opposite ear. Repeat from the other side for a double braid, or keep it single for a softer effect.
The braids act as a natural headband that keeps hair off your face all night — no headband headaches, no slipping. Leave the rest of your hair down with a few loose waves, and gently pancake the braids so they look full and romantic rather than tight. A little dry shampoo at the roots before you start gives the style grip and a bit of lived-in volume.
Here’s how to wear it:
- Braid each side loosely — tight braids look severe and give you a headache by dessert.
- Cross them slightly off-center at the top for an effortless, asymmetrical finish.
- Hide the ends under the opposite braid so there are no visible pins or tails.
Add a few tiny gold pins along the braid and you’ve got a holiday look that’s equal parts romantic and practical.
11. Voluminous Party Blowout
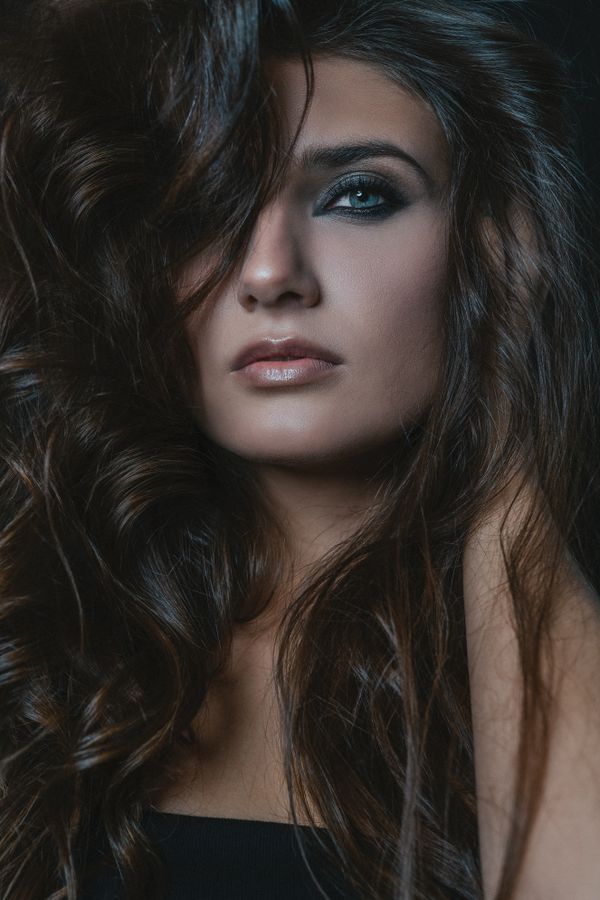
A bouncy blowout is the ultimate “I woke up like this (but better)” party hair, and you don’t need a salon to get it. The whole trick happens before you pick up the brush: apply volumizing mousse to damp roots, then rough-dry your hair upside down until it’s about eighty percent dry. That upside-down step builds the root lift that separates a flat blow-dry from a party blowout.
Then work in sections with a round brush, rolling each piece up and away from your face and blasting the roots with heat for ten seconds. Here’s the part everyone skips: let each section cool wrapped around your fingers — or better, pin it in a loose curl with a clip — while you move on. Cool hair holds shape; hot hair falls flat the second you let go.
Finish by flipping your head over, shaking out the roots with your fingertips, and misting a flexible spray underneath. The result is big, touchable, camera-ready hair in about fifteen minutes — worth every second when you catch your reflection in the elevator doors.
12. Fishtail Side Braid
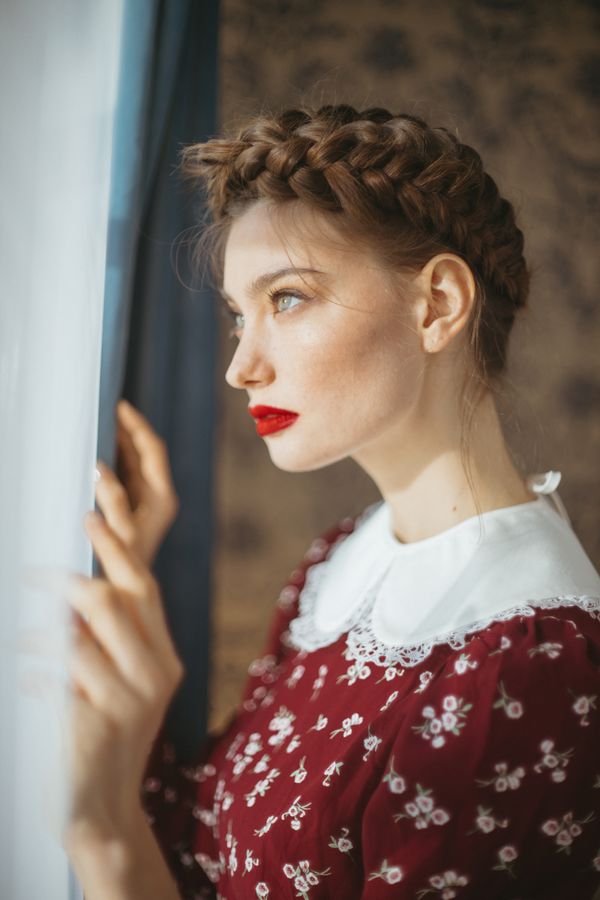
The fishtail braid looks impressively intricate, but it’s genuinely just two sections woven back and forth — if you can tie your shoes, you can fishtail. Sweep your hair over one shoulder and divide it into two equal halves. Take a thin strand from the outside of the left half, cross it over to the right; then a thin strand from the outside of the right, cross to the left. That’s the entire technique.
- Keep your strands thin — skinny pieces create that beautiful detailed weave; chunky ones look like a regular braid.
- Braid loosely and pancake as you go, tugging the edges outward for a full, romantic finish.
- Secure with a clear elastic, then wrap a small strand of hair around it for a polished end.
- Pull out soft face-framing pieces before you start braiding so they fall naturally.
Drape it over one shoulder for a look that’s equal parts bohemian and glamorous. It keeps long hair completely under control while looking like you tried far harder than you did — the ultimate party hair paradox.
13. Sleek Glass Hair
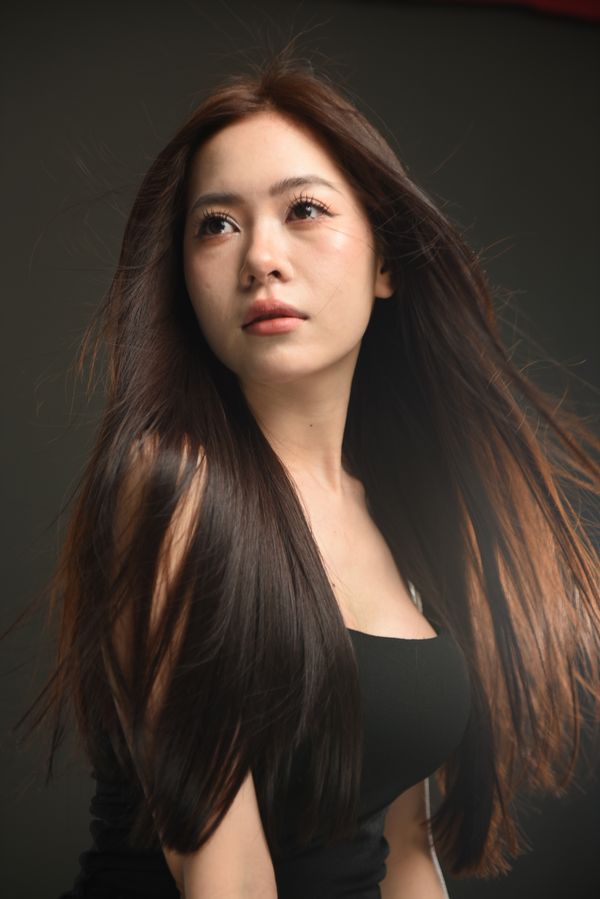
Glass hair — that mirror-shine, pin-straight finish — is stunningly simple and brutally honest: there’s nowhere for frizz to hide. Start with a smoothing serum on damp hair, blow-dry straight down with a paddle brush, then flat-iron in thin sections, moving slowly so the heat actually seals the cuticle instead of just skimming it.
- Work in half-inch sections; rushing with thick chunks is why most DIY straightening looks dull.
- Finish every section with a cool-air blast to lock the cuticle flat and boost shine.
- A single drop of shine oil on the very ends adds that liquid-glass reflection — more than a drop goes greasy fast.
The payoff is hair that looks impossibly healthy and catches every bit of party lighting. Wear it with a center part and tucked behind one ear to show off a statement earring, or leave it loose and let the shine be the whole accessory. Minimal effort, maximum impact — glass hair does all the talking.
14. Romantic Loose Updo

Not every party updo needs to be tight and severe — this loose, romantic version is soft, feminine, and wonderfully forgiving of imperfect technique. Gather your hair into a loose low ponytail, twist it gently, and coil it into a soft bun at the nape, pinning as you go but leaving everything a little undone on purpose. Then — and this is the magic — pull pieces out. Around your face, at the crown, at the nape.
The goal is “effortlessly romantic,” which is really just code for strategically messy. A few tendrils escaping around your face soften the whole look and make it feel modern rather than matronly. If a pin shows slightly, don’t panic — with this style, a visible pin reads as intentional texture rather than a mistake.
💡 Quick Tip: Curl your hair loosely before pinning it up. Pre-curled texture gives the updo natural volume and means the pieces you pull out already have a pretty bend — no flat, stringy tendrils.
Tuck in a sprig of greenery or a velvet ribbon for a holiday touch. Soft, dreamy, and done in ten minutes flat.
15. Double-Twist Low Ponytail
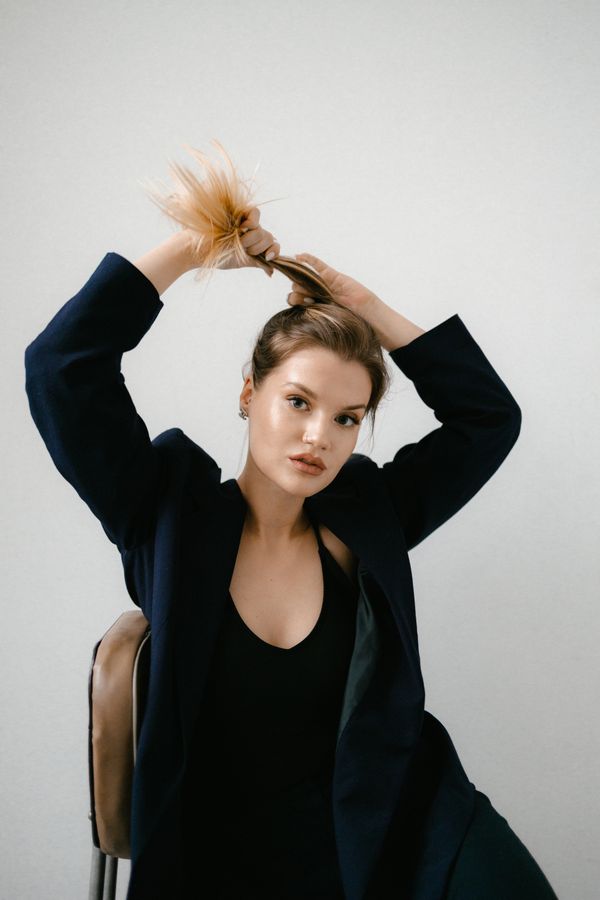
A plain ponytail is fine; a double-twist ponytail is a party. Part your hair down the middle, then take the front section on each side and twist it back toward the nape, adding hair as you go like a French twist’s cooler cousin. Gather everything — twists included — into a low ponytail and secure it.
The twists add gorgeous texture at the crown that a regular ponytail completely lacks, and they keep the front of your hair neatly off your face without a single bobby pin showing. Wrap a strand of hair around the elastic to hide it, then decide your finish: sleek and straight for polish, or a few waves through the tail for romance.
This style is a quiet workhorse — it stays put through an entire evening, looks good from the front and the back (crucial for group photos), and works on every hair texture from pin-straight to coily. Dress it up with a jeweled elastic or keep it clean; either way, it reads intentional and chic in about seven minutes.
16. Waterfall Braid
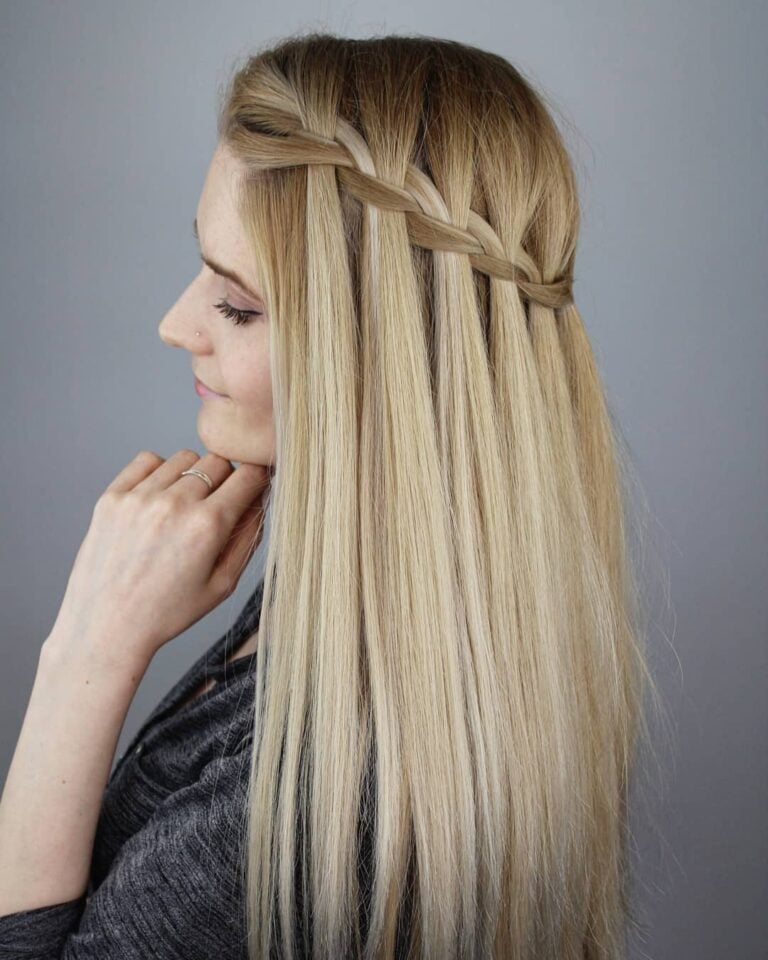
The waterfall braid is pure party magic — strands cascade through the braid like water over rocks, and it looks far harder than it is. Start a French braid at one temple, but here’s the twist: every time you’d normally pull a new section in from the bottom, drop that bottom strand instead and pick up a fresh piece behind it. The dropped strands are your “waterfall.”
- Keep the braid close to your head so the cascading pieces fall in a clean, even curtain.
- Work with slightly damp or texturized hair — slippery clean hair lets the dropped strands slide out.
- Braid from one temple to the other for a headband effect, or stop behind the ear and pin for an asymmetrical look.
- Curl the fallen strands lightly so the “waterfall” has movement instead of hanging straight.
Leave the rest of your hair down in soft waves and you’ve got a style that’s romantic, intricate-looking, and genuinely ten minutes of work. It holds beautifully all night because the braid itself is anchored — the loose pieces are just decoration.
17. Glam Deep Side Part
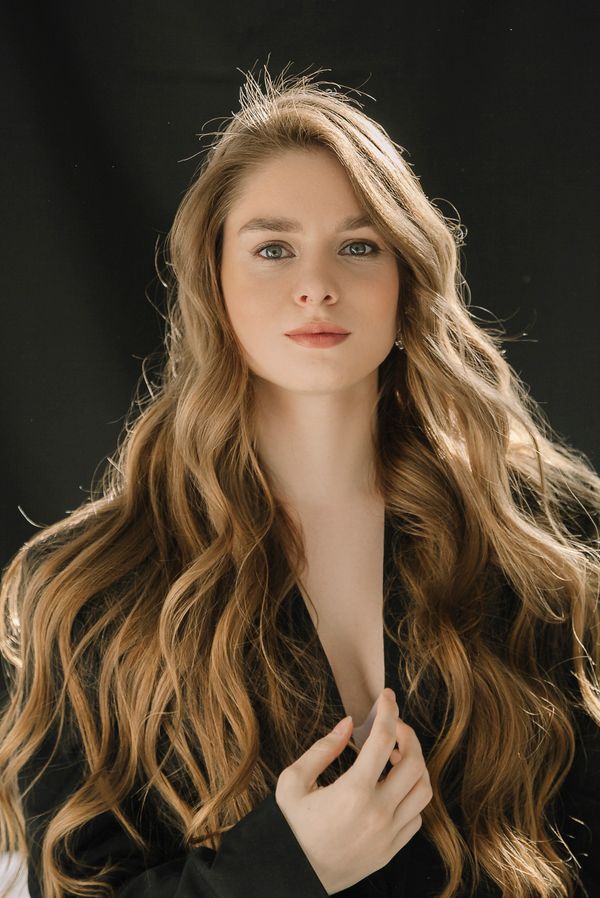
Sometimes the easiest party hairstyle isn’t a style at all — it’s a part. A dramatic deep side part instantly transforms whatever your hair is already doing, adding volume, asymmetry, and old-school glamour in literally thirty seconds. Flip your part to the opposite side from where it naturally falls; that rebellion against your hair’s habits is what creates the lift.
To make it party-worthy, smooth the heavier side over with a shine serum and tuck the smaller side behind your ear, securing it with two crossed bobby pins. Add loose waves or keep it straight — the part does the heavy lifting either way. A deep side part also has a wonderful slimming effect on the face, creating a diagonal that photographers love.
💡 Quick Tip: Train a new part by blow-drying it into place while damp. Once dry, hair has a memory — set the part with heat and a cool shot, and it’ll hold through the whole party without constant fussing.
Pair it with a bold lip and let one side of your hair do all the dramatic work. Proof that the smallest change can be the biggest transformation.
18. Knotted Low Ponytail
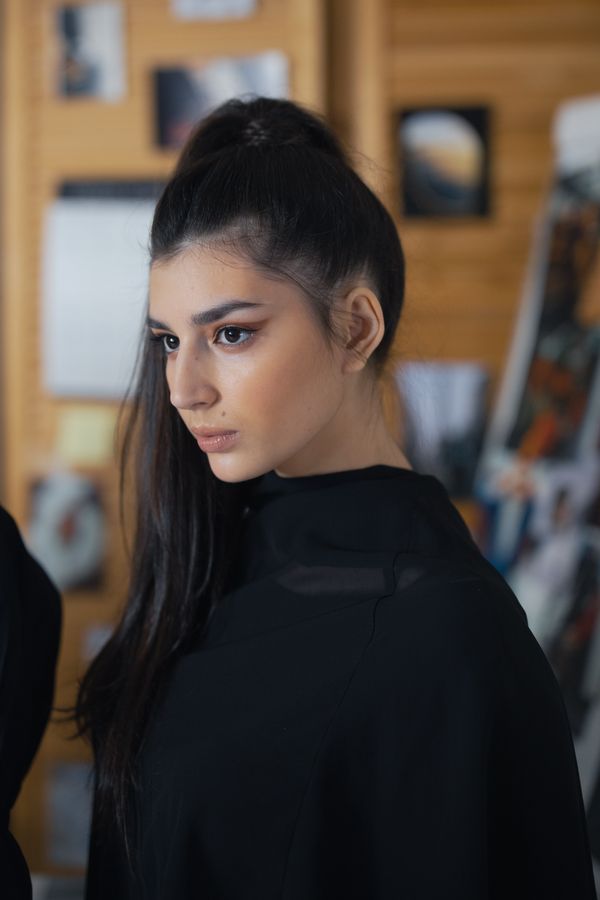
This is the minimalist’s party hairstyle — one knot, zero elastics showing, endless chic. Divide your low ponytail into two sections and tie them in a simple overhand knot, just like the first step of tying shoelaces. Tie a second knot right below the first, then pin the tail underneath so the knots sit cleanly at the nape.
The beauty of the knotted ponytail is its sculptural simplicity: it looks like something from a runway, but it’s literally just tying your hair in a knot. It works best on medium to long hair with some texture — day-old hair or a spritz of texturizing spray gives the knot something to grip. Secure everything with pins pushed up into the knot and finish with a light mist of hairspray.
Wear it sleek for a modern editorial vibe or slightly loosened for softness. Either way, you’ll spend the whole party answering “how did you DO that?” — and smiling, because it took you six minutes.
19. Pin-Curled Vintage Waves
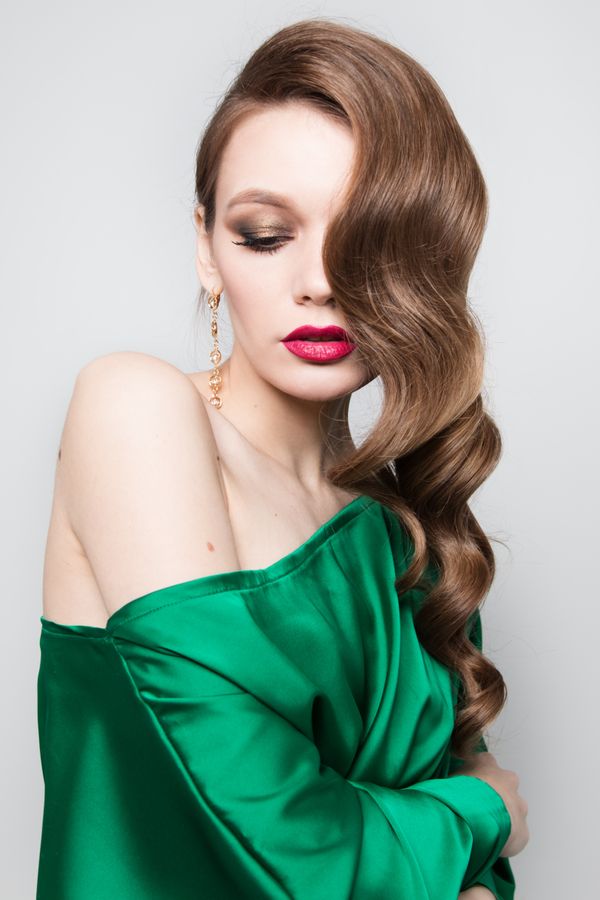
Channel your inner screen siren with vintage waves that scream holiday glamour. Curl your hair in one-inch sections around a medium wand, but instead of letting each curl drop, pin it to your head while it cools — this old-school pin-curl step is what creates those smooth, uniform, sculpted waves instead of random curls. Let them set for at least fifteen minutes while you do your makeup.
- Remove the pins and brush through with a soft bristle brush until the curls melt into waves.
- Mold the waves with your palms and a touch of pomade, encouraging that classic S-shape.
- Set one side flat against your head with a decorative clip for authentic vintage asymmetry.
Yes, this one takes a little longer — about twenty minutes — but the result is pure holiday-movie magic. Pair it with a red lip and winged liner, and you’re not just attending the party; you’re the reason it feels like an occasion.
20. Pearl-Clip Simple Down-Do

For the ultimate last-minute save, you don’t need a hairstyle — you need accessories. Pearl hair clips have turned the simplest down-do into a legitimate party look, and the effort involved is roughly ninety seconds. Style your hair however it looks best down — straight, wavy, air-dried, whatever — and then place two or three pearl clips along one side, stacked in a neat row above the ear.
- Cluster clips asymmetrically on one side; symmetry looks stiff, asymmetry looks styled.
- Mix sizes — one statement clip plus two smaller ones — for a curated, expensive feel.
- Smooth the clipped side flat with serum so the pearls sit cleanly against glossy hair.
- Match your clip finish to your jewelry: gold pearls with gold hoops, silver with silver.
This is your emergency glam plan for the night you have literally no time. Keep a set of pearl clips in your bag and you’re never more than two minutes from party-ready, no matter what your hair was doing before.
CONCLUSION
There you have it — twenty party hairstyles that prove gorgeous holiday hair doesn’t require a salon appointment or an hour in front of the mirror. Whether you’re team sleek bun, team bouncy blowout, or team “just add pearl clips,” there’s a ten-minute look here with your name on it. The best party hair is the kind you don’t have to think about once you walk in the door — so pick your favorite, practice it once, and spend the party actually enjoying it. 📌 Save this post to your party hairstyles board on Pinterest so you’re ready for every celebration!